Konica Minolta bizhub 215 bizhub 215 Quick Guide
Konica Minolta bizhub 215 Manual
 |
View all Konica Minolta bizhub 215 manuals
Add to My Manuals
Save this manual to your list of manuals |
Konica Minolta bizhub 215 manual content summary:
- Konica Minolta bizhub 215 | bizhub 215 Quick Guide - Page 1
Quick Guide [Copy/Print/Fax/Scan Operations] INDEX 1. Introduction 2. Using as a Copy Machine 3. Using as a Fax Machine 4. Using as a Printer 5. Using as a Scanner 6. Troubleshooting 7. Utility 8. Index - Konica Minolta bizhub 215 | bizhub 215 Quick Guide - Page 2
Legal restrictions on copying ...1-28 1.11 About the User's Guide ...1-29 Printed manual...1-29 User's guides contained on the CD 1-29 1.12 Functions of this machine ...1-30 Copy function...1-31 Printer function...1-31 Fax function ...1-31 Network function...1-31 bizhub 215 Contents-1 - Konica Minolta bizhub 215 | bizhub 215 Quick Guide - Page 3
Scan 16 Original Set ...1-37 Toner Bottle ...1-46 1.20 Option configuration...1-47 2 Using as a Copy Machine 2.1 Copying an original ...2-2 2.2 Enlarging or reducing the original to a different size 2-3 Specifying the zoom ratio manually List call correctly ...3-15 Contents-2 bizhub 215 - Konica Minolta bizhub 215 | bizhub 215 Quick Guide - Page 4
driver 5-13 5.6 Scanning using a WIA driver ...5-15 6 Troubleshooting The power does not turn on...6-2 A message prompting you to replace consumables has appeared 6-2 The paper jam message does not disappear 6-3 An error message has appeared...6-3 7 Utility 8 Index bizhub 215 Contents - Konica Minolta bizhub 215 | bizhub 215 Quick Guide - Page 5
Contents-4 bizhub 215 - Konica Minolta bizhub 215 | bizhub 215 Quick Guide - Page 6
1 Introduction Introduction Chapter 1 - Konica Minolta bizhub 215 | bizhub 215 Quick Guide - Page 7
to the User's Guides on the User's Guide CD included with this machine. In order to operate the machine safely and properly, be sure to read the safety information on page 1-12 of this manual before use efficiently, saves you money on utility bills and helps protect the environment. 1-2 bizhub 215 - Konica Minolta bizhub 215 | bizhub 215 Quick Guide - Page 8
in their names without prior written permission of the OpenSSL Project. 6. Redistributions of any form whatsoever must retain the following acknowledgment: "This product includes software developed by the OpenSSL Project for use in the OpenSSL Toolkit (http://www.openssl.org/)" bizhub 215 1-3 - Konica Minolta bizhub 215 | bizhub 215 Quick Guide - Page 9
not cryptographic related. 4. If you include any Windows specific code (or a derivative thereof) from the apps directory (application code) you must include an acknowledgement: "This product includes software written by Tim Hudson ([email protected])" THIS SOFTWARE IS PROVIDED BY ERIC YOUNG "AS IS - Konica Minolta bizhub 215 | bizhub 215 Quick Guide - Page 10
advertising or publicity pertaining to distribution of the software without specific, written prior permission. Zero-Knowledge Systems, Inc. makes no representations about the suitability of this software for any purpose. It is provided "as is" without express or implied warranty. bizhub 215 1-5 - Konica Minolta bizhub 215 | bizhub 215 Quick Guide - Page 11
by Sandia National Laboratory and developed by the University of Michigan's Center for Information Technology Integration, including the PKINIT implementation, are subject to the following license: COPYRIGHT © 2006-2007 THE REGENTS OF THE UNIVERSITY OF MICHIGAN ALL RIGHTS RESERVED 1-6 bizhub 215 - Konica Minolta bizhub 215 | bizhub 215 Quick Guide - Page 12
CONNECTION WITH THE USE OF THE SOFTWARE code has the following license: Copyright 2006 g10 Code GmbH Copyright 2006 Andreas Jellinghaus This file is free software software without specific prior written permission. This software is provided "as is" without express or implied warranty. bizhub 215 1-7 - Konica Minolta bizhub 215 | bizhub 215 Quick Guide - Page 13
source code must retain the above copyright notice, this list of includes software developed by Computing Services at ARISING OUT OF OR IN CONNECTION WITH THE USE OR PERFORMANCE OF THIS SOFTWARE. Smbfs Copyright © 2000, SOFTWARE, EVEN IF ADVISED OF THE POSSIBILITY OF SUCH DAMAGE. 1-8 bizhub 215 - Konica Minolta bizhub 215 | bizhub 215 Quick Guide - Page 14
part of an SSL implementation written by Eric Young ([email protected]). The implementation was written so as to conform with Netscapes SSL specification code must retain the copyright notice, this list GOODS OR SERVICES; LOSS SOFTWARE, EVEN IF ADVISED OF THE POSSIBILITY OF SUCH DAMAGE. bizhub 215 1-9 - Konica Minolta bizhub 215 | bizhub 215 Quick Guide - Page 15
TECHNOLOGIES, INC. will not be held liable for any incidents caused by using this printing system or User's Guide. Information included in User's Guide is subject to change without notice. KONICA MINOLTA BUSINESS TECHNOLOGIES, INC. maintains the copyright of the printer drivers. 1-10 bizhub 215 - Konica Minolta bizhub 215 | bizhub 215 Quick Guide - Page 16
227.7202-1 through 227.7202-4, all U.S. Government End Users acquire the Software with only those rights set forth herein. 12. You agree that you will not export the Software in any form in violation of any applicable laws and regulations regarding export control of any countries. bizhub 215 1-11 - Konica Minolta bizhub 215 | bizhub 215 Quick Guide - Page 17
optimum utility of this device, all operators should carefully read and follow the instructions in this manual. Please read the following section before connecting the machine to the supply. It contains important information related to user safety and preventing equipment problems. Please keep this - Konica Minolta bizhub 215 | bizhub 215 Quick Guide - Page 18
the power cord from the power outlet, and then call your authorized service representative. Power source WARNING • Use only the power source outlet. Failure to do this could result in a fire or electrical shock. CAUTION • Do not place any objects around the power plug, as the power bizhub 215 1-13 - Konica Minolta bizhub 215 | bizhub 215 Quick Guide - Page 19
authorized service representative. • Do not use flammable sprays, liquids, or gases inside or near this machine. Do not clean the inside of this machine using a flammable gas duster. A fire or explosion could result. CAUTION • After installing this product, mount it on a secure base. If the unit - Konica Minolta bizhub 215 | bizhub 215 Quick Guide - Page 20
label. Consumables WARNING • Do not throw the toner cartridge or toner into an open flame. The hot toner may scatter and cause burns or other damage. CAUTION • Do not leave toner-related parts (toner units, PC drum units, imaging units or developing units) within easy reach of children. Licking any - Konica Minolta bizhub 215 | bizhub 215 Quick Guide - Page 21
paper, conductive paper (such as silver paper or carbon paper) or treated heat-sensitive/inkjet paper, otherwise a fire may result. When the Fax is not installed: Before successive holidays CAUTION • Unplug the product when you will not use the product for long periods of time. 1-16 bizhub 215 - Konica Minolta bizhub 215 | bizhub 215 Quick Guide - Page 22
rules. USER INSTRUCTIONS FCC PART 15 - RADIO FREQUENCY DEVICES (for U.S.A. users) NOTE not installed and used in accordance with the instruction manual, user operation. This machine is certified as a Class 1 laser product: This means the machine does not produce hazardous laser radiation. bizhub 215 - Konica Minolta bizhub 215 | bizhub 215 Quick Guide - Page 23
. For European users CAUTION Use of controls, adjustments or performance of procedures other than those specified in this manual may result in hazardous radiation exposure. This is a semiconductor laser. The maximum power of the laser diode is 7 mW and the wavelength is 770800 nm. 1-18 bizhub 215 - Konica Minolta bizhub 215 | bizhub 215 Quick Guide - Page 24
users users ADVARSEL Dersom apparatet brukes på annen måte enn spesifisert i denne bruksan-visning, kan brukeren utsettes for unsynlig laserstråling som overskrider grensen for laser klass 1. Dette en halvleder laser. Maksimal effekt till laserdiode er 7 mW og bølge-lengde er 770-800 nm. bizhub 215 - Konica Minolta bizhub 215 | bizhub 215 Quick Guide - Page 25
noise (for European users only) Der höchste Schalldruckpegel beträgt 70 dB(A) oder weniger gemäss EN ISO 7779. Notification for US only Contains Mercury in the LCD control panel backlighting lamp, and/or in the scanning unit lamp. Dispose According to Local, State or Federal Laws. 1-20 bizhub 215 - Konica Minolta bizhub 215 | bizhub 215 Quick Guide - Page 26
For EU member states only This product complies with RoHS (2002/95/EC) Directive. This device is not intended for use in the direct field of view at visual display workplaces. To avoid zu vermeiden, darf dieses Produkt nicht im unmittelbaren Gesichtsfeld platziert werden. bizhub 215 1-21 - Konica Minolta bizhub 215 | bizhub 215 Quick Guide - Page 27
jams are performed. NOTICE Do not remove caution labels or notations. If any caution label or caution notation is soiled, please clean to make legible. If you cannot make them legible, or if the caution label or notation is damaged, please contact your service representative. 1-22 bizhub 215 - Konica Minolta bizhub 215 | bizhub 215 Quick Guide - Page 28
is provided with this product. It is designed to be connected to a compatible modular jack that is also compliant. See installation instructions for details. The REN is used to determine the number of devices that may be connected to a telephone line. Excessive RENs on a telephone line may result - Konica Minolta bizhub 215 | bizhub 215 Quick Guide - Page 29
to the auxiliary telephone port. The auxiliary port is not specifically designed for 3-wire connected equipment. 3-wire might not respond to incoming ringing when connected to this port. [UTILITY] - [FAX RX OPERATION] - [NO. of RINGS] setting must be configured between 3 and 10. 1-24 bizhub 215 - Konica Minolta bizhub 215 | bizhub 215 Quick Guide - Page 30
between the individual PSTNs provided in different countries, the approval does not, of itself, give an unconditional assurance of successful operation on every PSTN network terminal point. In the event of problems, you should contact your equipment supplier in the first instance. bizhub 215 1-25 - Konica Minolta bizhub 215 | bizhub 215 Quick Guide - Page 31
that machine operation, consumables replenishing, part replacement, and regular maintenance can easily be performed, adhere ) 19-3/16 (488) Unit: inch (mm) NOTICE Be sure to allow a clearance of 3-15/16 inches (100 mm) or more at the back of this machine for the ventilation duct. 1-26 bizhub 215 - Konica Minolta bizhub 215 | bizhub 215 Quick Guide - Page 32
hour Storage of copies To store copies, follow the recommendation listed below. - Copies that are to be kept for a toner on copies. - Color copies have a thicker layer of toner than normal black-and-white copies. Therefore, when a color copy is folded, the toner at the fold may peel off. bizhub 215 - Konica Minolta bizhub 215 | bizhub 215 Quick Guide - Page 33
originals. The following is not a complete list, but is meant to be used as a guide to responsible copying. - images may infrequently have some noise or image data may not be stored under certain circumstances due to this forgery prevention function. 1-28 bizhub 215 - Konica Minolta bizhub 215 | bizhub 215 Quick Guide - Page 34
on printer functions. - Printer function - Setting the printer driver [User's Guide Scan Operations] This manual describes details on scan functions. - Scan Function - Setting the TWAIN/WIA scan driver - Network scan (E-mail TX, FTP TX, and SMB TX) - Scan to USB [User's Guide Network Administrator - Konica Minolta bizhub 215 | bizhub 215 Quick Guide - Page 35
of this machine The bizhub 215 are digital monochrome MFPs that make your workflow more efficient in any application or office environment. These MFPs provide copy, fax, scanner, and printer functions that are critical to business operations, and they also have a network function that aids in - Konica Minolta bizhub 215 | bizhub 215 Quick Guide - Page 36
data via a network. This machine can be used as a scanner with various application software products that are compatible with the TWAIN interface. To use the scan function, the optional Network Card NC-504 or Image Controller IC-209 and Extended Operation Panel MK-733 are required. bizhub 215 1-31 - Konica Minolta bizhub 215 | bizhub 215 Quick Guide - Page 37
, you can configure the following settings: Machine setting, paper source setup, custom size memory, drum dehumidify, admin. management, copy setting 1, and copy setting 2, dial registration, fax registration, fax tx operation, fax rx operation, reporting, scan setting Displays the number of copies - Konica Minolta bizhub 215 | bizhub 215 Quick Guide - Page 38
key while the machine is warming up starts the Next Copy Job function. • This key lights up blue when the machine is ready to accept a copy job, and lights up orange when the machine is not ready to start a copy operation. • Specify the number of copies. • Enter various settings. bizhub 215 1-33 - Konica Minolta bizhub 215 | bizhub 215 Quick Guide - Page 39
only when Network Card NC-504 or Image Controller IC-209 is installed. ) Press this key to switch to copy mode. The lamp lights up green to indicate that the machine is in copy mode. This indicator lights up green when the machine is set in Auto RX mode. Press this key to configure a Memory - Konica Minolta bizhub 215 | bizhub 215 Quick Guide - Page 40
1 1.14 Operations on the Control Panel When changing a setting, use +, ,, *, or ) on this machine to move the cursor. To determine the setting you have selected, press OK. Specifying the zoom ratio The action you have carried out, press Back to return to the previous screen. bizhub 215 1-35 - Konica Minolta bizhub 215 | bizhub 215 Quick Guide - Page 41
may occur. - If you turn off the power while this machine is operating, the data being scanned, transmitted, or received, and jobs waiting to be performed, are deleted. d Reference For details on turning the power on/off, refer to Chapter 2 of the [User's Guide Copy Operations]. 1-36 bizhub 215 - Konica Minolta bizhub 215 | bizhub 215 Quick Guide - Page 42
's Guide Copy Operations]. 2 Adjust the Lateral Guide to the original size. % If the original is not loaded correctly, it may not be fed in straight. % You can also load mixed originals into the ADF. For details on the procedure, refer to Chapter 3 of the [User's Guide Copy Operations]. bizhub 215 - Konica Minolta bizhub 215 | bizhub 215 Quick Guide - Page 43
paper is loaded into the paper tray, specify the original direction (orientation of loading the original). Otherwise, part of the images on the original may not be printed. For details on the orientation of the original, refer to Chapter 4 of the [User's Guide Copy Operations]. 1-38 bizhub 215 - Konica Minolta bizhub 215 | bizhub 215 Quick Guide - Page 44
of the paper take-up roller with your hand. 2 Load the paper and adjust the lateral guide. % Slide the lateral guide to the size of the paper. % Load the paper so that the side on which you on how to load paper into Tray 1, refer to Chapter 3 of the [User's Guide Copy Operations]. bizhub 215 1-39 - Konica Minolta bizhub 215 | bizhub 215 Quick Guide - Page 45
until it "clicks" into position. 1 1 Lifter plate 2 Load the paper and adjust the lateral guide. % Slide the lateral guide to the size of the paper. % Load the paper so that the side on which you want 3, Tray 4, or Tray 5, refer to Chapter 3 of the [User's Guide Copy Operations]. 1-40 bizhub 215 - Konica Minolta bizhub 215 | bizhub 215 Quick Guide - Page 46
paper, you must specify the paper type on the Control Panel. 1 Load the paper and adjust the lateral guide. % Load the paper so that the side to be used for copying is facing down. % Be to load paper into the Bypass Tray, refer to Chapter 4 of the [User's Guide Copy Operations]. bizhub 215 1-41 - Konica Minolta bizhub 215 | bizhub 215 Quick Guide - Page 47
a jam 1.18 Removing a jam If a paper jam occurs in this machine, Error on the Control Panel lights up and a message appears. Be sure to see ] [Open duplex cover] Location of the jam • Inside the main unit • Bypass Tray • Tray 1 Tray 2 Tray 3 Tray 4 Tray 5 ADF Automatic Duplex Unit 1-42 bizhub 215 - Konica Minolta bizhub 215 | bizhub 215 Quick Guide - Page 48
unit, Bypass Tray, or Tray 1. Tips - Areas around the fusing unit are hot. To prevent burns, do not touch any parts part of the lever. - Touching the surface of the PC drum can deteriorate the image quality of copies. Be careful not to touch the surface of the PC drum with your hand. bizhub 215 - Konica Minolta bizhub 215 | bizhub 215 Quick Guide - Page 49
4, and Tray 5, use the same procedure. Removing a paper jam in the ADF The following describes the procedure for removing a paper jam in the ADF. 1-44 bizhub 215 - Konica Minolta bizhub 215 | bizhub 215 Quick Guide - Page 50
Introduction Chapter 1 1.18 Removing a jam 1 Removing a jam in the Automatic Duplex Unit The following describes the procedure for removing a paper jam in the Automatic Duplex Unit. bizhub 215 1-45 - Konica Minolta bizhub 215 | bizhub 215 Quick Guide - Page 51
. - Your service representative collects empty Toner Bottle. Store empty toner bottles in the individual packaging box. Do not dispose of the bottles. - Before installing a new Toner Bottle, give it a good shake approximately 5 to 10 times from side to side and up and down. 1-46 bizhub 215 - Konica Minolta bizhub 215 | bizhub 215 Quick Guide - Page 52
office. No. Name Description 1 Main unit The original is scanned by the scanner section, and the scanned image is printed by the printer section. The main unit is hereinafter referred to as "this machine", "main unit", or bizhub 215 throughout this manual. 2 Original Cover OC-512 Fixes the - Konica Minolta bizhub 215 | bizhub 215 Quick Guide - Page 53
. 11 Image Controller IC-209* This is a built-in printer controller that enables you to; • Use this machine as a PC printer (PCL or GDI); or • Scan an original to send its data to a computer or send it as an E-mail attachment. For details, refer to [User's Guide Print Operations]. 12 Network Card - Konica Minolta bizhub 215 | bizhub 215 Quick Guide - Page 54
2 Using as a Copy Machine Using as a Copy Machine Chapter 2 - Konica Minolta bizhub 215 | bizhub 215 Quick Guide - Page 55
image quality setting at the same time. 4 Use the Keypad to specify the number of copies, then press Start. % When you load the original onto the Original Glass, repeat Steps 1 to 4. % To interrupt the copy operation being performed, press Clear/Stop. For details, refer to page 2-8. 2-2 bizhub 215 - Konica Minolta bizhub 215 | bizhub 215 Quick Guide - Page 56
[MANUAL], then press OK. Use +,, or the Keypad to enter the value, then press OK. Tips - Pressing Clear/Stop deletes the value you have entered. d Reference For details on setting the portrait and landscape zoom ratios, refer to Chapter 4 of the [User's Guide Copy Operations]. bizhub 215 2-3 - Konica Minolta bizhub 215 | bizhub 215 Quick Guide - Page 57
Duplex Unit AD-509 is installed. 1 Press Copy and load the original. % For details on how to load the original, refer to page 1-37. 2 Configure the settings for all originals have been scanned, press Start. Tips - The number of scanned pages is displayed under the number of copies. 2-4 bizhub 215 - Konica Minolta bizhub 215 | bizhub 215 Quick Guide - Page 58
next, you can specify the original direction. 3 Use the Keypad to specify the number of copies, then press Start. % To interrupt the copy operation being performed, originals have been scanned, press Start. Tips - The number of scanned pages is displayed under the number of copies. bizhub 215 2-5 - Konica Minolta bizhub 215 | bizhub 215 Quick Guide - Page 59
of the custom sized paper, measure the X and Y lengths using the Original Scale. 4 Use the Keypad to specify the number of copies, then press Start. d Reference For details on configuring the settings for paper in Tray 1, refer to Chapter 6 of the [User's Guide Copy Operations]. 2-6 bizhub 215 - Konica Minolta bizhub 215 | bizhub 215 Quick Guide - Page 60
the size of the envelopes, measure the X and Y lengths using the Original Scale. 4 Use the Keypad to specify the number of copies, then press Start. d Reference For details on configuring the settings for paper in Tray 1, refer to Chapter 6 of the [User's Guide Copy Operations]. bizhub 215 2-7 - Konica Minolta bizhub 215 | bizhub 215 Quick Guide - Page 61
copy operation that has been started by pressing Start. 1 Configure the copy settings then press Start. 2 Press Clear/Stop during copy operation. The [Please wait] message appears and the job stops. 3 Use +, to select [YES], then press OK. % Selecting [NO] restarts the stopped job. 2-8 bizhub 215 - Konica Minolta bizhub 215 | bizhub 215 Quick Guide - Page 62
3 Using as a Fax Machine Using as a Fax Machine Chapter 3 - Konica Minolta bizhub 215 | bizhub 215 Quick Guide - Page 63
speed dial, press Speed Dial then specify the speed dial number using the Keypad. % To interrupt the transmission, press Clear/Stop and select [YES] in the displayed screen. For de- tails, refer to page 3-10. % When you have loaded the original onto the Original Glass, go to Step 6. 3-2 bizhub 215 - Konica Minolta bizhub 215 | bizhub 215 Quick Guide - Page 64
press OK. 8 When continuously scanning the original, load the next original, then press OK. 9 When scanning of all originals has been completed, press Start. % To interrupt the transmission, press Clear/Stop and select [YES] in the displayed screen. For details, refer to page 3-10. bizhub 215 3-3 - Konica Minolta bizhub 215 | bizhub 215 Quick Guide - Page 65
necessary settings then press Start. % When you have loaded the original onto the Original Glass, specify the scanning size. For details, refer to page 3-2. % To interrupt the transmission, press Clear/Stop and select [YES] in the displayed screen. For details, refer to page 3-10. 3-4 bizhub 215 - Konica Minolta bizhub 215 | bizhub 215 Quick Guide - Page 66
report has been printed, the basic screen appears. 2 Configure the settings for printing the report. % Use +, to select [ supported for printing out a report. 5-1/2 e 8-1/2 v, 5-1/2 e 8-1/2 w/v, 8-1/2 e 11 w/v, 8-1/2 e 14 w, 11 e 17 w, A5 v, B5 w/v, A4 w/v, B4 w, and A3 w 3 Press Start. bizhub 215 - Konica Minolta bizhub 215 | bizhub 215 Quick Guide - Page 67
destinations in the group dial, refer to Chapter 7 of the [User's Guide Fax Operations]. 3 Press the One-Touch Dial Key to register a destination in. % Up to 32 stations can be registered in One-touch Dial. % When the LDAP setting has been configured, select [MANUAL SETTING]. 3-6 bizhub 215 - Konica Minolta bizhub 215 | bizhub 215 Quick Guide - Page 68
dial, refer to Chapter 7 of the [User's Guide Fax Operations]. 3 Enter a desired 3-digit speed dial number using the Keypad, then press OK. % Up to 250 stations (001 to 250) can be registered in the speed dial. % When the LDAP setting has been configured, select [MANUAL SETTING]. bizhub 215 3-7 - Konica Minolta bizhub 215 | bizhub 215 Quick Guide - Page 69
and fax number of the destination using the Keypad, then press OK. % For how to enter characters, refer to page 3-9. % To configure the F-Code TX, baud rate, or transmission time setting, refer to Chapter 7 of the [User's Guide Fax Operations]. Using as a Fax Machine Chapter 3 3-8 bizhub 215 - Konica Minolta bizhub 215 | bizhub 215 Quick Guide - Page 70
For entering numerals Number of times pressed 1 Character entered 2 [A...]: For entering characters Number of times pressed 1 2 3 4 5 6 7 Character entered A B C 2 a b c List of characters that cursor to the character you want to delete, then press Clear/Stop. bizhub 215 3-9 - Konica Minolta bizhub 215 | bizhub 215 Quick Guide - Page 71
. 1 Press Clear/Stop during transmission. 2 Use +, to select [YES], then press OK. % Selecting [NO] restarts the fax transmission. A transmission result report is printed out. 3-10 bizhub 215 - Konica Minolta bizhub 215 | bizhub 215 Quick Guide - Page 72
group dial numbers and program dial num- bers registered in the One-touch Dial keys. % The following paper sizes are supported for printing out a report. 5-1/2 e 8-1/2 v, 5-1/2 e 8-1/2 w/v, 8-1/2 e 11 w/v, 8-1/2 e 14 w, 11 e 17 w, A5 v, B5 w/v, A4 w/v, B4 w, and A3 w 2 Press Start. bizhub 215 3-11 - Konica Minolta bizhub 215 | bizhub 215 Quick Guide - Page 73
, type the name and fax number into [Name] and [Fax Number], and click . (1)(3) % To search for a destination in the address book, select a target from the list, then click . (2) (3) % Right-click the group name of the address book to display the users registered in the group. 3-12 bizhub 215 - Konica Minolta bizhub 215 | bizhub 215 Quick Guide - Page 74
3.8 Sending data in the computer directly as a fax without leaving the desk 3 3 To specify multiple destinations, repeat Step 2. 4 Click [OK]. (4) Using as a Fax Machine Chapter 3 bizhub 215 3-13 - Konica Minolta bizhub 215 | bizhub 215 Quick Guide - Page 75
this machine to check the result. If a copy image is clear, send a fax again. Load the original, turning up the original side to be sent. Then, send the original again. For details, refer to [User's Guide Copy Operations]. Check the number. Check the number. Check with the sender. 3-14 bizhub 215 - Konica Minolta bizhub 215 | bizhub 215 Quick Guide - Page 76
a copy in this machine to check the result. If a copy image is clear, ask the sender to send the fax again. Install a new Toner Bottle. For details, refer to page 1-46. Check with the sender. Set to Auto RX. For details, refer to [User's Guide Fax Operations]. If a paper out occurs, add paper and - Konica Minolta bizhub 215 | bizhub 215 Quick Guide - Page 77
3 If you suspect a failure then do the following 3.9 Using as a Fax Machine Chapter 3 3-16 bizhub 215 - Konica Minolta bizhub 215 | bizhub 215 Quick Guide - Page 78
4 Using as a Printer Using as a Printer Chapter 4 - Konica Minolta bizhub 215 | bizhub 215 Quick Guide - Page 79
CD-ROM. d Reference For details on how to install the printer driver, refer to Chapter 3 of the [User's Guide Print Operations]. Printing Printing data The following describes the procedure for printing data in your computer from this machine. 1 In the software, select the Print menu. 2 Select the - Konica Minolta bizhub 215 | bizhub 215 Quick Guide - Page 80
4.2 Printing 4 3 Configure the print settings then click [OK]. 4 Click [Print]. Using as a Printer Chapter 4 bizhub 215 4-3 - Konica Minolta bizhub 215 | bizhub 215 Quick Guide - Page 81
computer and the paper size to be set in the driver, you can enlarge or reduce the original to the paper size. 1 Select the printer and open [Preferences] (or [Properties]). 2 Select the original size. Using as a Printer Chapter 4 % In [Original Size], specify the original size. 4-4 bizhub 215 - Konica Minolta bizhub 215 | bizhub 215 Quick Guide - Page 82
Using as a Printer Chapter 4 4.3 Enlarging or reducing the original to fit the paper size 4 3 Specify the output paper size or zoom ratio. % To specify the zoom ratio, select [Manual] and specify the zoom ratio. 4 Click [OK]. bizhub 215 4-5 - Konica Minolta bizhub 215 | bizhub 215 Quick Guide - Page 83
] (or [Properties]). 2 Configure the settings for 2-sided printing. % Select [Layout] and configure the [Double Sided] setting. % Selecting [Double Sided] prints the document on both sides of paper. % Selecting [Single Sided] prints the document on one side of paper. 3 Click [OK]. 4-6 bizhub 215 - Konica Minolta bizhub 215 | bizhub 215 Quick Guide - Page 84
onto a single sheet. 1 Select the printer and open [Preferences] (or [Properties]). 2 Configure the settings for combined printing. % Select [Layout] and configure the [Combination] setting. % To specify the detailed settings for combination, click [Combination Details...]. bizhub 215 4-7 - Konica Minolta bizhub 215 | bizhub 215 Quick Guide - Page 85
% In [Combination], you can specify the number of pages of the original to be printed on one page. % In [Order], you can specify the order of combined pages. % Select the [Border Line] check box to enclose each original page with a frame. 3 Click [OK]. Using as a Printer Chapter 4 4-8 bizhub 215 - Konica Minolta bizhub 215 | bizhub 215 Quick Guide - Page 86
Printer Chapter 4 % When the paper is loaded, a screen for specifying the paper in the Bypass Tray appears on the Control Panel. Go to Step 2 to configure the settings for the custom sized paper. 2 Configure the settings 3 Select the printer and open [Preferences] (or [Properties]). bizhub 215 4-9 - Konica Minolta bizhub 215 | bizhub 215 Quick Guide - Page 87
4 Printing on custom sized paper 4.5 Using as a Printer Chapter 4 4-10 (1) (2) bizhub 215 - Konica Minolta bizhub 215 | bizhub 215 Quick Guide - Page 88
4.5 Printing on custom sized paper 4 (3) (4) (5) Using as a Printer Chapter 4 bizhub 215 (6) (7) (8) 4-11 - Konica Minolta bizhub 215 | bizhub 215 Quick Guide - Page 89
and width (Y) using the Original Scale. 2 Configure the settings for the custom sized paper. 4-12 % Use +, to select the correct setting, then press OK. (1)(2)(3)(4)(7)(8)(9) % Use the width (Y) using the Original Scale. 3 Select the printer and open [Preferences] (or [Properties]). bizhub 215 - Konica Minolta bizhub 215 | bizhub 215 Quick Guide - Page 90
4.5 Printing on custom sized paper 4 Using as a Printer Chapter 4 bizhub 215 (1) (2) 4-13 - Konica Minolta bizhub 215 | bizhub 215 Quick Guide - Page 91
Using as a Printer Chapter 4 4 4-14 Printing on custom sized paper 4.5 (3) (4) (5) (6) (7) (8) bizhub 215 - Konica Minolta bizhub 215 | bizhub 215 Quick Guide - Page 92
select [Edit Custom] (1) and register the paper size specified in the main unit. Click [New] (2), enter the name in [Name] (3) and dimensions Check that [Paper Size] is set to the same size as the paper setting for the data to be printed. 4 Click [OK]. Using as a Printer Chapter 4 bizhub 215 4-15 - Konica Minolta bizhub 215 | bizhub 215 Quick Guide - Page 93
Printer Chapter 4 % Load the envelopes with the flap side facing up. % Up to 10 envelopes can be loaded. % When the paper is loaded, a screen for specifying the paper in the Bypass Tray appears on the Control Panel. Go to Step 2 to configure the settings for the envelopes. 2 Configure the settings - Konica Minolta bizhub 215 | bizhub 215 Quick Guide - Page 94
Using as a Printer Chapter 4 4.6 Printing on envelopes 4 3 Select the printer and open [Preferences] (or [Properties]). (1) bizhub 215 4-17 - Konica Minolta bizhub 215 | bizhub 215 Quick Guide - Page 95
[Env.DL]. % In [Original Size], select the envelope size. (1) % In [Paper Source], select [Bypass]. (2) % In [Paper Type], select [Envelope Paper]. (3) % Check that [Paper Size] is set to the same size as the paper setting for the data to be printed. 4 Click [OK]. 4-18 bizhub 215 - Konica Minolta bizhub 215 | bizhub 215 Quick Guide - Page 96
as a Printer Chapter 4 % Use +, to select the correct setting, then press OK. (1)(2)(3)(4)(7)(8)(9) % Use the Keypad to enter the paper size, then press OK. (5)(6) % If you are not sure about the size of the envelopes, measure the length (X) and width (Y) using the Original Scale. bizhub 215 4-19 - Konica Minolta bizhub 215 | bizhub 215 Quick Guide - Page 97
Using as a Printer Chapter 4 4 3 Select the printer and open [Preferences] (or [Properties]). Printing on envelopes 4.6 (1) 4-20 bizhub 215 - Konica Minolta bizhub 215 | bizhub 215 Quick Guide - Page 98
[Env.DL]. % In [Original Size], select the envelope size. (1) % In [Paper Source], select [Tray 1]. (2) % In [Paper Type], select [Envelope Paper]. (3) % Check that [Paper Size] is set to the same size as the paper setting for the data to be printed. 4 Click [OK]. bizhub 215 4-21 - Konica Minolta bizhub 215 | bizhub 215 Quick Guide - Page 99
4 Printing on envelopes 4.6 Using as a Printer Chapter 4 4-22 bizhub 215 - Konica Minolta bizhub 215 | bizhub 215 Quick Guide - Page 100
5 Using as a Scanner Using as a Scanner Chapter 5 - Konica Minolta bizhub 215 | bizhub 215 Quick Guide - Page 101
[Gray] is specified for the color setting, [600e600dpi] is not displayed. 4 Specify the color setting. % Use +, to select the correct setting, then press OK. % Select [BW], [GRAY], or [COLOR]. % If [BW] is selected with [Image Format] set to [JPEG], [PDF] is automatically selected. 5-2 bizhub 215 - Konica Minolta bizhub 215 | bizhub 215 Quick Guide - Page 102
For details on each setting, refer to Chapter 5 of the [User's Guide Scan Operations]. % When you have loaded the original onto the Original Glass, go to Step 7. 7 Use +, to select [AUTO DETECTION] or [MANUAL], then press OK. % When you select [MANUAL], you can specify the scanning size. 8 To start - Konica Minolta bizhub 215 | bizhub 215 Quick Guide - Page 103
correct setting, then press OK. % Select [BW], [GRAY], or [COLOR]. % If [BW] is selected with [Image Format] set to [JPEG], [PDF] is automatically selected. 5 Specify the image quality. % Use +, to select the correct setting, then press OK. % Select [TEXT/PHOTO], [TEXT], or [PHOTO]. 5-4 bizhub 215 - Konica Minolta bizhub 215 | bizhub 215 Quick Guide - Page 104
data to the server, register the FTP/SMB server address using a number between [251 and 300] on the speed dial. % The file format and compression coding method can be specified. For details, refer to Chapter 6 of the [User's Guide Scan Operations]. 7 Press Start. % To interrupt the transmission - Konica Minolta bizhub 215 | bizhub 215 Quick Guide - Page 105
Using as a Scanner Chapter 5 5 5.2 Registering frequently used destinations 5.2 Registering frequently used destinations You can register frequently in. % Up to 32 stations can be registered in One-touch Dial. % When the LDAP setting has been configured, select [MANUAL SETTING]. 5-6 bizhub 215 - Konica Minolta bizhub 215 | bizhub 215 Quick Guide - Page 106
destinations 5 4 Enter the name and E-mail address of the destination using the Keypad, then press OK . % You can specify the transmission size, resolution, and other settings. For details, refer to Chapter 4 of the [User's Guide Scan Operations]. Using as a Scanner Chapter 5 bizhub 215 5-7 - Konica Minolta bizhub 215 | bizhub 215 Quick Guide - Page 107
Using as a Scanner Chapter 5 5 Registering frequently used destinations 5.2 Registering speed dial number using the Keypad, then press OK. % Up to 250 stations (001 to 250) can be registered in the speed dial. % When the LDAP setting has been configured, select [MANUAL SETTING]. 5-8 bizhub 215 - Konica Minolta bizhub 215 | bizhub 215 Quick Guide - Page 108
used destinations 5 4 Enter the name and E-mail address of the destination using the Keypad, then press OK . % To specify the transmission size, resolution, or other settings, refer to Chapter 4 of the [User's Guide Scan Operations]. Using as a Scanner Chapter 5 bizhub 215 5-9 - Konica Minolta bizhub 215 | bizhub 215 Quick Guide - Page 109
has been started by pressing Start. 1 Press Clear/Stop during transmission. 2 Use +, to select [YES], then press OK. % Selecting [NO] restarts the transmission of the scanned data. A transmission result report is printed out. Using as a Scanner Chapter 5 5-10 bizhub 215 - Konica Minolta bizhub 215 | bizhub 215 Quick Guide - Page 110
a USB memory device is connected to this machine, the machine mode changes to scan mode and [TO: Scan to USB Memory] is displayed. Using as a Scanner Chapter 5 % The file format and compression coding method can be specified. For details, refer to Chapter 7 of the [User's Guide Scan Operations - Konica Minolta bizhub 215 | bizhub 215 Quick Guide - Page 111
% If [BW] is selected with [Image Format] set to [JPEG], [PDF] is automatically selected. 5 Specify the image quality. Using as a Scanner Chapter 5 % Use +, to select the correct setting, then press OK. % Select [TEXT/PHOTO], [TEXT], or [PHOTO]. 6 Press Start. Scanned original is stored in the USB - Konica Minolta bizhub 215 | bizhub 215 Quick Guide - Page 112
not displayed. % In [Scan Type], specify the scanning method. (4) % In [Duplex Scanning], turn on or off the 2-sided scanning function. (5) [Duplex Scanning] is displayed when the optional ADF is installed. % Click [Prescan] to display the scanned original in the pre-scan window. bizhub 215 5-13 - Konica Minolta bizhub 215 | bizhub 215 Quick Guide - Page 113
5 4 Scan the original. % For Pull Scan, click [Scan]. Scanning starts. Scanning using a TWAIN driver 5.5 % For Push Scan, press [Scan] then press Start on the Control Panel. Scanning starts. Using as a Scanner Chapter 5 5-14 bizhub 215 - Konica Minolta bizhub 215 | bizhub 215 Quick Guide - Page 114
an application that supports WIA. The operation method differs depending on the application to be used. 1 Load the original. % For details on how to load the original, refer to page 1-37. 2 Start the image processing application on the computer side. 3 Configure the scanning settings. % In [Paper - Konica Minolta bizhub 215 | bizhub 215 Quick Guide - Page 115
5 Scanning using a WIA driver 5.6 Using as a Scanner Chapter 5 5-16 bizhub 215 - Konica Minolta bizhub 215 | bizhub 215 Quick Guide - Page 116
6 Troubleshooting Troubleshooting Chapter 6 - Konica Minolta bizhub 215 | bizhub 215 Quick Guide - Page 117
Troubleshooting Chapter 6 6 6 Troubleshooting This chapter describes troubleshooting operations against typical problems. If the problem is not corrected after the described operation is performed, contact your service after replacement, contact your service representative. 6-2 bizhub 215 - Konica Minolta bizhub 215 | bizhub 215 Quick Guide - Page 118
turn off the power switch, wait for about 10 seconds, then turn on the power switch again. If the message remains displayed, check the error code displayed in the Display, disconnect the power cord from the outlet, then contact your service representative. Troubleshooting Chapter 6 bizhub 215 6-3 - Konica Minolta bizhub 215 | bizhub 215 Quick Guide - Page 119
Troubleshooting Chapter 6 6 6-4 bizhub 215 - Konica Minolta bizhub 215 | bizhub 215 Quick Guide - Page 120
7 Utility Utility Chapter 7 - Konica Minolta bizhub 215 | bizhub 215 Quick Guide - Page 121
the default settings for the scan function. Tips - Some items cannot be configured depending on which optional device is installed in this machine. If an unavailable item is selected, an error message appears. - For details, refer to the relevant operation guide. Utility Chapter 7 7-2 bizhub 215 - Konica Minolta bizhub 215 | bizhub 215 Quick Guide - Page 122
8 Index Index Chapter 8 - Konica Minolta bizhub 215 | bizhub 215 Quick Guide - Page 123
1-32 Image Controller IC-209 1-48 K Keypad 1-33 L Loading paper 1-39 M Main unit 1-47 Manual Zoom 2-3 Mechanical Counter MC-504 1-48 Memory TX 1-34 Mixed Original 1-32 Mode Memory 1-32 N Network Card NC-504 1-48 O On Hook 1-34 One-Touch Dial Key 1-34 Option configuration 1-47 Original - Konica Minolta bizhub 215 | bizhub 215 Quick Guide - Page 124
5-10 Stopping the copy operation 2-8 Switching Plate 1-34 T Tray 1 1-39 Tray 2 1-40 Tray 3 1-40 Tray 4 1-40 Tray 5 1-40 Troubleshooting 6-2 Turning the power on/off 1-36 TWAIN driver 5-13 U Utility 1-32, 7-2 W WIA driver 5-15 Z Zoom 1-32, 1-35 Index Chapter 8 bizhub 215 8-3 - Konica Minolta bizhub 215 | bizhub 215 Quick Guide - Page 125
8 Index Chapter 8 8-4 bizhub 215 - Konica Minolta bizhub 215 | bizhub 215 Quick Guide - Page 126
http://konicaminolta.com A3PE-9585-00 P/N:1BS0830401 2011 Copyright Printed in China 2011.10
-
 1
1 -
 2
2 -
 3
3 -
 4
4 -
 5
5 -
 6
6 -
 7
7 -
8
-
9
-
10
-
11
-
12
-
13
-
14
-
15
-
16
-
17
-
18
-
19
-
20
-
21
-
22
-
23
-
24
-
25
-
26
-
27
-
28
-
29
-
30
-
31
-
32
-
33
-
34
-
35
-
36
-
37
-
38
-
39
-
40
-
41
-
42
-
43
-
44
-
45
-
46
-
47
-
48
-
49
-
50
-
51
-
52
-
53
-
54
-
55
-
56
-
57
-
58
-
59
-
60
-
61
-
62
-
63
-
64
-
65
-
66
-
67
-
68
-
69
-
70
-
71
-
72
-
73
-
74
-
75
-
76
-
77
-
78
-
79
-
80
-
81
-
82
-
83
-
84
-
85
-
86
-
87
-
88
-
89
-
90
-
91
-
92
-
93
-
94
-
95
-
96
-
97
-
98
-
99
-
100
-
101
-
102
-
103
-
104
-
105
-
106
-
107
-
108
-
109
-
110
-
111
-
112
-
113
-
114
-
115
-
116
-
117
-
118
-
119
-
120
-
121
-
122
-
123
-
124
-
125
-
126
 |
 |
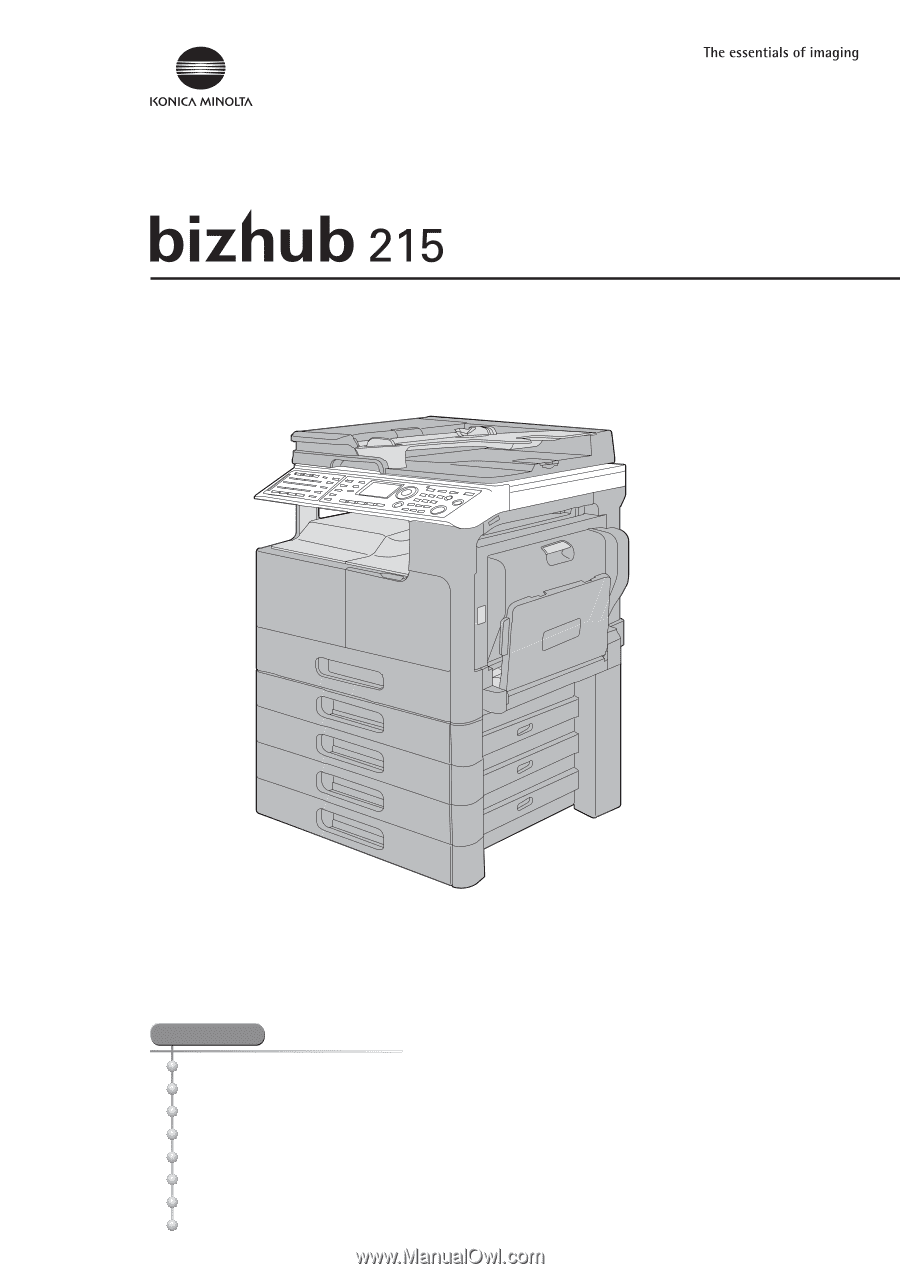
Quick Guide
[Copy/Print/Fax/Scan Operations]
1. Introduction
2. Using as a Copy Machine
3. Using as a Fax Machine
4. Using as a Printer
5. Using as a Scanner
6. Troubleshooting
7. Utility
8. Index
INDEX