Konica Minolta bizhub 363 bizhub 423/363/283/223 Copy Operations User Guide
Konica Minolta bizhub 363 Manual
 |
View all Konica Minolta bizhub 363 manuals
Add to My Manuals
Save this manual to your list of manuals |
Konica Minolta bizhub 363 manual content summary:
- Konica Minolta bizhub 363 | bizhub 423/363/283/223 Copy Operations User Guide - Page 1
User's Guide [Copy Operations] - Konica Minolta bizhub 363 | bizhub 423/363/283/223 Copy Operations User Guide - Page 2
...4-2 4.1 About Start, Stop, and Interrupt ...4-4 Start ...4-4 Stop...4-4 Interrupt...4-4 Reset ...4-4 4.2 About Copy, Fax/Scan, and User Box 4-5 Copy...4-5 Fax/Scan ...4-5 User Box ...4-5 4.3 Utility/Counter ...4-6 4.4 Mode Memory ...4-7 bizhub 423/363/283/223 Contents-1 - Konica Minolta bizhub 363 | bizhub 423/363/283/223 Copy Operations User Guide - Page 3
...5-11 [Separate Scan]...5-13 [Auto Jobs]...5-26 [Edit Image] ...5-29 [Neg./Pos. Reverse] ...5-29 [Mirror Image]...5-30 [Image Adjustment] ...5-30 [Book Copy/Repeat]...5-31 [Book Password Copy]...5-46 [Stamp Repeat] ...5-47 [Header/Footer] ...5-49 [Watermark]...5-50 [Overlay] ...5-50 bizhub 423 - Konica Minolta bizhub 363 | bizhub 423/363/283/223 Copy Operations User Guide - Page 4
...5-56 [Job List]...5-57 [Check Job] ...5-59 6 [User Settings] 6.1 [System Settings] ...6-3 6.2 [Custom Display Settings]...6-6 6.3 [Copier Settings] ...6-8 6.4 [Scan/Fax Settings]...6-10 6.5 [Printer Settings] ...6-11 6.6 [Change Password] ...6-12 6.7 [Change E-Mail Address] ...6-13 - Konica Minolta bizhub 363 | bizhub 423/363/283/223 Copy Operations User Guide - Page 5
35 [Scan to Authorized Folder Settings 7-35 [Network Settings] ...7-36 [Copier Settings] ...7-37 [Printer Settings] ...7-39 [Fax Settings]...7-40 [System Connection] ...7-41 [Security Settings]...7-43 [Administrator Password]...7-43 [User Box Administrator Setting] ...7-43 [Administrator Security - Konica Minolta bizhub 363 | bizhub 423/363/283/223 Copy Operations User Guide - Page 6
] is enabled 11-15 When [Card Authentication + Password] is enabled 11-16 12 Specifications 12.1 Paper ...12-2 Paper types and paper capacities 12-2 12.2 Machine specifications...12-3 bizhub 423/363/283/223...12-3 Auto Duplex Unit...12-5 12.3 Options...12-6 Reverse Automatic Document - Konica Minolta bizhub 363 | bizhub 423/363/283/223 Copy Operations User Guide - Page 7
1 Introduction - Konica Minolta bizhub 363 | bizhub 423/363/283/223 Copy Operations User Guide - Page 8
instructions, precautions for correct operation, and simple troubleshooting guidelines of this machine. In order to obtain maximum performance from this product and use it effectively, please read this User's Guide as necessary. 1.1.1 User's guides Printed manual [Quick Guide Copy/Print/Fax/Scan - Konica Minolta bizhub 363 | bizhub 423/363/283/223 Copy Operations User Guide - Page 9
the product is required to enable users to perform maintenance work or troubleshooting operations. Limit your maintenance and troubleshooting operations to the areas explained in this manual. Should you experience any problems, please contact our service representative. bizhub 423/363/283/223 1-3 - Konica Minolta bizhub 363 | bizhub 423/363/283/223 Copy Operations User Guide - Page 10
. % This symbol indicates a supplementary explanation of a procedural instruction. The operation procedures are described using illustrations. % This symbol indicates transition of the control panel to access a desired menu item. This symbol indicates a desired page. bizhub 423/363/283/223 1-4 - Konica Minolta bizhub 363 | bizhub 423/363/283/223 Copy Operations User Guide - Page 11
manual 1 d Reference This symbol indicates a reference. View the reference as required. Key symbols [ ] Key names on the touch panel or computer screen, or a name of user's guide are indicated by these brackets. Bold text This presents a key name, part the width (Y). bizhub 423/363/283/223 1-5 - Konica Minolta bizhub 363 | bizhub 423/363/283/223 Copy Operations User Guide - Page 12
2 Part names and their functions - Konica Minolta bizhub 363 | bizhub 423/363/283/223 Copy Operations User Guide - Page 13
No. Name 1 Main unit bizhub 423/363/283/223 10 9 8 Description The original is scanned by the scanner section, and the scanned image is printed by the printer section. The main unit is hereinafter referred to as "this machine", "main unit", or bizhub 423/363/283/223 through the manual. 2-2 - Konica Minolta bizhub 363 | bizhub 423/363/283/223 Copy Operations User Guide - Page 14
Finisher FS-527 to enable punching holes. 15 Job Separator JS-603 Install this unit onto the Finisher FS-527. Collects printed pages. 16 Finisher FS-529 Install this unit onto the output tray of the main unit to sort, group or staple printed paper before feeding out. bizhub 423/363/283/223 2-3 - Konica Minolta bizhub 363 | bizhub 423/363/283/223 Copy Operations User Guide - Page 15
sales area. 20 Stamp Unit SP-501 Applies a stamp to originals that have been scanned. 21 Spare TX Marker Stamp 2 A replacement stamp for the Stamp Unit SP-501. 22 Local Interface Kit EK-604 Install this holder to use a compact keyboard. For details on compact keyboards, contact your service - Konica Minolta bizhub 363 | bizhub 423/363/283/223 Copy Operations User Guide - Page 16
9 8 6 7 No. Name 1 Original Pad 2 Control Panel 3 USB Port (Type A) USB2.0/1.1 4 USB Port (Type A) USB2.0/1.1 (For compact keyboard) 5 Bypass Tray 6 Paper-Empty Indicator 7 LCT 8 Tray Release Button 9 Tray 2 10 Tray 1 11 Front Door 12 Output Tray bizhub 423/363/283/223 2-5 - Konica Minolta bizhub 363 | bizhub 423/363/283/223 Copy Operations User Guide - Page 17
Guide 16 Original Tray 17 Original Output Tray 18 Sub Power Switch 19 Auto Duplex Unit Lock Release Lever 20 Top Right Door 21 Auto Duplex Unit 22 Top Right Door Release Lever 23 Bottom Right Door 24 Bottom Right Door Release Lever 25 Tray 4/Storage Box 26 Tray 3 27 Status Indicator bizhub 423 - Konica Minolta bizhub 363 | bizhub 423/363/283/223 Copy Operations User Guide - Page 18
2.2 Main Body 2 2.2.2 Outside of the main body (rear) The illustration above shows the main unit with the optional Reverse Automatic Document Feeder DF-621, Paper Feed Cabinet PC-208, and Fax Kit FK-508. 7 6 5 1 2 3 4 bizhub 423/363/283/223 2-7 - Konica Minolta bizhub 363 | bizhub 423/363/283/223 Copy Operations User Guide - Page 19
(TEL PORT2) 2 Telephone Jack 2 (LINE PORT2) 3 Jack for connecting a telephone (TEL PORT1) 4 Telephone Jack 1 (LINE PORT1) 5 USB Port (Type A) USB2.0/1.1 6 USB Port (Type B) USB2.0/1.1 7 Network Connector (10Base-T/100Base-TX/1000Base-T) 8 Power Code bizhub 423/363/283/223 2-8 - Konica Minolta bizhub 363 | bizhub 423/363/283/223 Copy Operations User Guide - Page 20
PC-208. 11 10 1 9 2 3 8 4 7 5 6 No. Name 1 Original Glass 2 Fusing Unit Top Cover 3 Fusing Unit Cover Lever 4 Fusing Unit 5 Drum Unit 6 Toner Bottle 7 Main Power Switch 8 Total Counter 9 Slit Scan Glass 10 Original Scale 11 Jam Removal Dial bizhub 423/363/283/223 2-9 - Konica Minolta bizhub 363 | bizhub 423/363/283/223 Copy Operations User Guide - Page 21
2.2 Main Body 2.2.4 Control Panel 12 8 76 No. Name 1 Stylus Pen 2 Touch Panel 3 Power Indicator 4 Sub Power Switch 5 Function key 6 Data Indicator 7 Keypad 8 Brightness adjustment dial 2 3 4 5 bizhub 423/363/283/223 2-10 - Konica Minolta bizhub 363 | bizhub 423/363/283/223 Copy Operations User Guide - Page 22
the Control Panel to the left or right, hold the bottom of the Control Panel, and then tilt the panel to the left or right. bizhub 423/363/283/223 2-11 - Konica Minolta bizhub 363 | bizhub 423/363/283/223 Copy Operations User Guide - Page 23
be set are the same. This manual describes procedures for configuring settings from the screen, which is useful for configuring multiple settings. NOTICE Do not apply excessive indicators 5 Left panel 6 Check Job 7 Job List 8 Copier setting button (arrow) bizhub 423/363/283/223 2 3 1 - Konica Minolta bizhub 363 | bizhub 423/363/283/223 Copy Operations User Guide - Page 24
settings screen: Press Utility/Counterö[User Settings]ö[Custom Display Settings]ö[Copier Settings]ö[Default Tab]. To configure color selection settings for buttons and tabs: Press Utility/Counterö[User Settings]ö[Custom Display Settings]ö[Color Selection Settings]. bizhub 423/363/283/223 2-13 - Konica Minolta bizhub 363 | bizhub 423/363/283/223 Copy Operations User Guide - Page 25
2.3 Option 2 2.3 Option 2.3.1 Finisher FS-527/Saddle Stitcher SD-509/Punch Kit PK-517/Job Separator JS-603 3 4 2 1 56 7 8 9 10 11 14 13 12 bizhub 423/363/283/223 2-14 - Konica Minolta bizhub 363 | bizhub 423/363/283/223 Copy Operations User Guide - Page 26
Option 15 16 17 2 18 20 No. Name 1 Output Tray 2 2 Output Tray 1 3 Front Door 4 Horizontal Transport Unit Cover 5 Stapler 6 Guide Lever [FN3] 7 Jam Removal Dial [FN2] 8 Guide Lever [FN1] 9 Guide Lever [FN4] 10 Staple Holder 11 Punch Scrap Box bizhub 423/363/283/223 19 2-15 - Konica Minolta bizhub 363 | bizhub 423/363/283/223 Copy Operations User Guide - Page 27
] 14 Handle [FN5] 15 Transport Unit 16 Punch Kit 17 Job Separator 18 Staple Cartridge 19 Handle [FN7] 20 Folding Output Tray 2.3.2 Finisher FS-529 5 4 No. Name 1 Staple Holder 2 Jam Removal Dial 3 Lock Release Lever 4 Output Tray 5 Tray Extension 3 2 1 bizhub 423/363/283/223 2-16 - Konica Minolta bizhub 363 | bizhub 423/363/283/223 Copy Operations User Guide - Page 28
2.3 Option 2.3.3 Job Separator JS-505 5 4 3 2 No. Name 1 Jam Removal Dial 2 Assist Lever 3 Output Tray 2 4 Output Tray 1 5 Tray Extension 2 1 bizhub 423/363/283/223 2-17 - Konica Minolta bizhub 363 | bizhub 423/363/283/223 Copy Operations User Guide - Page 29
3 Using this machine - Konica Minolta bizhub 363 | bizhub 423/363/283/223 Copy Operations User Guide - Page 30
turned on. Do not also connect another medium to the USB port for the compact keyboard. 1 To turn the power on, open the Front Door, and press n on the Main Power Switch. 2 Close the Front Door. 3 Press the Sub Power Switch. Check that the Touch Panel is turned on. bizhub 423/363/283/223 3-2 - Konica Minolta bizhub 363 | bizhub 423/363/283/223 Copy Operations User Guide - Page 31
3.1 Turning on or off the machine 3 4 To turn the power off, press the Sub Power Switch, then the Main Power Switch. d Reference To change the default settings for Copy: Press the Utility/Counter key ö [User Settings] ö [Copier Settings] ö [Default Copy Settings]. bizhub 423/363/283/223 3-3 - Konica Minolta bizhub 363 | bizhub 423/363/283/223 Copy Operations User Guide - Page 32
been printed with this machine 1 Slide the Lateral Guide to fit the size of the original. 2 Load the original face up in the Original Tray and arrange accord- ing to the scanning order. orientation. 3 Slide the adjustable Lateral Guide against the edges of the original. bizhub 423/363/283/223 3-4 - Konica Minolta bizhub 363 | bizhub 423/363/283/223 Copy Operations User Guide - Page 33
force to press down on a book or any other form of original scanned and copied. % To interrupt the copy operation being performed, press the Stop key. % A [Ready to accept another job.] message that appears during the current printing job indicates that the next original can be scanned. bizhub 423 - Konica Minolta bizhub 363 | bizhub 423/363/283/223 Copy Operations User Guide - Page 34
, the copy operation is stopped and the job is discarded. % If an original with a password embedded by the password copy function is scanned, the copy operation starts after you enter the password. % If multiple originals with different passwords are scanned at the same time, you will need to enter - Konica Minolta bizhub 363 | bizhub 423/363/283/223 Copy Operations User Guide - Page 35
for respective functions. % For details on [Application], refer to page 5-20. 6 Press [Basic] ö [Finishing]. % For details on [Finishing] or [Fold/Bind], refer to page 5-11. bizhub 423/363/283/223 3-7 - Konica Minolta bizhub 363 | bizhub 423/363/283/223 Copy Operations User Guide - Page 36
key. % A [Ready to accept another job.] message that appears during the current printing job indicates that the next original can be scanned. Functions that cannot be combined Some settings cannot setting configured first is given priority. (A warning message appears.) bizhub 423/363/283/223 3-8 - Konica Minolta bizhub 363 | bizhub 423/363/283/223 Copy Operations User Guide - Page 37
4 Control Panel Keys - Konica Minolta bizhub 363 | bizhub 423/363/283/223 Copy Operations User Guide - Page 38
the Control Panel to use the Copy, Fax/Scan, User Box or other functions. 1 2 3 4 22 21 5 20 6 19 7 18 17 8 16 9 15 No. Name 1 Touch Panel 2 Power Indicator 3 Sub Power Switch 4 Power Save 5 Mode Memory 6 Utility/Counter 7 Reset bizhub 423/363/283/223 14 13 12 11 10 - Konica Minolta bizhub 363 | bizhub 423/363/283/223 Copy Operations User Guide - Page 39
in the Touch Panel. (Only when a Hard Disk is installed.) Press to start the copy, scan or fax operation. Flashes in blue while a print job is being received. Lights up in blue when a print job is queued to be printed or while it is being printed. The indicator lights up in blue when there is saved - Konica Minolta bizhub 363 | bizhub 423/363/283/223 Copy Operations User Guide - Page 40
be operated while an original is being scanned. 0 Pressing the Interrupt key restores the default settings. 1 Load the original. 2 Press the Interrupt key. The indicator on the Interrupt key lights up in green and printing of the current job is suspended. 3 Configure the copy settings. 4 Press - Konica Minolta bizhub 363 | bizhub 423/363/283/223 Copy Operations User Guide - Page 41
Fax/Scan % Press this key to enter Fax/Scan mode. For details on the fax/scan function, refer to the [User's Guide Network Scan/Fax/Network Fax Operations]. User Box % Press this key to enter User Box mode. For details on User Box functions, refer to the [User's Guide Box Operations]. bizhub 423 - Konica Minolta bizhub 363 | bizhub 423/363/283/223 Copy Operations User Guide - Page 42
about this machine. [Function Version]: Allows you to check the function version of the currently installed firmware. [IPv4 Address]: Allows you to check the currently specified IPv4 address. [IPv6 Address]: Allows you to check the currently specified IPv6 address. bizhub 423/363/283/223 4-6 - Konica Minolta bizhub 363 | bizhub 423/363/283/223 Copy Operations User Guide - Page 43
Program] [Check Job] [Edit Name] Administrator Settings] ö [System Settings] ö [Restrict User Access] ö [Copy Program Lock Settings]. To delete a program: Press the Utility/Counter key ö [Administrator Settings] ö [System Settings] ö [Restrict User Access] ö [Delete Saved Copy Program]. bizhub 423 - Konica Minolta bizhub 363 | bizhub 423/363/283/223 Copy Operations User Guide - Page 44
Authentication Manager, check with your server administrator for information on the login procedure. 0 The authentication using PageScope Authentication Manager is available only when a Hard Disk is installed. % Press the Access key. Screen for user authentication bizhub 423/363/283/223 4-8 - Konica Minolta bizhub 363 | bizhub 423/363/283/223 Copy Operations User Guide - Page 45
[Account Track Input Method] is set to [Password Only] in [Administrator Settings], the login screen displays only [Password]. The user can directly enter the password in the login screen from the keypad. For an all-number password, the user can log in without displaying the keyboard screen, simply - Konica Minolta bizhub 363 | bizhub 423/363/283/223 Copy Operations User Guide - Page 46
From the [Password for Non-Business Hours] screen (displayed from Administrator Settings mode), the machine can be set so that the screen for entering the password for non- the Utility/Counter key ö [Administrator Settings] ö [System Settings] ö [Weekly Timer Settings]. bizhub 423/363/283/223 4-10 - Konica Minolta bizhub 363 | bizhub 423/363/283/223 Copy Operations User Guide - Page 47
Sleep mode is more time-consuming. 0 As the factory default, Low Power mode is set to restart after 15 20 minutes has elapsed. 0 The machine can receive jobs even while it is in Low Power mode. % Press Administrator Settings] ö [System Settings] ö [Power Save Settings]. bizhub 423/363/283/223 4-11 - Konica Minolta bizhub 363 | bizhub 423/363/283/223 Copy Operations User Guide - Page 48
Setting screen, press the Accessibility key, the Reset key or [Close]. 0 In the Enlarge Display screen, [Default Enlarge Display Settings] appears, enabling you to configure default settings for use in the Enlarge Display mode using the copy or fax/scan functions. % Press the Accessibility key. Page - Konica Minolta bizhub 363 | bizhub 423/363/283/223 Copy Operations User Guide - Page 49
to the message that appears or the User's Guide • [Severe Caution Sound]: A sound produced when an error occurs that cannot be corrected by the user or requires action by a service representative For details, refer to the [User's Guide Enlarge Display Operations]. bizhub 423/363/283/223 4-13 - Konica Minolta bizhub 363 | bizhub 423/363/283/223 Copy Operations User Guide - Page 50
size characters. For details on the Enlarge Display screen, refer to the [User's Guide Enlarge Display Operations]. 0 Press the Enlarge Display key to return to normal display. Manager is available only when a Hard Disk is installed. % Press the Enlarge Display key. bizhub 423/363/283/223 4-14 - Konica Minolta bizhub 363 | bizhub 423/363/283/223 Copy Operations User Guide - Page 51
current screen or the menu structure it belongs to. Check descriptions by selecting a Guidance menu grouped by useful function. Check the description of the main unit and its options. Check the [Admin. Name], [Extension No.], and [E-Mail]. bizhub 423/363/283/223 4-15 - Konica Minolta bizhub 363 | bizhub 423/363/283/223 Copy Operations User Guide - Page 52
[Consumables Replace/Processing Procedure]* Use the animation guidance to check the procedure to replenish staples or throw punch scraps away from the punch scrap box. Press the target button, and then press [Start Guidance]. * This item is displayed only when a Hard Disk is installed. bizhub 423 - Konica Minolta bizhub 363 | bizhub 423/363/283/223 Copy Operations User Guide - Page 53
4.10 C (Clear) 4 4.10 C (Clear) Clears a value (such as the number of copies, a zoom ratio and size) entered using the keypad. % Press C (Clear). The value is deleted. Enter the correct value. bizhub 423/363/283/223 4-17 - Konica Minolta bizhub 363 | bizhub 423/363/283/223 Copy Operations User Guide - Page 54
registration is performed when the System Auto Reset function is activated or one minute after (if System Auto Reset is set to [OFF]). 9 Press the Proof Copy key to repeat proof copy. 10 Press [Print]. The number of copies yet to be printed is registered as a copy job. bizhub 423/363/283/223 4-18 - Konica Minolta bizhub 363 | bizhub 423/363/283/223 Copy Operations User Guide - Page 55
finishing image of a copy in the Touch Panel before printing. This prevents copy errors from occurring. Reference - This function is available only when a Hard Disk is installed. 0 When you scan the original using the [Program Jobs] function, scan all originals, press [Finish], and then check the - Konica Minolta bizhub 363 | bizhub 423/363/283/223 Copy Operations User Guide - Page 56
next original to be scanned. Switch between the [View Status] and [View Pages] tab in the Preview screen. Use [View Pages] to enable [Rotate Displayed Page] or [Change Setting], and stop scanning on [View Status]. 8 Press the Start key. Select this menu to start printing. bizhub 423/363/283/223 - Konica Minolta bizhub 363 | bizhub 423/363/283/223 Copy Operations User Guide - Page 57
5 Copy Function - Konica Minolta bizhub 363 | bizhub 423/363/283/223 Copy Operations User Guide - Page 58
You can configure the settings for multiple copy features by pressing buttons on the Job List] Check jobs currently being performed and jobs waiting to be performed. [Check Job] Check the current settings and the result of the settings. p. 5-3 p. 5-15 p. 5-18 p. 5-20 p. 5-57 p. 5-59 bizhub 423 - Konica Minolta bizhub 363 | bizhub 423/363/283/223 Copy Operations User Guide - Page 59
the finishing state of copies. Select this item to divide a large number of original and scan it in a number of batches. Select this item to copy the original according to the paper on the Basic screen. p. 5-4 p. 5-5 p. 5-7 p. 5-8 p. 6-8 p. 5-11 p. 5-13 p. 5-14 − − bizhub 423/363/283/223 5-3 - Konica Minolta bizhub 363 | bizhub 423/363/283/223 Copy Operations User Guide - Page 60
]. Normally [Bleed Removal] is selected. However, when copying an original with colored background, select [Paper Discoloration Adj] to make adjustments for background removal for copying. bizhub 423/363/283/223 5-4 - Konica Minolta bizhub 363 | bizhub 423/363/283/223 Copy Operations User Guide - Page 61
to be printed or change the paper size and paper type settings configured for each paper tray. The paper size can be selected automatically according to the original size or it can be specified manually. 0 The [Custom Size] (only for [Bypass Tray]): Enter the paper size. bizhub 423/363/283/223 5-5 - Konica Minolta bizhub 363 | bizhub 423/363/283/223 Copy Operations User Guide - Page 62
paper sizes. [memory1] to [memory5] Select the memory button where the paper size is to be stored. [Change Custom Size Name] Rename memory button names. bizhub 423/363/283/223 5-6 - Konica Minolta bizhub 363 | bizhub 423/363/283/223 Copy Operations User Guide - Page 63
as the paper. % Press [Basic] ö [Zoom]. Settings [Auto] [Full Size] [Manual] [Minimal] [-]/[+] [Fixed Zoom] [User Preset Zoom] The most appropriate zoom ratio is rotation: Press the Utility/Counter key ö [User Settings] ö [Copier Settings] ö [Enlargement Rotation]. bizhub 423/363/283/223 5-7 - Konica Minolta bizhub 363 | bizhub 423/363/283/223 Copy Operations User Guide - Page 64
original images can be reduced in size and printed on a single page. Using the [Duplex/Combine] function, you can save paper sheets for copying. % Press [Basic] ö [Duplex/Combine]. Settings [1-Sided > 1-Sided] [2-Sided > 1-Sided] [1-Sided > 2-Sided] [2-Sided > 2-Sided] bizhub 423/363/283/223 5-8 - Konica Minolta bizhub 363 | bizhub 423/363/283/223 Copy Operations User Guide - Page 65
not be what you intended. Disables combined copy. Copies images on two original pages on one sheet of paper. Portrait original pages Landscape original pages bizhub 423/363/283/223 5-9 - Konica Minolta bizhub 363 | bizhub 423/363/283/223 Copy Operations User Guide - Page 66
> Copies images of eight original pages on one sheet of paper. [Horizontal] [Vertical] Specify the combine order of the original (Numbering Direction setting). bizhub 423/363/283/223 5-10 - Konica Minolta bizhub 363 | bizhub 423/363/283/223 Copy Operations User Guide - Page 67
-529 is installed. 0 The Punch settings are available only if the Punch Kit PK-517 is installed on the multiple sets, copies can be fed out sorted by set of copies. 111 43 2 1 When multi-page originals are copied for multiple sets, copies can be fed out sorted by pages. 432 1 11 1 bizhub 423 - Konica Minolta bizhub 363 | bizhub 423/363/283/223 Copy Operations User Guide - Page 68
tray when copying multiple sets of multi-page originals. When the Finisher FS-527, Finisher FS-529, or Job Separator JS-505 is not installed: If the following conditions are met, printed copies are fed , press [Original Direction], and then select the original direction. bizhub 423/363/283/223 5-12 - Konica Minolta bizhub 363 | bizhub 423/363/283/223 Copy Operations User Guide - Page 69
of the original are scanned. 6 After all original pages have been scanned, press [Finish]. 7 Press the Start key. d Reference To set the Separate Scan output method: Press the Utility/Counter key ö [User Settings] ö [Copier Settings] ö [Separate Scan Output Method]. bizhub 423/363/283/223 5-13 - Konica Minolta bizhub 363 | bizhub 423/363/283/223 Copy Operations User Guide - Page 70
5.1 [Basic] 5 5.1.7 [Auto Rotate OFF] Select this setting to copy the original according to the paper orientation without rotating the image. 0 For some paper sizes or zoom values, part of the image may be cut off. % Press [Basic] ö [Auto Rotate OFF]. bizhub 423/363/283/223 5-14 - Konica Minolta bizhub 363 | bizhub 423/363/283/223 Copy Operations User Guide - Page 71
original binding position (page margin) to prevent the copy from being printed upside-down when scanning a 2-sided original. [Auto] Automatically configures the binding position of a dirt of the Slit Scan Glass upon a copy output when loading an original in the ADF. bizhub 423/363/283/223 5-15 - Konica Minolta bizhub 363 | bizhub 423/363/283/223 Copy Operations User Guide - Page 72
Guide of the ADF to fit the size of the largest original page. 2 Arrange originals in the order you want them to be scanned − − − o − o 1/2w (A5 w) (B5 v) o o o − − − o − (B5 w) − − o o o o o o o Possible to combine − Not possible to combine bizhub 423/363/283/223 5-16 - Konica Minolta bizhub 363 | bizhub 423/363/283/223 Copy Operations User Guide - Page 73
The length of the first page of the original is detected, and the subsequent pages are scanned as pages of the same size. NOTICE Unfold folded originals before loading them into the ADF. ]. % To cancel the setting, press [Z-Folded Original] again to deselect it. bizhub 423/363/283/223 5-17 - Konica Minolta bizhub 363 | bizhub 423/363/283/223 Copy Operations User Guide - Page 74
5.3 [Original Type] 5 5.3 [Original Type] Select the setting for the image type of the original to better adjust the copy quality. % Press [Original Type]. bizhub 423/363/283/223 5-18 - Konica Minolta bizhub 363 | bizhub 423/363/283/223 Copy Operations User Guide - Page 75
that it is darker, making it easier to read. Select this setting to copy images (originals) printed using this machine. Adjust the text reproduction level for an original with a photo overlapping the text can be configured when an item other than [Photo] is selected. bizhub 423/363/283/223 5-19 - Konica Minolta bizhub 363 | bizhub 423/363/283/223 Copy Operations User Guide - Page 76
, for example, insurance card, driver's license, or business card, on one sheet. Saves the scanned original data in a User Box. p. 5-21 p. 5-29 p. 5-31 p. 5-35 p. 5-36 p. 5-37 p. 5-38 p. 5-40 p. 5-54 p. 5-55 * This item is displayed only when a Hard Disk is installed. bizhub 423/363/283/223 5-20 - Konica Minolta bizhub 363 | bizhub 423/363/283/223 Copy Operations User Guide - Page 77
machine even once. It may lead to reduced print quality, a paper jam or a damage to the machine. (Even if a transparency has been discharged without printing, it cannot be reused.) 1 Load the a transparency interleaf. Indicates the paper size of the loaded transparency. bizhub 423/363/283/223 5-21 - Konica Minolta bizhub 363 | bizhub 423/363/283/223 Copy Operations User Guide - Page 78
loaded with the paper for the front/back cover page or blank cover pages. d Reference To configure the 2-sided copy mode: Press [Basic] ö [Duplex/Combine]. bizhub 423/363/283/223 5-22 - Konica Minolta bizhub 363 | bizhub 423/363/283/223 Copy Operations User Guide - Page 79
same orientation of paper for both. % Press [Application] ö [Sheet/Cover/Chapter Insert] ö [Insert Sheet]. Settings [P---] [Sort] [Insert Paper] [Copy] [Blank] bizhub 423/363/283/223 Specify where to insert sheets of a different paper type. Sorts specified pages in the ascending order. Select - Konica Minolta bizhub 363 | bizhub 423/363/283/223 Copy Operations User Guide - Page 80
/Cover/Chapter Insert] ö [Insert Image]. Settings [P---] [Sort] Specify the position to insert the page scanned through the Original Glass. Sorts specified pages in the ascending order. 3 Press the Start key. 4 Place the original to be inserted on the Original Glass. bizhub 423/363/283/223 5-24 - Konica Minolta bizhub 363 | bizhub 423/363/283/223 Copy Operations User Guide - Page 81
page original, repeat steps 4 and 5 until all pages of the insertion original are scanned in the order that they are to be inserted. 6 Press [Finish]. 7 Press the first page of a chapter can be printed on the front side of the paper. If the document was arranged so that bizhub 423/363/283/223 5-25 - Konica Minolta bizhub 363 | bizhub 423/363/283/223 Copy Operations User Guide - Page 82
only when a Hard Disk is installed. 1234 REPORT 123 4 1234 REPORT 123 1234 1R23E40P0O0R1T 0 Up to 100 types of originals can be scanned. 0 When configuring a program job, the [Group] setting cannot be selected in the [Finishing] screen. In- stead, select [Sort]. bizhub 423/363/283/223 5-26 - Konica Minolta bizhub 363 | bizhub 423/363/283/223 Copy Operations User Guide - Page 83
press the Start key. 3 Press [Fix]. % Press [Retry] to delete the scanned job. Press [Change Setting] to configure the copy settings. % When the original has been to 5 until all originals have been scanned. 6 After all original pages have been scanned, press [Finish]. bizhub 423/363/283/223 5-27 - Konica Minolta bizhub 363 | bizhub 423/363/283/223 Copy Operations User Guide - Page 84
5.4 [Application] 5 7 Press [Yes]. 8 Specify finish settings as needed. 9 Press [Start] or the Start key. bizhub 423/363/283/223 5-28 - Konica Minolta bizhub 363 | bizhub 423/363/283/223 Copy Operations User Guide - Page 85
reversed like negative film of photographs. % Press [Application] ö [Edit Image] ö [Neg./Pos. Reverse]. % To cancel the Neg./Pos. Reverse function, press [Neg./Pos. Reverse] again. bizhub 423/363/283/223 5-29 - Konica Minolta bizhub 363 | bizhub 423/363/283/223 Copy Operations User Guide - Page 86
. [Image Adjustment] Adjusts the image quality that meets an image based on the copied original. 1 Press [Application] ö [Edit Image] ö [Image Adjustment]. Settings [Contrast] [Copy Density] bizhub 423/363/283/223 Adjust the copy density balance. Adjust copy density (lighter or darker). 5-30 - Konica Minolta bizhub 363 | bizhub 423/363/283/223 Copy Operations User Guide - Page 87
on the Original Glass. 0 If [Book Copy] is selected, [Image Adjust] is scanned in order after the front cover. 0 When [Front and Back Cover] or [Front Cover] is selected, wait until all pages in the original are scanned and then press [Finish] and then the Start key to start printing. bizhub 423 - Konica Minolta bizhub 363 | bizhub 423/363/283/223 Copy Operations User Guide - Page 88
the frame to be erased. [None] Select this settings to not erase the frame. Erases projection of the dark shadow at the center of the book. Select the binding position of the original. To indicate it, select [Separation], [Front Cover], and [Front and Back Cover]. bizhub 423/363/283/223 5-32 - Konica Minolta bizhub 363 | bizhub 423/363/283/223 Copy Operations User Guide - Page 89
area of the original so that the sheet is filled with the copied image. However, some parts of the image may be lost. Automatically detects the area to be scanned. Select [Auto] to detect the size of the original automatically. If the size of the original is not automatically detected, or the - Konica Minolta bizhub 363 | bizhub 423/363/283/223 Copy Operations User Guide - Page 90
Staples 0 This item is available if the Saddle Stitcher SD-509 is installed in the optional Finisher FS-527. NOTICE Load a catalog with the Book Copy/Repeat] ö [Booklet Original]. 3 Press the Start key. 4 After all original pages have been scanned, press [Finish] and the Start key. bizhub 423 - Konica Minolta bizhub 363 | bizhub 423/363/283/223 Copy Operations User Guide - Page 91
are different from the binding position, the positions of the staples or punched holes are given priority. 0 If part of the image is lost when copied with the specified binding margin settings, reduce the zoom and perform copying. % Press [Application] ö [Page Margin]. bizhub 423/363/283/223 5-35 - Konica Minolta bizhub 363 | bizhub 423/363/283/223 Copy Operations User Guide - Page 92
is placed in the back. If the original is loaded in any other orientation, this setting fails. Adjust the image position according to the binding margin. [Change Back Shift] Adjust the image Copies the original image at the center of the paper without enlarging it. bizhub 423/363/283/223 5-36 - Konica Minolta bizhub 363 | bizhub 423/363/283/223 Copy Operations User Guide - Page 93
the photo size. 5.4.6 [Booklet] The page order of the scanned original is automatically arranged to produce 2-sided 2 in 1 copies in is installed in the optional Finisher FS-527. 0 Generally, a multiple of 4 pages is required with a 1-sided original, and a multiple of bizhub 423/363/283/223 5-37 - Konica Minolta bizhub 363 | bizhub 423/363/283/223 Copy Operations User Guide - Page 94
Ratio: Press the Utility/Counter key ö [User Settings] ö [Copier Settings] ö [Auto Zoom for Combine/Booklet]. 5.4.7 [Erase] [ the original text, such as the transmission information on received faxes and the shadows of punched holes. All four sides around (0 mm). bizhub 423/363/283/223 5-38 - Konica Minolta bizhub 363 | bizhub 423/363/283/223 Copy Operations User Guide - Page 95
] in Administrator Settings. 0 The size of the original automatically detected is 3/8 e 3/8 inch (10 e 10 mm) or larger. If the detection fails, a : Press the Utility/Counter key ö [Administrator Settings] ö [System Settings] ö [Expert Adjustment] ö [Erase Adjustment]. bizhub 423/363/283/223 5-39 - Konica Minolta bizhub 363 | bizhub 423/363/283/223 Copy Operations User Guide - Page 96
stamp cannot be printed on blank pages inserted using the Cover Sheet, Insert Sheet and Chapters functions. Change the setting for printing on blank pages in Administrator Settings to enable blank page printing. 0 The date/time as of scanning the original is stamped on the paper. bizhub 423/363/283 - Konica Minolta bizhub 363 | bizhub 423/363/283/223 Copy Operations User Guide - Page 97
and chapter numbers are printed on all pages. 0 Page numbers cannot be printed on blank pages inserted using the Cover Sheet, Insert Sheet and Chapters functions. Change the setting for printing on blank pages in Administrator Settings to enable blank page printing. bizhub 423/363/283/223 5-41 - Konica Minolta bizhub 363 | bizhub 423/363/283/223 Copy Operations User Guide - Page 98
Page(s)]: Disables counting and printing on inserted pages. Select a position from the nine print position options. [Adjust Position] Adjust horizontal and vertical positions to be between 1/16 inch (0.1 mm) and 1-15/16 inch (50.0 mm). Set the text size and type. bizhub 423/363/283/223 5-42 - Konica Minolta bizhub 363 | bizhub 423/363/283/223 Copy Operations User Guide - Page 99
Position] Adjust horizontal and vertical positions to be between 1/16 inch (0.1 mm) and 1-15/16 inch (50.0 mm). d Reference To enable printing on blank pages: Press the Utility/Counter key ö [Administrator Settings] ö [System Settings] ö [Blank Page Print Settings]. bizhub 423/363/283/223 5-43 - Konica Minolta bizhub 363 | bizhub 423/363/283/223 Copy Operations User Guide - Page 100
your service representative. [Distribution Control Number] Prints the distribution control number. Specify the distribution control number using a value between 1 and 99999999. Specify [Text Size], [Density], [Copy Protect Pattern], [Pattern Overwrite], and [Background Pattern]. bizhub 423/363 - Konica Minolta bizhub 363 | bizhub 423/363/283/223 Copy Operations User Guide - Page 101
can be used in combination for up to six text lines. 0 [Preset Stamp], [Date/Time], and [Other] can be selected together. 0 In [Preset Stamp], multiple copy guards cannot be selected. 0 A copy guard cannot be printed on a colored paper, envelope, or transparency film. bizhub 423/363/283/223 5-45 - Konica Minolta bizhub 363 | bizhub 423/363/283/223 Copy Operations User Guide - Page 102
can be selected together. 0 In [Preset Stamp], multiple passwords cannot be selected. 0 A password copy cannot be printed on a colored paper, envelope, or transparency film. 0 If you fail to enter a password three times, the currently processed copy job will be erased. bizhub 423/363/283/223 5-46 - Konica Minolta bizhub 363 | bizhub 423/363/283/223 Copy Operations User Guide - Page 103
Zoom, Image Adjustment, Colored Paper, Envelope, or Transparency specified, the currently processed copy job will be erased. 0 If multiple originals with different passwords are scanned, you will need to enter a password for each original. % Press [Application] ö [Stamp/Composition] ö [Copy Security - Konica Minolta bizhub 363 | bizhub 423/363/283/223 Copy Operations User Guide - Page 104
date/time as of scanning the original is stamped on the paper. [Job Number] Select Yes to print the copy job number. [Serial Number] Select Yes to print the serial number of this machine. For details on setting for the serial number, contact your service representative. [Distribution Control - Konica Minolta bizhub 363 | bizhub 423/363/283/223 Copy Operations User Guide - Page 105
page. [Text Details] Select [Text Size] and [Text Type]. Reset the settings to the initial contents. d Reference To register a header/footer: Press the Utility/Counter key ö [Administrator Settings] ö [System Settings] ö [Stamp Settings] ö [Header/Footer Settings]. bizhub 423/363/283/223 5-49 - Konica Minolta bizhub 363 | bizhub 423/363/283/223 Copy Operations User Guide - Page 106
the eight types available. The watermark selected is printed over the original image. [Overlay] Makes copies with the image of the first scanned original page overlapping the subsequent original images. - This function is available only when a Hard Disk is installed. bizhub 423/363/283/223 5-50 - Konica Minolta bizhub 363 | bizhub 423/363/283/223 Copy Operations User Guide - Page 107
Composition (Original)] Composes the original as the background. The overlay image is superimposed on the original when they are printed. [Back] Composes the overlay image as the background. The original is superimposed on the overlay image when they are printed. bizhub 423/363/283/223 5-51 - Konica Minolta bizhub 363 | bizhub 423/363/283/223 Copy Operations User Guide - Page 108
[Registered Overlay] This function enables storing of an image from the scanned original as a registered overlay on the hard disk for later use is available only when a Hard Disk is installed. % Press [Application] ö [Stamp/Composition] ö [Registered Overlay]. bizhub 423/363/283/223 5-52 - Konica Minolta bizhub 363 | bizhub 423/363/283/223 Copy Operations User Guide - Page 109
when they are printed. [Image Details] Check the [Name], [Registered Date], and [Image Size] of the overlay image. To confirm the enlarged overlay [Administrator Settings] ö [System Settings] ö [Restrict User Access] ö [Restrict Access to Job Settings] ö [Change Registered Overlay]. bizhub 423/ - Konica Minolta bizhub 363 | bizhub 423/363/283/223 Copy Operations User Guide - Page 110
[Card Shot] Separately scans the contents of the front and back sides of a card, for example, insurance card, driver's license, or business the default of Card Copy: Press the Utility/Counter key ö [Administrator Settings] ö [Copier Settings] ö [Card Shot Settings]. bizhub 423/363/283/223 5-54 - Konica Minolta bizhub 363 | bizhub 423/363/283/223 Copy Operations User Guide - Page 111
for the read original. A name automatically assigned to the document appears. You can change the file name. [Yes]: Select to copy the scanned original and save it in the specified User Box. [No]: Select to save the data of the scanned original in the specified User Box. bizhub 423/363/283/223 5-55 - Konica Minolta bizhub 363 | bizhub 423/363/283/223 Copy Operations User Guide - Page 112
Display Default]. To prohibit other users from deleting jobs or to give permission to do so: Press the Utility/Counter key ö [Administrator Settings] ö [System Settings] ö [Restrict User Access] ö [Restrict Access to Job Settings] ö [Delete Other User Jobs]. To prohibit or permit change if the print - Konica Minolta bizhub 363 | bizhub 423/363/283/223 Copy Operations User Guide - Page 113
[User's Guide Network Scan/Fax/Network Fax Operations]. Opens the screen for checking fax reception jobs. For details, refer to the [User's Guide Network Scan/Fax/Network Fax Operations]. Opens the screen for saving jobs. For details, refer to the [User's Guide Box Operations]. bizhub 423/363/283 - Konica Minolta bizhub 363 | bizhub 423/363/283/223 Copy Operations User Guide - Page 114
. [Finished Jobs] Displays only jobs that were completed normally. [All Jobs] Displays all jobs. [Detail] Check the status, results, error details, user name, queued time, completed time, number of original pages and number of copies for jobs in the Job History list. bizhub 423/363/283 - Konica Minolta bizhub 363 | bizhub 423/363/283/223 Copy Operations User Guide - Page 115
[Check Job] From the Check Job Settings screens, the current copy settings can be checked and changed if desired. 1 Press [Check Job] ö [Check Details]. 2 Check the copy settings. To change the copy settings, press the relevant button. 3 After checking the settings, press [Close]. bizhub 423/363 - Konica Minolta bizhub 363 | bizhub 423/363/283/223 Copy Operations User Guide - Page 116
6 [User Settings] - Konica Minolta bizhub 363 | bizhub 423/363/283/223 Copy Operations User Guide - Page 117
. To initialize all settings, either manually reset them one by one or contact your service representative. Settings [System Settings] [Custom Display Settings] [Copier Settings] [Scan/Fax Settings] [Printer Settings] [Change Password] [Change E-Mail Address] [Change Icon] [Register Authentication - Konica Minolta bizhub 363 | bizhub 423/363/283/223 Copy Operations User Guide - Page 118
. Also select whether to print lists in 1-Sided or 2Sided mode. Adjusts the criteria level of an original in color or black and white. Refer to page 7-3. Appears when user access is permitted under [Ad- Refer to page 7-4. ministrator Settings]. Refer to page 7-8. bizhub 423/363/283/223 6-3 - Konica Minolta bizhub 363 | bizhub 423/363/283/223 Copy Operations User Guide - Page 119
Finisher FS-527 or Job Separator JS-505 is installed. [Tray 3] is displayed when the Job Separator JS-603 is installed in the Finisher FS-527. Standard (2) [Prohibit Copy] [Do Not Print] [Left & Right Bind: All the Same Top & Bottom Bind: All the Same] [Local Keyboard] bizhub 423/363/283/223 6-4 - Konica Minolta bizhub 363 | bizhub 423/363/283/223 Copy Operations User Guide - Page 120
6.1 [System Settings] 6 d Reference To enable Auto Paper: Press [Basic] ö [Paper] ö [Auto]. To configure Background Removal to Auto: Press [Basic] ö [Density/Background] ö [Auto]. bizhub 423/363/283/223 6-5 - Konica Minolta bizhub 363 | bizhub 423/363/283/223 Copy Operations User Guide - Page 121
the next job during the printing operation. This setting is for the fax and network fax operations. For details, refer to the [User's Guide Network Scan/Fax/Network Fax Operations]. Select the color used for indicating that the button is selected. [Left Panel Display Default] Configure whether - Konica Minolta bizhub 363 | bizhub 423/363/283/223 Copy Operations User Guide - Page 122
Fax Operations]. Factory default [Default Tab] [Shortcut Key 1]/[Shortcut Key 2]/[Quick Settings 1]/[Quick Settings 2]/[Quick Settings 3]/[Quick Settings 4] [Default Tab Density Settings] [Default Tab] (Fax/Scan Settings) [Program Default] (Fax/Scan Settings) [Address Book Index Default] (Fax/Scan - Konica Minolta bizhub 363 | bizhub 423/363/283/223 Copy Operations User Guide - Page 123
pages of the original have been scanned. Configure whether to rotate and print a large-size original image when the original orientation does not match that of paper. Appears when user access is permitted under [Administrator Settings]. For details, refer to page 7-37. bizhub 423/363/283/223 6-8 - Konica Minolta bizhub 363 | bizhub 423/363/283/223 Copy Operations User Guide - Page 124
Shot Settings] [Auto Select Booklet] [Auto Display Zoom Ratio] [Yes] [Factory Default] [Print] [Page Print] [Allow] [OFF] [ON] [Tray Before APS ON] [Tray 2] [Multiple Sheets] [Accept] [When Auto Paper/Auto Zoom is set] [ON] - [Layout]: [Top/Bottom] - [Zoom]: [Full Size] bizhub 423/363/283/223 6-9 - Konica Minolta bizhub 363 | bizhub 423/363/283/223 Copy Operations User Guide - Page 125
6.4 [Scan/Fax Settings] 6 6.4 [Scan/Fax Settings] This setting is for the network scan, fax, and network fax operations. For details, refer to the [User's Guide Network Scan/Fax/Network Fax Operations]. bizhub 423/363/283/223 6-10 - Konica Minolta bizhub 363 | bizhub 423/363/283/223 Copy Operations User Guide - Page 126
6.5 [Printer Settings] 6 6.5 [Printer Settings] This setting is for the printer operations. For details, refer to the [User's Guide Print Operations]. bizhub 423/363/283/223 6-11 - Konica Minolta bizhub 363 | bizhub 423/363/283/223 Copy Operations User Guide - Page 127
function. 1 Press the Utility/Counter key ö [User Settings] ö [Change Password]. 2 Enter the previous password, and then press [OK]. 3 Enter a new password. 4 Press [Password Confirmation], and enter the password again. 5 Press [OK]. The new password is registered. bizhub 423/363/283/223 6-12 - Konica Minolta bizhub 363 | bizhub 423/363/283/223 Copy Operations User Guide - Page 128
the E-mail address. 0 Appears when user access is permitted under [Administrator Settings]. For details, refer to page 7-44. 1 Press the Utility/Counter key ö [User Settings] ö [Change E-Mail Address]. 2 Press [E-Mail Address]. 3 Change the E-mail address. 4 Press [OK]. bizhub 423/363/283/223 - Konica Minolta bizhub 363 | bizhub 423/363/283/223 Copy Operations User Guide - Page 129
6.8 [Change Icon] 6 6.8 [Change Icon] Change the icon specified as registered user information. 0 When logged in as a registered user, you can change the icon. 1 Press the Utility/Counter key ö [User Settings] ö [Change Icon]. 2 Select the icon and press [OK]. bizhub 423/363/283/223 6-14 - Konica Minolta bizhub 363 | bizhub 423/363/283/223 Copy Operations User Guide - Page 130
. - Select Utility/Counterö[Administrator Settings]ö[System Settings]ö[Restrict User Access]ö[Re- strict Access to Job Settings]ö[Biometric/IC Card Info To delete authentication information, press [Delete]. For biometric authentication For IC card authentication bizhub 423/363/283/223 6-15 - Konica Minolta bizhub 363 | bizhub 423/363/283/223 Copy Operations User Guide - Page 131
Test]. % If your finger vein patterns have been authenticated in the authentication test, press [New]. If authentication has failed, retry scanning the finger. For IC card authentication, place your IC card on the authentication unit, and press [OK]. 4 Press [Close]. bizhub 423/363/283/223 6-16 - Konica Minolta bizhub 363 | bizhub 423/363/283/223 Copy Operations User Guide - Page 132
6.10 [Cellular Phone/PDA Setting] 6 6.10 [Cellular Phone/PDA Setting] Configure settings to print data in a cellular phone or PDA through this machine. For details, refer to the [User's Guide Box Operations] or [User's Guide Print Operations]. bizhub 423/363/283/223 6-17 - Konica Minolta bizhub 363 | bizhub 423/363/283/223 Copy Operations User Guide - Page 133
7 [Administrator Settings] - Konica Minolta bizhub 363 | bizhub 423/363/283/223 Copy Operations User Guide - Page 134
on to Administrator Settings requires the administrator password. Settings [System Settings] [Administrator/Machine Settings] [One-Touch/User Box Registration] [User Authentication/Account Track] [Network Settings] [Copier Settings] [Printer Settings] [Fax Settings] [System Connection] [Security - Konica Minolta bizhub 363 | bizhub 423/363/283/223 Copy Operations User Guide - Page 135
after printing documents from computers or receiving faxes. [ Guide Network Scan/Fax/Network Fax Operations]. Factory default [Low Power Mode Settings] [Sleep Mode Settings] [Power Save Key] [Enter Power Save Mode] [Fax Board Power Save] 15 min. 20 min. [Low Power] [Immediately] [Yes] bizhub 423 - Konica Minolta bizhub 363 | bizhub 423/363/283/223 Copy Operations User Guide - Page 136
[Administrator Settings] ö [System Settings] ö [Output Settings]. Settings [Print/Fax Output Settings] [Output Tray Settings] [Shift Output Each Job] This setting is for the print and fax operations. For details, refer to the [User's Guide Network Scan/Fax/Network Fax Operations] and [User's Guide - Konica Minolta bizhub 363 | bizhub 423/363/283/223 Copy Operations User Guide - Page 137
zone. Factory default [Time Zone] +00:00 d Reference To cancel the current settings: Press C (Clear). 7.1.4 [Daylight Saving Time] Configure daylight saving time settings. % Press the Utility/Counter key ö [Administrator Settings] ö [System Settings] ö [Daylight Saving Time]. bizhub 423/363 - Konica Minolta bizhub 363 | bizhub 423/363/283/223 Copy Operations User Guide - Page 138
enter the password if the user uses this machine outside the specified time. • To make the user to enter the password, you need to specify the pass- word. Factory default [Weekly Timer ON/OFF Settings] [Select Time for Power Save] [Password for Non-Business Hours] [OFF] [No] [No] bizhub 423/363 - Konica Minolta bizhub 363 | bizhub 423/363/283/223 Copy Operations User Guide - Page 139
scan, fax, and network fax operations. For details, refer to the [User's Guide Network Scan/Fax/Network Fax Operations]. Factory default [Changing Job Priority] [Delete Other User Jobs] [Registering and Changing Addresses] [Changing Zoom Ratio] [Allow] [Restrict] [Allow] [Allow] bizhub 423 - Konica Minolta bizhub 363 | bizhub 423/363/283/223 Copy Operations User Guide - Page 140
7.1 [System Settings] 7 Factory default [Changing the "From" Address] [Change Registered Overlay] * [Biometric/IC Card Information Registration] * [Restrict Broadcasting] [Login User Address] [Allow] [Restrict] [No] * This item is displayed only when a Hard Disk is installed. 7.1.7 [Expert - Konica Minolta bizhub 363 | bizhub 423/363/283/223 Copy Operations User Guide - Page 141
FS-529 is installed. d Reference print image is not reproduced with consistent density. Scan factory default value (0). For details, refer to page 7-16. Adjust the scan range of the scanner. For details on displaying this item, contact your service representative. Make adjustments for scanning - Konica Minolta bizhub 363 | bizhub 423/363/283/223 Copy Operations User Guide - Page 142
. Press Start to start drum dry processing. Directly after replacing the toner bottle or after printing a large number of originals printing density may fall temporarily. In this case, using this function forcibly replenishes the toner. Press Start to start replenishing toner. Factory default - Konica Minolta bizhub 363 | bizhub 423/363/283/223 Copy Operations User Guide - Page 143
7.1 [System Settings] 7 Factory default [Maximum Density Adjust- [3] ment] [Leading Edge Adjustment] Adjust the starting print position at the leading edge of each type of paper (with respect to the paper feed direction). 1 Press the Utility/Counter key ö [Administrator Settings] ö [System - Konica Minolta bizhub 363 | bizhub 423/363/283/223 Copy Operations User Guide - Page 144
the sample. 4 Press [OK]. 5 Create a sample, and check the print result. d Reference To adjust the half-fold position: Press the Utility/Counter key ö [Administrator Settings] ö [System Settings] ö [Expert Adjustment] ö [Finisher Adjustment] ö [Half-Fold Position]. bizhub 423/363/283/223 7-12 - Konica Minolta bizhub 363 | bizhub 423/363/283/223 Copy Operations User Guide - Page 145
installed. 0 When adjusting the half-fold position in parallel with the left edge of paper, contact your service repre- sentative. 1 Press the Utility/Counter key ö [Administrator Settings] ö [System sample. 4 Press [OK]. 5 Create a sample, and check the print result. bizhub 423/363/283/223 7-13 - Konica Minolta bizhub 363 | bizhub 423/363/283/223 Copy Operations User Guide - Page 146
printing result is not obtained, for example, the printing density is too high or too low. Scan the service representative. 1 Press the Utility/Counter key ö [Administrator Settings] ö [System Settings] ö [Expert Adjustment] ö [Gradation Adjustment]. 2 Press [Maximum Density Adjustment]. bizhub 423 - Konica Minolta bizhub 363 | bizhub 423/363/283/223 Copy Operations User Guide - Page 147
function is useful when a print image is not reproduced with consistent density. Scan the density of an output test pattern and adjust to the optimal gradation. 0 Adjust the gradation three times. 1 Press the Utility/Counter key ö [Administrator Settings] ö [System Settings] ö [Expert Adjustment - Konica Minolta bizhub 363 | bizhub 423/363/283/223 Copy Operations User Guide - Page 148
settings and paper count settings for this machine. % Press the Utility/Counter key ö [Administrator Settings] ö [System Settings] ö [List/Counter]. Settings [Management List] bizhub 423/363/283/223 [Job Settings List] Configure paper tray settings for printing the job settings list and specify - Konica Minolta bizhub 363 | bizhub 423/363/283/223 Copy Operations User Guide - Page 149
] Select the paper size of the counter. [Paper Type] Select the paper type of the counter. Factory default [Job Settings List] • [1-Sided] • Tray 1 7.1.9 [Reset Settings] Configure auto reset settings. 0 All settings performed in the following tabs during operation using the copy function are - Konica Minolta bizhub 363 | bizhub 423/363/283/223 Copy Operations User Guide - Page 150
Set/Bind Direction] • [Reset Data After Job] The destination of data is always reset. Factory default [Priority Mode] [System Auto Reset Time] [Auto Reset] [When Account is changed] [When original is set on ADF] [Next Job] [Copy] 1 minute • [Copy]: 1 Minute • [Fax/Scan]: 1 Minute • [User Box - Konica Minolta bizhub 363 | bizhub 423/363/283/223 Copy Operations User Guide - Page 151
[8 1/2 e 14/Foolscap Size Detection] [Foolscap Size Setting] [Table 1] [8-1/2 e 14] [8 e 13] 7.1.12 [Stamp Settings] Configure header and footer settings to be printed. % Press the Utility/Counter key ö [Administrator Settings] ö [System Settings] ö [Stamp Settings]. bizhub 423/363/283/223 7-19 - Konica Minolta bizhub 363 | bizhub 423/363/283/223 Copy Operations User Guide - Page 152
User's Guide Network Scan/Fax/Network Fax Operations]. Factory default [Fax TX Settings] [Cancel] 7.1.13 [Blank Page Print Settings] Configure whether to print stamps or overlay on blank pages. % Press the Utility/Counter key ö [Administrator Settings] ö [System Settings] ö [Blank Page Print Set - Konica Minolta bizhub 363 | bizhub 423/363/283/223 Copy Operations User Guide - Page 153
tray runs out of paper. % Press Utility/Counterö[Administrator Settings]ö[System Settings]ö[Default Bypass Paper Type Set- ting]. Settings Configure whether to specify the initial setting for paper type for the bypass tray. When you specified this, select a paper type. bizhub 423/363/283/223 7-21 - Konica Minolta bizhub 363 | bizhub 423/363/283/223 Copy Operations User Guide - Page 154
. Factory default [Page Number Print Position] [Left & Right Bind: All the Same Top & Bottom Bind: All the Same] 7.1.17 [Advanced Preview Setting] Configure settings to fax or scan a document. For details, refer to the [User's Guide Network Scan/Fax/Network Fax Operations]. bizhub 423/363 - Konica Minolta bizhub 363 | bizhub 423/363/283/223 Copy Operations User Guide - Page 155
the Input Machine Address may not be supported by your operating system. % Press the Utility/Counter key ö [Administrator Settings] ö [Administrator/Machine Settings]. Settings [Administrator Registration] [Input Machine Address] Register administrator information displayed on the Service/Admin - Konica Minolta bizhub 363 | bizhub 423/363/283/223 Copy Operations User Guide - Page 156
-Touch/User Box Registration] 7 7.3 [One-Touch/User Box Registration] This setting is for the User Box, network scan, fax, and network fax operations. For details, refer to the [User's Guide Network Scan/Fax/Network Fax Operations] and [User's Guide Box Operations]. bizhub 423/363/283/223 7-24 - Konica Minolta bizhub 363 | bizhub 423/363/283/223 Copy Operations User Guide - Page 157
data is cleared after the authentication method was selected, the histories of the registered users, print, send, receive, and save jobs are deleted. % Press the Utility/Counter key ö [Administrator Settings] ö [User Authentication/Account Track] ö [General Settings]. bizhub 423/363/283/223 7-25 - Konica Minolta bizhub 363 | bizhub 423/363/283/223 Copy Operations User Guide - Page 158
[Account Track Input Method] [ Password] Enter the account name and password to log in. [Password Only] Enter only the password Jobs Reach Maximum] [Number of User Counters Assigned] d Reference This function is appropriate when each user performs multiple installed. bizhub 423/363/283/223 7-26 - Konica Minolta bizhub 363 | bizhub 423/363/283/223 Copy Operations User Guide - Page 159
registered. If user authentication and account track settings are configured, up to 50 users can be registered as initial settings. % Press the Utility/Counter key ö [Administrator Settings] ö [User Authentication/Account Track] ö [User Authentication Settings]. bizhub 423/363/283/223 7-27 - Konica Minolta bizhub 363 | bizhub 423/363/283/223 Copy Operations User Guide - Page 160
ID & Print User Box. [ID & Print Operation Settings] * With the authentication unit installed, specify the screen transition and operation to be performed directly after the authentication has been completed by the authentication unit when ID & print jobs are stored. [Default Operation Selection - Konica Minolta bizhub 363 | bizhub 423/363/283/223 Copy Operations User Guide - Page 161
Fax]: [Allow] [Print]: [Allow] [User Box]: [Allow] [Print Sent Document]: [Allow] [Save to External Memory]: [Restrict] [External Memory Document Scan]: [Restrict] * [Manual Destination]: [Allow]/[Allow All] [Biometric/IC Card Info. Registration]: [Restrict] [Cellular Phone/PDA]: [Allow] bizhub 423 - Konica Minolta bizhub 363 | bizhub 423/363/283/223 Copy Operations User Guide - Page 162
Factory default [Pause] [Icon] [Continue Job] * This item is displayed only when a Hard Disk is installed. d Reference To specify the maximum number of registrations for the user: Press the Utility/Counter key ö [Administrator again. [Password] Enter the password. bizhub 423/363/283/223 7-30 - Konica Minolta bizhub 363 | bizhub 423/363/283/223 Copy Operations User Guide - Page 163
/Counter key ö [Administrator Settings] ö [User Authentication/Account Track] ö [General Settings] ö [Number of User Counters Assigned]. 7.4.4 [Print without Authentication] This setting is for the print operations. For details, refer to the [User's Guide Print Operations]. bizhub 423/363/283/223 - Konica Minolta bizhub 363 | bizhub 423/363/283/223 Copy Operations User Guide - Page 164
ö [Administrator Settings] ö [User Authentication/Account Track] ö [Print Counter List]. Settings [Paper Tray] [Simplex/Duplex] [Print Item] Select the desired paper tray. Select Print (1-Sided) or Print (2-Sided). Configure whether to print all data or printing data only. Factory default [Print - Konica Minolta bizhub 363 | bizhub 423/363/283/223 Copy Operations User Guide - Page 165
function is available only when a Hard Disk is installed. 0 This setting is available when the optional authentication unit is installed. % Press the Utility/Counter key ö [Administrator Settings] ö [User Authentication/Account Track] ö [Authentication Device Settings]. bizhub 423/363/283/223 7-33 - Konica Minolta bizhub 363 | bizhub 423/363/283/223 Copy Operations User Guide - Page 166
Utility/Counter key ö [Administrator Settings] ö [User Authentication/Account Track] ö [User/Account Common Setting]. Settings [Logout Confirmation Screen Display Setting] Configure whether to display the logout confirmation screen when you press the Access key to log out. bizhub 423/363/283/223 - Konica Minolta bizhub 363 | bizhub 423/363/283/223 Copy Operations User Guide - Page 167
Track] 7 Factory default [Logout Confirmation Screen Display Setting] [ON] 7.4.10 [Scan to Home Settings] This setting is for the network scan operations. For details, refer to the[User's Guide Network Scan/Fax/Network Fax Operations] and [User's Guide Network Administrator]. 7.4.11 [Scan to - Konica Minolta bizhub 363 | bizhub 423/363/283/223 Copy Operations User Guide - Page 168
7.5 [Network Settings] 7 7.5 [Network Settings] This setting is for the network operations. For details, refer to the [User's Guide Network Administrator]. bizhub 423/363/283/223 7-36 - Konica Minolta bizhub 363 | bizhub 423/363/283/223 Copy Operations User Guide - Page 169
by the copy functions. % Press the Utility/Counter key ö [Administrator Settings] ö [Copier Settings]. Settings [Auto Zoom (Platen)] [Auto Zoom (ADF)] [Specify Default Tray when APS Off] [Select Tray for Insert Sheet] [Print Jobs During Copy Operation] [Automatic Image Rotation] [Card Shot Settings - Konica Minolta bizhub 363 | bizhub 423/363/283/223 Copy Operations User Guide - Page 170
7.6 [Copier Settings] 7 Factory default [Select Tray for Insert Sheet] [Print Jobs During Copy Operation] [Automatic Image Rotation] [Card Shot Settings] [Tray 2] [Accept] [When Auto Paper/Auto Zoom is set] • [Layout]: [Top/Bottom] • [Zoom]: [Full Size] bizhub 423/363/283/223 7-38 - Konica Minolta bizhub 363 | bizhub 423/363/283/223 Copy Operations User Guide - Page 171
7.7 [Printer Settings] 7 7.7 [Printer Settings] This setting is for the print operations. For details, refer to the [User's Guide Print Operations]. bizhub 423/363/283/223 7-39 - Konica Minolta bizhub 363 | bizhub 423/363/283/223 Copy Operations User Guide - Page 172
7.8 [Fax Settings] 7 7.8 [Fax Settings] This setting is for the fax and network fax operations. For details, refer to the [User's Guide Network Scan/Fax/Network Fax Operations]. bizhub 423/363/283/223 7-40 - Konica Minolta bizhub 363 | bizhub 423/363/283/223 Copy Operations User Guide - Page 173
for software, cellular phone, or PDA that can be accessed with this machine. % Press Utility/Counterö[Administrator Settings]ö[System Connection]. Settings [OpenAPI Settings] [Access Setting] [SSL/Port Settings] [Authentication] Specify whether to allow the user to access this machine from other - Konica Minolta bizhub 363 | bizhub 423/363/283/223 Copy Operations User Guide - Page 174
Printer Information] in [HTTP Server Settings]. Specify whether to allow the user to print data in a cellular phone or PDA or save such data in a User Box. Factory default [Access Setting] [SSL Setting] [Request Client Certificate] [Expiration Date] [Key Usage] [Chain] [Expiration Date Confirmation - Konica Minolta bizhub 363 | bizhub 423/363/283/223 Copy Operations User Guide - Page 175
Settings] ö [Security Details] ö [Password Rules]. 7.10.2 [User Box Administrator Setting] Configure settings for the User Box operations. For details, refer to the [User's Guide Box Operations]. Reference - This function is available only when a Hard Disk is installed. bizhub 423/363/283/223 - Konica Minolta bizhub 363 | bizhub 423/363/283/223 Copy Operations User Guide - Page 176
Settings] • [AE Level Adjustment] • [Blank Page Print Settings] • [Change E-Mail Address] • [Print Jobs During Copy Operation] Does not allow the user to change the settings allowed in Level 1 and Level 2. Factory default [Administrator Security Levels] [Prohibit] bizhub 423/363/283/223 7-44 - Konica Minolta bizhub 363 | bizhub 423/363/283/223 Copy Operations User Guide - Page 177
Administrator Password • User password • Account password • User Box password • Security document password [Prohibited Functions When Authentication Error] • Specify a password in 8 or more digits are automatically released. bizhub 423/363/283/223 7-45 - Konica Minolta bizhub 363 | bizhub 423/363/283/223 Copy Operations User Guide - Page 178
Security Kit SC-507 is in- stalled. Factory default [Password Rules] [Prohibited Functions When Authentication Error] [Confidential Document Access Method] [Manual Destination Input] [Print Data Capture] [Job Log Settings] * [Restrict Fax TX] [Hide Personal Information] [Hide Personal Information - Konica Minolta bizhub 363 | bizhub 423/363/283/223 Copy Operations User Guide - Page 179
Administrator Settings [System Settings] / [Restrict User Access] / [Restrict Access to Job Settings] / [Registering and Changing Addresses] [User Authentication/Account Track] / [General Settings] / [Public User Access] Settings to forcibly changed Set to [Restrict]. Set to [Restrict]. bizhub 423 - Konica Minolta bizhub 363 | bizhub 423/363/283/223 Copy Operations User Guide - Page 180
] / [SSL Setting] [System Connection] / [OpenAPI Settings] [Security Settings] / [User Box Administrator Setting] * [Security Settings] / [Security Details] / [Password Rules] [Security Settings] / [Security Details] / [Prohibited Functions When Authentication Error] [Security Settings] / [Security - Konica Minolta bizhub 363 | bizhub 423/363/283/223 Copy Operations User Guide - Page 181
TWAIN driver to view and re- trieve documents in User Boxes • Using PageScope Box Operator to view and retrieve documents in User Boxes • Using PageScope Scan Direct to retrieve documents in User Boxes • Box operations using PageScope Web Con- nection (The User Box tab does not appear.) bizhub 423 - Konica Minolta bizhub 363 | bizhub 423/363/283/223 Copy Operations User Guide - Page 182
[Do Not Apply] d Reference To configure copy protect and stamp repeat settings: Press [Application] ö [Stamp/Composition]. 7.10.9 [Driver Password Encryption Setting] This setting is for the print operations. For details, refer to the [User's Guide Print Operations]. bizhub 423/363/283/223 7-50 - Konica Minolta bizhub 363 | bizhub 423/363/283/223 Copy Operations User Guide - Page 183
to the [Quick Guide Copy/Print/Fax/Scan/Box Operations]. Reference - This function is available only when a Hard Disk is installed. 0 You must purchase optional i-Option LK-101, i-Option LK-102, i-Option LK-103, or i-Option LK-105. For details, contact your service representative. % Press Utility - Konica Minolta bizhub 363 | bizhub 423/363/283/223 Copy Operations User Guide - Page 184
7.12 [OpenAPI Authentication Management Setting] 7 7.12 [OpenAPI Authentication Management Setting] Configure settings to prevent our deprecated OpenAPI connection application from being registered in this machine. For details, contact your service representative. bizhub 423/363/283/223 7-52 - Konica Minolta bizhub 363 | bizhub 423/363/283/223 Copy Operations User Guide - Page 185
8 Maintenance - Konica Minolta bizhub 363 | bizhub 423/363/283/223 Copy Operations User Guide - Page 186
the machine (even if they are still blank) ) - Paper that has been printed on with a heat-transfer printer or an inkjet printer - Folded, curled, wrinkled, or torn paper - Paper that has been left unwrapped flat, not on its edge. Curled paper may cause a paper jam. bizhub 423/363/283/223 8-2 - Konica Minolta bizhub 363 | bizhub 423/363/283/223 Copy Operations User Guide - Page 187
touch the Film. 1 2 Slide the Lateral Guide to fit the size of paper being loaded. % If the Lateral Guide are not positioned correctly for the loaded paper, to be printed on faces down. 4 Close Tray 1. d Reference To configure paper settings: Press [Basic] ö [Paper]. bizhub 423/363/283/223 8-3 - Konica Minolta bizhub 363 | bizhub 423/363/283/223 Copy Operations User Guide - Page 188
of the LCT tray so that the side to be printed (the side facing up when the package was unwrapped) printed on faces down. 4 Load paper into the left side of the LCT tray so that the side to be printed (the side facing up when the package was unwrapped) faces up. 5 Close the LCT tray. bizhub 423 - Konica Minolta bizhub 363 | bizhub 423/363/283/223 Copy Operations User Guide - Page 189
curled, flatten it before loading it. % Push the Lateral Guide firmly up against the edges of the paper. % Load letterhead paper so that the side to be printed on faces up. % When loading postcards: Load them in . The flap side of envelopes cannot be printed on. bizhub 423/363/283/223 8-5 - Konica Minolta bizhub 363 | bizhub 423/363/283/223 Copy Operations User Guide - Page 190
the Lateral Guide to fit the size of paper being loaded. 4 Select the paper type. % To use label sheets, select [Thick 1]. % If you select 4 e 6 w (A6 Card w), the paper type is automatically set to [Thick 2]. d Reference To configure paper settings: Press [Basic] ö [Paper]. bizhub 423/363/283 - Konica Minolta bizhub 363 | bizhub 423/363/283/223 Copy Operations User Guide - Page 191
is time to replace the Toner Bottle or Drum Unit, an advanced warning message appears at the top of the screen. For details on replacing the Toner Bottle, refer to [Quick Guide Copy/Print/Fax/Scan/Box Operations]. For details on replacing the Drum Unit, contact your service representative. When the - Konica Minolta bizhub 363 | bizhub 423/363/283/223 Copy Operations User Guide - Page 192
contained in your maintenance agreement. For Drum Unit, contact your service representative. Toner Bottle Drum Unit Checking consumables status In the Check Consumable Life screen, you can check the status (usage level) of consumables. 1 Press the Utility/Counter key. bizhub 423/363/283/223 8-8 - Konica Minolta bizhub 363 | bizhub 423/363/283/223 Copy Operations User Guide - Page 193
consumed amount of toner can be viewed. 1 Press the Utility/Counter key. 2 Press [Meter Count] ö [Check Details]. % To print the counter list, press [Print List], select paper, and then press the Start key. % To display the Coverage Rate screen, press [Coverage Rate]. bizhub 423/363/283/223 8-9 - Konica Minolta bizhub 363 | bizhub 423/363/283/223 Copy Operations User Guide - Page 194
8.2 Consumables 8 Checking the total number of pages printed Pressing Total Counter displays the total number of pages printed to date. 1. Total counter 1 bizhub 423/363/283/223 8-10 - Konica Minolta bizhub 363 | bizhub 423/363/283/223 Copy Operations User Guide - Page 195
Slit Scan Glass with a dry cloth. % Wipe off stains from the back side to the front side along the guide. Original Glass, Control Panel, Paper Take-Up Roller NOTICE Do not press the Control Panelhard, or the keys and Touch Panel may be damaged. % Wipe the surface using a soft, dry cloth. bizhub 423 - Konica Minolta bizhub 363 | bizhub 423/363/283/223 Copy Operations User Guide - Page 196
8.3 Cleaning procedure 8 Housing, Original Pad NOTICE Never use solvents, such as benzene or thinner, to clean the Original Pad. % Wipe the surface using a soft cloth moistened with a mild household detergent. bizhub 423/363/283/223 8-12 - Konica Minolta bizhub 363 | bizhub 423/363/283/223 Copy Operations User Guide - Page 197
9 Troubleshooting - Konica Minolta bizhub 363 | bizhub 423/363/283/223 Copy Operations User Guide - Page 198
key. However, the problem has not been resolved, so contact your service representative immediately. Problems that cannot be corrected by the user 1 Write down the malfunction code in the Service Call screen. 2 Turn off the Sub Power Switch. 3 Turn off the Main Power Switch. bizhub 423/363/283/223 - Konica Minolta bizhub 363 | bizhub 423/363/283/223 Copy Operations User Guide - Page 199
9.1 When a problem is detected (call a service representative) 9 4 Unplug the machine. 5 Contact your service representative and inform them of the written down malfunction code. bizhub 423/363/283/223 9-3 - Konica Minolta bizhub 363 | bizhub 423/363/283/223 Copy Operations User Guide - Page 200
8-12) Place a blank sheet of paper on top of the original. (p. 3-5) If a thin 2-sided original is being copied, the print on the back side may be reproduced on the front side of the copy. In the Background Removal screen, select a lighter background density. (p. 5-18) bizhub 423/363/283/223 9-4 - Konica Minolta bizhub 363 | bizhub 423/363/283/223 Copy Operations User Guide - Page 201
(p. 5-7) Remove any jammed paper from other locations. Check the combinations of the selected settings. Contact your administrator. Securely close the ADF. Check that the original is one that can be loaded into the ADF. (p. 12-6) Position the original correctly. (p. 3-4) bizhub 423/363/283/223 9-5 - Konica Minolta bizhub 363 | bizhub 423/363/283/223 Copy Operations User Guide - Page 202
your computer. Check that the driver is correctly installed in your computer. (p. 10-2), (p. 11-2) Turn on the notice sound of this machine. (p. 10-2) To finish scanning within the limited time, refer to [Quick Guide Copy/Print/Fax/Scan/Box Operations] to confirm how to perform authentication and - Konica Minolta bizhub 363 | bizhub 423/363/283/223 Copy Operations User Guide - Page 203
USB port to which the authentication unit is connected the same as the one used when installing the driver? Remedy Refer to [Quick Guide Copy/Print/Fax/Scan/Box Operations] to confirm how to perform authentication and how to place your finger when scanning. During scanning, place the scanned part - Konica Minolta bizhub 363 | bizhub 423/363/283/223 Copy Operations User Guide - Page 204
and replaceable part. Or contact your service representative. Add paper. (p. 8-3) Prepare a spare Toner Bottle for replacement following the guidance contained in your maintenance agreement. Replace the Toner Bottle following the guidance contained in your maintenance agreement. bizhub 423/363 - Konica Minolta bizhub 363 | bizhub 423/363/283/223 Copy Operations User Guide - Page 205
instructions.] [Empty the hole-punch scrap box. To continue the job, cancel punching.] [Reset the following number of originals.] [An internal error occurred. Open and then close the top right door to remedy a problem. If the trouble code appears again, contact your Service Rep.] [An internal error - Konica Minolta bizhub 363 | bizhub 423/363/283/223 Copy Operations User Guide - Page 206
that there is an error with the printing or scanning function. Press this icon to view a screen containing a warning code. If the warning job is in the waiting-for-redial status because, for example, the recipient's line is busy when sending with the G3 Fax or IP Address Fax function. bizhub 423 - Konica Minolta bizhub 363 | bizhub 423/363/283/223 Copy Operations User Guide - Page 207
10 Authentication unit (biometric type) - Konica Minolta bizhub 363 | bizhub 423/363/283/223 Copy Operations User Guide - Page 208
completed Authentication failed Scanning canceled To use the Authentication Unit (biometric type) AU-102, first register the user's finger vein patterns in this machine. The registered user, who is authenticated with the finger vein pattern, can log in to this machine or execute a print job - Konica Minolta bizhub 363 | bizhub 423/363/283/223 Copy Operations User Guide - Page 209
support external server authentication. To combine account track settings with user authentication settings, set Synchronize User Authentication & Account Track to [Synchronize]. 1 Use the Control Panel of this machine to display the Administrator [Bio Authentication]. bizhub 423/363/283/223 10-3 - Konica Minolta bizhub 363 | bizhub 423/363/283/223 Copy Operations User Guide - Page 210
log in to this machine, refer to page 10-16. 8 Press [OK] twice. 9 Press [Logoff Settings]. 10 Specify whether to log out the user when scanning the original has finished after the user logged in with the authentication unit. 11 Press [OK]. 12 Press [Close] twice. bizhub 423/363/283/223 10-4 - Konica Minolta bizhub 363 | bizhub 423/363/283/223 Copy Operations User Guide - Page 211
register the target user in this machine - Connect the authentication unit to your computer, and use Data Administrator to register the target user NOTICE The registered user data is desired registration number, and then press [Edit]. 4 Press [Register Auth. Info.]. bizhub 423/363/283/223 10-5 - Konica Minolta bizhub 363 | bizhub 423/363/283/223 Copy Operations User Guide - Page 212
-Driver) of the authentication unit, and then install Data Administrator Bio Plugin. NOTICE Before setup, install Data Administrator V4.0 or later in your computer. For the Data Administrator operating environment and installation procedure, refer to the Data Administrator User's Guide. bizhub 423 - Konica Minolta bizhub 363 | bizhub 423/363/283/223 Copy Operations User Guide - Page 213
the authentication unit to the USB port of your computer. The [Found New Hardware] dialog box appears. 3 Select [Locate and install driver software (recommended)]. 4 Insert the application CD-ROM provided with the authentication unit into the CD-ROM drive of the com- puter. bizhub 423/363/283 - Konica Minolta bizhub 363 | bizhub 423/363/283/223 Copy Operations User Guide - Page 214
(advanced)]. 6 Check that the driver's search location is the application CD-ROM, and then click [Next]. % When the driver's search location is not the application CD-ROM, click [Browse]. Select the BioDriver (USB-Driver) folder on the CD-ROM, and then click [OK]. bizhub 423/363/283/223 10-8 - Konica Minolta bizhub 363 | bizhub 423/363/283/223 Copy Operations User Guide - Page 215
is completed. 8 Install Data Administrator Bio Plugin. Open the DA_Bio_Plugin folder on the application CD-ROM, and then click setup.exe. 9 Select a language, and then click [OK]. The installation program starts. 10 Follow the on-screen instructions to proceed with the installation. bizhub 423/363 - Konica Minolta bizhub 363 | bizhub 423/363/283/223 Copy Operations User Guide - Page 216
10.1 Using an authentication unit (biometric type) 10 11 Click [Next]. 12 Select [I accept the terms in the license agreement], and then click [Next]. 13 Click [Install]. bizhub 423/363/283/223 10-10 - Konica Minolta bizhub 363 | bizhub 423/363/283/223 Copy Operations User Guide - Page 217
10.1 Using an authentication unit (biometric type) 10 14 Click [Finish]. Installation of the Data Administrator Bio Plugin is completed, which completes the setup. User registration To register a user with Data Administrator, connect the authentication unit to the USB port of the computer, and - Konica Minolta bizhub 363 | bizhub 423/363/283/223 Copy Operations User Guide - Page 218
information of this machine is imported. The Device Information window appears. % For details on how to import device information, refer to the Data Administrator User's Guide. 5 In Select Function, select [Authentication Settings] - [User Setting], and then click [Add]. bizhub 423/363/283/223 10 - Konica Minolta bizhub 363 | bizhub 423/363/283/223 Copy Operations User Guide - Page 219
unit (biometric type) 10 6 Select the desired template, and then click [OK]. The User Registration window appears. 7 Enter the user name and password, select the [AU-102] tab, and then click [Register Auth. Info]. % Enter the E-mail address and other information as required. bizhub 423 - Konica Minolta bizhub 363 | bizhub 423/363/283/223 Copy Operations User Guide - Page 220
test has failed, place your finger on the authentication unit again, and click [Au- thentication Test]. % If the authentication has failed, click [Reset] to repeat the scanning process. 9 Click [Registration]. 10 Click [OK]. % Repeat steps 5 to 10 to register all users. bizhub 423/363/283 - Konica Minolta bizhub 363 | bizhub 423/363/283/223 Copy Operations User Guide - Page 221
copy function that batch-configures the registered user data in multiple machines with the authentication unit enabled. The registered user data is configured in this machine. 13 Click [OK]. 14 Disconnect the authentication unit from the USB port of the computer. bizhub 423/363/283/223 10-15 - Konica Minolta bizhub 363 | bizhub 423/363/283/223 Copy Operations User Guide - Page 222
unit (biometric type), register the finger vein pattern in advance. - If authentication fails Password], without using the authentication unit. When [1-to-many authentication] has been specified % Place your finger on the authentication unit. The basic settings screen appears. bizhub 423 - Konica Minolta bizhub 363 | bizhub 423/363/283/223 Copy Operations User Guide - Page 223
10.1 Using an authentication unit (biometric type) 10 When [1-to-1 authentication] has been specified 1 Select [User Name], and enter the user name. 2 Place your finger on the authentication unit. The basic settings screen appears. bizhub 423/363/283/223 10-17 - Konica Minolta bizhub 363 | bizhub 423/363/283/223 Copy Operations User Guide - Page 224
11 Authentication unit (IC card type) - Konica Minolta bizhub 363 | bizhub 423/363/283/223 Copy Operations User Guide - Page 225
in the authentication unit, refer to the [Quick Guide Copy/Print/Fax/Scan/Box Operations]. NOTICE Authentication Unit (IC card type) AU-201 must be installed inside the Working Table WT-506. Do not disconnect the USB cable while using the authentication unit. Doing so may cause the system to become - Konica Minolta bizhub 363 | bizhub 423/363/283/223 Copy Operations User Guide - Page 226
11.1 Using authentication unit (IC card type) 11 2 Set [User Authentication] to [ON (MFP)], and then press Authentication + Password]: Allows the user to log in by placing the IC card and entering the password. For details on how to log in to this machine, refer to page 11-15. bizhub 423/363/283/ - Konica Minolta bizhub 363 | bizhub 423/363/283/223 Copy Operations User Guide - Page 227
1 Use the Control Panel of this machine to display the Administrator Settings screen. Press [User Au- thentication/Account Track], and then [User Authentication Settings]. 2 Press [User Registration]. 3 Select a desired registration number, and then press [Edit]. bizhub 423/363/283/223 11-4 - Konica Minolta bizhub 363 | bizhub 423/363/283/223 Copy Operations User Guide - Page 228
[Edit]. 6 Place the IC card on the authentication unit, and press [OK]. 7 When message [Registration complete.] appears, press [Close] twice. 8 Enter the user name and password. 9 Configure function permission settings as required. 10 Press [OK]. 11 Press [Close]. bizhub 423/363/283/223 11-5 - Konica Minolta bizhub 363 | bizhub 423/363/283/223 Copy Operations User Guide - Page 229
(USB-Driver) of the authentication unit, and then install Data Administrator IC Card Plugin. NOTICE Before setup, install Data Administrator V4.0 or later in your computer. For the Data Administrator operating environment and installation procedure, refer to the Data Administrator User's Guide - Konica Minolta bizhub 363 | bizhub 423/363/283/223 Copy Operations User Guide - Page 230
Hardware] dialog box appears. 3 Select [Locate and install driver software (recommended)]. 4 Insert the application CD-ROM provided with the authentication unit into the CD-ROM drive of the com- puter. 5 Click the [Browse my computer for driver software (advanced)]. bizhub 423/363/283/223 11-7 - Konica Minolta bizhub 363 | bizhub 423/363/283/223 Copy Operations User Guide - Page 231
6 Check that the driver's search location is the application CD-ROM, and then click [Next]. % When the driver's search location is not the application CD-ROM, click [Browse]. Select the IC Card Driver (USB-Driver) folder in the CD-ROM, and click [OK]. % Installation starts. bizhub 423/363/283/223 - Konica Minolta bizhub 363 | bizhub 423/363/283/223 Copy Operations User Guide - Page 232
Data Administrator IC Card Plugin. Open the IC_Card_Plugin folder on the application CD-ROM, and then click setup.exe. 9 Select a language, and then click [OK]. The installation program starts. 10 Follow the on-screen instructions to proceed with the installation. 11 Click [Next]. bizhub 423/363 - Konica Minolta bizhub 363 | bizhub 423/363/283/223 Copy Operations User Guide - Page 233
11.1 Using authentication unit (IC card type) 11 12 Select [I accept the terms in the license agreement], and then click [Next]. 13 Click [Install]. 14 Click [Finish]. Installation of the Data Administrator IC Card Plugin is completed, which completes the setup. bizhub 423/363/283/223 11-10 - Konica Minolta bizhub 363 | bizhub 423/363/283/223 Copy Operations User Guide - Page 234
seconds after connecting the authentication unit. 4 Data Administrator starts, and device information of this machine is imported. The Device Information window appears. % For details on how to import device information, refer to the Data Administrator User's Guide. bizhub 423/363/283/223 11-11 - Konica Minolta bizhub 363 | bizhub 423/363/283/223 Copy Operations User Guide - Page 235
11.1 Using authentication unit (IC card type) 11 5 In Select Function, select [Authentication Settings] - [User Setting], and then click [Add]. 6 Select the desired template, and then click [OK]. The User Registration window appears. bizhub 423/363/283/223 11-12 - Konica Minolta bizhub 363 | bizhub 423/363/283/223 Copy Operations User Guide - Page 236
] tab. % Enter the E-mail address and other information as required. 8 Place the IC card on the authentication unit, and click [Start reading]. % If necessary, click [Card ID Input] to register the card ID. 9 Click [OK]. % Repeat steps 5 to 9 to register all users. bizhub 423/363/283/223 11-13 - Konica Minolta bizhub 363 | bizhub 423/363/283/223 Copy Operations User Guide - Page 237
copy function that batch-configures the registered user data in multiple machines with the authentication unit enabled. The registered user data is configured in this machine. 12 Click [OK]. 13 Disconnect the authentication unit from the USB port of the computer. bizhub 423/363/283/223 11-14 - Konica Minolta bizhub 363 | bizhub 423/363/283/223 Copy Operations User Guide - Page 238
unit (IC card type), register the information recorded in the IC card in advance. - If authentication fails Password], without using the authentication unit. When [Card Authentication] is enabled % Place the IC card on the Working Table WT-506. The basic settings screen appears. bizhub 423 - Konica Minolta bizhub 363 | bizhub 423/363/283/223 Copy Operations User Guide - Page 239
11.1 Using authentication unit (IC card type) 11 When [Card Authentication + Password] is enabled 1 Place the IC card on the Working Table WT-506. 2 Press [Password], and enter the password. 3 Press [Login] or the Access key. The basic settings screen appears. bizhub 423/363/283/223 11-16 - Konica Minolta bizhub 363 | bizhub 423/363/283/223 Copy Operations User Guide - Page 240
12 Specifications - Konica Minolta bizhub 363 | bizhub 423/363/283/223 Copy Operations User Guide - Page 241
are already printed. *4 Colored paper. *5 Paper that is registered as one of frequently used paper types. For paper weight and media adjustment settings, contact your service representative. NOTICE 2nd Side when you load paper where something is printed on one side. bizhub 423/363/283/223 12-2 - Konica Minolta bizhub 363 | bizhub 423/363/283/223 Copy Operations User Guide - Page 242
bizhub 423/363/283/223 Specifications Type Scanner, printer, desktop, or stand-alone Document holder Stationary (mirror scanning) Photo conductor OPC Light source White rare-gas fluorescent Copy system Laser electrostatic copying Developing system Dry 2-component HMT developing system - Konica Minolta bizhub 363 | bizhub 423/363/283/223 Copy Operations User Guide - Page 243
Size Machine occupation dimensions Memory capacity Hard disk capacity SSD Top edge 3/16 inches (4.2 mm) Bottom edge 1/8 inches (3.0 mm) Right edge 1/8 inches (3.0 mm) Left edge 1/8 inches (3.0 mm) bizhub 423/363 3.6 sec. or less bizhub 283/223 4.2 sec. or less 1-Sided bizhub 423 42 sheets - Konica Minolta bizhub 363 | bizhub 423/363/283/223 Copy Operations User Guide - Page 244
Specifications Weight Auto Duplex Unit Specifications Paper Type Paper Size Power supply 12 bizhub 423/363 Approx. 171-15/16 lb (78 kg) bizhub 283/223 Approx. w. Any one of these sizes is selectable. For details, contact your service representative. Supply from machine bizhub 423/363/283/223 12-5 - Konica Minolta bizhub 363 | bizhub 423/363/283/223 Copy Operations User Guide - Page 245
power consumption Size Weight Unit configuration Plain paper (15 service representative. Tray 3 Plain paper: 500 sheets Supply from machine 15 W or less Width 23-5/8 inches (600 mm) Depth 23-3/4 inches (603 mm) Height 12-13/16 inches (325 mm) Approx. 66-1/8 lb (30 kg) Paper tray, 1 level bizhub 423 - Konica Minolta bizhub 363 | bizhub 423/363/283/223 Copy Operations User Guide - Page 246
Number of loadable sheets Power supply Max. power consumption Size Weight Unit configuration Plain paper (15-15/16 lb to 23-15/16 Any one of these sizes is selectable. For details, contact your service representative. Top tray (Tray 3) Plain paper: 500 sheets Bottom tray bizhub 423/363/283/223 12-7 - Konica Minolta bizhub 363 | bizhub 423/363/283/223 Copy Operations User Guide - Page 247
*(658 mm*) Depth 25-1/4 inches (641 mm) Height 40-3/8 inches (1025 mm), 42-13/16 inches*(1087 mm*) * Size when the tray is pulled out bizhub 423/363/283/223 12-8 - Konica Minolta bizhub 363 | bizhub 423/363/283/223 Copy Operations User Guide - Page 248
Staple SK-602 For EH-280 (Product No. 505 manufactured by MAX) (5000 staples included) e 2 unit Supplied from Finisher FS-527. Punch Kit PK-517 Specifications Number of punch holes Paper Type Paper Size Power supply 5-5/16 inches (135 mm) Approx. 3-15/16 lb (1.8 kg) bizhub 423/363/283/223 12-9 - Konica Minolta bizhub 363 | bizhub 423/363/283/223 Copy Operations User Guide - Page 249
sheets Paper loading height: 7/8 inches (22 mm) Width 6-1/2 inches (165 mm) Depth 15-5/16 inches (389 mm) Height 2-1/2 inches (63 mm) Approx. 2-3/16 lb (1 kg) bizhub 423/363/283/223 12-10 - Konica Minolta bizhub 363 | bizhub 423/363/283/223 Copy Operations User Guide - Page 250
tray is pulled out Approx. 26-7/16 lb (12 kg) Staple SK-602 For EH-590 (Product No. 505 manufactured by MAX) (5000 staples included) e 1 unit bizhub 423/363/283/223 12-11 - Konica Minolta bizhub 363 | bizhub 423/363/283/223 Copy Operations User Guide - Page 251
inches (423 mm), 21-3/8 inches*(543 mm*) Depth 18-3/4 inches (477 mm) Height 5-1/8 inches (129.5 mm) * Size when the tray is pulled out Approx. 11 lb (5 kg) Authentication Unit (biometric type) AU-102 Specifications Name Biometric sensor system Verification time Interface Dimensions Weight Max - Konica Minolta bizhub 363 | bizhub 423/363/283/223 Copy Operations User Guide - Page 252
later USB 1.1 or later Windows 2000 Professional (SP4) Windows XP Professional Edition (SP2) Windows Vista Business/Enterprise Authentication Unit (IC card type) AU-201 Specifications Name Dimensions Weight Power supply System conditions (during operation) System conditions (during non-operation - Konica Minolta bizhub 363 | bizhub 423/363/283/223 Copy Operations User Guide - Page 253
13 Appendix - Konica Minolta bizhub 363 | bizhub 423/363/283/223 Copy Operations User Guide - Page 254
] [Half-Fold] [Manual] [Minimal] [Mirror printed upside-down when making a 2-sided copy from a 1-sided original or when making a 1-sided copy from a 2-sided original. Separately scans the contents of the front and back sides of a card, for example, insurance card, driver bizhub 423/363/283/223 13-2 - Konica Minolta bizhub 363 | bizhub 423/363/283/223 Copy Operations User Guide - Page 255
. In this case, enter the password to copy data. Function that punches copies for filing. Function that temporarily saves the job on the hard disk so that it can be recalled later and used again. Function that divides the original into multiple parts for scanning when the number of original pages - Konica Minolta bizhub 363 | bizhub 423/363/283/223 Copy Operations User Guide - Page 256
copy and stops printing temporarily before printing a large number of copies. This prevents copy errors from occurring in a large number of copies. Function that prints a document in sets of copies. The second copy set is printed after all of the first copy set is finished. bizhub 423/363/283/223 - Konica Minolta bizhub 363 | bizhub 423/363/283/223 Copy Operations User Guide - Page 257
14 Index - Konica Minolta bizhub 363 | bizhub 423/363/283/223 Copy Operations User Guide - Page 258
size 5-6 D Data indicator 2-10 Date/time 5-40 Date/time settings 7-5 Daylight saving time 7-5 Default bypass paper type setting 7-21 Driver password encryption setting 7-50 Drum unit 2-9 Duplex/combine 5-8 E Editing pages 5-21 Eject assist lever 2-17 Enhanced security mode 7-47 Enlarge - Konica Minolta bizhub 363 | bizhub 423/363/283/223 Copy Operations User Guide - Page 259
2-12 Fusing cover lever 2-9 Fusing unit 2-9 Fusing unit top cover 2-9 G General settings 7-25, 7-34 Grouping 5-11 Guidance 4-15 Guide lever 12-2 Paper-empty indicator 2-5 Password 5-46 Placing originals 3-4 Power cord 2-7 Power indicator 2-10 Power save 4-11 bizhub 423/363/283/223 14-3 - Konica Minolta bizhub 363 | bizhub 423/363/283/223 Copy Operations User Guide - Page 260
31 Printer settings 6-11, 7-39 Printing counter list 7-32 Program jobs 5-26 Proof copy 4-18 Punch 5-12 Punch kit 2-2, 2-14, 12-9 Punch kit PK-517 2-14 Punch scrap box 2-15 Q Quick copy tab 2-12 R Register auth. info 6-15 Registering one-touch destinations or user boxes ...7-24 Replacement - Konica Minolta bizhub 363 | bizhub 423/363/283/223 Copy Operations User Guide - Page 261
7-30 Account Track Settings 7-30 Administrative Settings 7-28 Administrator Password 7-43 Administrator Registration 7-23 Administrator Security Levels 7-44 Administrator Settings 4-6, 7-2 Administrator/Machine Settings 7-23 AE Level Adjustment 6-3, 7-8 All Jobs 5-58 Application 5-20 Apply - Konica Minolta bizhub 363 | bizhub 423/363/283/223 Copy Operations User Guide - Page 262
5-55 Dot Matrix Original 5-19 Driver Password Encryption Setting 7-50 Drum Dry 7-10 Duplex/Combine 5-8 E Edit Image 5-20, 5-29 Edit Name 4-7 E-Mail Address 7-28 Enhanced Security Mode 7-47 Enlarge Display 4-14 Enlarge Display Mode Confirmation 4-13 Enlargement Rotation 6-8 Enter Power - Konica Minolta bizhub 363 | bizhub 423/363/283/223 Copy Operations User Guide - Page 263
6-9, 7-37 Print Lists 6-3 Print Position 5-41, 5-42, 5-43 Print without Authentication 7-31 Print/Fax Output Settings 7-4 Printer Adjustment 7-8 Printer Information 7-42 Printer Settings 6-11, 7-39 Prior Detection Setting 7-9 Program Jobs 5-26 Prohibited Functions When Authentication Error - Konica Minolta bizhub 363 | bizhub 423/363/283/223 Copy Operations User Guide - Page 264
31 Reset Settings 7-17 Restrict Access to Job Settings 7-7 Restrict Fax TX 7-46 Restrict Operation 7-7 Restrict User Access 7-7 Right 5-38 Right Bind 5-37 Rotate Image 4-20 RX Display 6-7 S Save 5-57 Save & Print 5-55 Save in User Box 5-55 Scan to Authorized Folder Settings 7-35 Scan to - Konica Minolta bizhub 363 | bizhub 423/363/283/223 Copy Operations User Guide - Page 265
W Watermark 5-50 Watermark Type 5-50 Weekly Timer ON/OFF Settings 7-6 Weekly Timer Settings 7-6 When # of Jobs Reach Maximum 7-26 When AMS Direction is Incorrect 6-8 With Margin 5-33 Without Margin 5-33 X X/Y 5-6 Z Z-Folded Original 5-15 Zoom 4-19, 5-7, 5-54 bizhub 423/363/283/223 14-9 - Konica Minolta bizhub 363 | bizhub 423/363/283/223 Copy Operations User Guide - Page 266
http://konicaminolta.com A1UD-9586CO-00 2010 Copyright 2010. 1
-
 1
1 -
 2
2 -
 3
3 -
 4
4 -
 5
5 -
 6
6 -
 7
7 -
8
-
9
-
10
-
11
-
12
-
13
-
14
-
15
-
16
-
17
-
18
-
19
-
20
-
21
-
22
-
23
-
24
-
25
-
26
-
27
-
28
-
29
-
30
-
31
-
32
-
33
-
34
-
35
-
36
-
37
-
38
-
39
-
40
-
41
-
42
-
43
-
44
-
45
-
46
-
47
-
48
-
49
-
50
-
51
-
52
-
53
-
54
-
55
-
56
-
57
-
58
-
59
-
60
-
61
-
62
-
63
-
64
-
65
-
66
-
67
-
68
-
69
-
70
-
71
-
72
-
73
-
74
-
75
-
76
-
77
-
78
-
79
-
80
-
81
-
82
-
83
-
84
-
85
-
86
-
87
-
88
-
89
-
90
-
91
-
92
-
93
-
94
-
95
-
96
-
97
-
98
-
99
-
100
-
101
-
102
-
103
-
104
-
105
-
106
-
107
-
108
-
109
-
110
-
111
-
112
-
113
-
114
-
115
-
116
-
117
-
118
-
119
-
120
-
121
-
122
-
123
-
124
-
125
-
126
-
127
-
128
-
129
-
130
-
131
-
132
-
133
-
134
-
135
-
136
-
137
-
138
-
139
-
140
-
141
-
142
-
143
-
144
-
145
-
146
-
147
-
148
-
149
-
150
-
151
-
152
-
153
-
154
-
155
-
156
-
157
-
158
-
159
-
160
-
161
-
162
-
163
-
164
-
165
-
166
-
167
-
168
-
169
-
170
-
171
-
172
-
173
-
174
-
175
-
176
-
177
-
178
-
179
-
180
-
181
-
182
-
183
-
184
-
185
-
186
-
187
-
188
-
189
-
190
-
191
-
192
-
193
-
194
-
195
-
196
-
197
-
198
-
199
-
200
-
201
-
202
-
203
-
204
-
205
-
206
-
207
-
208
-
209
-
210
-
211
-
212
-
213
-
214
-
215
-
216
-
217
-
218
-
219
-
220
-
221
-
222
-
223
-
224
-
225
-
226
-
227
-
228
-
229
-
230
-
231
-
232
-
233
-
234
-
235
-
236
-
237
-
238
-
239
-
240
-
241
-
242
-
243
-
244
-
245
-
246
-
247
-
248
-
249
-
250
-
251
-
252
-
253
-
254
-
255
-
256
-
257
-
258
-
259
-
260
-
261
-
262
-
263
-
264
-
265
-
266
 |
 |
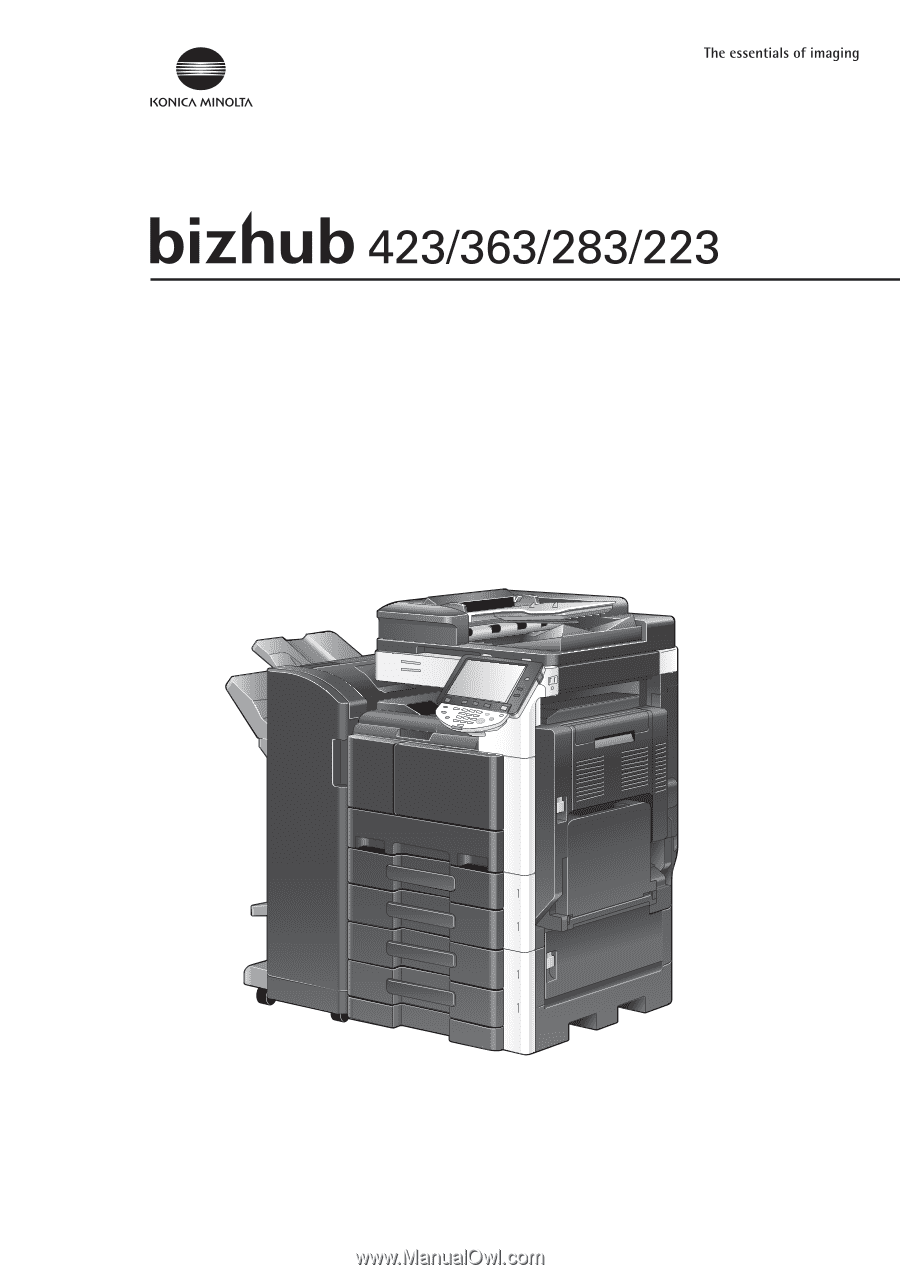
User’s Guide
[Copy Operations]