Konica Minolta bizhub 363 bizhub 423/363/283/223 Fax Driver Operations User Gu
Konica Minolta bizhub 363 Manual
 |
View all Konica Minolta bizhub 363 manuals
Add to My Manuals
Save this manual to your list of manuals |
Konica Minolta bizhub 363 manual content summary:
- Konica Minolta bizhub 363 | bizhub 423/363/283/223 Fax Driver Operations User Gu - Page 1
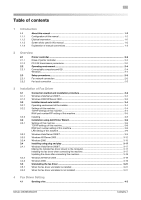
User's Guide [Fax Driver Operations] - Konica Minolta bizhub 363 | bizhub 423/363/283/223 Fax Driver Operations User Gu - Page 2
connecting this machine 3-18 Windows XP/Server 2003 ...3-19 Windows 2000 ...3-19 Uninstalling the fax driver ...3-21 When the fax driver uninstaller is installed 3-21 When the fax driver uninstaller is not installed 3-21 4 Fax Driver Setting 4.1 Sending a fax ...4-2 bizhub 423/363/283/223 - Konica Minolta bizhub 363 | bizhub 423/363/283/223 Fax Driver Operations User Gu - Page 3
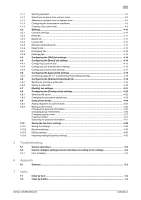
settings 4-30 5 Troubleshooting 5.1 5.2 5.2.1 Cannot send faxes ...5-2 Cannot configure settings/cannot send faxes according to the settings 5-3 Error message...5-3 6 Appendix 6.1 Glossary ...6-2 7 Index 7.1 Index by item ...7-2 7.2 Index by button...7-4 bizhub 423/363/283/223 - Konica Minolta bizhub 363 | bizhub 423/363/283/223 Fax Driver Operations User Gu - Page 4
1 Introduction - Konica Minolta bizhub 363 | bizhub 423/363/283/223 Fax Driver Operations User Gu - Page 5
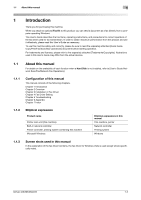
to [User's Guide Network Scan/Fax/Network Fax Operations]. 1.1.1 Configuration of this manual This manual consists of the following chapters. Chapter 1 Introduction Chapter 2 Overview Chapter 3 Installation of Fax Driver Chapter 4 Fax Driver Setting Chapter 5 Troubleshooting Chapter 6 Appendix - Konica Minolta bizhub 363 | bizhub 423/363/283/223 Fax Driver Operations User Gu - Page 6
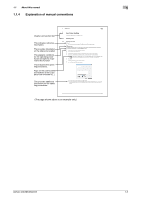
1.1 About this manual 1 1.1.4 Explanation of manual conventions Chapter and section title This indicates additional information on the operating procedures. To perform fax transmission, an optional Fax Kit is required. (The page shown above is an example only.) bizhub 423/363/283/223 1-3 - Konica Minolta bizhub 363 | bizhub 423/363/283/223 Fax Driver Operations User Gu - Page 7
2 Overview - Konica Minolta bizhub 363 | bizhub 423/363/283/223 Fax Driver Operations User Gu - Page 8
is received by the fax driver. The data is sent to this machine via the USB interface for USB connection or via Ethernet (TCP/IP, IPX/SPX) for network connection. Then the data is in the memory of this machine, and sent as a fax in the same manner as usual fax jobs. bizhub 423/363/283/223 2-2 - Konica Minolta bizhub 363 | bizhub 423/363/283/223 Fax Driver Operations User Gu - Page 9
2.1 Printer controller 2 When using USB connection Application Computer When using network connection Application Fax driver Fax driver USB Ethernet (TCP/IP, IPX/SPX) This machine Fax Printer controller PCL processing (Rasterization) bizhub 423/363/283/223 2-3 - Konica Minolta bizhub 363 | bizhub 423/363/283/223 Fax Driver Operations User Gu - Page 10
Connectable computers and OS Make sure that the computer to be connected meets the following conditions. Windows Operating system CPU Memory Drive Windows 2000 Professional (SP4 or later) Windows 2000 Server (SP3 or later) Windows applications to be used. CD-ROM drive bizhub 423/363/283/223 2-4 - Konica Minolta bizhub 363 | bizhub 423/363/283/223 Fax Driver Operations User Gu - Page 11
: In [Web Service Settings], enable the print function. 5 Install the fax driver. % Specify the network port for the fax driver according to the connection method or protocol. 2.3.2 For local connection 1 Connect this machine to the computer. 2 Install the fax driver. bizhub 423/363/283/223 2-5 - Konica Minolta bizhub 363 | bizhub 423/363/283/223 Fax Driver Operations User Gu - Page 12
3 Installation of Fax Driver - Konica Minolta bizhub 363 | bizhub 423/363/283/223 Fax Driver Operations User Gu - Page 13
for the Windows fax driver differs depending on the operating system and connection method to be used. d Reference For details on setting method in the network environment, refer to [User's Guide Network Administrator]. 3.1.1 Windows Vista/Server 2008/7 Reference - To use Windows Vista/Server - Konica Minolta bizhub 363 | bizhub 423/363/283/223 Fax Driver Operations User Gu - Page 14
other network connections (SMB, IPP/IPPS), refer to [User's Guide Print Operations]. - The installer does not support installation in the IPv6 environment of Windows 2000/XP/Server 2003. - For USB connection, this manual covers only the plug and play-based setup procedures. bizhub 423/363/283/223 - Konica Minolta bizhub 363 | bizhub 423/363/283/223 Fax Driver Operations User Gu - Page 15
Settings] of this machine, specify the IP address. d Reference When this machine is connected through the network, you must previously specify the IP address on this machine so that it can be detected automatically. For details, refer to [User's Guide Network Administrator]. bizhub 423/363/283/223 - Konica Minolta bizhub 363 | bizhub 423/363/283/223 Fax Driver Operations User Gu - Page 16
to the connection method or protocol. - Port9100: In [TCP/IP Settings], enable the RAW port number (initial setting: [9100]). - IPP/IPPS: In [IPP Settings], enable IPP printing. d Reference For details on TCP/IP setting and IPP setting for this machine, refer to [User's Guide Network Administrator - Konica Minolta bizhub 363 | bizhub 423/363/283/223 Fax Driver Operations User Gu - Page 17
In Windows Vista/Server 2008/7, you cannot set up [Secure Printing] (IPPS connection) using the installer. To use IPPS connection, use the Add Printer Wizard. For details, refer to page 3-9. % [Internet Printing] (IPP) or [Secure Printing] (IPPS) in the IPv6 environment is not supported. bizhub 423 - Konica Minolta bizhub 363 | bizhub 423/363/283/223 Fax Driver Operations User Gu - Page 18
auto install 3 6 Click [Installation Settings]. 7 Select the fax driver as a component to be installed, and then click [OK]. 8 In the [Confirm Installation Settings] page, click [Install]. % In Windows Vista/Server 2008/7, when the [Windows Security] window for verifying the publisher, click - Konica Minolta bizhub 363 | bizhub 423/363/283/223 Fax Driver Operations User Gu - Page 19
driver. For details, refer to page 4-22. - [Print Setting]: Click this button to display the [Printing Preferences] page of the fax driver and configure various function settings. For details, refer to page 4-10. - [Print Test page]: Click this button to perform test print. bizhub 423/363/283/223 - Konica Minolta bizhub 363 | bizhub 423/363/283/223 Fax Driver Operations User Gu - Page 20
the network connection, you must configure the network settings for this machine. TCP/IP settings of this machine In [TCP/IP Settings] of this machine, specify the IP address. d Reference For details on setting the IP address of this machine, refer to [User's Guide Network Administrator]. RAW port - Konica Minolta bizhub 363 | bizhub 423/363/283/223 Fax Driver Operations User Gu - Page 21
the additional functions of the printer. % In Windows Vista/Server 2008, click [Add a printer] on the toolbar. In Windows Vista: In Windows Server 2008: % In Windows 7, click [Add a printer] on the toolbar. [Add Printer Wizard] appears. 5 Click [Add a local printer]. bizhub 423/363/283/223 3-10 - Konica Minolta bizhub 363 | bizhub 423/363/283/223 Fax Driver Operations User Gu - Page 22
Required] dialog box appears, go to Step 10. % If the [Install the printer driver] dialog box appears, go to Step 13. 10 Select [Custom], and then click [Settings...]. 11 Change the settings according to the port, and then click [OK]. % For LPR connection, select [LPR], and then enter [Print] in - Konica Minolta bizhub 363 | bizhub 423/363/283/223 Fax Driver Operations User Gu - Page 23
ROM drive. This completes the fax driver installation. d Reference If both [RAW Port Number] and [LPD Setting] are enabled in the network settings for this machine, check the enabled port, and then change it if necessary. For details, refer to the [User's Guide Print Operations]. 3.3.3 Windows XP - Konica Minolta bizhub 363 | bizhub 423/363/283/223 Fax Driver Operations User Gu - Page 24
] starts. 8 Click [Next >]. 9 In the [Printer Name or IP Address:] box, enter the IP address for the machine, and then click [Next >]. % If the [Additional Port Information Required] dialog box appears, go to Step 10. % If the [Finish] screen appears, go to Step 13. bizhub 423/363/283/223 3-13 - Konica Minolta bizhub 363 | bizhub 423/363/283/223 Fax Driver Operations User Gu - Page 25
in the network settings for this machine, check the enabled port, and then change it if necessary. For details, refer to the [User's Guide Print Operations]. 20 After finishing the installation, make sure that the icon for the installed printer is displayed in the [Printers and Faxes] window. 21 - Konica Minolta bizhub 363 | bizhub 423/363/283/223 Fax Driver Operations User Gu - Page 26
the administrator authority. 1 Insert the printer driver CD-ROM into the CD-ROM drive of the computer. 2 Click [Start], and then select [Settings] - [Printers]. 3 Double-click the [Add Printer] icon. [Add Printer Wizard] appears. 4 Follow the instructions on the pages that follow. 5 On the page for - Konica Minolta bizhub 363 | bizhub 423/363/283/223 Fax Driver Operations User Gu - Page 27
instructions on the pages that follow. % If the [Digital Signature] window appears, click [Yes]. 21 After finishing the installation, make sure that the icon for the installed printer is displayed in the [Print- ers] window. 22 Remove the CD-ROM from the CD-ROM drive. This completes the fax driver - Konica Minolta bizhub 363 | bizhub 423/363/283/223 Fax Driver Operations User Gu - Page 28
and play. 1 Install the fax driver for this machine. % Install the fax driver using the installer or Add Printer Wizard. To use the Add Printer Wizard, select the USB port to be connected in the [Use an existing port] page. For details, refer to page 3-5 or page 3-9. 2 Connect this machine to the - Konica Minolta bizhub 363 | bizhub 423/363/283/223 Fax Driver Operations User Gu - Page 29
from the CD-ROM drive. This completes the fax driver installation. Updating the driver after connecting this machine In Windows 7, if this machine is connected without first installing the fax driver, the driver will not be correctly identified. If the fax driver is not correctly identified, the - Konica Minolta bizhub 363 | bizhub 423/363/283/223 Fax Driver Operations User Gu - Page 30
ROM, and then click [Open]. % Select a folder according to the printer driver, operating system, and language to be used. 8 Click [OK], and then follow the instructions on the pages that follow. % If the [Digital Signature] window appears, click [Yes]. 9 Click [Finish]. bizhub 423/363/283/223 3-19 - Konica Minolta bizhub 363 | bizhub 423/363/283/223 Fax Driver Operations User Gu - Page 31
3.4 Installing using plug and play 3 10 After finishing the installation, make sure that the icon for the installed printer is displayed in the [Print- ers] window. 11 Remove the CD-ROM from the CD-ROM drive. This completes the fax driver installation. bizhub 423/363/283/223 3-20 - Konica Minolta bizhub 363 | bizhub 423/363/283/223 Fax Driver Operations User Gu - Page 32
[Remove device]. 4 From then on, follow the instructions on the pages that follow. When the uninstallation process completes, the icon disappears from [Printers] (in Windows XP/Server 2003, [Printers and Faxes]) window. Remove the fax driver from the server properties. 5 Open [Server Properties - Konica Minolta bizhub 363 | bizhub 423/363/283/223 Fax Driver Operations User Gu - Page 33
last few lines to confirm it is the file for the corresponding model. The number of the PNF file is the same as that of the inf file. - When you have deleted a file using [Remove driver and driver package.] in Windows Vista/Server 2008/7, this operation is not required. bizhub 423/363/283/223 3-22 - Konica Minolta bizhub 363 | bizhub 423/363/283/223 Fax Driver Operations User Gu - Page 34
4 Fax Driver Setting - Konica Minolta bizhub 363 | bizhub 423/363/283/223 Fax Driver Operations User Gu - Page 35
then change the fax driver settings. % Clicking [Properties] (or [Preferences]) in the [Print] window displays the [Printing Preferences] page of the fax driver where you can configure various functions. For details, refer to page 4-10. 5 Click [Print]. The [FAX Transmission Popup] window appears - Konica Minolta bizhub 363 | bizhub 423/363/283/223 Fax Driver Operations User Gu - Page 36
the recipient. For details, refer to page 4-24. 1 When sending a fax, click [Add from Phone Book...] in the [FAX Transmission Popup] window. % To open the [FAX Transmission Popup] window, follow the Sending operation (Steps 1 through 5). For details, refer to page 4-2. bizhub 423/363/283/223 4-3 - Konica Minolta bizhub 363 | bizhub 423/363/283/223 Fax Driver Operations User Gu - Page 37
as a group, select the name of the group, and then click [Add Recipients]. All members of the group are added to [Recipient List] (Broadcast). 4 Click [OK]. The specified names are added to the recipient list, and then the [FAX Transmission Popup] window appears again. bizhub 423/363/283/223 4-4 - Konica Minolta bizhub 363 | bizhub 423/363/283/223 Fax Driver Operations User Gu - Page 38
to the [User's Guide Network Scan/Fax/Network Fax Operations]. 0 Selection of recipients from the address book of this machine requires your computer to be connected to and be able to communicate with this machine. 1 When sending a fax, click [Add from Address Book...] in the [FAX Transmission Popup - Konica Minolta bizhub 363 | bizhub 423/363/283/223 Fax Driver Operations User Gu - Page 39
. Configure the FAX cover sheet in the [FAX] tab of the fax driver before sending faxes. For details, refer to page 4-14. 1 Select the [FAX Cover Sheet] check box in the [FAX Transmission Popup] window. 2 Click [Settings...]. The [FAX Cover Sheet Settings] dialog box appears. bizhub 423/363/283/223 - Konica Minolta bizhub 363 | bizhub 423/363/283/223 Fax Driver Operations User Gu - Page 40
Name] bizhub 423/363/283/223 Select this button to use the preset text. Select this button to specify details in [Recipient Setting Details] in the lower part. Select this button to add recipients in joint names. The contents of the recipient list in the [FAX Transmission Popup] window are added - Konica Minolta bizhub 363 | bizhub 423/363/283/223 Fax Driver Operations User Gu - Page 41
with Joint Name] or [Change Each Recipient] adds the registered name without the title. % If you have not specified any recipient in the [FAX Transmission Popup] window, you cannot select [Load Set Information]. You cannot select it even in the [FAX] tab of the fax driver. 6 Use the [Sender] tab - Konica Minolta bizhub 363 | bizhub 423/363/283/223 Fax Driver Operations User Gu - Page 42
4.1 Sending a fax 4 8 Check the specified contents. To confirm the enlarged layout image, click [Check...]. % Clicking [Add...] allows you to save the cover sheet settings with a name. You can recall them from the [Cover Sheet Settings] list next time. 9 Click [OK]. bizhub 423/363/283/223 4-9 - Konica Minolta bizhub 363 | bizhub 423/363/283/223 Fax Driver Operations User Gu - Page 43
the [Properties] page, right-click the printer icon of the [Printers] or [Printers and Faxes] window, and select [Properties]. Button Name [OK] [Cancel] [Help] [Add...] (Favorite Setting) [Edit...] (Favorite Setting) [Default] Functions Click this button to enable changed settings and close the - Konica Minolta bizhub 363 | bizhub 423/363/283/223 Fax Driver Operations User Gu - Page 44
] box. Specify the SUB address when performing confidential transmission using F code. Specify the sender ID when performing confidential communication using F code. Select this check box to configure the cover sheet for the fax. Click this button to edit phone books. bizhub 423/363/283/223 4-11 - Konica Minolta bizhub 363 | bizhub 423/363/283/223 Fax Driver Operations User Gu - Page 45
fonts. In addition, specify whether to replace the TrueType fonts by printer fonts when sending a fax from this machine. When garbled characters are detected in the destination, set download fonts to bitmap fonts, and also set printer fonts to OFF. 4.2.7 [Configure] tab Item Name [Device Option - Konica Minolta bizhub 363 | bizhub 423/363/283/223 Fax Driver Operations User Gu - Page 46
to display a window for entering the fax number again for confirmation if you click [Add Recipients] after directly entering information in the [FAX Number] box in the [FAX Transmission Popup] window. Click this button to register custom paper sizes. Reference - To display the [Settings] tab, right - Konica Minolta bizhub 363 | bizhub 423/363/283/223 Fax Driver Operations User Gu - Page 47
Address] box, you can enter up to 20 numbers (0 through 9) In the [Sender ID] box, you can enter up to 20 characters including numbers (0 through 9), #, and *. For details on the SUB address and sender ID, refer to the [User's Guide Network Scan/Fax/Network Fax Operations]. bizhub 423/363/283/223 - Konica Minolta bizhub 363 | bizhub 423/363/283/223 Fax Driver Operations User Gu - Page 48
track, refer to page 4-17. 4.4.1 Configuring a custom size To send a fax of the original of a custom size, specify a paper size following the procedure shown below. 1 Select [Custom Size] from [Original Size] or [Paper Size]. The [Custom Size Settings] dialog box appears. 2 Configure the following - Konica Minolta bizhub 363 | bizhub 423/363/283/223 Fax Driver Operations User Gu - Page 49
using the relay server, in the Administrator Settings of this machine, set [System Connection] - [OpenAPI Settings] - [Authentication] to [OFF]. For details, refer to the [User's Guide Print Operations]. 4 Click [OK]. Reference - Even a registered user cannot send a fax if the user is not allowed - Konica Minolta bizhub 363 | bizhub 423/363/283/223 Fax Driver Operations User Gu - Page 50
computer is connected to and can communicate with this machine. 4 Click [OK]. Reference - Even a registered account cannot send a fax if it is not permitted to use the printer. For information on the account track function, contact the administrator of this machine. bizhub 423/363/283/223 4-17 - Konica Minolta bizhub 363 | bizhub 423/363/283/223 Fax Driver Operations User Gu - Page 51
for [Border] or [Overlap width line], click [Combination Details...], and then on the appeared window, configure settings. Reference - Sending documents containing pages of different sizes or orientations in one job may cause images to be partially lost or to overlap. bizhub 423/363/283/223 4-18 - Konica Minolta bizhub 363 | bizhub 423/363/283/223 Fax Driver Operations User Gu - Page 52
4.6 Configuring the [Stamp/Composition] tab 4.6.1 Sending by printing a watermark Send a fax by printing particular text on the document background as box appears. 4 To create a watermark, click [Add]. % To change the watermark, select any in [Current Watermark]. bizhub 423/363/283/223 4-19 - Konica Minolta bizhub 363 | bizhub 423/363/283/223 Fax Driver Operations User Gu - Page 53
print the watermark only on the first page. Select this check box to print the watermark on one page repeatedly. % You can register up to 30 sharing watermarks, and up to 20 private watermarks. % Only the administrator can select the [Sharing] check box. 6 Click [OK]. bizhub 423/363/283/223 4-20 - Konica Minolta bizhub 363 | bizhub 423/363/283/223 Fax Driver Operations User Gu - Page 54
fonts or outline fonts. In addition, specify whether to replace the TrueType fonts by printer fonts when sending a fax from this machine. When garbled characters are detected in the destination, set download fonts to bitmap fonts, and also set printer fonts to OFF. bizhub 423/363/283/223 4-21 - Konica Minolta bizhub 363 | bizhub 423/363/283/223 Fax Driver Operations User Gu - Page 55
Preferences] page of the fax driver. Any options that are installed in this machine but not configured in the [Configure] tab cannot be used in the [Printing Preferences] of the fax driver. Be sure to configure the settings for the installed options. 1 Open the [Printers] window (in Windows 7, open - Konica Minolta bizhub 363 | bizhub 423/363/283/223 Fax Driver Operations User Gu - Page 56
Information], in Administrator Settings of this machine, set [System Connection] - [OpenAPI Settings] - [Authentication] to [OFF]. For details, refer to the [User's Guide Print Operations]. - Clicking [Obtain Settings...] allows you to configure the destination. 4.8.2 Changing the encryption - Konica Minolta bizhub 363 | bizhub 423/363/283/223 Fax Driver Operations User Gu - Page 57
frequently used recipients to a phone book allows you to recall them when sending faxes. Use the [FAX] tab of the fax driver to add recipients to a phone book. 1 In the [FAX] tab of the fax driver, click [Phone Book Entry...]. The [Phone Book Entry] window appears. 2 Select [Personal List] from - Konica Minolta bizhub 363 | bizhub 423/363/283/223 Fax Driver Operations User Gu - Page 58
6 Click [OK]. If you have added the name, finish editing the phone book. If you have added a recipient to the phone book for the first time, the dialog box for confirming whether to save the phone book will be displayed. 7 Click [Yes]. The [Save As] dialog box appears. 8 Locate the folder you want - Konica Minolta bizhub 363 | bizhub 423/363/283/223 Fax Driver Operations User Gu - Page 59
fax numbers using [Register To Phone Book] when sending faxes, they are displayed in the [Simple Entry] folder of the phone book. Changing group book to a group, you can add the recipient to the group. However, you cannot remove the recipient from the group by dragging. bizhub 423/363/283/223 4- - Konica Minolta bizhub 363 | bizhub 423/363/283/223 Fax Driver Operations User Gu - Page 60
a group name Select the group you want to change from [Group] on the left of the phone book, click the [Edit...] menu, and then select [Rename Group...]. Creating a folder Select [Personal List] on the left of the phone book, and click [Add Folder...] to create a folder. You can also select - Konica Minolta bizhub 363 | bizhub 423/363/283/223 Fax Driver Operations User Gu - Page 61
necessary. 4.10.1 Saving the settings 1 Change the fax driver settings in the [Basic], [Layout], or other tab. 2 Click [Add...] next to the [Favorite Setting] box. 3 Configure the following items. Item Name [Name] [Icon] [Sharing] [Comment] [Restore Items] bizhub 423/363/283/223 Functions Enter - Konica Minolta bizhub 363 | bizhub 423/363/283/223 Fax Driver Operations User Gu - Page 62
[Favorite Setting] list. % You can add up to 30 shared driver settings, and up to 20 private driver settings. % Only the administrator can select the [Sharing] check box. d Reference You can save (export) the settings in a file. For details, refer to page 4-30. 4.10.2 Recalling settings Open the - Konica Minolta bizhub 363 | bizhub 423/363/283/223 Fax Driver Operations User Gu - Page 63
the fax driver settings 4 4.10.4 Importing settings/Exporting settings You can save (export) the settings in a file or load (import) them from the file. This is useful when using the same settings on a different computer. 1 Click [Edit...] in [Favorite Setting] in the [Printing Preferences] page - Konica Minolta bizhub 363 | bizhub 423/363/283/223 Fax Driver Operations User Gu - Page 64
5 Troubleshooting - Konica Minolta bizhub 363 | bizhub 423/363/283/223 Fax Driver Operations User Gu - Page 65
settings in the enhanced security mode. For details, contact your network administrator. If the problem recurs after you have checked the above items, refer to the [User's Guide Copy Operations], [User's Guide Network Scan/Fax/Network Fax Operations], and [User's Guide Print Operations]. bizhub - Konica Minolta bizhub 363 | bizhub 423/363/283/223 Fax Driver Operations User Gu - Page 66
Cannot connect to the network Cause and remedy A connection to the network was not able to be established. Make sure that the network cable is correctly connected. In addition, make sure that [Network Settings] in [Administrator Settings] have been correctly configured. bizhub 423/363/283/223 5-3 - Konica Minolta bizhub 363 | bizhub 423/363/283/223 Fax Driver Operations User Gu - Page 67
6 Appendix - Konica Minolta bizhub 363 | bizhub 423/363/283/223 Fax Driver Operations User Gu - Page 68
terms used in this document. Read this chapter if necessary. Glossary Term 10Base-T/ 100Base-TX/ 1000Base-T bit BMP BOOTP Brightness Byte Client Default Gateway DHCP DNS DPI (dpi) Driver Ethernet Frame type FTP Gateway Gray scale Hard disk Host name Description A set of specifications under the - Konica Minolta bizhub 363 | bizhub 423/363/283/223 Fax Driver Operations User Gu - Page 69
the same building, or in neighboring buildings. A printer connected to a parallel or USB port of a computer. The acronym for Line Printer Daemon. This is a platform-independent printer protocol running on the TCP/IP network. The protocol was originally developed for BSD UNIX, and has become one of - Konica Minolta bizhub 363 | bizhub 423/363/283/223 Fax Driver Operations User Gu - Page 70
SNMP Spool bizhub 423/363/283/223 6 Description The acronym for Operating System. This is base software used to control the system of a computer. Windows, MacOS, or UNIX is an OS. A type of fonts represented using lines and curves to display an outline of a character. Larger-size characters can - Konica Minolta bizhub 363 | bizhub 423/363/283/223 Fax Driver Operations User Gu - Page 71
protocol widely used for the Internet. An IP address is used to identify each network device. A feature that allows documents sent from the printer driver to be printed simply by placing your finger or IC card on the authentication unit connected to the printer when the user authentication is - Konica Minolta bizhub 363 | bizhub 423/363/283/223 Fax Driver Operations User Gu - Page 72
7 Index - Konica Minolta bizhub 363 | bizhub 423/363/283/223 Fax Driver Operations User Gu - Page 73
a phone book 4-24 Address book 4-5 Auto install 3-4 B Basic tab 4-12, 4-15 Border 4-18 C Cannot configure settings 5-3 Cannot send faxes 5-2 Combination 4-18 Configure tab 4-12, 4-22 Connection 2-4, 3-2 Custom size 4-15 E Editing a watermark 4-19 Encryption passphrase 4-23 Error message - Konica Minolta bizhub 363 | bizhub 423/363/283/223 Fax Driver Operations User Gu - Page 74
7.1 Index by item 7 Windows Vista 3-2, 3-9, 3-17 Windows XP 3-3, 3-12, 3-19 bizhub 423/363/283/223 7-3 - Konica Minolta bizhub 363 | bizhub 423/363/283/223 Fax Driver Operations User Gu - Page 75
by button 7 7.2 Index by button A Add from Address Book 4-5 Add from Phone Book 4-3 Add Recipients 4-2, 4-3, 4-5 Authentication/Account Track 4-15 C Combination Details 4-18 G Get Addr. Info 4-5 I Installing 3-5 O Obtain Device Information 4-22 P Phone Book Entry 4-14, 4-24 Preferences - Konica Minolta bizhub 363 | bizhub 423/363/283/223 Fax Driver Operations User Gu - Page 76
http://konicaminolta.com A1UD-9586FD-00 2010 Copyright 2010. 1
-
 1
1 -
 2
2 -
 3
3 -
 4
4 -
 5
5 -
 6
6 -
 7
7 -
8
-
9
-
10
-
11
-
12
-
13
-
14
-
15
-
16
-
17
-
18
-
19
-
20
-
21
-
22
-
23
-
24
-
25
-
26
-
27
-
28
-
29
-
30
-
31
-
32
-
33
-
34
-
35
-
36
-
37
-
38
-
39
-
40
-
41
-
42
-
43
-
44
-
45
-
46
-
47
-
48
-
49
-
50
-
51
-
52
-
53
-
54
-
55
-
56
-
57
-
58
-
59
-
60
-
61
-
62
-
63
-
64
-
65
-
66
-
67
-
68
-
69
-
70
-
71
-
72
-
73
-
74
-
75
-
76
 |
 |
User’s Guide
[Fax Driver Operations]