Konica Minolta bizhub C280 bizhub C220/C280/C360 Enlarge Display Operations Us
Konica Minolta bizhub C280 Manual
 |
View all Konica Minolta bizhub C280 manuals
Add to My Manuals
Save this manual to your list of manuals |
Konica Minolta bizhub C280 manual content summary:
- Konica Minolta bizhub C280 | bizhub C220/C280/C360 Enlarge Display Operations Us - Page 1
User's Guide [Enlarge Display Operations] - Konica Minolta bizhub C280 | bizhub C220/C280/C360 Enlarge Display Operations Us - Page 2
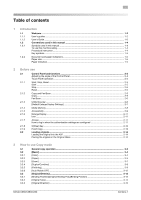
] ...3-4 [Color]...3-4 [Paper]...3-5 [Zoom] ...3-7 [Duplex/Combine] ...3-8 [Finishing] ...3-9 [Auto Rotate OFF] ...3-12 [Original/Density] ...3-13 [Binding Position]/[Original Binding Pos.](Binding Position 3-13 [Original Type] ...3-14 [Original Direction]...3-15 bizhub C360/C280/C220 Contens-1 - Konica Minolta bizhub C280 | bizhub C220/C280/C360 Enlarge Display Operations Us - Page 3
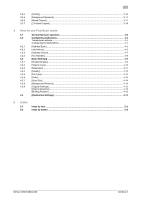
...4-12 [File Type]...4-12 [Color]...4-13 [Scan Size] ...4-14 [Background Removal]...4-14 [Original Settings]...4-15 [Original Direction]...4-15 [Binding Position] ...4-16 [Destination Settings] ...4-17 5 Index 5.1 Index by item ...5-2 5.2 Index by button...5-3 bizhub C360/C280/C220 Contens-2 - Konica Minolta bizhub C280 | bizhub C220/C280/C360 Enlarge Display Operations Us - Page 4
1 Introduction - Konica Minolta bizhub C280 | bizhub C220/C280/C360 Enlarge Display Operations Us - Page 5
This manual describes details on the fax driver function that transmits faxes directly from a computer. • PC-FAX This manual describes details on setting methods for each function using the network connection. • Network settings • Settings using PageScope Web Connection bizhub C360/C280/C220 1-2 - Konica Minolta bizhub C280 | bizhub C220/C280/C360 Enlarge Display Operations Us - Page 6
the product is required to enable users to perform maintenance work or troubleshooting operations. Limit your maintenance and troubleshooting operations to the areas explained in this manual. Should you experience any problems, please contact our service representative. bizhub C360/C280/C220 1-3 - Konica Minolta bizhub C280 | bizhub C220/C280/C360 Enlarge Display Operations Us - Page 7
. % This symbol indicates a supplementary explanation of a procedural instruction. The operation procedures are described using illustrations. % This symbol indicates transition of the Control Panel to access a desired menu item. This symbol indicates a desired page. bizhub C360/C280/C220 1-4 - Konica Minolta bizhub C280 | bizhub C220/C280/C360 Enlarge Display Operations Us - Page 8
used in this manual 1 d Reference This symbol indicates a reference. View the reference as required. Key symbols [ ] Key names on the Touch Panel or computer screen, or a name of user's guide the paper size with the length (X) being shorter than the width (Y). bizhub C360/C280/C220 1-5 - Konica Minolta bizhub C280 | bizhub C220/C280/C360 Enlarge Display Operations Us - Page 9
2 Before use - Konica Minolta bizhub C280 | bizhub C220/C280/C360 Enlarge Display Operations Us - Page 10
Main Power Switch. Press this switch to turn on/off machine operations. When turned off, the machine enters an energy conservation state. Reference "3 How to use Copy mode", "4 How to use Fax/Scan mode" - - bizhub C360/C280/C220 2-2 - Konica Minolta bizhub C280 | bizhub C220/C280/C360 Enlarge Display Operations Us - Page 11
screen for configuring settings for user accessibility function. If user authentication or account track is enabled, press this key after entering the user name and password (for user authentication) or the account name and password (for account track) in order to use this machine. Use this dial to - Konica Minolta bizhub C280 | bizhub C220/C280/C360 Enlarge Display Operations Us - Page 12
of this machine to three different levels. You can also tilt the Control Panel to the left. Set it to your desired angle. NOTICE Do not adjust the Touch Panel in the horizontal direction while directly Control Panel, and then adjust the panel in the horizontal direction. bizhub C360/C280/C220 2-4 - Konica Minolta bizhub C280 | bizhub C220/C280/C360 Enlarge Display Operations Us - Page 13
registered settings are not erased. 2.1.2 Copy and Fax/Scan Select a function according to your desired operation. The indicator on the selected function key lights up in green. Copy % Press the Copy key to enter Copy mode. The basic settings screen for Copy mode appears. bizhub C360/C280/C220 - Konica Minolta bizhub C280 | bizhub C220/C280/C360 Enlarge Display Operations Us - Page 14
settings screen for Fax/Scan mode appears. 2.1.3 Utility/Counter Press the Utility/Counter key to display the Utility screen, which allows you to configure or check the usage status of this machine. You can configure the default enlarge display settings in [User Settings]. bizhub C360/C280/C220 - Konica Minolta bizhub C280 | bizhub C220/C280/C360 Enlarge Display Operations Us - Page 15
the default settings for Copy or Fax/Scan mode. The factory default settings are registered as the default settings for Copy or Fax/Scan mode. d Reference You can also configure the default enlarge display settings in the Accessibility screen. For details, refer to page 2-9. bizhub C360/C280/C220 - Konica Minolta bizhub C280 | bizhub C220/C280/C360 Enlarge Display Operations Us - Page 16
either of the two buttons to move to the previous or next page. Press this button to return to the basic settings screen with the changed settings applied. d Reference An address can be added to the selected program. For details on adding an address, refer to page 4-4. bizhub C360/C280/C220 2-8 - Konica Minolta bizhub C280 | bizhub C220/C280/C360 Enlarge Display Operations Us - Page 17
the time before a continuous operation starts when a button is kept pressed. [Interval] defines the time interval of a continuous operation when a button is kept pressed for a prolonged time. Press the corresponding button in the Touch Panel, or press the 2 key on the Keypad. bizhub C360/C280/C220 - Konica Minolta bizhub C280 | bizhub C220/C280/C360 Enlarge Display Operations Us - Page 18
screen immediately before the Ac- cessibility key is pressed can be selected. • You can also change the default settings in User Settings. For details, refer to page 2-7. d Reference To return to the basic settings screen, press the Accessibility, [Close], or Reset key. bizhub C360/C280/C220 2-10 - Konica Minolta bizhub C280 | bizhub C220/C280/C360 Enlarge Display Operations Us - Page 19
authentication unit can be used for logging in to the machine. For details, refer to the [User's Guide Copy Operations]. % Configure the necessary settings for logging in to the machine, and then press the Access key. The basic settings screen appears. bizhub C360/C280/C220 - Konica Minolta bizhub C280 | bizhub C220/C280/C360 Enlarge Display Operations Us - Page 20
For details on the authentication setting, refer to the [User's Guide Copy Operations]. - If [Password Only] has been selected for Account Track Input Method, only [Password] appears in the Authentication screen. If the password consists of numbers only, enter it using the Keypad without displaying - Konica Minolta bizhub C280 | bizhub C220/C280/C360 Enlarge Display Operations Us - Page 21
print the remaining number of copies, press [Print]. % If the system reset or auto reset function starts operating while proofing a copy, the job being proofed is registered as a stored job. For details on printing a stored job, refer to [User's Guide Copy Operations]. bizhub C360/C280/C220 2-13 - Konica Minolta bizhub C280 | bizhub C220/C280/C360 Enlarge Display Operations Us - Page 22
of the machine. % Align the original with the the Original Scale. mark in the back-left corner of % For transparent or translucent originals, place a blank sheet of paper of the same size as the original over the original. 3 Close the ADF or the Original Cover. bizhub C360/C280/C220 2-14 - Konica Minolta bizhub C280 | bizhub C220/C280/C360 Enlarge Display Operations Us - Page 23
2.2 Loading originals 2 d Reference For details on originals that cannot be placed on the original glass or loaded into the ADF, refer to the [User's Guide Copy Operations]. bizhub C360/C280/C220 2-15 - Konica Minolta bizhub C280 | bizhub C220/C280/C360 Enlarge Display Operations Us - Page 24
3 How to use Copy mode - Konica Minolta bizhub C280 | bizhub C220/C280/C360 Enlarge Display Operations Us - Page 25
2-14. 3 Configure the desired copy settings. % For details on the Basic tab, refer to Using the Keypad, enter the desired number of copies. % If the number of copies was incorrectly entered, press the C (clear) key in the keypad, and then enter the correct number of copies. bizhub C360/C280/C220 - Konica Minolta bizhub C280 | bizhub C220/C280/C360 Enlarge Display Operations Us - Page 26
- If an original with a password embedded by the password copy function is scanned, the copy operation starts after you enter the password. - If multiple originals with different passwords are scanned at the same time, you will need to enter a password for each original. bizhub C360/C280/C220 3-3 - Konica Minolta bizhub C280 | bizhub C220/C280/C360 Enlarge Display Operations Us - Page 27
% Press [Basic] ö [Color]. Settings [Auto Color] [Full Color] bizhub C360/C280/C220 Select this setting to automatically detect whether the scanned original is in color or in black and white, and then select the appropriate color setting (full color or black). Select this setting to print the copy - Konica Minolta bizhub C280 | bizhub C220/C280/C360 Enlarge Display Operations Us - Page 28
Settings [Auto] Trays [1] - [4] # (Bypass Tray) The paper size is automatically selected according to the original size. Select the corresponding try button to manually select the desired paper. • The paper tray that is displayed varies depending on the installed op- tions. bizhub C360/C280/C220 - Konica Minolta bizhub C280 | bizhub C220/C280/C360 Enlarge Display Operations Us - Page 29
When other than plain paper is loaded in the paper tray, the icon indicating the paper type appears. [Single Side Only] [Special Paper] [Thick 1] [Thick 2] [Thick 3] [Thick 4] [Transparency] [Letterhead] [Colored Paper] [Envelope] [User Paper 1] [User Paper 2] bizhub C360/C280/C220 3-6 - Konica Minolta bizhub C280 | bizhub C220/C280/C360 Enlarge Display Operations Us - Page 30
the administrator settings. 0 If the auto zoom setting is selected and an enlargement is to be copied on paper larger than the original, load the original with the same orientation as the paper. % Press [Basic] ö [Zoom]. Settings [Auto Zoom] [Full Size] [Enlarge] [Reduce] bizhub C360/C280/C220 The - Konica Minolta bizhub C280 | bizhub C220/C280/C360 Enlarge Display Operations Us - Page 31
images can be combined and printed on a single page. Using these functions helps to reduce the number of sheets of paper. % Press [Basic] ö [Duplex/ Combine]. Settings [Original > Copy] [1-Sided > 1-Sided] [1-Sided > 2-Sided] [2-Sided > 1-Sided] [2-Sided > 2-Sided] bizhub C360/C280/C220 3-8 - Konica Minolta bizhub C280 | bizhub C220/C280/C360 Enlarge Display Operations Us - Page 32
Finisher FS-527. 0 [Staple] cannot be used together with [Offset]. 0 [Half-Fold] and [Center Staple & Fold] cannot be used together with [Offset], [Staple], or [Punch]. % Press [Basic] ö [Finishing]. bizhub C360/C280/C220 3-9 - Konica Minolta bizhub C280 | bizhub C220/C280/C360 Enlarge Display Operations Us - Page 33
type is loaded in the w direction and v direction. The auto paper setting is selected in the paper/size function. • If the finisher or Job Separator JS-505 is installed: The copies are fed out and stacked on top of each other with each set staggered to separate them. bizhub C360/C280/C220 3-10 - Konica Minolta bizhub C280 | bizhub C220/C280/C360 Enlarge Display Operations Us - Page 34
them out. [Main Screen] Press this button to return to the basic settings screen with the changed settings applied. d Reference For details on the paper that can be half-folded, center stapled & folded, stapled, and punched, refer to [Us- er's Guide Copy Operations]. bizhub C360/C280/C220 3-11 - Konica Minolta bizhub C280 | bizhub C220/C280/C360 Enlarge Display Operations Us - Page 35
3.2 [Basic] 3 3.2.6 [Auto Rotate OFF] You can copy the original according to the paper orientation without rotating the image. % Press [Basic] ö [Auto Rotate OFF]. % To cancel the setting, press [Auto Rotate OFF] again to deselect it. bizhub C360/C280/C220 3-12 - Konica Minolta bizhub C280 | bizhub C220/C280/C360 Enlarge Display Operations Us - Page 36
scanning a double-sided original, the original binding position (page margin) can be specified to prevent the copy from being printed upside-down. Select the setting sizes can be loaded into the ADF and scanned at the same time. If folded originals are loaded into the ADF bizhub C360/C280/C220 3-13 - Konica Minolta bizhub C280 | bizhub C220/C280/C360 Enlarge Display Operations Us - Page 37
screen with the changed settings applied. 3.3.2 [Original Type] The copy quality can be better adjusted by selecting the original type (text and image type). % Press [Original/Density] ö [Original Type]. Settings [Text] [Map] bizhub C360/C280/C220 Select this setting when copying documents - Konica Minolta bizhub C280 | bizhub C220/C280/C360 Enlarge Display Operations Us - Page 38
orientation with correct page order. % Press [Original/Density] ö [Original Direction]. % Alternatively, press [Basic] ö [Duplex/ Combine] ö [Original Direction]. Settings bizhub C360/C280/C220 Select this setting for an original loaded with the top toward the back of this machine. Select this - Konica Minolta bizhub C280 | bizhub C220/C280/C360 Enlarge Display Operations Us - Page 39
, the density is lightened by one level. Press this button to select the center setting (default setting). Each time this button is pressed, the density is darkened by one level. Press this button to return to the basic settings screen with the changed settings applied. bizhub C360/C280/C220 3-16 - Konica Minolta bizhub C280 | bizhub C220/C280/C360 Enlarge Display Operations Us - Page 40
] Select this setting to remove background prints of the original. Normally, select [Bleed Removal]. If the original to be scanned has a colored background, adjust optional ADF is installed. 1 Slide the Lateral Guide of the ADF to fit the size of the largest page. bizhub C360/C280/C220 3-17 - Konica Minolta bizhub C280 | bizhub C220/C280/C360 Enlarge Display Operations Us - Page 41
is detected, and all subsequent pages are scanned at that size. 0 [Z-Folded Original] is setting, press [Z-Folded Original] again to deselect it. Reference - If you have configured settings before placing an original, a message appears prompting you to place an original. bizhub C360/C280/C220 - Konica Minolta bizhub C280 | bizhub C220/C280/C360 Enlarge Display Operations Us - Page 42
4 How to use Fax/Scan mode - Konica Minolta bizhub C280 | bizhub C220/C280/C360 Enlarge Display Operations Us - Page 43
scan operation. 0 Register addresses using the setting menu, and configure the fax and network settings and register ad- dresses in Administrator Settings in advance. For details, refer to the [User's Guide Network Administrator] and the [User's Guide Network Scan again. bizhub C360/C280/C220 4-2 - Konica Minolta bizhub C280 | bizhub C220/C280/C360 Enlarge Display Operations Us - Page 44
. - If an original with a password embedded by the password copy function is scanned, the data is sent after you enter the password. - If multiple originals with different passwords are scanned at the same time, you will need to enter a password for each original. bizhub C360/C280/C220 4-3 - Konica Minolta bizhub C280 | bizhub C220/C280/C360 Enlarge Display Operations Us - Page 45
receive color images by fax. Send or receive faxes over the IP network. Specify the IP address (host name) or E-mail address of the destination to send scanned data. using the settings menu in advance. It is convenient to register fax recipients in advance as well. bizhub C360/C280/C220 - Konica Minolta bizhub C280 | bizhub C220/C280/C360 Enlarge Display Operations Us - Page 46
, and [Security Details] - [Copy Guard] or [Password Copy] is set to [Yes] in Administrator Settings, [Off-Hook] is not displayed. 4.2.1 [Address Book] Select the desired destinations from the list of registered destinations in this machine. % Press [Address Book]. bizhub C360/C280/C220 4-5 - Konica Minolta bizhub C280 | bizhub C220/C280/C360 Enlarge Display Operations Us - Page 47
4 Settings [Address Book] [Other Dest.] [Scan Settings] [Dest. Settings] The settings for scan operations. For details, refer to page 4-9. The selected destinations appear, allowing you to check the destinations before sending data. For details, refer to page 4-17. bizhub C360/C280/C220 - Konica Minolta bizhub C280 | bizhub C220/C280/C360 Enlarge Display Operations Us - Page 48
use this tab, you must enable LDAP and set up the LDAP server in Administrator Settings in advance. For details on the LDAP settings, refer to the [User's Guide Network Administrator]. % Press [Address Search] ö [Search]. Press [Address City] [Company Name] [Department] bizhub C360/C280/C220 4-7 - Konica Minolta bizhub C280 | bizhub C220/C280/C360 Enlarge Display Operations Us - Page 49
Input] setting, refer to the [User's Guide Network Administrator]. If user authentication is enabled, whether to permit [Manual Destination Input] is determined for each registered user. For details on user registration, refer to the [User's Guide Copy Operations]. bizhub C360/C280/C220 4-8 - Konica Minolta bizhub C280 | bizhub C220/C280/C360 Enlarge Display Operations Us - Page 50
p. 4-10 p. 4-11 p. 4-12 p. 4-12 p. 4-13 p. 4-14 p. 4-14 p. 4-15 4.3.1 [Simplex/Duplex] Specify whether to scan one side or both sides of the original. % Press [Scan Settings] ö [Simplex/ Duplex]. Settings [1-Sided] Select this setting to scan single-sided originals. bizhub C360/C280/C220 4-9 - Konica Minolta bizhub C280 | bizhub C220/C280/C360 Enlarge Display Operations Us - Page 51
when the photos on the originals are printed on photographic papers. [Printed Photo]: This setting is suitable for scanning printed originals, such as pamphlets or catalogs. Press this button to return to the Address Book screen with the changed settings applied. bizhub C360/C280/C220 4-10 - Konica Minolta bizhub C280 | bizhub C220/C280/C360 Enlarge Display Operations Us - Page 52
return to the Address Book screen with the changed settings applied. Reference - The finer the scan resolution is, the larger the data volume becomes, resulting in longer transmission time. To send with the specified resolution, the resolution is reduced accordingly. bizhub C360/C280/C220 4-11 - Konica Minolta bizhub C280 | bizhub C220/C280/C360 Enlarge Display Operations Us - Page 53
Type] and [Color], refer to the [User's Guide Network Scan/Fax/Network Fax Operations]. 0 The file type is fixed to TIFF for fax or Internet fax transmissions. % Press [Scan Settings] ö [File Type]. Settings [PDF] [Compact PDF] [TIFF] [JPEG] bizhub C360/C280/C220 Select this setting to save data - Konica Minolta bizhub C280 | bizhub C220/C280/C360 Enlarge Display Operations Us - Page 54
for scanning originals with many halftones, such as black and white photos. Appropriate for scanning originals with distinct black and white areas, such as line drawings. Press this button to return to the Address Book screen with the changed settings applied. bizhub C360/C280/C220 4-13 - Konica Minolta bizhub C280 | bizhub C220/C280/C360 Enlarge Display Operations Us - Page 55
]. Settings [Bleed Removal] [Paper Discoloration Adj] Select this setting to remove background prints of the original. Normally, select [Bleed Removal]. Select this setting to adjust the background density such as when the original to be scanned has a colored background. bizhub C360/C280/C220 - Konica Minolta bizhub C280 | bizhub C220/C280/C360 Enlarge Display Operations Us - Page 56
arranged in the correct orientation when scanning double-sided originals. 0 The [Original Direction] setting will not be used for fax operations. % Press [Scan Settings] ö [Original Settings] ö [Original Direction]. Settings bizhub C360/C280/C220 Select this setting for an original loaded with the - Konica Minolta bizhub C280 | bizhub C220/C280/C360 Enlarge Display Operations Us - Page 57
in (297 mm). Select this setting if the original is loaded with the binding position at the left. Select this setting if the original is loaded with the binding position at the top. Press this button to return to the Address Book screen with the changed settings applied. bizhub C360/C280/C220 4-16 - Konica Minolta bizhub C280 | bizhub C220/C280/C360 Enlarge Display Operations Us - Page 58
confirm the specified destinations before sending data. % Press [Dest. Settings]. Settings [Destination Settings] [Details] [Delete] [Main Screen] The configured destinations and Press this button to return to the Address Book screen with the changed settings applied. bizhub C360/C280/C220 4-17 - Konica Minolta bizhub C280 | bizhub C220/C280/C360 Enlarge Display Operations Us - Page 59
5 Index - Konica Minolta bizhub C280 | bizhub C220/C280/C360 Enlarge Display Operations Us - Page 60
2-9 Account track 2-11 Address book 4-5 B Background removal 3-17, 4-14 Binding position 3-13, 4-16 C C 2-12 Center stapling/folding 3-9 Collating 3-9 Color 3-4, 4-13 Configuring destinations 4-4 Configuring the basic settings 3-4 Control pane 2-2 Copy 2-5 Copy operation 3-2 D Default - Konica Minolta bizhub C280 | bizhub C220/C280/C360 Enlarge Display Operations Us - Page 61
4-16 Black 3-5, 4-13 Bleed Removal 3-17, 4-14 Bypass tray 3-5 C C 2-12 Center Staple & Fold 3-11 Collate (By Set 3-10 Color 3-4, 4-13 Combine 3-9 Compact PDF 4-12 Compact XPS 4-13 Copied Paper 3-15, 4-10 Copy 2-5 Cover + 2-Sided 4-10 D Default Enlarge Display Settings 2-7, 2-10 Density - Konica Minolta bizhub C280 | bizhub C220/C280/C360 Enlarge Display Operations Us - Page 62
2-5 System Auto Reset Confirmation 2-10 T Text 3-14, 4-10 Text/Photo 3-15, 4-10 TIFF 4-12 Tray 1 3-5 Tray 2 3-5 Tray 3 3-5 Tray 4 3-5 U User Name 2-12 User Name List 2-12 Utility/Counter 2-6 W Wide Paper 3-6 X XPS 4-13 Z Z-Folded Original 3-18 Zoom 3-7 bizhub C360/C280/C220 5-4 - Konica Minolta bizhub C280 | bizhub C220/C280/C360 Enlarge Display Operations Us - Page 63
http://konicaminolta.com A0ED-9565EN-11 2009 Copyright 2009.10
-
 1
1 -
 2
2 -
 3
3 -
 4
4 -
 5
5 -
 6
6 -
 7
7 -
8
-
9
-
10
-
11
-
12
-
13
-
14
-
15
-
16
-
17
-
18
-
19
-
20
-
21
-
22
-
23
-
24
-
25
-
26
-
27
-
28
-
29
-
30
-
31
-
32
-
33
-
34
-
35
-
36
-
37
-
38
-
39
-
40
-
41
-
42
-
43
-
44
-
45
-
46
-
47
-
48
-
49
-
50
-
51
-
52
-
53
-
54
-
55
-
56
-
57
-
58
-
59
-
60
-
61
-
62
-
63
 |
 |
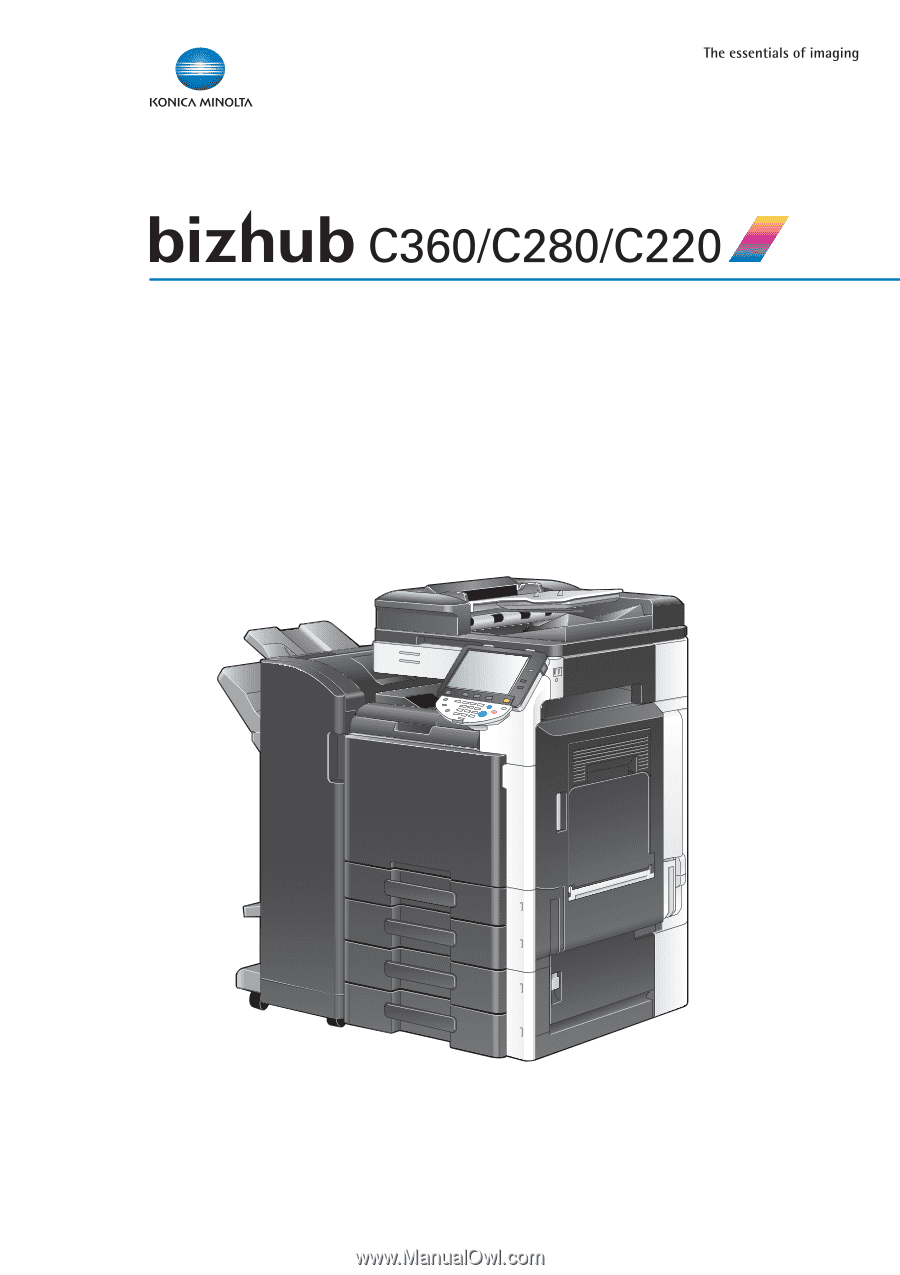
User’s Guide
[Enlarge Display Operations]