Konica Minolta bizhub C452 bizhub C452/C552/C552DS/C652/C652DS Copy Operations
Konica Minolta bizhub C452 Manual
 |
View all Konica Minolta bizhub C452 manuals
Add to My Manuals
Save this manual to your list of manuals |
Konica Minolta bizhub C452 manual content summary:
- Konica Minolta bizhub C452 | bizhub C452/C552/C552DS/C652/C652DS Copy Operations - Page 1
User's Guide [Copy Operations] - Konica Minolta bizhub C452 | bizhub C452/C552/C552DS/C652/C652DS Copy Operations - Page 2
Main bodyInside...2-11 bizhub C652/C552/C452 ...2-11 bizhub C652DS/C552DS ...2-13 Control panel...2-14 Adjusting the angle of the control panel 2-15 Touch panel ...2-16 Option...2-18 Finisher FS-526/Saddle stitcher SD-508/Punch kit PK-516 2-18 Job separator JS-602 ...2-20 Z Folding Unit ZU-606 - Konica Minolta bizhub C452 | bizhub C452/C552/C552DS/C652/C652DS Copy Operations - Page 3
Jobs ...5-27 Edit Color ...5-29 Neg./Pos. Reverse ...5-29 Mirror Image...5-30 Background Color...5-31 Color Adjustment ...5-31 Book Copy/Repeat ...5-33 Book Copy ...5-33 Image Repeat...5-34 Poster Mode ...5-35 Booklet Original...5-36 Page Margin...5-37 Image Adjust ...5-39 bizhub C652/C652DS/C552 - Konica Minolta bizhub C452 | bizhub C452/C552/C552DS/C652/C652DS Copy Operations - Page 4
...5-59 Save in User Box ...5-60 Left panel display ...5-61 Job List ...5-62 Check Job...5-64 6 User Settings 6.1 System Settings ...6-3 6.2 Custom Display Settings ...6-6 6.3 Copier Settings...6-8 6.4 Fax/Scan Settings ...6-11 6.5 Printer Settings ...6-12 6.6 Change Password ...6-13 - Konica Minolta bizhub C452 | bizhub C452/C552/C552DS/C652/C652DS Copy Operations - Page 5
Scan to Home Settings ...7-41 Scan to Authorized Folder Settings 7-41 Network Settings ...7-42 Copier Settings...7-43 Printer Settings ...7-45 Fax Settings ...7-46 System Connection...7-47 Security Settings ...7-49 Administrator Password...7-49 User Box Administrator Setting ...7-49 Administrator - Konica Minolta bizhub C452 | bizhub C452/C552/C552DS/C652/C652DS Copy Operations - Page 6
...8-8 Checking consumables status...8-10 Viewing counters...8-10 Checking the total number of pages printed 8-11 Cleaning procedure ...8-12 Slit glass (bizhub C652/C552/C452 8-12 Slit glass (front) (bizhub C652DS/C552DS 8-12 Slit glass (back) (bizhub C652DS/C552DS 8-13 Original glass, control - Konica Minolta bizhub C452 | bizhub C452/C552/C552DS/C652/C652DS Copy Operations - Page 7
document feeder (bizhub C652/C552/C452 12-7 Reverse automatic document feeder (bizhub C652DS/C552DS 12-7 12.3 Options...12-8 Large capacity unit LU-301...12-8 Large capacity unit LU-204...12-8 Finisher FS-526...12-9 Saddle stitcher SD-508...12-10 Punch kit PK-516 ...12-11 Job Separator JS - Konica Minolta bizhub C452 | bizhub C452/C552/C552DS/C652/C652DS Copy Operations - Page 8
1 Introduction - Konica Minolta bizhub C452 | bizhub C452/C552/C552DS/C652/C652DS Copy Operations - Page 9
details on transmitting scanned data. • Scan to E-Mail, FTP TX, SMB TX, Save in User Box, WebDAV and Web Service • G3 fax • IP Address Fax, Internet Fax This manual describes details on the fax driver function that transmits faxes directly from a computer. • PC-FAX This manual describes details on - Konica Minolta bizhub C452 | bizhub C452/C552/C552DS/C652/C652DS Copy Operations - Page 10
is required to enable users to perform maintenance work or troubleshooting operations. Limit your maintenance and troubleshooting operations to the areas explained in this manual. Should you experience any problems, please contact our service representative. bizhub C652/C652DS/C552/C552DS/C452 1-3 - Konica Minolta bizhub C452 | bizhub C452/C552/C552DS/C652/C652DS Copy Operations - Page 11
explanation of a procedural instruction. A procedural operation is illustrated. % This symbol indicates transition of the control panel to access a desired menu item. This symbol indicates a desired page. d Reference This symbol indicates a reference. bizhub C652/C652DS/C552/C552DS/C452 1-4 - Konica Minolta bizhub C452 | bizhub C452/C552/C552DS/C652/C652DS Copy Operations - Page 12
control panel, touch panel or the computer screen, power switch, etc. 1.2.2 Original and paper indications Original and paper sizes The following explains the indication for originals and paper described in this manual (X) being shorter than the width (Y). bizhub C652/C652DS/C552/C552DS/C452 1-5 - Konica Minolta bizhub C452 | bizhub C452/C552/C552DS/C652/C652DS Copy Operations - Page 13
2 Part names and their functions - Konica Minolta bizhub C452 | bizhub C452/C552/C552DS/C652/C652DS Copy Operations - Page 14
WT-506 Description The original is scanned by the scanner section, and the scanned image is printed by the printer section. Referred to as the "machine", the "main unit", or the "C652/C652DS/C552/C552DS" throughout the manual. Performs user authentication by scanning vein patterns in the finger - Konica Minolta bizhub C452 | bizhub C452/C552/C552DS/C652/C652DS Copy Operations - Page 15
printed pages. 8 Mount kit MK-715 Used for banner printing. • This option may not be available depending on the sales area. 9 Image controller IC-412 v1.1 Allows you to use this machine as a network-enabled color printer. 10 Large capacity unit LU-301 Can be loaded with up to 3,000 sheets of - Konica Minolta bizhub C452 | bizhub C452/C552/C552DS/C652/C652DS Copy Operations - Page 16
the searchable PDF function. Required when using Web browser, image panel, PDF processing, searchable PDF, My panel, or My address function. If necessary, you can increase up to nine languages, which can be displayed in the control panel of this machine. bizhub C652/C652DS/C552/C552DS/C452 2-4 - Konica Minolta bizhub C452 | bizhub C452/C552/C552DS/C652/C652DS Copy Operations - Page 17
-715 9 Image controller IC-412 v1.1 10 Large capacity unit LU-301 Description The original is scanned by the scanner section, and the scanned image is printed by the printer section. Referred to as the "machine", the "main unit", or the "C452" throughout the manual. Performs user authentication by - Konica Minolta bizhub C452 | bizhub C452/C552/C552DS/C652/C652DS Copy Operations - Page 18
loaded with up to 2,500 sheets of 12 e 18-size (A3-size) paper. To change the paper size, contact your service representative. Referred to as the LCT throughout the manual. 12 Saddle Stitcher SD-509 Install this unit onto the Finisher to allow Fold/Bind. This unit is hereinafter referred to as the - Konica Minolta bizhub C452 | bizhub C452/C552/C552DS/C652/C652DS Copy Operations - Page 19
lever 3 Left-side cover 4 Lateral guide 5 ADF 6 Original tray 7 Original output tray 8 Sub power switch 9 USB port (type A) USB 2.0/1.1 10 USB port (type A) USB 2.0/1.1 (For compact keyboard) 11 Automatic duplex unit release lever 12 Automatic duplex unit bizhub C652/C652DS/C552/C552DS/C452 2-7 - Konica Minolta bizhub C452 | bizhub C452/C552/C552DS/C652/C652DS Copy Operations - Page 20
release lever 18 Lower right-side door 19 Lower right-side door release lever 20 Paper-empty indicator 21 Total counter 22 Main power switch 23 Tray 4 24 Tray 3 25 Tray 2 26 Tray 1 27 Lower front door 28 Upper front door 29 Output tray 30 Status indicator bizhub C652/C652DS/C552/C552DS/C452 2-8 - Konica Minolta bizhub C452 | bizhub C452/C552/C552DS/C652/C652DS Copy Operations - Page 21
unit with an optional video interface kit, fax kit, and mount kit. 1 13 2 12 11 10 9 4 3 5 6 87 No. Name 1 Finisher connector 2 Filter 3 Power cord 4 Power switch for dehumidifying heater 5 Jack for connecting a telephone (TEL PORT2) 6 Telephone jack 2 (LINE PORT2) bizhub C652/C652DS/C552 - Konica Minolta bizhub C452 | bizhub C452/C552/C552DS/C652/C652DS Copy Operations - Page 22
2.2 Main Body 2 No. Name 7 Jack for connecting a telephone (TEL PORT1) 8 Telephone jack 1 (LINE PORT1) 9 USB port (type A) USB 2.0/1.1 10 RS-232C port 11 USB port (type B) USB 2.0/1.1 12 Network connector (10Base-T/100Base-TX/1000Base-T) 13 Ozone filter bizhub C652/C652DS/C552/C552DS/C452 2-10 - Konica Minolta bizhub C452 | bizhub C452/C552/C552DS/C652/C652DS Copy Operations - Page 23
2.2 Main Body 2 2.2.3 Main bodyInside bizhub C652/C552/C452 8 12 13 7 6 11 10 9 5 1 2 3 4 No. Name 1 Original glass 2 Fusing unit 3 Fusing unit cover lever 4 Print head glass cleaning tool bizhub C652/C652DS/C552/C552DS/C452 2-11 - Konica Minolta bizhub C452 | bizhub C452/C552/C552DS/C652/C652DS Copy Operations - Page 24
2.2 Main Body 2 No. Name 5 Waste toner box 6 Imaging unit 7 Charger-cleaning tool 8 Imaging unit release lever 9 Toner cartridges 10 Slit glass 11 Original scales 12 Jam removal dial 13 Slit glass cleaner bizhub C652/C652DS/C552/C552DS/C452 2-12 - Konica Minolta bizhub C452 | bizhub C452/C552/C552DS/C652/C652DS Copy Operations - Page 25
2.2 Main Body 2 bizhub C652DS/C552DS 14 8 12 13 7 6 11 10 9 5 1 2 3 4 No. Name 1 Original glass 2 Fusing unit 3 Fusing unit cover lever 4 Print head glass cleaning tool bizhub C652/C652DS/C552/C552DS/C452 2-13 - Konica Minolta bizhub C452 | bizhub C452/C552/C552DS/C652/C652DS Copy Operations - Page 26
6 Imaging unit 7 Charger-cleaning tool 8 Imaging unit release lever 9 Toner cartridges 10 Slit glass (front) 11 Original scales 12 Opening and closing guide 13 Slit glass cleaner 14 Slit glass (back) 2.2.4 Control panel 12 8 No. Name 1 Stylus pen 2 Touch panel 3 Main power indicator 4 Sub power - Konica Minolta bizhub C452 | bizhub C452/C552/C552DS/C652/C652DS Copy Operations - Page 27
then pull the control panel up or down. You can tilt the angle of the control panel to one of the three positions. 2 To tilt the control panel to the left or right, hold the bottom of the control panel, and then tilt the panel to the left or right. bizhub C652/C652DS/C552/C552DS/C452 - Konica Minolta bizhub C452 | bizhub C452/C552/C552DS/C652/C652DS Copy Operations - Page 28
that can be set are the same. This manual describes procedures for configuring settings from the Basic tab. The Quick Copy tab Icon/shortcut key display area 4 Toner supply indicators 5 Left panel 6 Check Job 7 Job List 8 Copier setting button (arrow) bizhub C652/C652DS/C552/C552DS/C452 2 3 1 2 - Konica Minolta bizhub C452 | bizhub C452/C552/C552DS/C652/C652DS Copy Operations - Page 29
] key ö [User Settings] ö [Custom Display Settings] ö [Copier Settings] ö [Default Tab]. To configure color selection settings for buttons and tabs: Press the [Utility/Counter] key ö [User Settings] ö [Custom Display Settings] ö [Color Selection Settings] . bizhub C652/C652DS/C552/C552DS/C452 2-17 - Konica Minolta bizhub C452 | bizhub C452/C552/C552DS/C652/C652DS Copy Operations - Page 30
2.3 Option 2 2.3 Option 2.3.1 Finisher FS-526/Saddle stitcher SD-508/Punch kit PK-516 2 3 4 1 20 5 6 7 89 10 11 12 13 14 19 18 26 15 17 16 21 22 23 No. Name 1 Output tray 2 2 Output tray 1 3 Front door bizhub C652/C652DS/C552/C552DS/C452 25 24 2-18 - Konica Minolta bizhub C452 | bizhub C452/C552/C552DS/C652/C652DS Copy Operations - Page 31
unit cover 5 Jam removal dial [FN8] 6 Guide lever [FN7] 7 Guide lever [FN9] 8 Jam removal dial [FN6] 9 Jam removal dial [FN5] 10 Guide lever [FN3] 11 Guide lever [FN4] 12 Punch kit 13 Punch scrap box 14 Guide FN2] 22 Guide lever [FN1] 23 Staple replacement door 24 Guide lever [FN13] 25 Guide lever [ - Konica Minolta bizhub C452 | bizhub C452/C552/C552DS/C652/C652DS Copy Operations - Page 32
2.3 Option 2 2.3.2 Job separator JS-602 1 2 No. Name 1 Finishing tray 2 Job separator cover bizhub C652/C652DS/C552/C552DS/C452 2-20 - Konica Minolta bizhub C452 | bizhub C452/C552/C552DS/C652/C652DS Copy Operations - Page 33
Z Folding Unit ZU-606 5 6 8 9 7 11 10 1 4 3 No. Name 1 Z folding/conveyance unit 2 Guide lever [FN1] 3 Punch scrap box 4 Front door 5 Guide lever [FN6] 6 Guide lever [FN7] 7 Guide lever [FN8] 8 Recessed pull [FN2] 9 Jam removal dial [FN5] bizhub C652/C652DS/C552/C552DS - Konica Minolta bizhub C452 | bizhub C452/C552/C552DS/C652/C652DS Copy Operations - Page 34
No. Name 10 Guide lever [FN3] 11 Jam removal dial [FN4] 2.3.4 Post Inserter PI-505 2 6 4 5 1 3 2 No. Name 1 Post inserter control panel 2 Lower tray paper guide 3 Lower Tray 4 Upper Tray 5 Upper Tray paper guide 6 Upper unit release lever bizhub C652/C652DS/C552/C552DS/C452 - Konica Minolta bizhub C452 | bizhub C452/C552/C552DS/C652/C652DS Copy Operations - Page 35
2.3 Option 2 2.3.5 Finisher FS-527/ Saddle Stitcher SD-509/ Punch Kit PK-517/ Job Separator JS-603 3 4 2 1 56 7 8 9 10 11 14 13 12 bizhub C652/C652DS/C552/C552DS/C452 2-23 - Konica Minolta bizhub C452 | bizhub C452/C552/C552DS/C652/C652DS Copy Operations - Page 36
1 Output tray 2 2 Output tray 1 3 Front door 4 Horizontal transport unit cover 5 Stapler 6 Guide lever [FN3] 7 Jam removal dial [FN2] 8 Guide lever [FN1] 9 Guide lever [FN4] 10 Staple holder 11 Punch scrap box 12 Saddle stitcher bizhub C652/C652DS/C552/C552DS/C452 18 19 2-24 - Konica Minolta bizhub C452 | bizhub C452/C552/C552DS/C652/C652DS Copy Operations - Page 37
] 15 Transport unit 16 Punch kit 17 Job separator 18 Staple cartridge 19 Recessed pull [FN7] 20 Folding output tray 2.3.6 Job Separator JS-504 5 4 3 2 1 No. Name 1 Jam removal dial 2 Eject assist lever 3 Output tray 2 4 Tray extension 5 Output tray 1 bizhub C652/C652DS/C552/C552DS/C452 - Konica Minolta bizhub C452 | bizhub C452/C552/C552DS/C652/C652DS Copy Operations - Page 38
2.3 Option 2 2.3.7 Large capacity unit LU-301/LU-204 2 1 3 5 4 1 5 4 No. Name 1 Jam removal cover 2 Upper door 3 Paper take-up roller 4 Paper-empty indicator 5 Release lever bizhub C652/C652DS/C552/C552DS/C452 2 3 2-26 - Konica Minolta bizhub C452 | bizhub C452/C552/C552DS/C652/C652DS Copy Operations - Page 39
3 Using this machine - Konica Minolta bizhub C452 | bizhub C452/C552/C552DS/C652/C652DS Copy Operations - Page 40
the [Reset] key is pressed to cancel all settings configured from the control panel or touch panel. The default settings can be changed. 0 Do not turn off the [main power switch] while a queued job or stored data is waiting to be printed. The jobs yet to be printed will be deleted. 0 Settings that - Konica Minolta bizhub C452 | bizhub C452/C552/C552DS/C652/C652DS Copy Operations - Page 41
or off the machine 3 4 To turn the power off, press the [sub power switch], then the [main power switch]. d Reference To change the default settings for Copy: Press the [Utility/Counter] key ö [User Settings] ö [Copier Settings] ö [Default Copy Settings]. bizhub C652/C652DS/C552/C552DS/C452 3-3 - Konica Minolta bizhub C452 | bizhub C452/C552/C552DS/C652/C652DS Copy Operations - Page 42
scanning. This method is suited for originals in the form of a book and the like that cannot be fed through the ADF. Load the original, and configure book or booklet form - Originals with pages bound together with glue - Originals with pages that have had cutouts removed or are cutouts - Label sheets - Konica Minolta bizhub C452 | bizhub C452/C552/C552DS/C652/C652DS Copy Operations - Page 43
document is being scanned with the ADF open, do not look directly at the original glass surface where light may be emitted through. Note, however, that the light coming through the original glass is not a laser beam, and will not expose the user to the related hazards. 0 When Non-Image Area Erase is - Konica Minolta bizhub C452 | bizhub C452/C552/C552DS/C652/C652DS Copy Operations - Page 44
copy operations using combination of functions. 1 Load the original. 2 Press [Original Setting]. % For details on original setting, refer to page 5-15. 3 Press [Basic] ö [Duplex/Combine]. % For details on the Duplex/Combine settings, refer to page 5-8. bizhub C652/C652DS/C552/C552DS/C452 3-6 - Konica Minolta bizhub C452 | bizhub C452/C552/C552DS/C652/C652DS Copy Operations - Page 45
images, refer to page 5-14. 5 Press [Application] and then configure settings for respective functions. % For setting for the application functions, refer to page 5-20. 6 Press [Basic] ö [Finishing]. % For details on copy finishing and folding/binding, refer to page 5-10. bizhub C652/C652DS/C552 - Konica Minolta bizhub C452 | bizhub C452/C552/C552DS/C652/C652DS Copy Operations - Page 46
on checking job settings, refer to page 5-64. 8 Using the keypad, enter a value for the number of copies you desire. % If you have entered incorrect number of copies, press the [C] (clear) key on the keypad, and then reenter the correct number. 9 Press the [Start] key. The original is scanned and - Konica Minolta bizhub C452 | bizhub C452/C552/C552DS/C652/C652DS Copy Operations - Page 47
4 Control Panel Keys - Konica Minolta bizhub C452 | bizhub C452/C552/C552DS/C652/C652DS Copy Operations - Page 48
keys on the operation panel. Control panel and functions Press the keys on the operation panel to use the Copy, Fax/Scan, User Box or other functions. 1 2 3 4 22 21 5 20 6 19 7 18 17 8 16 9 15 No. Name 1 Touch panel 2 Power indicator 3 [Sub power switch] 4 [Power Save] 5 [Mode Memory - Konica Minolta bizhub C452 | bizhub C452/C552/C552DS/C652/C652DS Copy Operations - Page 49
the [Fax/Scan] key lights up in green. For details on the fax/scan function, refer to the "User's Guide [Network Scan/Fax/Network Fax Operations]". Enters Copy mode. (As a default, the machine is in Copy mode. ) While the machine is copying, the indicator on the [Copy] key lights up in green. Page - Konica Minolta bizhub C452 | bizhub C452/C552/C552DS/C652/C652DS Copy Operations - Page 50
operated while an original is being scanned. 0 Pressing the [Interrupt] key restores the default settings. 1 Load the original. 2 Press the [Interrupt] key. The indicator on the Interrupt key lights up in green and printing of the current job is suspended. 3 Configure the copy settings. 4 Press the - Konica Minolta bizhub C452 | bizhub C452/C552/C552DS/C652/C652DS Copy Operations - Page 51
key to enter Fax/Scan mode. For details on the fax/scan function, refer to the "User's Guide [Network Scan/Fax/Network Fax Operations]". The [User Box] key % Enters User Box mode. For details on User Box functions, refer to the "User's Guide [Box Operations]". bizhub C652/C652DS/C552/C552DS/C452 - Konica Minolta bizhub C452 | bizhub C452/C552/C552DS/C652/C652DS Copy Operations - Page 52
, refer to the "User's Guide [Network Scan/Fax/Network Fax Operations]" and "User's Guide [Box Operations]". Provides setting items that can be operated by the user. Provides setting items that can only be operated by the administrator of the machine. Allows you to check the status (usage level) of - Konica Minolta bizhub C452 | bizhub C452/C552/C552DS/C652/C652DS Copy Operations - Page 53
configure Check Administrator Settings] ö [System Settings] ö [Restrict User Access] ö [Copy Program Lock Settings]. To delete a copy program: Press the [Utility/Counter] key ö [Administrator Settings] ö [System Settings] ö [Restrict User Access] ö [Delete Saved Copy Program]. bizhub C652/C652DS/C552 - Konica Minolta bizhub C452 | bizhub C452/C552/C552DS/C652/C652DS Copy Operations - Page 54
can use this machine. If the administrator has configured a usage schedule, a user can use the machine by entering a password for non-business hours. Controlling access to the machine by user/account (user authentication/account track) 0 With the user authentication/account track functions enabled - Konica Minolta bizhub C452 | bizhub C452/C552/C552DS/C652/C652DS Copy Operations - Page 55
Password] to enter alphabets and symbols in succession. Login Displays the basic settings screen, enabling you to use this machine. d Reference To configure user authentication/account track: Press the [Utility/Counter] key ö [Administrator Settings] ö [User Authentication/Account Track]. bizhub - Konica Minolta bizhub C452 | bizhub C452/C552/C552DS/C652/C652DS Copy Operations - Page 56
of time to elapse before the machine enters Sleep mode again. 5 Press [OK]. The basic settings screen appears. d Reference To configure Weekly Timer: Press the [Utility/Counter] key ö [Administrator Settings] ö [System Settings] ö [Weekly Timer Settings]. bizhub C652/C652DS/C552/C552DS/C452 4-10 - Konica Minolta bizhub C452 | bizhub C452/C552/C552DS/C652/C652DS Copy Operations - Page 57
machine returns from Low Power mode when any other key on the control panel or the touch panel surface is pressed. d Reference To enable Low Power mode: Press the [Utility/Counter] key ö [Administrator Settings] ö [System Settings] ö [Power Save Settings]. bizhub C652/C652DS/C552/C552DS/C452 4-11 - Konica Minolta bizhub C452 | bizhub C452/C552/C552DS/C652/C652DS Copy Operations - Page 58
[Close]. 0 In the Enlarge Display screen, [Default Enlarge Display Settings] appears, enabling you to configure default settings for use in the Enlarge Display mode using the copy or fax/scan functions. % Press the [Accessibility] key. Page 1/2 Page 2/2 Settings Touch Panel Adjustment Adjust the - Konica Minolta bizhub C452 | bizhub C452/C552/C552DS/C652/C652DS Copy Operations - Page 59
that appears or the User's Guide • [Severe Caution Sound]: A sound produced when an error occurs that cannot be corrected by the user or requires action by a service representative For details, refer to the "User's Guide [Enlarge Display Operations]". bizhub C652/C652DS/C552/C552DS/C452 4-13 - Konica Minolta bizhub C452 | bizhub C452/C552/C552DS/C652/C652DS Copy Operations - Page 60
Guide [Enlarge Display Operations]". 0 Press the [Enlarge Display] key to return to normal display. 0 If PageScope Authentication Manager is used for authentication, the login screen cannot be switched to the enlarged display mode. % Press the [Enlarge Display] key. bizhub C652/C652DS/C552/C552DS - Konica Minolta bizhub C452 | bizhub C452/C552/C552DS/C652/C652DS Copy Operations - Page 61
current screen or the menu structure it belongs to. Check descriptions by selecting a Guidance menu grouped by useful function. Check the description of the main unit and its options. Check the name, extension number and E-mail address of the administrator. bizhub C652/C652DS/C552/C552DS/C452 4-15 - Konica Minolta bizhub C452 | bizhub C452/C552/C552DS/C652/C652DS Copy Operations - Page 62
Consumables Replace/ Processing Procedure 4 Check procedures for replacing the toner cartridge, imaging unit or waste toner box, adding staples or discarding punch-hole scraps by viewing animations. Press the target button, and then press [Start Guidance]. bizhub C652/C652DS/C552/C552DS/C452 4-16 - Konica Minolta bizhub C452 | bizhub C452/C552/C552DS/C652/C652DS Copy Operations - Page 63
4.10 The [C] (Clear) key 4 4.10 The [C] (Clear) key Clears a value (such as the number of copies, a zoom ratio and size) entered using the keypad. % Press the [C] key. The value is deleted. Enter the correct value. bizhub C652/C652DS/C552/C552DS/C452 4-17 - Konica Minolta bizhub C452 | bizhub C452/C552/C552DS/C652/C652DS Copy Operations - Page 64
sets specified to be printed", and "Total # of Pages Printed" indicates "the number of sheets printed in the proof copy mode/the total number of sheets to be printed". % To stop copying while the screen for changing the settings is displayed, select the proof copy job to be stopped from the list of - Konica Minolta bizhub C452 | bizhub C452/C552/C552DS/C652/C652DS Copy Operations - Page 65
the original direction. 5 Press the [Start] key. The Preview (View Status) screen appears. 6 Check the preview image. % To change the settings, press [View Pages]. Go to Step 7. % To start printing, press the [Start] key. % To scan another original, press [Finish], load the original, and then press - Konica Minolta bizhub C452 | bizhub C452/C552/C552DS/C652/C652DS Copy Operations - Page 66
original to be scanned. Switch between the View Status and View Pages tab in the Preview screen. Perform image rotation and setting changes on [View Pages] and stop scanning on [View Status]. 8 Press the [Start] key. Select this menu to start printing. bizhub C652/C652DS/C552/C552DS/C452 4-20 - Konica Minolta bizhub C452 | bizhub C452/C552/C552DS/C652/C652DS Copy Operations - Page 67
5 Copy Function - Konica Minolta bizhub C452 | bizhub C452/C552/C552DS/C652/C652DS Copy Operations - Page 68
quality. Configure the application settings for making copies. Job List Check jobs currently being performed and jobs waiting to be performed. Check Job Check the current settings and the result of the settings. p. 5-3 p. 5-15 p. 5-18 p. 5-20 p. 5-62 p. 5-64 bizhub C652/C652DS/C552/C552DS - Konica Minolta bizhub C452 | bizhub C452/C552/C552DS/C652/C652DS Copy Operations - Page 69
. Item Color Paper Zoom Duplex/Combine Finishing program button Finishing Separate Scan Auto Rotate OFF Language Selection Shortcut Key Specify the print color for making copies. Select the paper type to be printed on and paper tray. Select the zoom ratio of the image to be copied. Configure the - Konica Minolta bizhub C452 | bizhub C452/C552/C552DS/C652/C652DS Copy Operations - Page 70
Color], [Full Color], [2 Color], [Black] and [Single Color]. % Press [Basic] ö [Color]. Settings Auto Color Full Color 2 Color Black Single Color Automatically detects whether the scanned original is in color or in black and white, and selects the appropriate color setting (full color or black - Konica Minolta bizhub C452 | bizhub C452/C552/C552DS/C652/C652DS Copy Operations - Page 71
size to be printed, or to change the paper size and paper type settings specified for each paper tray. The paper size can be selected automatically according to the original size or it can be specified manually. 0 If you select [Transparency], specify [Black] for [Color] in advance. 0 The auto zoom - Konica Minolta bizhub C452 | bizhub C452/C552/C552DS/C652/C652DS Copy Operations - Page 72
Name Configuring wide paper % [Basic] ö [Paper] ö [Bypass Tray] ö [Change Tray Settings] ö [Wide Paper]. Settings Wide Paper Change Size Select the size of the paper to be loaded. X/Y Enter the length [X] and width [Y] of the paper. Preset Paper Sizes Enables 12 e 18 w to be selected. bizhub - Konica Minolta bizhub C452 | bizhub C452/C552/C552DS/C652/C652DS Copy Operations - Page 73
original onto a fixed size paper. Select a registered copy zoom value. To change the registered zoom values, use [Set Zoom]. d Reference To set image rotation: Press the [Utility/Counter] key ö [User Settings] ö [Copier Settings] ö [Enlargement Rotation]. bizhub C652/C652DS/C552/C552DS/C452 5-7 - Konica Minolta bizhub C452 | bizhub C452/C552/C552DS/C652/C652DS Copy Operations - Page 74
/Combine Configure whether to scan one side or both sides of the originals and whether to print on one side or both sides of the paper. Multiple (2, 4 or 8) pages of original images can be reduced in size and printed on a single page. Using the Duplex/Combine function, you can save paper sheets for - Konica Minolta bizhub C452 | bizhub C452/C552/C552DS/C652/C652DS Copy Operations - Page 75
sheet of paper. Portrait original pages Landscape original pages 4in1 Copies images of four original pages on one sheet of paper. 8in1 Copies images of eight original pages on one sheet of paper. Horizontal Vertical bizhub C652/C652DS/C552 - Konica Minolta bizhub C452 | bizhub C452/C552/C552DS/C652/C652DS Copy Operations - Page 76
"Staple" or "Punch". % Press [Basic] ö [Finishing]. Settings Sort Group Prints the copied sets separately when a multi-page original is copied. 111 43 2 1 Makes multiple copies of each page when you make multiple copies of a multipage original. 432 1 11 1 bizhub C652/C652DS/C552/C552DS/C452 5-10 - Konica Minolta bizhub C452 | bizhub C452/C552/C552DS/C652/C652DS Copy Operations - Page 77
-page originals. When the Finisher or Job Unit ZU-606. When the Saddle Stitcher SD-509 is installed on the Finisher FS-527: Half Fold Center Staple & Fold Staples copies in corner or at two points before they are output. Punches holes in copies before they are output. 1 bizhub C652/C652DS/C552 - Konica Minolta bizhub C452 | bizhub C452/C552/C552DS/C652/C652DS Copy Operations - Page 78
available. Keys on control panel 12 3 45 6 7 10 9 8 No. Name 1 Corner staple lamp 2 Center staple & fold lamp 3 [Finishing] key 4 2-hole lamp 5 3-hole lamp 6 [Select punch] key 7 [Start/stop] key 8 4-hole lamp 9 Tri-fold lamp 10 2 position staple lamp bizhub C652/C652DS/C552 - Konica Minolta bizhub C452 | bizhub C452/C552/C552DS/C652/C652DS Copy Operations - Page 79
contains pages exceeding the capacity of the ADF, you can divide the original into several batches to handle each lot as a single copy job. You can also use the copy function by switching between the ADF and the original glass for scanning the originals. 0 Do not load original sheets beyond - Konica Minolta bizhub C452 | bizhub C452/C552/C552DS/C652/C652DS Copy Operations - Page 80
, press [Change Setting]. 5 Repeat Step 4 until all pages of the original are scanned. 6 After all original pages have been scanned, press [Finish]. 7 Press the [Start] key. d Reference To set the Separate Scan output method: Press the [Utility/Counter] key ö [User Settings] ö [Copier Settings - Konica Minolta bizhub C452 | bizhub C452/C552/C552DS/C652/C652DS Copy Operations - Page 81
Original Setting Configure the original status or original direction for outputting desired copies. % Press [Original Setting]. Settings Mixed Original Z-Folded Original Original Size Binding Position Original Direction Despeckle Loads originals of different sizes into the ADF and scan them at - Konica Minolta bizhub C452 | bizhub C452/C552/C552DS/C652/C652DS Copy Operations - Page 82
guides of the ADF to fit the size of the largest original page. 2 Arrange originals in the order you want them to be scanned and load them face up in the ADF e 8-1/2 v (A5 v) - - - o o - o 5-1/2 e 8-1/2 w (A5 w) - - - - - o - (B5 v) o o o o o (B5 w) o o bizhub C652/C652DS/C552/C552DS/C452 5-16 - Konica Minolta bizhub C452 | bizhub C452/C552/C552DS/C652/C652DS Copy Operations - Page 83
Z-folded originals Correctly detects the original size when folded originals are loaded into the ADF and copied. The length of the first page of the original is detected, and the subsequent pages are scanned as pages of the same size. NOTICE Unfold folded originals before loading them into the - Konica Minolta bizhub C452 | bizhub C452/C552/C552DS/C652/C652DS Copy Operations - Page 84
the usual settings will be reproduced in as nearly an original state as possible. Map Select this setting to copy originals with a background color, originals containing pencil markings or fine colored lines such as maps. A sharp copy image is produced. bizhub C652/C652DS/C552/C552DS/C452 5-18 - Konica Minolta bizhub C452 | bizhub C452/C552/C552DS/C652/C652DS Copy Operations - Page 85
, press [Daker Text] to adjust the setting toward +. To emphasize the background image, press [Lighter Text] to adjust the setting toward -. [Text Enhancement] can be configured when an item other than [Photo] is selected. Makes copies with a glossy finish. bizhub C652/C652DS/C552/C552DS/C452 5-19 - Konica Minolta bizhub C452 | bizhub C452/C552/C552DS/C652/C652DS Copy Operations - Page 86
Configure the application settings for making copies. Item Sheet/Cover/Chapter Insert Edit Color Book Copy/Repeat Page Margin Image Adjust Booklet Erase Stamp/Composition Card Copy Save in User Box Inserts another sheet of paper or adds a cover page to the paper for copying. You can also scan - Konica Minolta bizhub C452 | bizhub C452/C552/C552DS/C652/C652DS Copy Operations - Page 87
black. 0 Use interleaf paper with the same size as the OHP transparencies. 0 The number of copies is fixed to one. You cannot change. 0 The finishing function cannot be changed d Reference Setting Black for Color Settings: Press [Basic] ö [Color] ö [Black]. bizhub C652/C652DS/C552/C552DS/C452 5-21 - Konica Minolta bizhub C452 | bizhub C452/C552/C552DS/C652/C652DS Copy Operations - Page 88
/back cover page or blank cover pages. You can select the paper tray of the Post Inserter when [Front(Blank)] or [Back(Blank)] is selected while the optional Post Inserter is installed. d Reference To configure the 2-sided copy mode: Press [Basic] ö [Duplex/Combine]. bizhub C652/C652DS/C552/C552DS - Konica Minolta bizhub C452 | bizhub C452/C552/C552DS/C652/C652DS Copy Operations - Page 89
copy blank, inserts the specified paper for the second page of the copy, and makes a 2-sided copy of the second and third pages of the original onto the inserted sheet. 123456 REPORT 123 4 5 6 123456 REPORT 123 4 5 6 1246 REPORT 12 5 3 4 6 bizhub C652/C652DS/C552/C552DS/C452 5-23 - Konica Minolta bizhub C452 | bizhub C452/C552/C552DS/C652/C652DS Copy Operations - Page 90
46 13 5 2 REPORT 46 13 d Reference To configure the 2-sided copy mode: Press [Basic] ö [Duplex/Combine]. Insert Image A multi-page original scanned on the original glass can be inserted at the pre-set location in an original first scanned with the ADF. 1234 REPORT 123 4 AB 1 2 34 REPORT - Konica Minolta bizhub C452 | bizhub C452/C552/C552DS/C652/C652DS Copy Operations - Page 91
Sheet/Cover/Chapter Insert] ö [Insert Image]. Settings P --- Sort Specify the position to insert the page scanned through the original glass. Sorts specified pages % To insert a multi-page original, repeat steps 4 and 5 until all pages of the insertion original are scanned in the order that they - Konica Minolta bizhub C452 | bizhub C452/C552/C552DS/C652/C652DS Copy Operations - Page 92
the first page of the chapter. Makes copies of the first pages of the chapters on paper of a different type from that for the text pages. Copies all pages with the same type of paper. d Reference To configure the 2-sided copy mode: Press [Basic] ö [Duplex/Combine]. bizhub C652/C652DS/C552/C552DS - Konica Minolta bizhub C452 | bizhub C452/C552/C552DS/C652/C652DS Copy Operations - Page 93
the [Start] key. 3 Press [Fix]. % Press [Retry] to delete the scanned job. Press [Change Setting] to configure the copy settings. % When the original has been loaded on the original glass, press [Finish]. 4 Load the next original and press [Change Setting]. bizhub C652/C652DS/C552/C552DS/C452 5-27 - Konica Minolta bizhub C452 | bizhub C452/C552/C552DS/C652/C652DS Copy Operations - Page 94
5.4 Application 5 5 Select the desired copy settings, and then press the [Start] key. % Repeat Steps 3 to 5 until all originals have been scanned. 6 After all original pages have been scanned, press [Finish]. 7 Press [Yes]. 8 Specify finish settings as needed. 9 Press [Start] or the [Start] key - Konica Minolta bizhub C452 | bizhub C452/C552/C552DS/C652/C652DS Copy Operations - Page 95
ö [Neg./Pos. Reverse]. % To cancel the Neg./Pos. Reverse function, press [Neg./Pos. Reverse] again. d Reference To set Single Color: Press [Basic] ö [Color] ö [Single Color]. To Set Background Color: Press [Application] ö [Edit Color] ö [Background Color]. bizhub C652/C652DS/C552/C552DS/C452 5-29 - Konica Minolta bizhub C452 | bizhub C452/C552/C552DS/C652/C652DS Copy Operations - Page 96
Color] ö [Mirror Image]. Settings Original Size Select [Auto] to detect the size of the original automatically. If the size of the original is not automatically detected, select the original size. Custom Size Enter the original size. Photo Size Select the photo size. bizhub C652/C652DS/C552 - Konica Minolta bizhub C452 | bizhub C452/C552/C552DS/C652/C652DS Copy Operations - Page 97
color. % Press [Application] ö [Edit Color] ö [Background Color]. Settings Select Color Select a background color. Color Adjustment Adjust the image quality to fit an image based on the color-copied original. 1 Press [Application] ö [Edit Color] ö [Color Adjust]. bizhub C652/C652DS/C552 - Konica Minolta bizhub C452 | bizhub C452/C552/C552DS/C652/C652DS Copy Operations - Page 98
: yellow, magenta, cyan, and black. By changing the amount of each of the four toners, adjust the tints in the copy. 2 Configure respective functions. % Press [Sample Copy] to see how it will appear with the currently specified color quality adjustment settings. bizhub C652/C652DS/C552/C552DS/C452 - Konica Minolta bizhub C452 | bizhub C452/C552/C552DS/C652/C652DS Copy Operations - Page 99
Copy Divides or does not divide page spreads (such as a book or catalog) into left and right pages to copy data. This function enables copying with the ADF open by placing the original on the Original Glass. If necessary, you can place an original image at the center of the paper to copy. SURVEYOR - Konica Minolta bizhub C452 | bizhub C452/C552/C552DS/C652/C652DS Copy Operations - Page 100
not fit into the copy area, the extra range is not copied. Repeats copying of the scanned area of the original so that the sheet is filled with the copied image. However, some parts of the image may be lost. Automatically detects the area to be scanned. bizhub C652/C652DS/C552/C552DS/C452 5-34 - Konica Minolta bizhub C452 | bizhub C452/C552/C552DS/C652/C652DS Copy Operations - Page 101
. 0 Place the original on the original glass. 0 In Poster Mode, the number of copies is set to 1. % Press [Application] ö [Book Copy/Repeat] ö [Poster Mode]. Settings Image Size Select the finished image size. Custom Size Enter the finished image size. bizhub C652/C652DS/C552/C552DS/C452 5-35 - Konica Minolta bizhub C452 | bizhub C452/C552/C552DS/C652/C652DS Copy Operations - Page 102
Configure 7 Staples 0 This function is available if a saddle stitcher is installed in pages in order, starting with the side that includes the first page, then the side that includes the second page, then the side that includes the third page. 2 7 8 1 + 4 5 6 3 bizhub C652/C652DS/C552 - Konica Minolta bizhub C452 | bizhub C452/C552/C552DS/C652/C652DS Copy Operations - Page 103
from the binding position, the positions of the staples or punched holes are given priority. 0 If part of the image is lost when copied with the specified binding margin settings, reduce the zoom and perform copying. % Press [Application] ö [Page Margin]. bizhub C652/C652DS/C552/C552DS/C452 5-37 - Konica Minolta bizhub C452 | bizhub C452/C552/C552DS/C652/C652DS Copy Operations - Page 104
image position according to the binding margin. Change Back Shift Adjust the image position on the back side of the paper in the 2-sided copy mode. • North American model (inch): Configure the original loaded into the ADF or placed on the original glass. bizhub C652/C652DS/C552/C552DS/C452 5-38 - Konica Minolta bizhub C452 | bizhub C452/C552/C552DS/C652/C652DS Copy Operations - Page 105
image at the center of the paper without enlarging it. Select [Auto] to detect the size of the original automatically. If the size of the original is not automatically detected, select the original size. Custom Size Enter the original size. Photo Size Select the photo size. bizhub C652 - Konica Minolta bizhub C452 | bizhub C452/C552/C552DS/C652/C652DS Copy Operations - Page 106
paper. Copies the front and back cover sheets onto separate paper when copying an original with a front/back cover sheet. When the original to copy does not have a front and back cover, you can insert blank sheets of paper as the front and back covers. bizhub C652/C652DS/C552/C552DS/C452 5-40 - Konica Minolta bizhub C452 | bizhub C452/C552/C552DS/C652/C652DS Copy Operations - Page 107
d Reference To set to an appropriate zoom: Press the [Utility/Counter] key ö [User Settings] ö [Copier Settings] ö [Auto Zoom for Combine/Booklet]. 5.4.7 Erase Frame Erase Copies can be produced using the keypad. Sets the erasing width to 0 inch (0 mm). bizhub C652/C652DS/C552/C552DS/C452 5-41 - Konica Minolta bizhub C452 | bizhub C452/C552/C552DS/C652/C652DS Copy Operations - Page 108
under "Erase Adjustment" in Administrator Settings. 0 The size of the original automatically detected is 3/8 inch e 3/8 inch (10 mm e 10 mm) or larger. If the detection fails, a blank sheet of paper is output. 0 You cannot make copies with the ADF closed. 0 The original image may be defected at its - Konica Minolta bizhub C452 | bizhub C452/C552/C552DS/C652/C652DS Copy Operations - Page 109
copies with the image of the first scanned original page overlapping the subsequent original images. Saves an image of the scanned original as a registered overlay in the hard disk and later overlay the registered image on the copy of another original. bizhub C652/C652DS/C552/C552DS/C452 5-43 - Konica Minolta bizhub C452 | bizhub C452/C552/C552DS/C652/C652DS Copy Operations - Page 110
between 1/16 inch (0.1 mm) and 1-15/16 inch (50.0 mm). Set the text color, size and type. d Reference To enable printing on blank pages: Press the [Utility/Counter] key ö [Administrator Settings] ö [System Settings] ö [Blank Page Print Settings]. bizhub C652/C652DS/C552/C552DS/C452 5-44 - Konica Minolta bizhub C452 | bizhub C452/C552/C552DS/C652/C652DS Copy Operations - Page 111
numbers are printed on all pages. 0 Page numbers cannot be printed on blank pages inserted using the Cover Sheet, Insert Sheet and Chapters functions. Change the setting for printing on blank pages in Administrator Settings to enable blank page printing. % Press [Application] ö [Stamp/Composition - Konica Minolta bizhub C452 | bizhub C452/C552/C552DS/C652/C652DS Copy Operations - Page 112
]. To configure the settings for the Chapters function: Press [Application] ö [Sheet/Cover/Chapter Insert] ö [Chapters]. To enable printing on blank pages: Press the [Utility/Counter] key ö [Administrator Settings] ö [System Settings] ö [Blank Page Print Settings]. bizhub C652/C652DS/C552/C552DS - Konica Minolta bizhub C452 | bizhub C452/C552/C552DS/C652/C652DS Copy Operations - Page 113
for printing on blank pages in Administrator Settings to enable blank page printing. % Press [Application] ö [Stamp/Composition] ö [Stamp]. Settings Stamp Type/Preset Stamps Pages Text Size Text Color Print Position Select a stamp to be printed from the eight types available. Select to print the - Konica Minolta bizhub C452 | bizhub C452/C552/C552DS/C652/C652DS Copy Operations - Page 114
Number Prints the distribution control number. Specify the distribution control number using a value between 1 and 99999999. Configure the settings for Text/Background Color, Density, Copy Protect Text, Text Size, Pattern Overwrite and Background Pattern. bizhub C652/C652DS/C552/C552DS/C452 5-48 - Konica Minolta bizhub C452 | bizhub C452/C552/C552DS/C652/C652DS Copy Operations - Page 115
or date. If an attempt is made to copy copy-guarded sheets, the machine that supports this function scans a Copy Guard pattern, stops copying, and discards the currently running job. ABCD DarrafAatftft DBDrDarDrafarCfatftft DDDrDraDarfratfatftft NG 0 For a text, specify the pre-registered - Konica Minolta bizhub C452 | bizhub C452/C552/C552DS/C652/C652DS Copy Operations - Page 116
with Zoom, 2 Color, Grayscale, Color Adjust, Colored Paper, Envelope, or Transparency specified, the currently processed copy job will be erased. 0 If multiple originals with different passwords are scanned, you will need to enter a password for each original. bizhub C652/C652DS/C552/C552DS/C452 - Konica Minolta bizhub C452 | bizhub C452/C552/C552DS/C652/C652DS Copy Operations - Page 117
. Other Specify Job Number, Serial Number, and Distribution Control Number to be printed on paper. Serial Number is assigned at the time of shipment of this machine. For details on settings, contact your service representative. Detail Settings Specify Text/Background Color, Password Copy Pattern - Konica Minolta bizhub C452 | bizhub C452/C552/C552DS/C652/C652DS Copy Operations - Page 118
serial number, contact your service representative. Distribution Control Number Prints the distribution control number. Specify the distribution control number using a value between 1 and 99999999. Select the Text Color, Density, Text Size and Pattern Overwrite. Change the angle as required when - Konica Minolta bizhub C452 | bizhub C452/C552/C552DS/C652/C652DS Copy Operations - Page 119
and time notation. Other: Select to print or not to print the distribution control number, job number, or serial number. Pages Select to print the header/footer on all pages or only on the first page. Text Details Select the Text Color, Text Size and Text Type. Reset the settings to the initial - Konica Minolta bizhub C452 | bizhub C452/C552/C552DS/C652/C652DS Copy Operations - Page 120
Settings Watermark Type Text Color Select a watermark from the eight types available. The watermark selected is printed over the original image. Select the watermark color from [Black], [Magenta] and [Cyan]. The watermark is printed in the selected color. bizhub C652/C652DS/C552/C552DS/C452 5-54 - Konica Minolta bizhub C452 | bizhub C452/C552/C552DS/C652/C652DS Copy Operations - Page 121
size. Photo Size Select the photo size. Use the keypad to enter the density of an overlay image (using a value between 20 to 100%). Select the color of overlay image from [full color], [black], [red], [blue], [green], [yellow], [cyan], or [magenta]. bizhub C652/C652DS/C552/C552DS/C452 5-55 - Konica Minolta bizhub C452 | bizhub C452/C552/C552DS/C652/C652DS Copy Operations - Page 122
storing of an image from the scanned original as a registered overlay on the hard disk for later use in copying another original. It is useful to register frequently used overlay images. % Press [Application] ö [Stamp/Composition] ö [Registered Overlay]. bizhub C652/C652DS/C552/C552DS/C452 5-56 - Konica Minolta bizhub C452 | bizhub C452/C552/C552DS/C652/C652DS Copy Operations - Page 123
of an overlay to be registered between 20% and 100%. Color: Select the color for the overlay image to be registered from [Auto Color], [Full Color] and [Black]. Select to print the overlay image on all pages or only on the first page. Select [Auto] to detect the size of the original automatically - Konica Minolta bizhub C452 | bizhub C452/C552/C552DS/C652/C652DS Copy Operations - Page 124
5.4 Application 5 d Reference To prohibit changing the overlay registration: Press the [Utility/Counter] key ö [Administrator Settings] ö [System Settings] ö [Restrict User Access] ö [Restrict Access to Job Settings] ö [Change Registered Overly]. bizhub C652/C652DS/C552/C552DS/C452 5-58 - Konica Minolta bizhub C452 | bizhub C452/C552/C552DS/C652/C652DS Copy Operations - Page 125
to place the front and back sides of a card. You can copy a card with the full size or enlarge an image to fit paper. d Reference To specify the default of Card Copy: Select [Utility/Counter] ö [Administrator Settings] ö [Copier Settings] ö [Card Copy]. bizhub C652/C652DS/C552/C552DS/C452 5-59 - Konica Minolta bizhub C452 | bizhub C452/C552/C552DS/C652/C652DS Copy Operations - Page 126
original. A name automatically assigned to the document appears. You can change the file name. [Yes]: Select to copy the scanned original and save it in the specified User Box. [No]: Select to save the data of the scanned original in the specified User Box. bizhub C652/C652DS/C552/C552DS/C452 5-60 - Konica Minolta bizhub C452 | bizhub C452/C552/C552DS/C652/C652DS Copy Operations - Page 127
Default is set to "Status Display" in User Settings, the job status is displayed. Delete To delete a job, select the job from the job list, and then press [Delete]. Job Details Opens the Job List screen. Displays the result of the settings being configured. Check Details Check or change - Konica Minolta bizhub C452 | bizhub C452/C552/C552DS/C652/C652DS Copy Operations - Page 128
"User's Guide [Network Scan/Fax/Network Fax Operations]". Opens the screen for checking fax reception jobs. For details, refer to the "User's Guide [Network Scan/Fax/Network Fax Operations]". Opens the screen for saving jobs. For details, refer to the "User's Guide [Box Operations]". bizhub C652 - Konica Minolta bizhub C452 | bizhub C452/C552/C552DS/C652/C652DS Copy Operations - Page 129
. Finished Jobs Displays only jobs that were completed normally. All Jobs Displays all jobs. Detail Check the status, results, error details, user name, queued time, completed time, number of original pages and number of copies for jobs in the Job History list. bizhub C652/C652DS/C552/C552DS - Konica Minolta bizhub C452 | bizhub C452/C552/C552DS/C652/C652DS Copy Operations - Page 130
Job Settings screens, the current copy settings can be checked and changed if desired. 1 Press [Check Job] ö [Check Details]. 2 Check the copy settings. To change the copy settings, press the relevant button. 3 After checking the settings, press [Close]. bizhub C652/C652DS/C552/C552DS/C452 5-64 - Konica Minolta bizhub C452 | bizhub C452/C552/C552DS/C652/C652DS Copy Operations - Page 131
6 User Settings - Konica Minolta bizhub C452 | bizhub C452/C552/C552DS/C652/C652DS Copy Operations - Page 132
Settings Copier Settings Scan/Fax Settings Printer Settings Change Password Change E-Mail Address Change Icon Register Authentication Information Cellular Phone/PDA Setting Configure the basic functions of this machine. Change the touch panel display to the convenience of the user. Configure the - Konica Minolta bizhub C452 | bizhub C452/C552/C552DS/C652/C652DS Copy Operations - Page 133
installed. Adjust the reference level for detecting a color or black-and-white original when the Auto Color setting is selected. Refer to page 7-3. Refer to page 7-4. Appears when user access is permitted under Administrator settings. Refer to page 7-9. bizhub C652/C652DS/C552/C552DS/C452 6-3 - Konica Minolta bizhub C452 | bizhub C452/C552/C552DS/C652/C652DS Copy Operations - Page 134
when a paper tray is selected manually and the [Start] key is pressed. Appears when user access is permitted under Administrator settings. For details, refer to page 7-26. Specify a page number print position when printing page numbers after configuring 2-sided print or booklet settings. Select - Konica Minolta bizhub C452 | bizhub C452/C552/C552DS/C652/C652DS Copy Operations - Page 135
default Select Keyboard Local Keyboard d Reference To enable Auto Paper: Press [Basic] ö [Paper] ö [Auto Paper]. To enable Auto Color: Press [Basic] ö [Color] ö [Auto Color]. To configure Background Removal to Auto: Press [Quality/Density] ö [Background Removal] ö [Auto]. bizhub C652/C652DS/C552 - Konica Minolta bizhub C452 | bizhub C452/C552/C552DS/C652/C652DS Copy Operations - Page 136
When the optional image controller is in- fax and network fax operations. For details, refer to the "User's Guide [Network Scan/Fax/Network Fax Operations]". Select the color used for indicating that the button is selected. Left Panel Display Default Configure whether to display a list of jobs - Konica Minolta bizhub C452 | bizhub C452/C552/C552DS/C652/C652DS Copy Operations - Page 137
Key 1/Shortcut Key 2 (Fax/Scan Settings) Default Address Book (Fax/Scan Settings) Default Address Type (Fax/Scan Settings) Default Tab (User Box Settings) Shortcut Key 1/Shortcut Key 2 (User Box Settings) Copy Operating Screen Color Selection Settings Left Panel Display Default Job Display Setting - Konica Minolta bizhub C452 | bizhub C452/C552/C552DS/C652/C652DS Copy Operations - Page 138
to the "User's Guide [Enlarge Display Operations]". Configure whether to print or discard the job when the original orientation does not match that of paper in Auto Zoom mode. Configure the output for divided original loaded in the ADF or for multiple pages of the original scanned on the original - Konica Minolta bizhub C452 | bizhub C452/C552/C552DS/C652/C652DS Copy Operations - Page 139
. To change the folding capacity, contact your service representative. Half-folding capacity setting: 1-3 (default:3) Tri-folding capacity setting: 1-3 (default:1) Specify whether to apply Half-Fold together for all pages or for each page when handling a job containing multiple pages. When Booklet - Konica Minolta bizhub C452 | bizhub C452/C552/C552DS/C652/C652DS Copy Operations - Page 140
6.3 Copier Settings 6 Factory default Print Jobs During Copy Operation Automatic Image Rotation Finishing Program Card Shot Accept When Auto Paper/Auto Zoom Is Set ON Layout: Top/Bottom Zoom: Full Size Store Original Size: X: 3-1/2 inch (89.0 mm) Y: 21 inch (51.0 mm) bizhub C652/C652DS/C552/ - Konica Minolta bizhub C452 | bizhub C452/C552/C552DS/C652/C652DS Copy Operations - Page 141
6.4 Fax/Scan Settings 6 6.4 Fax/Scan Settings This setting is for the network scan, fax, and network fax operations. For details, refer to the "User's Guide [Network Scan/Fax/Network Fax Operations]". bizhub C652/C652DS/C552/C552DS/C452 6-11 - Konica Minolta bizhub C452 | bizhub C452/C552/C552DS/C652/C652DS Copy Operations - Page 142
6.5 Printer Settings 6 6.5 Printer Settings This setting is for the printer operations. For details, refer to the "User's Guide [Print Operations]". bizhub C652/C652DS/C552/C552DS/C452 6-12 - Konica Minolta bizhub C452 | bizhub C452/C552/C552DS/C652/C652DS Copy Operations - Page 143
[Utility/Counter] key ö [User Settings] ö [Change Password]. 2 Enter the previous password, and then press [OK]. 3 Enter a new password. 4 Press [Password Confirmation], and then enter the new password again. 5 Press [OK]. The new password is registered. bizhub C652/C652DS/C552/C552DS/C452 6-13 - Konica Minolta bizhub C452 | bizhub C452/C552/C552DS/C652/C652DS Copy Operations - Page 144
E-mail address. 0 Appears when user access is permitted under Administrator settings. For details, refer to page 7-50. 1 Press the [Utility/Counter] key ö [User Settings] ö [Change E-Mail Address]. 2 Press [E-mail Address]. 3 Change the E-mail address. 4 Press [OK]. bizhub C652/C652DS/C552/C552DS - Konica Minolta bizhub C452 | bizhub C452/C552/C552DS/C652/C652DS Copy Operations - Page 145
6.8 Change Icon 6 6.8 Change Icon Change the icon specified as registered user information. 0 When logged in as a registered user, you can change the E-mail address. 1 Press the [Utility/Counter] key ö [User Settings] ö [Change Icon]. 2 Select the icon and press [OK]. bizhub C652/C652DS/C552/ - Konica Minolta bizhub C452 | bizhub C452/C552/C552DS/C652/C652DS Copy Operations - Page 146
register or delete authentication information when performing the following operations. 0 Select [Utility/Counter] ö [Administrator Settings] ö [System Settings] ö [Restrict User Access] ö [Restrict Access to Job Settings] ö [Biometric/IC Card Info. Registration] ö [Allow]. 0 Select [Utility/Counter - Konica Minolta bizhub C452 | bizhub C452/C552/C552DS/C652/C652DS Copy Operations - Page 147
finger vein patterns have been authenticated in the authentication test, press [Register]. If authentication has failed, retry scanning the finger. For IC card authentication, place your IC card on the Authentication Unit, and press [OK]. 4 Press [Close]. bizhub C652/C652DS/C552/C552DS/C452 6-17 - Konica Minolta bizhub C452 | bizhub C452/C552/C552DS/C652/C652DS Copy Operations - Page 148
6.10 Cellular Phone/PDA Setting 6 6.10 Cellular Phone/PDA Setting Configure settings to print data in a cellular phone or PDA through this machine. For details, refer to the "User's Guide Box Operations" and "User's Guide Print Operations". bizhub C652/C652DS/C552/C552DS/C452 6-18 - Konica Minolta bizhub C452 | bizhub C452/C552/C552DS/C652/C652DS Copy Operations - Page 149
7 Administrator Settings - Konica Minolta bizhub C452 | bizhub C452/C552/C552DS/C652/C652DS Copy Operations - Page 150
the settings. Logging on to Administrator Settings requires the administrator password. Settings System Settings Administrator/Machine Settings One-Touch/User Box Registration User Authentication/Account Track Network Settings Copier Settings Printer Settings Fax Settings System Connection Security - Konica Minolta bizhub C452 | bizhub C452/C552/C552DS/C652/C652DS Copy Operations - Page 151
Configure settings for switching to the power save mode after printing documents from computers or receiving faxes. Normal Enters the power save mode when the time specified in Low Power Mode Settings has elapsed. Immediately Enters the power save mode in a short time. Factory default Low Power - Konica Minolta bizhub C452 | bizhub C452/C552/C552DS/C652/C652DS Copy Operations - Page 152
ö [Administrator Settings] ö [System Settings] ö [Output Settings]. Settings Print/Fax Output Settings Output Tray Settings Shift Output Each Job This setting is for the print and fax operations. For details, refer to the "User's Guide [Network Scan/Fax/Network Fax Operations]" and " User's Guide - Konica Minolta bizhub C452 | bizhub C452/C552/C552DS/C652/C652DS Copy Operations - Page 153
]. Settings Year Monthly Daily Hour Minute Time Zone Configure the current date and time. Configure the UTC (Coordinate Universal Time) related time zone. Factory default Time Zone +00:00 d Reference To cancel the current settings: Press the [C] key. bizhub C652/C652DS/C552/C552DS/C452 7-5 - Konica Minolta bizhub C452 | bizhub C452/C552/C552DS/C652/C652DS Copy Operations - Page 154
[Utility/Counter] key ö [Administrator Settings] ö [System Settings] ö [Daylight Saving Time]. Settings Configure whether to use daylight saving time and the time difference from UTC (Coordinate Universal Time). Factory default Daylight Saving Time No bizhub C652/C652DS/C552/C552DS/C452 7-6 - Konica Minolta bizhub C452 | bizhub C452/C552/C552DS/C652/C652DS Copy Operations - Page 155
if the user uses this machine outside the specified time. • To make the user to enter the password, you need to specify the pass- word. Factory default Weekly Timer ON/OFF Set- OFF tings Select Time for Power No Save Password for Non-Busi- No ness Hours bizhub C652/C652DS/C552/C552DS/C452 - Konica Minolta bizhub C452 | bizhub C452/C552/C552DS/C652/C652DS Copy Operations - Page 156
the network scan, fax, and network fax operations. For details, refer to the "User's Guide [Network Scan/Fax/Network Fax Operations]". Factory default Changing Job Priority Delete Other User Jobs Registering and Changing Addresses Changing Zoom Ratio Allow Restrict Allow Allow bizhub C652/C652DS - Konica Minolta bizhub C452 | bizhub C452/C552/C552DS/C652/C652DS Copy Operations - Page 157
7 Factory default Changing the "From" Address Change Registered Overlay service representative. Vertical Adjustment Adjust the feed direction zoom ratio of paper types. For details on displaying this item, contact your service representative. Media Adjustment p. 7-14 bizhub C652/C652DS/C552 - Konica Minolta bizhub C452 | bizhub C452/C552/C552DS/C652/C652DS Copy Operations - Page 158
. This button appears when the Post Inserter PI-505 is installed. Correct the toner amount to be used by color depending on the paper type. • To correct the toner amount to be used in the black print mode, press [Black Image Density]. Image Stabilization Only Press the [Start] key to stabilize - Konica Minolta bizhub C452 | bizhub C452/C552/C552DS/C652/C652DS Copy Operations - Page 159
the color gradation has been changed in a print image. This function performs adjustment to save as many images as possible in memory. Adjust the scan range of the scanner. For details on displaying this item, contact your service representative. Make adjustments for scanning images in the ADF - Konica Minolta bizhub C452 | bizhub C452/C552/C552DS/C652/C652DS Copy Operations - Page 160
Erase Adjustment 7 Configure special paper settings for User Paper 1 through 6. Settings to configure include Basic Weight and Media Adjustment. For details on displaying this item, contact your service representative. Non-Image Area Erase Operation Settings Configure Non-Image Area operation - Konica Minolta bizhub C452 | bizhub C452/C552/C552DS/C652/C652DS Copy Operations - Page 161
default Color Registration Adjust Prior Detection Setting Prior Detection Setting (front) Prior Detection Setting (back) Feed Cleaning Settings Non-Image Administrator Duplex 2nd Side)]. 2 Select a paper tray to be adjusted. 3 Press the [Start] kay. A test pattern is printed. bizhub C652/C652DS/C552 - Konica Minolta bizhub C452 | bizhub C452/C552/C552DS/C652/C652DS Copy Operations - Page 162
the center staple position while checking the created sample. 0 It can be adjusted only when the saddle sticher is installed. 0 When stapling in parallel with the left edge of paper, contact your service representative. 1 Press the [Utility/Counter] key ö [Administrator Settings] ö [System Settings - Konica Minolta bizhub C452 | bizhub C452/C552/C552DS/C652/C652DS Copy Operations - Page 163
position while checking the created sample. 0 It can be adjusted only when the saddle sticher is installed. 0 When adjusting the half-fold position in parallel with the left edge of paper, contact your service representative. 1 Press the [Utility/Counter] key ö [Administrator Settings] ö [System - Konica Minolta bizhub C452 | bizhub C452/C552/C552DS/C652/C652DS Copy Operations - Page 164
checking the created sample. 0 This adjustment is available if the Finisher FS-526 and Punch Kit PK-516 are installed. 1 Press the [Utility/Counter] key ö [Administrator while checking the sample. 3 Press [OK]. 4 Create a sample, and check the print result. bizhub C652/C652DS/C552/C552DS/C452 7-16 - Konica Minolta bizhub C452 | bizhub C452/C552/C552DS/C652/C652DS Copy Operations - Page 165
checking the created sample. 0 This adjustment is available if the Z Folding Unit is installed. 1 Select [Utility/Counter] ö [Administrator punched hole position while checking the sample. 4 Press [OK]. 5 Create a sample, and check the print result. bizhub C652/C652DS/C552/C552DS/C452 7-17 - Konica Minolta bizhub C452 | bizhub C452/C552/C552DS/C652/C652DS Copy Operations - Page 166
] ö [Administrator Settings] ö [System Settings] ö [Expert Adjustment] ö [Finisher Adjustment] ö [1st Z-Fold Position Adjustment]. 2 While checking the sample, press [+] or [-] to adjust the first folding position. 3 Press [OK]. 4 Create a sample, and check the print result. bizhub C652/C652DS/C552 - Konica Minolta bizhub C452 | bizhub C452/C552/C552DS/C652/C652DS Copy Operations - Page 167
Select [Utility/Counter] ö [Administrator Settings] ö [System Settings] ö [Expert Adjustment] ö [Finisher Adjustment] ö [Punch Unit Size Detect Sensor]. 2 Press [Start]. % The punch unit edge sensor is automatically adjusted. % The adjusted result appears. bizhub C652/C652DS/C552/C552DS/C452 7-19 - Konica Minolta bizhub C452 | bizhub C452/C552/C552DS/C652/C652DS Copy Operations - Page 168
and Y positions of the test pattern. % Press [+] or [-] to adjust the color line to be corrected while checking the sample. The color registration is adjusted. 7 Press the [Start] key to print a test pattern, and then check the print result. 8 Press [OK]. bizhub C652/C652DS/C552/C552DS/C452 7-20 - Konica Minolta bizhub C452 | bizhub C452/C552/C552DS/C652/C652DS Copy Operations - Page 169
side. 9 Place 10 or more sheets of blank paper on top of the test pattern to prevent it from becoming transparent. 10 Close the ADF. 11 Press the [Start] key. The test pattern is scanned. The gradation level is automatically adjusted. 12 Repeat steps 5 through 11 two more times. bizhub C652/C652DS - Konica Minolta bizhub C452 | bizhub C452/C552/C552DS/C652/C652DS Copy Operations - Page 170
. Every time the counter is changed, the count is reset to 0. Counter Clear Resets the count to 0. Paper Size Select the paper size of the counter. Paper Type Select the paper type of the counter. Factory default Job Settings List • 1-Sided • Tray 1 bizhub C652/C652DS/C552/C552DS/C452 7-22 - Konica Minolta bizhub C452 | bizhub C452/C552/C552DS/C652/C652DS Copy Operations - Page 171
Account is changed Configure whether to reset the settings when you log off if the user authentication or account track settings have been configured. When original is set on ADF Configure whether to reset the settings when an original is loaded in the ADF. Next Job Configure whether to reset - Konica Minolta bizhub C452 | bizhub C452/C552/C552DS/C652/C652DS Copy Operations - Page 172
When Account is changed When original is set on ADF Next Job Copy 1 minute • Copy: 1 Minute • Scan/Fax: 1 Minute • User Box: 1 Minute Reset Do Not Reset • Staple Setting: OFF • Original Set/Bind Direction: OFF • Reset Data After Job: Reset All d Reference To configure user authentication/account - Konica Minolta bizhub C452 | bizhub C452/C552/C552DS/C652/C652DS Copy Operations - Page 173
header or footer. Check/Edit Change the selected header or footer. This setting is for the fax and network fax operations. For details, refer to the "User's Guide [Network Scan/Fax/Network Fax Operations]". Factory default FAX TX Settings Cancel bizhub C652/C652DS/C552/C552DS/C452 7-25 - Konica Minolta bizhub C452 | bizhub C452/C552/C552DS/C652/C652DS Copy Operations - Page 174
Settings] ö [Skip Job Operation Settings]. Settings Fax Other than Fax Configure whether to skip a job in the fax mode. Configure whether to skip a job in a mode other than the fax mode. Factory default Skip Job Operation Settings Fax: Yes Other than Fax: Yes bizhub C652/C652DS/C552/C552DS/C452 - Konica Minolta bizhub C452 | bizhub C452/C552/C552DS/C652/C652DS Copy Operations - Page 175
a paper type. Factory default Default Bypass Paper Type Setting Yes Paper Type: Plain Paper 7.1.16 Advanced Preview Setting Configure settings to fax or scan a document. For details, refer to the "User's Guide [Network Scan/Fax/Network Fax Operations]". bizhub C652/C652DS/C552/C552DS/C452 7-27 - Konica Minolta bizhub C452 | bizhub C452/C552/C552DS/C652/C652DS Copy Operations - Page 176
Bind: Symmetrical Top & Bottom Bind: All the Same Left & Right Bind: Symmetrical Top & Bottom Bind: Symmetrical Select a desired print position. Factory default Page Number Print Position Left & Right Bind: All the Same Top & Bottom Bind: All the Same bizhub C652/C652DS/C552/C552DS/C452 7-28 - Konica Minolta bizhub C452 | bizhub C452/C552/C552DS/C652/C652DS Copy Operations - Page 177
Machine Address may not be supported by your operating system. % Press the [Utility/Counter] key ö [Administrator Settings] ö [Administrator/Machine Setting]. Settings Administrator Registration Input Machine Address Register administrator information displayed on the Service/Admin. Information - Konica Minolta bizhub C452 | bizhub C452/C552/C552DS/C652/C652DS Copy Operations - Page 178
Registration 7 7.3 One-Touch/User Box Registration This setting is for the User Box, network scan, fax, and network fax operations. For details, refer to the "User's Guide [Network Scan/Fax/Network Fax Operations]" and "User's Guide [Box Operations]". bizhub C652/C652DS/C552/C552DS/C452 7-30 - Konica Minolta bizhub C452 | bizhub C452/C552/C552DS/C652/C652DS Copy Operations - Page 179
of outputting and scanning by user. - Limits on using color or black printing and on the number of copies that can be set by user. - Operates a Personal User Box for each user and group box. - Controls the access allowed level of the destination. - Prohibits jobs of other users from being deleted - Konica Minolta bizhub C452 | bizhub C452/C552/C552DS/C652/C652DS Copy Operations - Page 180
save jobs are deleted. % Press the [Utility/Counter] key ö [Administrator Settings] ö [User Authentication/Account Track] ö [General Settings]. Settings User Authentication Public User Access Account Track Account Track Input Method Configure whether to use user authentication. OFF Disables user - Konica Minolta bizhub C452 | bizhub C452/C552/C552DS/C652/C652DS Copy Operations - Page 181
Job 500 60 min. d Reference To configure external server settings: Press the [Utility/Counter] key ö [Administrator Settings] ö [User Authentication/Account Track] ö [External Server Settings]. For details on enhanced security settings, contact your service representative. bizhub C652/C652DS/C552 - Konica Minolta bizhub C452 | bizhub C452/C552/C552DS/C652/C652DS Copy Operations - Page 182
registration number "000". User Name Enter a user name. • Once a user name is registered, it cannot be changed. • A user name that has already been registered cannot be used again. Password Enter the password. E-Mail Address Enter an E-mail address. bizhub C652/C652DS/C552/C552DS/C452 7-34 - Konica Minolta bizhub C452 | bizhub C452/C552/C552DS/C652/C652DS Copy Operations - Page 183
print is restricted, print in black and white cannot be output. • Send Configure whether to allow the user to send fax and E-mail in color. d Reference Single color and 2 color output settings can be changed by the administrator. For details, refer to page 7-41. Configure the max. allowance for the - Konica Minolta bizhub C452 | bizhub C452/C552/C552DS/C652/C652DS Copy Operations - Page 184
All Jobs Begin Printing All Items: Allow Individual Allowance: Color No Limit/Black No Limit Total Allowance: No Limit Copy: Allow Scan: Allow Fax: Allow Print: Allow User Box: Allow Print Scan/Fax TX: Allow External Memory Document Scan: Restrict Save to External Memory: Restrict Manual Destination - Konica Minolta bizhub C452 | bizhub C452/C552/C552DS/C652/C652DS Copy Operations - Page 185
restricted, print in black and white cannot be output. • Send Specify whether to allow the account members to send fax or E-mail in color. Max. Allowance Set d Reference Single color and 2 color output settings can be changed by the administrator. For details, refer to page 7-41. Configure the max - Konica Minolta bizhub C452 | bizhub C452/C552/C552DS/C652/C652DS Copy Operations - Page 186
[Administrator Settings] ö [User Authentication/Account Track] ö [Print Counter List]. Settings Paper Tray Simplex/Duplex Print Item Select the desired paper tray. Select Print (1-Sided) or Print (2-Sided). Configure whether to print all data or printing data only. bizhub C652/C652DS/C552/C552DS - Konica Minolta bizhub C452 | bizhub C452/C552/C552DS/C652/C652DS Copy Operations - Page 187
and then press the [Set as Default] button. d Reference For details on configuring external server settings, refer to the "User's Guide [Network Administrator]". 7.4.7 Limiting Access to Destinations This setting is for the network scan, fax, and network fax operations. For details, refer to the - Konica Minolta bizhub C452 | bizhub C452/C552/C552DS/C652/C652DS Copy Operations - Page 188
Authentication Device Settings Configure the authentication operations when the optional authentication unit is installed. 0 This setting is available when the optional authentication unit is installed. % Press the [Utility/Counter] key ö [Administrator Settings] ö [User Authentication/Account Track - Konica Minolta bizhub C452 | bizhub C452/C552/C552DS/C652/C652DS Copy Operations - Page 189
default Logout Confirmation Screen Display Setting Single Color > 2 Color Output Management ON Color 7.4.10 Scan to Home Settings This setting is for the network scan operations. For details, refer to the "User's Guide [Network Scan/Fax/Network Fax Operations]""User's Guide [Network Administrator - Konica Minolta bizhub C452 | bizhub C452/C552/C552DS/C652/C652DS Copy Operations - Page 190
7.5 Network Settings 7 7.5 Network Settings This setting is for the network operations. For details, refer to the "User's Guide [Network Administrator]". bizhub C652/C652DS/C552/C552DS/C452 7-42 - Konica Minolta bizhub C452 | bizhub C452/C552/C552DS/C652/C652DS Copy Operations - Page 191
/Counter] key ö [Administrator Settings] ö [Copier Settings]. Settings Auto Zoom (Platen) Auto Zoom (ADF) Specify Default Tray when APS Off Select Tray for Insert Sheet Print Jobs During Copy Operation Tri-Fold Print Side Automatic Image Rotation Copy Card Settings Configure whether Auto Select is - Konica Minolta bizhub C452 | bizhub C452/C552/C552DS/C652/C652DS Copy Operations - Page 192
Specify Default Tray when APS Off Select Tray for Insert Sheet Print Jobs During Copy Operation Tri-Fold Print Side Automatic Image Rotation Card Shot Settings Tray Before APS ON Tray 2 Accept Inside When Auto Paper/Auto Zoom is Set Layout: Top/Bottom Zoom: Full Size bizhub C652/C652DS/C552/C552DS - Konica Minolta bizhub C452 | bizhub C452/C552/C552DS/C652/C652DS Copy Operations - Page 193
7.7 Printer Settings 7 7.7 Printer Settings This setting is for the print operations. For details, refer to the "User's Guide [Print Operations]". bizhub C652/C652DS/C552/C552DS/C452 7-45 - Konica Minolta bizhub C452 | bizhub C452/C552/C552DS/C652/C652DS Copy Operations - Page 194
7.8 Fax Settings 7 7.8 Fax Settings This setting is for the fax and network fax operations. For details, refer to the "User's Guide [Network Scan/Fax/Network Fax Operations]". bizhub C652/C652DS/C552/C552DS/C452 7-46 - Konica Minolta bizhub C452 | bizhub C452/C552/C552DS/C652/C652DS Copy Operations - Page 195
Confirmation]: Select whether to check the target certificate for validation. [CN]: Select whether to check that the CN of the certificate matches the server address will be restricted. For details, refer to the "User's Guide [Network Administrator]". bizhub C652/C652DS/C552/C552DS/C452 7-47 - Konica Minolta bizhub C452 | bizhub C452/C552/C552DS/C652/C652DS Copy Operations - Page 196
], [Printer Location], [Printer Information], and [Printer URI]. The [Printer Information] setting is linked to [Printer Information] in [HTTP Server Settings]. Specify whether to allow the user to print data in a cellular phone or PDA or save such data in a User Box. Factory default Access Setting - Konica Minolta bizhub C452 | bizhub C452/C552/C552DS/C652/C652DS Copy Operations - Page 197
Utility/Counter] key ö [Administrator Settings] ö [Security Settings] ö [Security Details] ö [Password Rules]. 7.10.2 User Box Administrator Setting Configure settings for the User Box operations. For details, refer to the "User's Guide [Box Operations]". bizhub C652/C652DS/C552/C552DS/C452 7-49 - Konica Minolta bizhub C452 | bizhub C452/C552/C552DS/C652/C652DS Copy Operations - Page 198
Level 2 Prohibit Allows the user to change the following settings. • Power Save Settings • Auto Zoom (Platen) • Auto Zoom (ADF) • Specify Default Tray when APS Off • Select Tray for Insert Sheet • Automatic Image Rotation • Card Shot Settings Allows the user to change the following settings. • All - Konica Minolta bizhub C452 | bizhub C452/C552/C552DS/C652/C652DS Copy Operations - Page 199
Configure whether to enable the password rules. When enabled, the restrictions are applied to the following passwords. The set passwords must be changed to ones that meet the conditions. • Administrator password • User password • Account password • User Box password • Security document password - Konica Minolta bizhub C452 | bizhub C452/C552/C552DS/C652/C652DS Copy Operations - Page 200
the network scan, fax, and network fax operations. For details, refer to the "User's Guide [Network Scan/Fax/Network Fax Operations]". This setting is for the print operations. For details, refer to the "User's Guide [Print Operations]". Configure job log settings to be obtained when power is turned - Konica Minolta bizhub C452 | bizhub C452/C552/C552DS/C652/C652DS Copy Operations - Page 201
7.10 Security Settings 7 Factory default Copy Guard No Password Copy No bizhub C652/C652DS/C552/C552DS/C452 7-53 - Konica Minolta bizhub C452 | bizhub C452/C552/C552DS/C652/C652DS Copy Operations - Page 202
details on the password rules, refer to page 7-51. - For details on the network settings to be forcibly changed, refer to the "User's Guide [Network Scan/Fax/Network Fax Operations]". Administrator Settings System Settings / Restrict User Access / Restrict Access to Job Settings / Registering and - Konica Minolta bizhub C452 | bizhub C452/C552/C552DS/C652/C652DS Copy Operations - Page 203
security mode, the following settings must first be configured. Different screens appear depending on the current settings. 7.10.6 HDD Settings This setting is for the hard disk operations. For details, refer to the "User's Guide [Box Operations]". bizhub C652/C652DS/C552/C552DS/C452 7-55 - Konica Minolta bizhub C452 | bizhub C452/C552/C552DS/C652/C652DS Copy Operations - Page 204
7 7.10.7 Function Management Settings Configure the settings for the network functions that are difficult to count. % Press the [Utility/Counter] key ö [Administrator Settings] ö [Security Settings] ö [Function Management Settings] . Settings Network Function Usage ON Settings OFF Factory default - Konica Minolta bizhub C452 | bizhub C452/C552/C552DS/C652/C652DS Copy Operations - Page 205
d Reference To configure copy protect and stamp repeat settings: Press [Application] ö [Stamp/Composition]. 7.10.9 Driver Password Encryption Setting This setting is for the print operations. For details, refer to the "User's Guide [Print Operations]". bizhub C652/C652DS/C552/C552DS/C452 7-57 - Konica Minolta bizhub C452 | bizhub C452/C552/C552DS/C652/C652DS Copy Operations - Page 206
, refer to the "Quick Guide [Copy/Print/Fax/Scan/Box Operations]". 0 An optional component i-Option LK-101, LK-102, LK-103 or LK-105 must be purchased. For details, contact your service representative. % Press the [Utility/Counter] key ö [Administrator Settings] ö [License Settings] . Settings - Konica Minolta bizhub C452 | bizhub C452/C552/C552DS/C652/C652DS Copy Operations - Page 207
Authentication Management Settings 7 7.12 OpenAPI Authentication Management Settings Configure settings to prevent our deprecated OpenAPI connection application from being registered in this machine. For details, contact your service representative. bizhub C652/C652DS/C552/C552DS/C452 7-59 - Konica Minolta bizhub C452 | bizhub C452/C552/C552DS/C652/C652DS Copy Operations - Page 208
8 Maintenance - Konica Minolta bizhub C452 | bizhub C452/C552/C552DS/C652/C652DS Copy Operations - Page 209
Checking the paper Replenishment message If a tray has run out of paper during printing, load paper or change the paper tray. Load paper in the paper tray that is highlighted in color etc., attached Paper storage Store paper in a cool, dark location with little humidity. If the paper becomes damp, a - Konica Minolta bizhub C452 | bizhub C452/C552/C552DS/C652/C652DS Copy Operations - Page 210
For the types of paper to be used, refer to page 12-2. Loading paper into trays 1 and 2 The same was unwrapped) faces up. % Do not load so many sheets of paper that the top of the stack is higher configure paper settings: Press [Basic] ö [Paper]. bizhub C652/C652DS/C552/C552DS/C452 8-3 - Konica Minolta bizhub C452 | bizhub C452/C552/C552DS/C652/C652DS Copy Operations - Page 211
) faces up. % Do not load so many sheets of paper that the top of the stack is change the paper size for tray 3, contact your service representative. 3 Lower the paper take-up roller, and then close tray 3. d Reference To configure paper settings: Press [Basic] ö [Paper]. bizhub C652/C652DS/C552 - Konica Minolta bizhub C452 | bizhub C452/C552/C552DS/C652/C652DS Copy Operations - Page 212
possible into the feed slot. % The image will be printed on the surface of the it before loading it. % Push the paper guides firmly up against the edges of the paper. postcards other than 4 e 6-size (A6-size), check the size of postcards to be used, and then bizhub C652/C652DS/C552/C552DS/C452 8-5 - Konica Minolta bizhub C452 | bizhub C452/C552/C552DS/C652/C652DS Copy Operations - Page 213
can be printed only in black. Before selecting OHP transparencies, select [Black] in the Color tab. % If you select [4 e 6 w (A6 Card w)], the paper type is automatically set to [Thick 3]. d Reference To configure paper settings: Press [Basic] ö [Paper]. bizhub C652/C652DS/C552/C552DS/C452 8-6 - Konica Minolta bizhub C452 | bizhub C452/C552/C552DS/C652/C652DS Copy Operations - Page 214
load paper into Large capacity unit LU-301. 0 To change the paper size, contact your service representative. 1 Open the ) faces down. % Do not load so many sheets of paper that the top of the stack is configure paper settings: Press [Basic] ö [Paper]. bizhub C652/C652DS/C552/C552DS/C452 8-7 - Konica Minolta bizhub C452 | bizhub C452/C552/C552DS/C652/C652DS Copy Operations - Page 215
/Box Operations]. For details on using the guidance, refer to the [Quick Guide Copy/Print/Fax/Scan/Box Operations]. When the message appears, make a preparation and replace the Toner Cartridge or Imaging Unit according to the guidance contained in your maintenance agreement. When it is almost time - Konica Minolta bizhub C452 | bizhub C452/C552/C552DS/C652/C652DS Copy Operations - Page 216
agreement. Toner Cartridge Imaging Unit Replacement by user Replacement by service representative If a Toner Cartridge other than for black or the Imaging Unit is empty, printing can continue using black. Press [Continue], and then select the job to be printed. bizhub C652/C652DS/C552/C552DS - Konica Minolta bizhub C452 | bizhub C452/C552/C552DS/C652/C652DS Copy Operations - Page 217
counting started. In the Coverage Rate screen, the consumed amount of toner can be viewed. 1 Press the [Utility/Counter] key. 2 Press [Meter Count] ö [Check Details]. % To print the counter list, press [Print List], select paper, and then press the [Start] key. bizhub C652/C652DS/C552/C552DS/C452 - Konica Minolta bizhub C452 | bizhub C452/C552/C552DS/C652/C652DS Copy Operations - Page 218
8.2 Consumables 8 % To display the Coverage Rate screen, press [Coverage Rate]. Checking the total number of pages printed Pressing Total Counter displays the total number of pages printed to date. Total Counter bizhub C652/C652DS/C552/C552DS/C452 8-11 - Konica Minolta bizhub C452 | bizhub C452/C552/C552DS/C652/C652DS Copy Operations - Page 219
Cleaning procedure Slit glass (bizhub C652/C552/C452) NOTICE Do not touch the slit glass. 1 Open the ADF, and then remove the slit glass cleaner. 2 Wipe stains off the slit glass using the slit glass cleaner. % Wipe off stains from the back side to the front side along the guide. Slit glass (front - Konica Minolta bizhub C452 | bizhub C452/C552/C552DS/C652/C652DS Copy Operations - Page 220
glass (back). 1 Open the ADF, and then remove the slit glass cleaner. 2 Open the opening and closing guide. 3 Wipe stains off the slit glass using the slit glass (back) cleaner. % Wipe off stains from the back side to the front side along the guide. Original glass, control panel, paper take-up - Konica Minolta bizhub C452 | bizhub C452/C552/C552DS/C652/C652DS Copy Operations - Page 221
8.3 Cleaning procedure 8 Housing, document pad NOTICE Never use solvents, such as benzene or thinner, to clean the document pad. % Wipe the surface using a soft cloth moistened with a mild household detergent. bizhub C652/C652DS/C552/C552DS/C452 8-14 - Konica Minolta bizhub C452 | bizhub C452/C552/C552DS/C652/C652DS Copy Operations - Page 222
9 Troubleshooting - Konica Minolta bizhub C452 | bizhub C452/C552/C552DS/C652/C652DS Copy Operations - Page 223
, the problem has not been resolved, so contact your service representative immediately. Problems that cannot be corrected by the user 1 Write down the malfunction code in the Service Call screen. 2 Turn off the [sub power switch]. 3 Turn off the [main power switch]. bizhub C652/C652DS/C552/C552DS - Konica Minolta bizhub C452 | bizhub C452/C552/C552DS/C652/C652DS Copy Operations - Page 224
9.1 When the message "Trouble" appears (call a service representative) 9 4 Unplug the machine. 5 Contact your service representative and inform them of the written down malfunction code. bizhub C652/C652DS/C552/C552DS/C452 9-3 - Konica Minolta bizhub C452 | bizhub C452/C552/C552DS/C652/C652DS Copy Operations - Page 225
table Simple troubleshooting The following explains simple troubleshooting procedures. If the problem is not corrected after the described operation is performed, contact your service representative. Description of problem The machine does not start up when the [main power switch] is - Konica Minolta bizhub C452 | bizhub C452/C552/C552DS/C652/C652DS Copy Operations - Page 226
Troubleshooting table 9 Description of problem The image is printed at an angle The printed page is curled The edge of the printed image is dirty Even though a paper jam was cleared, copies cannot be produced Printing with the "2-Sided > 1-Sided" or "2-Sided > 2-Sided" settings are not available - Konica Minolta bizhub C452 | bizhub C452/C552/C552DS/C652/C652DS Copy Operations - Page 227
Troubleshooting table 9 Description of problem The staple is incorrectly positioned by 90° The pages that were fed out were not uniformly loaded and the punched holes or staples are incorrectly positioned Though the authentication unit is connected with this machine sing a USB cable, the status - Konica Minolta bizhub C452 | bizhub C452/C552/C552DS/C652/C652DS Copy Operations - Page 228
Use the same USB port as the one used when installing the driver. To finish scanning within the limited time, confirm how to place the IC card. (p. 11-2) Check the password, and then enter the correct one if not. Turn off the main power of this machine, disconnect the USB cable from this machine or - Konica Minolta bizhub C452 | bizhub C452/C552/C552DS/C652/C652DS Copy Operations - Page 229
of the output tray of the displayed Finisher or Job Separator reached the maximum. User authentication settings have been configured. Copies cannot be made unless a user name and correct password are entered. Account track settings have been configured. Copies cannot be made unless an account name - Konica Minolta bizhub C452 | bizhub C452/C552/C552DS/C652/C652DS Copy Operations - Page 230
OFF and ON. If the trouble code appears again, contact your Service Rep. Malfunction detected. Inform the service representative of the error code. Clean the slit scan glass on the far left with a glass cleaner. Continuing using the machine in this condition may cause lines to appear in the output - Konica Minolta bizhub C452 | bizhub C452/C552/C552DS/C652/C652DS Copy Operations - Page 231
9.2 Troubleshooting table 9 Message Now Downloading Program Data from the Firmware server. Authentication information entered is invalid, due to failed access attempts. Contact the administrator. Due to failed access attempts, the current administrator password is invalid. The job log has reached - Konica Minolta bizhub C452 | bizhub C452/C552/C552DS/C652/C652DS Copy Operations - Page 232
9.2 Troubleshooting table Icon 9 Description Indicates that "Enhanced Security Mode" is set to "ON that the job is in the waiting-for-redial status because, for example, the recipient's line is busy when sending with the G3 Fax or IP Address Fax function. bizhub C652/C652DS/C552/C552DS/C452 - Konica Minolta bizhub C452 | bizhub C452/C552/C552DS/C652/C652DS Copy Operations - Page 233
though the printed images. If this occurs, follow the procedure described below to clean the electrostatic charger wire. 0 When replacing the waste toner box, follow the "Quick Guide" to clean the the charger-cleaning tool, and then close the front door. bizhub C652/C652DS/C552/C552DS/C452 9-12 - Konica Minolta bizhub C452 | bizhub C452/C552/C552DS/C652/C652DS Copy Operations - Page 234
. 1 Pull out tray 1. 2 Remove the print head glass cleaning tool from tray 1. 3 Open the machine's lower front door. 4 Release the securing levers for the waste toner box, and then remove the waste toner box. bizhub C652/C652DS/C552/C552DS/C452 9-13 - Konica Minolta bizhub C452 | bizhub C452/C552/C552DS/C652/C652DS Copy Operations - Page 235
tool into the print head cleaning opening, pull it out, and then repeat this back-and-forth movement two or three times. 6 Install the waste toner box. 7 Place back the print head glass cleaning tool to tray 1. 8 Close tray 1. bizhub C652/C652DS/C552/C552DS/C452 9-14 - Konica Minolta bizhub C452 | bizhub C452/C552/C552DS/C652/C652DS Copy Operations - Page 236
10 Authentication unit (biometric type) - Konica Minolta bizhub C452 | bizhub C452/C552/C552DS/C652/C652DS Copy Operations - Page 237
to page 10-17. NOTICE If you change the authentication unit from AU-101 to AU-102, the users you registered with AU-101 cannot use AU-102. Connect AU-102 to this machine, and then register the users again. Do not place anything other than your finger on the scanning section during scanning operation - Konica Minolta bizhub C452 | bizhub C452/C552/C552DS/C652/C652DS Copy Operations - Page 238
job. This section explains how to configure the required settings in this machine, register users, and log in with authentication. 10.1.1 Configuring this machine NOTICE User authentication settings must be configured with MFP authentication on this machine. This device does not support external - Konica Minolta bizhub C452 | bizhub C452/C552/C552DS/C652/C652DS Copy Operations - Page 239
in to this machine, refer to page 10-17. 8 Press [OK] twice. 9 Press [2 Logoff Settings]. 10 Specify whether to log out the user when scanning the original has finished after the user logged in with the authentication unit. 11 Press [OK]. 12 Press [Close] twice. bizhub C652/C652DS/C552/C552DS/C452 - Konica Minolta bizhub C452 | bizhub C452/C552/C552DS/C652/C652DS Copy Operations - Page 240
unit to your computer, and use Data Administrator to register the target user NOTICE The registered user data is saved in the HDD of this machine. Changing the user authentication type of this machine or formatting the HDD will erase the registered user data. Registering a user using the control - Konica Minolta bizhub C452 | bizhub C452/C552/C552DS/C652/C652DS Copy Operations - Page 241
and password. 9 Configure function permission settings as required. 10 Press [OK]. 11 Press [Close]. Registering a user using Data Administrator To use Data Administrator, configure this machine, and set up Data Administrator. For setup, install the BioDriver (USB-Driver) of the authentication unit - Konica Minolta bizhub C452 | bizhub C452/C552/C552DS/C652/C652DS Copy Operations - Page 242
list:", confirm the plugin version of Data Administrator. % This software is available if the plugin version is "4.x". Setup 1 Turn the main power of this machine off, and disconnect the authentication unit from this machine. 2 Install BioDriver (USB-Driver). Connect the authentication unit to the - Konica Minolta bizhub C452 | bizhub C452/C552/C552DS/C652/C652DS Copy Operations - Page 243
that the driver's search location is the application CD-ROM, and then click the [Next]. % When the driver's search location is not the application CD-ROM, click the [Browse]. Select the BioDriver (USB-Driver) folder on the CD-ROM, and then click the [OK]. bizhub C652/C652DS/C552/C552DS/C452 10-8 - Konica Minolta bizhub C452 | bizhub C452/C552/C552DS/C652/C652DS Copy Operations - Page 244
Administrator Bio Plugin. Open the DA_Bio_Plugin folder on the application CD-ROM, and then click setup.exe. 9 Select a language, and then click the [OK]. The installation program starts. 10 Follow the on-screen instructions to proceed with the installation. bizhub C652/C652DS/C552/C552DS/C452 10 - Konica Minolta bizhub C452 | bizhub C452/C552/C552DS/C652/C652DS Copy Operations - Page 245
10.1 Using an authentication unit (biometric type) 10 11 Click the [Next]. 12 Select "I accept the terms in the license agreement", and then click the [Next]. 13 Click the [Install]. bizhub C652/C652DS/C552/C552DS/C452 10-10 - Konica Minolta bizhub C452 | bizhub C452/C552/C552DS/C652/C652DS Copy Operations - Page 246
unit. Doing so reduces the USB power supply, resulting in an operation failure. To use the USB hub, be sure to connect the self-power USB hub that supplies 500 mA or more. Restart the procedure 5 or more seconds after connecting the authentication unit. bizhub C652/C652DS/C552/C552DS/C452 10 - Konica Minolta bizhub C452 | bizhub C452/C552/C552DS/C652/C652DS Copy Operations - Page 247
machine is imported. The Device Information window appears. % For details on how to import device information, refer to the Data Administrator User's Guide. 5 In Select Function, select "Authentication Settings" - "User Setting", and then click the [Add]. bizhub C652/C652DS/C552/C552DS/C452 10-12 - Konica Minolta bizhub C452 | bizhub C452/C552/C552DS/C652/C652DS Copy Operations - Page 248
template, and then click the [OK]. The User Registration window appears. 7 Enter the user name and password, select the "AU-101" or "AU-102" tab, and then click the [Register Auth. Info]. % Enter the E-mail address and other information as required. bizhub C652/C652DS/C552/C552DS/C452 10-13 - Konica Minolta bizhub C452 | bizhub C452/C552/C552DS/C652/C652DS Copy Operations - Page 249
your finger on the authentication unit again, and click [Authentication Test]. % If the authentication has failed, click [Reset] to repeat the scanning process. For authentication unit AU-101 For authentication unit AU-102 9 Click the [Registration]. bizhub C652/C652DS/C552/C552DS/C452 10-14 - Konica Minolta bizhub C452 | bizhub C452/C552/C552DS/C652/C652DS Copy Operations - Page 250
10.1 Using an authentication unit (biometric type) 10 10 Click the [OK]. % Repeat steps 5 to 10 to register all users. 11 Click the [Export to the device]. % Select the user name and click the [Edit] to change the registered data. bizhub C652/C652DS/C552/C552DS/C452 10-15 - Konica Minolta bizhub C452 | bizhub C452/C552/C552DS/C652/C652DS Copy Operations - Page 251
Using an authentication unit (biometric type) 10 12 Click the [Write]. % Data Administrator provides the batch copy function that batch-configures the registered user data in multiple machines with the authentication unit enabled. The registered user data is configured in this machine. 13 Click - Konica Minolta bizhub C452 | bizhub C452/C552/C552DS/C652/C652DS Copy Operations - Page 252
user name and the password, without using the authentication unit. When 1-to-many authentication has been specified % Place your finger on the authentication unit. Authentication unit (biometric type) AU-101 Authentication unit (biometric type) AU-102 The basic settings screen appears. bizhub - Konica Minolta bizhub C452 | bizhub C452/C552/C552DS/C652/C652DS Copy Operations - Page 253
authentication has been specified 1 Select [User Name], and enter the user name. 2 Place your finger on the authentication unit. Authentication unit (biometric type) AU-101 Authentication unit (biometric type) AU-102 The basic settings screen appears. bizhub C652/C652DS/C552/C552DS/C452 10-18 - Konica Minolta bizhub C452 | bizhub C452/C552/C552DS/C652/C652DS Copy Operations - Page 254
11 Authentication unit (IC card type) - Konica Minolta bizhub C452 | bizhub C452/C552/C552DS/C652/C652DS Copy Operations - Page 255
machine or execute a print job. This section explains how to configure the required settings in this machine, register users, and log in with authentication. For details on how to place the IC card in the authentication unit, refer to the "Quick Guide [Copy/Print/Fax/Scan/Box Operations]". NOTICE - Konica Minolta bizhub C452 | bizhub C452/C552/C552DS/C652/C652DS Copy Operations - Page 256
. Card Authentication: Allows the user to log in by simply placing the IC card. Card Authentication + Password: Allows the user to log in by placing the IC card and entering the password. For details on how to log in to this machine, refer to page 11-15. bizhub C652/C652DS/C552/C552DS/C452 11-3 - Konica Minolta bizhub C452 | bizhub C452/C552/C552DS/C652/C652DS Copy Operations - Page 257
unit to your computer, and use Data Administrator to register the target user NOTICE The registered user data is saved in the HDD of this machine. Changing the user authentication type of this machine or formatting the HDD will erase the registered user data. Registering a user using the control - Konica Minolta bizhub C452 | bizhub C452/C552/C552DS/C652/C652DS Copy Operations - Page 258
6 Place the IC card on the authentication unit, and press [OK]. 7 When message [Registration complete] appears, press [Close] twice. 8 Enter the user name and password. 9 Configure function permission settings as required. 10 Press [OK]. 11 Press [Close]. bizhub C652/C652DS/C552/C552DS/C452 11-5 - Konica Minolta bizhub C452 | bizhub C452/C552/C552DS/C652/C652DS Copy Operations - Page 259
(IC card type) 11 Registering a user using Data Administrator To use Data Administrator, configure this machine, and set up Data Administrator. For setup, install the IC Card Driver (USB-Driver) of the authentication unit, and then install Data Administrator IC Card Plugin. NOTICE Before setup - Konica Minolta bizhub C452 | bizhub C452/C552/C552DS/C652/C652DS Copy Operations - Page 260
" dialog box appears. 3 Select "Locate and install driver software (recommended)". 4 Insert the application CD-ROM provided with the authentication unit into the CD-ROM drive of the computer. 5 Click the "Browse my computer for driver software (advanced)". bizhub C652/C652DS/C552/C552DS/C452 11-7 - Konica Minolta bizhub C452 | bizhub C452/C552/C552DS/C652/C652DS Copy Operations - Page 261
6 Check that the driver's search location is the application CD-ROM, and then click the [Next]. % When the driver's search location is not the application CD-ROM, click the [Browse]. Select the IC Card Driver (USB-Driver) folder in the CD-ROM, and click the [OK]. % Installation starts. bizhub C652 - Konica Minolta bizhub C452 | bizhub C452/C552/C552DS/C652/C652DS Copy Operations - Page 262
IC Card Driver (USB-Driver) is completed. 8 Install Data Administrator IC Card Plugin. Open the IC_Card_Plugin folder on the application CD-ROM, and then click setup.exe. 9 Select a language, and then click the [OK]. The installation program starts. 10 Follow the on-screen instructions to proceed - Konica Minolta bizhub C452 | bizhub C452/C552/C552DS/C652/C652DS Copy Operations - Page 263
unit (IC card type) 11 12 Select "I accept the terms in the license agreement", and then click the [Next]. 13 Click the [Install]. 14 Click the [Finish]. Installation of the Data Administrator IC Card Plugin is completed, which completes the setup. bizhub C652/C652DS/C552/C552DS/C452 11-10 - Konica Minolta bizhub C452 | bizhub C452/C552/C552DS/C652/C652DS Copy Operations - Page 264
after connecting the authentication unit. 4 Data Administrator starts, and device information of this machine is imported. The Device Information window appears. % For details on how to import device information, refer to the Data Administrator User 's Guide. bizhub C652/C652DS/C552/C552DS/C452 11 - Konica Minolta bizhub C452 | bizhub C452/C552/C552DS/C652/C652DS Copy Operations - Page 265
11.1 Using authentication unit (IC card type) 11 5 In Select Function, select "Authentication Settings" - "User Setting", and then click the [Add]. 6 Select the desired template, and then click the [OK]. The User Registration window appears. bizhub C652/C652DS/C552/C552DS/C452 11-12 - Konica Minolta bizhub C452 | bizhub C452/C552/C552DS/C652/C652DS Copy Operations - Page 266
the E-mail address and other information as required. 8 Place the IC card on the authentication unit, and click the [Start reading]. % If necessary, click [Card ID Input] to register the card ID. 9 Click the [OK]. % Repeat steps 5 to 12 to register all users. bizhub C652/C652DS/C552/C552DS/C452 - Konica Minolta bizhub C452 | bizhub C452/C552/C552DS/C652/C652DS Copy Operations - Page 267
11.1 Using authentication unit (IC card type) 11 10 Click [Export to the device]. % Select the user name and click the [Edit] to change the registered data. 11 Click the [Write]. % Data Administrator provides the batch copy function that batch-configures the registered user data in multiple - Konica Minolta bizhub C452 | bizhub C452/C552/C552DS/C652/C652DS Copy Operations - Page 268
are used for authentication. - Press [ID & PW] to log in by entering the user name and the password, without using the authentication unit. When IC card authentication is enabled % Place the IC card on the working table. The basic settings screen appears. bizhub C652/C652DS/C552/C552DS/C452 11-15 - Konica Minolta bizhub C452 | bizhub C452/C552/C552DS/C652/C652DS Copy Operations - Page 269
unit (IC card type) 11 When IC card authentication + password authentication is enabled 1 Place the IC card on the working table. 2 Press [Password], and then enter the password. 3 Press either [Login] or the [Access] key. The basic settings screen appears. bizhub C652/C652DS/C552 - Konica Minolta bizhub C452 | bizhub C452/C552/C552DS/C652/C652DS Copy Operations - Page 270
12 Specifications - Konica Minolta bizhub C452 | bizhub C452/C552/C552DS/C652/C652DS Copy Operations - Page 271
sheets Large capacity unit LU-301: 1,300 sheets Large capacity unit LU-204: 1,000 sheets Bypass tray: 50 sheets Bypass tray: 20 sheets Bypass tray: 50 sheets Tray 3: 200 sheets*, Tray 4: 200 sheets* * Ask the service representative to change the setting. Bypass tray: 10 sheets Bypass tray: 50 sheets - Konica Minolta bizhub C452 | bizhub C452/C552/C552DS/C652/C652DS Copy Operations - Page 272
may occur or poor image quality may result. When you select Plain Paper, Thick 1, Thick 1+, Thick 2, Thick 3, or Thick 4 for the bypass tray, you can select Duplex 2nd Side. Select Duplex 2nd Side when you load paper where something is printed on one side. bizhub C652/C652DS/C552/C552DS/C452 12-3 - Konica Minolta bizhub C452 | bizhub C452/C552/C552DS/C652/C652DS Copy Operations - Page 273
) OPC White rare-gas fluorescent Laser electrostatic copying Dry 2-component HMT developing system Belt fusing Scanning 600 dpi e 600 dpi Output 1,800 dpi e 600 dpi Type Sheets, books (two-page spread), three-dimensional objects Size Max. 11 e17 (A3) Weight 4-7/16 lb (2 kg) (three - Konica Minolta bizhub C452 | bizhub C452/C552/C552DS/C652/C652DS Copy Operations - Page 274
1/8 (3.0 mm) Right edge 1/8 (3.0 mm) Left edge 1/8 (3.0 mm) C652/C652DS Full color: 5.5 sec. or less Black: 3.8 sec. or less C552/C552DS Full color: 6.0 sec. or less Black: 4.3 sec. or less C452 Full color: 6.0 sec. or less Black: 4.8 sec. or less bizhub C652/C652DS/C552/C552DS/C452 12-5 - Konica Minolta bizhub C452 | bizhub C452/C552/C552DS/C652/C652DS Copy Operations - Page 275
Max. power consumption Size Machine occupation dimensions Memory size (hard disk capacity) Weight Full Color (Simplex/Duplex) C652/C652DS Plain paper: 50 sheets/min., Thick1 or 1+: 32 sheets/min., Thick2, 3 or 4, Special paper, Glossy mode: 25 sheets/min. C552/C552DS Plain paper: 45 sheets/min - Konica Minolta bizhub C452 | bizhub C452/C552/C552DS/C652/C652DS Copy Operations - Page 276
selectable. For details, contact your service representative. Supply from machine Reverse automatic document feeder (bizhub C652/C552/C452) Specification Original feed function Original types Original Size Original loading capacity Power supply Max. power consumption Size Weight 1-sided original - Konica Minolta bizhub C452 | bizhub C452/C552/C552DS/C652/C652DS Copy Operations - Page 277
e Height 405 mm) Approx. 39-11/16 lb (Approx. 18 kg) Large capacity unit LU-204 Specification Paper type Paper size * Number of loadable sheets Power supply Max. power consumption Size Weight Plain paper (17 lb to 23-15/16 lb (64 to 90 g/m2)), Thick 1 (24-3/16 lb to 3115/16 lb (91 to - Konica Minolta bizhub C452 | bizhub C452/C552/C552DS/C652/C652DS Copy Operations - Page 278
g/m2)) Thick (24-3/16 lb to 79-13/16 lb (91 to 300 g/m2)), transparency, postcard, envelope, label sheet, letterhead paper, colored paper Staple: Plain paper (17 lb to 23-15/16 lb (64 to 90 g/m2)) Thick (24-3/16 lb to 55-5/8 lb (91 to 209 g/m2))* *Can be used only as - Konica Minolta bizhub C452 | bizhub C452/C552/C552DS/C652/C652DS Copy Operations - Page 279
(64 to 90 g/m2)) Shift amount Power supply Max. power consumption Size Weight Consumables Staple 100 sheets 100 sheets 11 e 17 w, A3 w Other than 11 e 17 w, A3 w 2 sheets-9 sheets 10 sheets-20 sheets 21 sheets-30 sheets 31 sheets-40 sheets 41 sheets-50 sheets 2 sheets-9 sheets 10 sheets-20 sheets - Konica Minolta bizhub C452 | bizhub C452/C552/C552DS/C652/C652DS Copy Operations - Page 280
sheet folded Two sheets stapled and folded 10 sheets 10 sets Three sheets stapled 10 sets and folded Four sheets stapled 5 sets Five sheets stapled 5 sets Six to 15 sheets sta- 5 sets pled 16 to 20 sheets 1 unit Supply from finisher * Not applicable to multi-function jobs (jobs with multiple - Konica Minolta bizhub C452 | bizhub C452/C552/C552DS/C652/C652DS Copy Operations - Page 281
8-1/8 e 13-1/4 w, 8 e 13 w. Any one of these sizes is selectable. For details, contact your service representative. Plain paper (80 g/m2) 8-1/2 × 11 w, A4 w 100 sheets Other than 8-1/2 × 11 w, A4 w 50 sheets Width 13-7/16 e Depth 21-1/8 e Height 5-7/8 (Width 341 mm e Depth 537 mm e Height 149 - Konica Minolta bizhub C452 | bizhub C452/C552/C552DS/C652/C652DS Copy Operations - Page 282
12.3 Options 12 Post Inserter PI-505 Specification Configuration Cover paper type Cover paper size Paper loading capacity Power supply Size Weight 2 trays (upper and lower) Plain paper 17 lb to 23-15/16 lb (64-90g/m2), Thick 24-1/4 lb to 55-5/8 lb (91 g/m2-209 g/m2) 8-1/2 e 11 w/v, - Konica Minolta bizhub C452 | bizhub C452/C552/C552DS/C652/C652DS Copy Operations - Page 283
tray is pulled output Approx. 92-5/8 lb (Approx. 42 kg) Staples SK-602 For EH-590 (Product No.505 manufactured by MAX) (5,000 staples included) e 1 unit Saddle stitcher SD-509 Specification Feeding function Center Staple and Fold, Half-Fold bizhub C652/C652DS/C552/C552DS/C452 12-14 - Konica Minolta bizhub C452 | bizhub C452/C552/C552DS/C652/C652DS Copy Operations - Page 284
- 3 sheets 4 sheets- 10 sheets 20 sets 10 sets 11 sheets- 15 sheets 5 sets Width 9-7/16 e Depth 22-13/16 e Height 21 (Width 239 mm e Depth 579 mm e Height 534 mm) Approx. 52-15/16 lb (Approx. 24 kg) Staples SK-602 For EH-280 (Product No.505 manufactured by MAX) (5,000 staples included) e 2 unit - Konica Minolta bizhub C452 | bizhub C452/C552/C552DS/C652/C652DS Copy Operations - Page 285
Paper: 10 sheets Paper loading height: 7/8 (22 mm) Width 14-7/16 e Depth 20-13/16 e Height 15-15/16 inch (Width 165 mm e Depth 389 mm e Height 63 mm) Approx. 2-3/16 lb (Approx. 1 kg) Authentication unit (biometric type) AU-101 Specification Name Applied finger width Interface Dimensions Weight - Konica Minolta bizhub C452 | bizhub C452/C552/C552DS/C652/C652DS Copy Operations - Page 286
(SP2) Windows Vista Business/Enterprise Authentication unit (IC card type) AU-201 Specification Name Dimensions Weight Power supply AU-201 Approx. 3-5/8 (W) e 2-1/2 (D) e 5/8 (H) (Approx. 92 mm (W) e 64 mm (D) e 16 mm (H)) Approx. 1/4 lb (Approx. 120 g) Power received from USB port bizhub C652 - Konica Minolta bizhub C452 | bizhub C452/C552/C552DS/C652/C652DS Copy Operations - Page 287
Supported ) Self-guided read-write bit color or more TCP/IP Microsoft Internet Explorer 6.0 (SP1) or later Microsoft .NET Framework (SP1) or later USB 1.1 or later Windows 2000 Professional (SP4) Windows XP Professional Edition (SP2) Windows Vista Business/Enterprise bizhub C652/C652DS/C552 - Konica Minolta bizhub C452 | bizhub C452/C552/C552DS/C652/C652DS Copy Operations - Page 288
13 Appendix - Konica Minolta bizhub C452 | bizhub C452/C552/C552DS/C652/C652DS Copy Operations - Page 289
is brightness? "Brightness" is the degree of lightness in a color, as compared with another color, which makes it a light color or a dark color. For example, when comparing the yellow of a lemon and lightness that enables comparison regardless of the hue. bizhub C652/C652DS/C552/C552DS/C452 13-2 - Konica Minolta bizhub C452 | bizhub C452/C552/C552DS/C652/C652DS Copy Operations - Page 290
the yellow of a pear? By saying that the lemon is a more vivid yellow and the pear is a duller yellow, the difference between the two colors is stated in terms of "saturation", as opposed to "brightness". As opposed to hue and brightness, "saturation" is the characteristic that indicates the degree - Konica Minolta bizhub C452 | bizhub C452/C552/C552DS/C652/C652DS Copy Operations - Page 291
13.1 Colors 13 Red, green, and blue This machine allows you to adjust red, green, and blue in 19 levels. Red Green Bule bizhub C652/C652DS/C552/C552DS/C452 13-4 - Konica Minolta bizhub C452 | bizhub C452/C552/C552DS/C652/C652DS Copy Operations - Page 292
. Copy density: You can finely adjust the shading of an image. Sharpness: You can adjust the amount of contours in text and images. You can adjust the contrast and copy density in 19 levels and the sharpness in 7 levels. Contrast Copy Density Sharpness bizhub C652/C652DS/C552/C552DS/C452 13-5 - Konica Minolta bizhub C452 | bizhub C452/C552/C552DS/C652/C652DS Copy Operations - Page 293
of the original by mixing toners of four colors: yellow, magenta, cyan, and black. By changing the amount of each of the four toners, adjust the tints in the copy. You can adjust the color balance in 19 levels. Yellow Red Green Magenta Bule Cyan Black bizhub C652/C652DS/C552/C552DS/C452 13-6 - Konica Minolta bizhub C452 | bizhub C452/C552/C552DS/C652/C652DS Copy Operations - Page 294
Change Tray Settings Color Color Adjust Color Balance Combine Originals Contrast Copy Density Copy Protect Cover Sheet Density Duplex 2nd Side Duplex/Combine Edit Color Finishing Description The acronym for automatic 2-sided document feeder, which automatically scans originals. (ADF = Automatic - Konica Minolta bizhub C452 | bizhub C452/C552/C552DS/C652/C652DS Copy Operations - Page 295
colors in the image. Function that temporarily saves the job on the hard disk so that it can be recalled later and used again. Function that divides the original into multiple parts for scanning when the number of original pages exceeds the maximum (100 pages) that can be loaded into the ADF. You - Konica Minolta bizhub C452 | bizhub C452/C552/C552DS/C652/C652DS Copy Operations - Page 296
that inserts a blank sheet between transparency films each time a transparency film is copied. This function prevents transparency films from sticking together. Function that tri-folds printed paper. Function that changes the zoom ratio of the copy. bizhub C652/C652DS/C552/C552DS/C452 13-9 - Konica Minolta bizhub C452 | bizhub C452/C552/C552DS/C652/C652DS Copy Operations - Page 297
14 Index - Konica Minolta bizhub C452 | bizhub C452/C552/C552DS/C652/C652DS Copy Operations - Page 298
duplex 2nd side 7-13 Changing E-mail addresses 6-14 Changing icons 6-15 Changing passwords 6-13 Charger-cleaning tool 2-11 Checking comsumables 8-8 Checking job settings 2-16 Checking job settings 5-64 Checking the total number of pages printed 8-11 Cleaning procedure 8-12 CMYK 13-6 Color - Konica Minolta bizhub C452 | bizhub C452/C552/C552DS/C652/C652DS Copy Operations - Page 299
card type 11-2 Icon/shortcut key display area 2-16 Icons 9-10 Image adjustment 5-39 Image controller 2-2, 2-5 Image quality 13-5 Image Repeat 5-34 Imaging unit 2-11 Imaging unit release lever 2-11 Inserting images 5-24 Inserting sheets 5-23 Inside of the main body 2-11 Interleaving OHP - Konica Minolta bizhub C452 | bizhub C452/C552/C552DS/C652/C652DS Copy Operations - Page 300
7-51 Security kit 2-2, 2-6 Security settings 7-49 Separate scan 5-13 Separating chapters 5-26 Service call 9-2 Settings common to user and account track authentication 7-41 Sharpness 13-5 Skip job operation settings 7-26 Sorting 5-10 Specifications 12-2 Stamp 5-47 Stamp repetition 5-51 - Konica Minolta bizhub C452 | bizhub C452/C552/C552DS/C652/C652DS Copy Operations - Page 301
settings 7-24 User settings 6-2 Utility/Counter 4-6 V Video interface kit 2-2 W Waste toner box 2-11 Watermark 5-54 Weekly timer setting 7-7 Wide paper 5-6 Working table 2-2, 2-5 Z Z folding unit 2-21, 12-12 Z-folded original 5-17 Zoom 5-7, 5-59 bizhub C652/C652DS/C552/C552DS/C452 14 - Konica Minolta bizhub C452 | bizhub C452/C552/C552DS/C652/C652DS Copy Operations - Page 302
(Duplex 2nd Side 7-13 Change E-Mail Address 6-14 Change Icon 6-15 Change Password 6-13 Change Setting 4-20 Change Size 5-6 Change Tray Settings 5-5 Chapter Paper 5-26 Chapters 5-26 Check Consumable Life 4-6 Check Details 5-61 Check Job 5-61, 5-64 Check Job Set 5-63 Check Program - Konica Minolta bizhub C452 | bizhub C452/C552/C552DS/C652/C652DS Copy Operations - Page 303
5-60 Dot Matrix Original 5-19 Driver Password Encryption Setting 7-57 Duplex/Combine 5-8 E Edit Color 5-29 Edit Name 4-7 E-Mail Address 7-34 Enhanced Security Mode 7-54 Enlarge Display 4-14 Enlarge Display Mode Confirmation 4-13 Enlargement Rotation 6-8 Enter Power Save Mode 7-3 14 Erase - Konica Minolta bizhub C452 | bizhub C452/C552/C552DS/C652/C652DS Copy Operations - Page 304
Copy 5-50 Password for Non- Business Hours 7-7 Password Rules 7-51 Pause 7-35, 7-38 Photo 5-18 Position 5-49, 5-52 Position Setting 5-12 Post Inserter 2-3, 5-12 Post inserter control panel 5-12 Poster Mode 5-35 Power Save 4-11 Power Save Key 7-3 bizhub C652/C652DS/C552/C552DS/C452 14 - Konica Minolta bizhub C452 | bizhub C452/C552/C552DS/C652/C652DS Copy Operations - Page 305
Time for Power Save 7-7 Select Tray for Insert Sheet 6-8, 7-43 Send 5-62 Separate Scan 5-13 Separate Scan Output Method 6-8 Separation 5-33 Server Name 4-9 Service/Admin. Information 4-15 Set Range 5-35 Sharpness 5-32 Sheet/Cover/ Chapter Insert 5-21 Shift Output Each Job 7-4 Shortcut - Konica Minolta bizhub C452 | bizhub C452/C552/C552DS/C652/C652DS Copy Operations - Page 306
Administrator Setting 7-49 User Box Settings 6-6, 7-24 User Counter 7-36 User Name 4-9, 7-34 User Name List 4-9, 7-34 User Preset Zoom 5-7 User Registration 7-34 User Settings 4-6, 6-2 User/Account Common Setting 7-41 Utility/Counter 4-6 V View Finishing 4-20 View Pages 4-20 View Status - Konica Minolta bizhub C452 | bizhub C452/C552/C552DS/C652/C652DS Copy Operations - Page 307
http://konicaminolta.com A1DM-9585CO-00 2009 Copyright 2009.11
-
 1
1 -
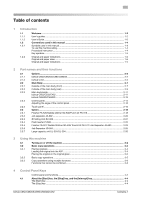 2
2 -
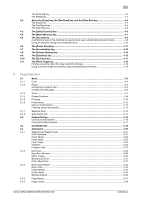 3
3 -
 4
4 -
 5
5 -
 6
6 -
 7
7 -
8
-
9
-
10
-
11
-
12
-
13
-
14
-
15
-
16
-
17
-
18
-
19
-
20
-
21
-
22
-
23
-
24
-
25
-
26
-
27
-
28
-
29
-
30
-
31
-
32
-
33
-
34
-
35
-
36
-
37
-
38
-
39
-
40
-
41
-
42
-
43
-
44
-
45
-
46
-
47
-
48
-
49
-
50
-
51
-
52
-
53
-
54
-
55
-
56
-
57
-
58
-
59
-
60
-
61
-
62
-
63
-
64
-
65
-
66
-
67
-
68
-
69
-
70
-
71
-
72
-
73
-
74
-
75
-
76
-
77
-
78
-
79
-
80
-
81
-
82
-
83
-
84
-
85
-
86
-
87
-
88
-
89
-
90
-
91
-
92
-
93
-
94
-
95
-
96
-
97
-
98
-
99
-
100
-
101
-
102
-
103
-
104
-
105
-
106
-
107
-
108
-
109
-
110
-
111
-
112
-
113
-
114
-
115
-
116
-
117
-
118
-
119
-
120
-
121
-
122
-
123
-
124
-
125
-
126
-
127
-
128
-
129
-
130
-
131
-
132
-
133
-
134
-
135
-
136
-
137
-
138
-
139
-
140
-
141
-
142
-
143
-
144
-
145
-
146
-
147
-
148
-
149
-
150
-
151
-
152
-
153
-
154
-
155
-
156
-
157
-
158
-
159
-
160
-
161
-
162
-
163
-
164
-
165
-
166
-
167
-
168
-
169
-
170
-
171
-
172
-
173
-
174
-
175
-
176
-
177
-
178
-
179
-
180
-
181
-
182
-
183
-
184
-
185
-
186
-
187
-
188
-
189
-
190
-
191
-
192
-
193
-
194
-
195
-
196
-
197
-
198
-
199
-
200
-
201
-
202
-
203
-
204
-
205
-
206
-
207
-
208
-
209
-
210
-
211
-
212
-
213
-
214
-
215
-
216
-
217
-
218
-
219
-
220
-
221
-
222
-
223
-
224
-
225
-
226
-
227
-
228
-
229
-
230
-
231
-
232
-
233
-
234
-
235
-
236
-
237
-
238
-
239
-
240
-
241
-
242
-
243
-
244
-
245
-
246
-
247
-
248
-
249
-
250
-
251
-
252
-
253
-
254
-
255
-
256
-
257
-
258
-
259
-
260
-
261
-
262
-
263
-
264
-
265
-
266
-
267
-
268
-
269
-
270
-
271
-
272
-
273
-
274
-
275
-
276
-
277
-
278
-
279
-
280
-
281
-
282
-
283
-
284
-
285
-
286
-
287
-
288
-
289
-
290
-
291
-
292
-
293
-
294
-
295
-
296
-
297
-
298
-
299
-
300
-
301
-
302
-
303
-
304
-
305
-
306
-
307
 |
 |
User’s Guide
[Copy Operations]