Konica Minolta bizhub C452 bizhub C452/C552/C552DS/C652/C652DS Print Operation
Konica Minolta bizhub C452 Manual
 |
View all Konica Minolta bizhub C452 manuals
Add to My Manuals
Save this manual to your list of manuals |
Konica Minolta bizhub C452 manual content summary:
- Konica Minolta bizhub C452 | bizhub C452/C552/C552DS/C652/C652DS Print Operation - Page 1
User's Guide [Print Operations] - Konica Minolta bizhub C452 | bizhub C452/C552/C552DS/C652/C652DS Print Operation - Page 2
environment of the installer 4-2 Easy installation procedure using the installer 4-3 Settings for the machine ...4-3 TCP/IP settings for the machine ...4-3 RAW port number/IPP setting for the machine 4-3 Installing the printer driver ...4-3 bizhub C652/C652DS/C552/C552DS/C452 Contents-1 - Konica Minolta bizhub C452 | bizhub C452/C552/C552DS/C652/C652DS Print Operation - Page 3
the printer driver manually using the Add Printer Wizard 5-8 For network connection (Web service print 5-9 Settings for the machine ...5-9 Installing the printer from the Network window 5-10 Installing the printer driver by specifying the IP address using the Add Printer Wizard 5-10 For - Konica Minolta bizhub C452 | bizhub C452/C552/C552DS/C652/C652DS Print Operation - Page 4
copies and pages...10-10 Output Method...10-10 Checking the output method detail settings 10-11 Layout/Finish...10-13 Paper Tray/Output Tray ...10-15 Cover Mode/Transparency Interleave 10-16 Per Page Setting ...10-17 Editing Per Page Setting ...10-18 bizhub C652/C652DS/C552/C552DS/C452 Contents - Konica Minolta bizhub C452 | bizhub C452/C552/C552DS/C652/C652DS Print Operation - Page 5
job from the control panel 12-7 When the Secure Print Document Access Method is set to "Mode 1 12-8 When the Secure Print Document Access Method is set to "Mode 2 12-10 Save in User Box ...12-12 Setting the printer driver ...12-12 For Windows ...12-12 For Mac OS X...12-13 Recalling a job from the - Konica Minolta bizhub C452 | bizhub C452/C552/C552DS/C652/C652DS Print Operation - Page 6
-28 Black Overprint ...13-29 Verify XPS Digital Signature ...13-30 Print Reports ...13-31 TIFF Image Paper Setting ...13-32 Link File Error Notification...13-34 Proxy Server Use ...13-35 Print Settings...13-36 Half-Fold/Tri-Fold Specification (Half-Fold Specification 13-38 bizhub C652/C652DS/C552 - Konica Minolta bizhub C452 | bizhub C452/C552/C552DS/C652/C652DS Print Operation - Page 7
14-10 Logging in as the User Box Administrator 14-12 Structure of pages ...14-13 Overview of the user mode ...14-15 Information ...14-15 Job ...14-16 Box...14-17 Direct print ...14-18 Store Address ...14-19 Customize ...14-19 Administrator mode overview...14-20 Maintenance ...14-20 bizhub C652 - Konica Minolta bizhub C452 | bizhub C452/C552/C552DS/C652/C652DS Print Operation - Page 8
Setting ...14-26 Store Address ...14-27 Fax Settings ...14-28 Wizard ...14-29 15 Troubleshooting 15.1 15.2 15.2.1 15.2.2 15.2.3 Cannot print...15-2 Cannot configure the settings/Cannot print according to the settings 15-4 The printer driver settings have no effect 15-4 Others ...15-5 Error - Konica Minolta bizhub C452 | bizhub C452/C552/C552DS/C652/C652DS Print Operation - Page 9
1 Introduction - Konica Minolta bizhub C452 | bizhub C452/C552/C552DS/C652/C652DS Print Operation - Page 10
. Please be sure to read this manual before using this machine. User's guide CD manuals Copy Operations Enlarge Display Operations Print Operations Box Operations Network Scan/Fax/Network Fax Operations Fax Driver Operations Network Administrator Overview This manual describes details on copy mode - Konica Minolta bizhub C452 | bizhub C452/C552/C552DS/C652/C652DS Print Operation - Page 11
product is required to enable users to perform maintenance work or troubleshooting operations. Limit your maintenance and troubleshooting operations to the areas explained in this manual. Should you experience any problems, please contact our service representative. bizhub C652/C652DS/C552/C552DS - Konica Minolta bizhub C452 | bizhub C452/C552/C552DS/C652/C652DS Print Operation - Page 12
result in damage to this machine or originals. Follow the instructions to avoid property damage. Procedural instruction 0 This check mark indicates an option that is required explanation of a procedural instruction. A procedural operation is illustrated. bizhub C652/C652DS/C552/C552DS/C452 1-4 - Konica Minolta bizhub C452 | bizhub C452/C552/C552DS/C652/C652DS Print Operation - Page 13
originals and paper described in this manual. When indicating the original or paper size, the Y side represents the width and the X side the length. Original and paper indications w indicates the paper size with the length (X) being longer than the width (Y). bizhub C652/C652DS/C552/C552DS/C452 - Konica Minolta bizhub C452 | bizhub C452/C552/C552DS/C652/C652DS Print Operation - Page 14
1.2 Conventions used in this manual 1 v indicates the paper size with the length (X) being shorter than the width (Y). bizhub C652/C652DS/C552/C552DS/C452 1-6 - Konica Minolta bizhub C452 | bizhub C452/C552/C552DS/C652/C652DS Print Operation - Page 15
2 Overview - Konica Minolta bizhub C452 | bizhub C452/C552/C552DS/C652/C652DS Print Operation - Page 16
and Account Track functions) - Fax operations using a computer (PC-FAX transmission) d Reference To use the fax function, the optional fax kit is required. For details on the PC-FAX transmission, refer to the "User's Guide [Fax Driver Operations]". bizhub C652/C652DS/C552/C552DS/C452 2-2 - Konica Minolta bizhub C452 | bizhub C452/C552/C552DS/C652/C652DS Print Operation - Page 17
Computer Application For network connection Application Printer driver Printer driver Print USB Ethernet (TCP/IP, IPX/SPX) Machine Printer controller PS/PCL processing (rasterization) While this machine is operating as a printer, originals can be scanned using the copy function or network - Konica Minolta bizhub C452 | bizhub C452/C552/C552DS/C652/C652DS Print Operation - Page 18
or fax is queued to be printed or while it is being printed. Press this key to erase a value entered using the keypad or characters entered from the keyboard on the screen. Press to enter numbers. Use the keypad to enter the administrator password or other setting values. bizhub C652/C652DS/C552 - Konica Minolta bizhub C452 | bizhub C452/C552/C552DS/C652/C652DS Print Operation - Page 19
to the "User's Guide [Copy Operations]". Reference - The default print settings can be changed in the Utility mode. - You can use this machine as a printer in either of User Box, Fax/Scan, and Copy modes. d Reference For details on proof printing, refer to page 12-2. bizhub C652/C652DS/C552/C552DS - Konica Minolta bizhub C452 | bizhub C452/C552/C552DS/C652/C652DS Print Operation - Page 20
being used. CD-ROM drive Macintosh Operating System CPU Memory Drive Mac OS 9.2/OS X (10.2.8, 10.3, 10.4, 10.5) PowerPC, Intel Processor (Intel Processor must be Mac OS X 10.4/10.5 only) Capacity recommended for your operating system CD-ROM drive bizhub C652/C652DS/C552/C552DS/C452 2-6 - Konica Minolta bizhub C452 | bizhub C452/C552/C552DS/C652/C652DS Print Operation - Page 21
LPD/LPR, IPP, SMB), Web services, IPX/SPX (NetWare), AppleTalk (EtherTalk) protocols are supported. USB interface Use this interface to use this printing system via a USB connection. The USB interface can be connected to a computer running Windows. A USB cable is required for connection. Use a type - Konica Minolta bizhub C452 | bizhub C452/C552/C552DS/C652/C652DS Print Operation - Page 22
printer driver, perform test print to make sure that the connections are made properly. d Reference For details on the connectable interfaces, refer to page 2-7. For details on the network settings, refer to the "User's Guide [Network Administrator]". The procedure for installing the printer driver - Konica Minolta bizhub C452 | bizhub C452/C552/C552DS/C652/C652DS Print Operation - Page 23
2.3 Setup procedure 2 2.3.2 For local connection 1 Connect this machine to the computer. 2 Install the printer driver. 3 Install the screen fonts. % The CD-ROM contains the European TrueType adding fonts. For details, refer to Help of the Operating System. bizhub C652/C652DS/C552/C552DS/C452 2-9 - Konica Minolta bizhub C452 | bizhub C452/C552/C552DS/C652/C652DS Print Operation - Page 24
PageScope Web Connection manual. - User's guide CD-ROM Contains the user's guide. Reference - In User's Guide manuals, location paths of folders or files may not contain the root directory. - Be sure to use the files contained in the EN (English) folder. bizhub C652/C652DS/C552/C552DS/C452 2-10 - Konica Minolta bizhub C452 | bizhub C452/C552/C552DS/C652/C652DS Print Operation - Page 25
3 Precautions for Installation - Konica Minolta bizhub C452 | bizhub C452/C552/C552DS/C652/C652DS Print Operation - Page 26
of the printer driver to be installed. To determine the printer driver to be installed and connection method, check the operating system of the computer and connection environment. Select the installation method according to the printer driver and connection method. bizhub C652/C652DS/C552/C552DS - Konica Minolta bizhub C452 | bizhub C452/C552/C552DS/C652/C652DS Print Operation - Page 27
the required printer driver. Printer driver KONICA MINOLTA PCL Driver (PCL driver) PostScript KONICA MINOLTA driver (PS driver) PostScript PPD driver (PS-PPD) KONICA MINOLTA XPS Driver (XPS driver) Page description language PCL6 PostScript 3 Emulation XPS Supported Operating Systems Windows NT - Konica Minolta bizhub C452 | bizhub C452/C552/C552DS/C652/C652DS Print Operation - Page 28
application used for printing. - Either of the installer or Add Printer Wizard can be used for installing the PCL driver, PS driver. and XPS driver for Windows. d Reference For details on the fax drivers, refer to the "User's Guide [Fax Driver Operations]". bizhub C652/C652DS/C552/C552DS/C452 3-4 - Konica Minolta bizhub C452 | bizhub C452/C552/C552DS/C652/C652DS Print Operation - Page 29
A network connection using SMB (Server Message Block) for sharing files or printers in Windows. It supports the TCP/IP protocol. IPP/IPPS A network connection using the IPP (Internet Printing Protocol) print service. Printing via the Internet is possible with the HTTP (HyperText Transfer Protocol - Konica Minolta bizhub C452 | bizhub C452/C552/C552DS/C652/C652DS Print Operation - Page 30
not support installation in the IPv6 environment of Windows XP/Server 2003. d Reference To use the machine in the network environment, you must configure the network settings for the machine in advance. For details, refer to the "User's Guide [Network Administrator]". bizhub C652/C652DS/C552/C552DS - Konica Minolta bizhub C452 | bizhub C452/C552/C552DS/C652/C652DS Print Operation - Page 31
in Windows NT 4.0, you must have Internet Explorer 5.0 or later installed in your computer. d Reference To use the machine in the network environment, you must configure the network settings for the machine in advance. For details, refer to the "User's Guide [Network Administrator]". bizhub C652 - Konica Minolta bizhub C452 | bizhub C452/C552/C552DS/C652/C652DS Print Operation - Page 32
For details on the NetWare functions, refer to the NetWare operation manual. To use the machine in the NetWare environment, you must configure the network settings for the machine in advance. For details, refer to the "User's Guide [Network Administrator]". bizhub C652/C652DS/C552/C552DS/C452 3-8 - Konica Minolta bizhub C452 | bizhub C452/C552/C552DS/C652/C652DS Print Operation - Page 33
4 Easy Installation Using the Installer (Windows) - Konica Minolta bizhub C452 | bizhub C452/C552/C552DS/C652/C652DS Print Operation - Page 34
used. Reference - Installing the driver to Windows NT 4.0/2000/XP/Vista/Server 2003/Server 2008-based computers requires the administrator authority. - If a wizard window for adding new hardware opens when using USB connection, click [Cancel]. - The installer supports both IPv4/IPv6 environments - Konica Minolta bizhub C452 | bizhub C452/C552/C552DS/C652/C652DS Print Operation - Page 35
-signed certificate that is preinstalled in the machine. For details, refer to the "User's Guide [Network Administrator]". 4.2.2 Installing the printer driver 1 Insert the printer driver CD-ROM for Windows into the CD-ROM drive of the computer. % Make sure that the installer starts, and then go to - Konica Minolta bizhub C452 | bizhub C452/C552/C552DS/C652/C652DS Print Operation - Page 36
to install the driver. % In the language display box, you can change the language used with the installer as required. 4 When a page for selecting menu to setup appears, select "Install printers/MFPs", and then click [Next]. Connected printers and MFPs are detected. % For Windows Vista/Server 2008 - Konica Minolta bizhub C452 | bizhub C452/C552/C552DS/C652/C652DS Print Operation - Page 37
Connection and IPP is enabled. % In Windows Vista/Server 2008, you cannot set up "IPPS connection (Secure Print)" using the installer. To use IPPS connection, use the Add Printer Wizard. For details, refer to page 5-8. % Windows Vista/Server 2008 supports both IPv4 and IPv6 environments, however, it - Konica Minolta bizhub C452 | bizhub C452/C552/C552DS/C652/C652DS Print Operation - Page 38
for the printer. For details, refer to page 9-4. [Print Setting]: Click this button to display the printer driver window and configure various function settings. For details, refer to page 9-10. [Print Test page]: Click this button to perform test print. bizhub C652/C652DS/C552/C552DS/C452 4-6 - Konica Minolta bizhub C452 | bizhub C452/C552/C552DS/C652/C652DS Print Operation - Page 39
5 Manual Installation Using the Add Printer Wizard - Konica Minolta bizhub C452 | bizhub C452/C552/C552DS/C652/C652DS Print Operation - Page 40
on the network settings for the machine, refer to the "User's Guide [Network Administrator]". To use SMB printing in the IPv6 environment, "Direct Hosting setting" for the machine must be enabled. For details, refer to the "User's Guide [Network Administrator]". bizhub C652/C652DS/C552/C552DS/C452 - Konica Minolta bizhub C452 | bizhub C452/C552/C552DS/C652/C652DS Print Operation - Page 41
the driver to Windows Vista/Server 2008-based computers requires the administrator authority. 0 Since the printer is searched for during the installation, be sure to connect the machine to the network before turning it on. 1 Insert the printer driver CD-ROM for Windows into the CD-ROM drive of - Konica Minolta bizhub C452 | bizhub C452/C552/C552DS/C652/C652DS Print Operation - Page 42
, and then click [Open]. % Select a folder according to the printer driver, operating system, and language to be used. Selectable printer drivers: PCL driver, PS driver, XPS driver and fax driver 10 Click [OK]. The "Printers" list appears. 11 Click [Next]. bizhub C652/C652DS/C552/C552DS/C452 5-4 - Konica Minolta bizhub C452 | bizhub C452/C552/C552DS/C652/C652DS Print Operation - Page 43
the driver to Windows Vista/Server 2008-based computers requires the administrator authority. 0 Since the printer is searched for during the installation, be sure to connect the machine to the network before turning it on. 1 Insert the printer driver CD-ROM for Windows into the CD-ROM drive of - Konica Minolta bizhub C452 | bizhub C452/C552/C552DS/C652/C652DS Print Operation - Page 44
box. % Enter the same NetBIOS name and print service name specified in "Print Setting" in "SMB Setting". 9 Click [Next]. % If the "Additional Port Information Required" page appears, go to Step 10. % If the "Install the printer driver" page appears, go to Step 13. 10 Select "Custom", and then click - Konica Minolta bizhub C452 | bizhub C452/C552/C552DS/C652/C652DS Print Operation - Page 45
this driver software anyway". 19 Click [Finish]. 20 After finishing the installation, make sure that the icon for the installed printer is displayed in the "Printers" window. 21 Remove the CD-ROM from the CD-ROM drive. This completes the printer driver installation. bizhub C652/C652DS/C552/C552DS - Konica Minolta bizhub C452 | bizhub C452/C552/C552DS/C652/C652DS Print Operation - Page 46
to the "User's Guide [Network Administrator]". Installing the printer driver manually using the Add Printer Wizard 0 Installing the driver to Windows Vista/Server 2008-based computers requires the administrator authority. 1 Insert the printer driver CD-ROM for Windows into the CD-ROM drive of the - Konica Minolta bizhub C452 | bizhub C452/C552/C552DS/C652/C652DS Print Operation - Page 47
Settings Description In "TCP/IP Settings" of the machine, specify the IP address. In "Web Service Settings" for the machine, enable the print function. d Reference For details on the network settings for the machine, refer to the "User's Guide [Network Administrator]". bizhub C652/C652DS/C552 - Konica Minolta bizhub C452 | bizhub C452/C552/C552DS/C652/C652DS Print Operation - Page 48
20 in the succeeding section. Installing the printer driver by specifying the IP address using the Add Printer Wizard 0 Installing the driver to Windows Vista/Server 2008-based computers requires the administrator authority. 0 Since the printer is searched for during the installation, be sure - Konica Minolta bizhub C452 | bizhub C452/C552/C552DS/C652/C652DS Print Operation - Page 49
. In Windows Vista: In Windows Server 2008: "Add Printer" Wizard appears. 7 Click "Add a local printer". The "Select a Printer Port" page appears. 8 Click "Create a new port", and then select the port type. % Select "Standard TCP/IP Port". 9 Click [Next]. bizhub C652/C652DS/C552/C552DS/C452 - Konica Minolta bizhub C452 | bizhub C452/C552/C552DS/C652/C652DS Print Operation - Page 50
this driver software anyway". 18 Click [Close]. 19 After finishing the installation, make sure that the icon for the installed printer is displayed in the "Printers" window. 20 Remove the CD-ROM from the CD-ROM drive. This completes the printer driver installation. bizhub C652/C652DS/C552/C552DS - Konica Minolta bizhub C452 | bizhub C452/C552/C552DS/C652/C652DS Print Operation - Page 51
of the software supported by the machine appears. 5 Select a desired printer driver name, and then click [Next]. % Selectable printer drivers: PCL driver, PS driver, XPS driver and fax driver 6 Follow the instructions on the pages that follow. % If the "User Account Control" window appears, click - Konica Minolta bizhub C452 | bizhub C452/C552/C552DS/C652/C652DS Print Operation - Page 52
on the network settings for the machine, refer to the "User's Guide [Network Administrator]". Installing the printer driver using the Add Printer Wizard 0 Installing the driver to Windows XP/Server 2003-based computers requires the administrator authority. 1 Insert the printer driver CD-ROM for - Konica Minolta bizhub C452 | bizhub C452/C552/C552DS/C652/C652DS Print Operation - Page 53
my Plug and Play printer" check box. The "Select a Printer Port" page appears. 6 Select "Create a new port", and then select "Standard TCP/IP Port" as the type of port. 7 Click [Next]. "Add Standard TCP/IP Printer Port Wizard" starts. 8 Click [Next]. bizhub C652/C652DS/C552/C552DS/C452 5-15 - Konica Minolta bizhub C452 | bizhub C452/C552/C552DS/C652/C652DS Print Operation - Page 54
printer drivers: PCL driver, PS driver and fax driver 17 Click [OK]. The "Printers" list appears. 18 Click [Next]. 19 Follow the instructions on the pages that follow. % To use a network connection, perform a test print after the network settings have been configured. bizhub C652/C652DS/C552 - Konica Minolta bizhub C452 | bizhub C452/C552/C552DS/C652/C652DS Print Operation - Page 55
"User's Guide [Network Administrator]". Installing the printer driver by specifying the printer using the Add Printer Wizard 0 Installing the driver to Windows XP/Server 2003-based computers requires the administrator authority. 1 Insert the printer driver CD-ROM for Windows into the CD-ROM drive - Konica Minolta bizhub C452 | bizhub C452/C552/C552DS/C652/C652DS Print Operation - Page 56
click [Next]. 7 Enter "\\NetBIOS name\print service name" in the "Enter a port name" box. % Enter the same NetBIOS name and print service name specified in "Print Settings" in "SMB Settings". 8 Click [OK]. "Add Printer Wizard" appears. 9 Click [Have Disk]. bizhub C652/C652DS/C552/C552DS/C452 5-18 - Konica Minolta bizhub C452 | bizhub C452/C552/C552DS/C652/C652DS Print Operation - Page 57
drivers: PCL driver, PS driver and fax driver 12 Click [OK]. The "Printers" list appears. 13 Click [Next]. 14 Follow the instructions on the pages that follow. % To use a network connection, perform a test print after the network settings have been configured. 15 Click [Finish]. % If the "Windows - Konica Minolta bizhub C452 | bizhub C452/C552/C552DS/C652/C652DS Print Operation - Page 58
XP/Server 2003 5 Installing the printer driver manually using the Add Printer Wizard 0 Installing the driver to Windows XP/Server 2003-based computers requires the administrator authority. 1 Insert the printer driver CD-ROM for Windows into the CD-ROM drive of the computer. 2 Press the [Start - Konica Minolta bizhub C452 | bizhub C452/C552/C552DS/C652/C652DS Print Operation - Page 59
, click [Continue] or [Yes]. 9 After finishing the installation, make sure that the icon for the installed printer is displayed in the "Printers and Faxes" window. 10 Remove the CD-ROM from the CD-ROM drive. This completes the printer driver installation. bizhub C652/C652DS/C552/C552DS/C452 5-21 - Konica Minolta bizhub C452 | bizhub C452/C552/C552DS/C652/C652DS Print Operation - Page 60
-based computers requires the administrator authority. 1 Insert the printer driver CD-ROM for Windows into the CD-ROM drive of the computer. 2 Press the [Start] key, and then select "Settings" - "Printers". 3 Double-click "Add Printer". "Add Printer Wizard" appears. 4 Follow the instructions on the - Konica Minolta bizhub C452 | bizhub C452/C552/C552DS/C652/C652DS Print Operation - Page 61
Signature" window appears, click [Yes]. 21 After finishing the installation, make sure that the icon for the installed printer is displayed in the "Printers" window. 22 Remove the CD-ROM from the CD-ROM drive. This completes the printer driver installation. bizhub C652/C652DS/C552/C552DS/C452 - Konica Minolta bizhub C452 | bizhub C452/C552/C552DS/C652/C652DS Print Operation - Page 62
refer to the "User's Guide [Network Administrator]". Installing the printer driver manually using the Add Printer Wizard 0 Installing the driver to Windows 2000-based computers requires the administrator authority. 1 Insert the printer driver CD-ROM for Windows into the CD-ROM drive of the computer - Konica Minolta bizhub C452 | bizhub C452/C552/C552DS/C652/C652DS Print Operation - Page 63
finishing the installation, make sure that the icon for the installed printer is displayed in the "Printers" window. 18 Remove the CD-ROM from the CD-ROM drive. This completes the printer driver installation. 5.3.3 For network connection (IPP/IPPS) For IPP printing, configure the network settings - Konica Minolta bizhub C452 | bizhub C452/C552/C552DS/C652/C652DS Print Operation - Page 64
the printer driver manually using the Add Printer Wizard 0 Installing the driver to Windows 2000-based computers requires the administrator authority. 1 Insert the printer driver CD-ROM for Windows into the CD-ROM drive of the computer. 2 Press the [Start] key, and then select "Settings" - "Printers - Konica Minolta bizhub C452 | bizhub C452/C552/C552DS/C652/C652DS Print Operation - Page 65
Signature" window appears, click [Yes]. 11 After finishing the installation, make sure that the icon for the installed printer is displayed in the "Printers" window. 12 Remove the CD-ROM from the CD-ROM drive. This completes the printer driver installation. bizhub C652/C652DS/C552/C552DS/C452 - Konica Minolta bizhub C452 | bizhub C452/C552/C552DS/C652/C652DS Print Operation - Page 66
address. To use LPR printing: In "LPD Setting" for the machine, enable LPD printing. d Reference For details on the network settings for the machine, refer to the "User's Guide [Network Administrator]". Installing the printer driver using the Add Printer Wizard 0 Installing the driver to Windows - Konica Minolta bizhub C452 | bizhub C452/C552/C552DS/C652/C652DS Print Operation - Page 67
5.4 Windows NT 4.0 5 16 Click [Finish]. 17 After finishing the installation, make sure that the icon for the installed printer is displayed in the "Printers" window. 18 Remove the CD-ROM from the CD-ROM drive. This completes the printer driver installation. bizhub C652/C652DS/C552/C552DS/C452 5- - Konica Minolta bizhub C452 | bizhub C452/C552/C552DS/C652/C652DS Print Operation - Page 68
6 Installation on Macintosh Computers - Konica Minolta bizhub C452 | bizhub C452/C552/C552DS/C652/C652DS Print Operation - Page 69
describes the settings necessary when using Macintosh and the procedure for installing printer drivers for Macintosh. 6.1 Mac OS X 10.2/10.3/10.4/10.5 6.1.1 Installing the printer driver 1 Start the Macintosh computer. 2 Insert the printer driver CD-ROM for Macintosh into the CD-ROM drive of the - Konica Minolta bizhub C452 | bizhub C452/C552/C552DS/C652/C652DS Print Operation - Page 70
to the "User's Guide [Network Administrator]". Adding a printer 1 In the "Apple" menu, select "System Preferences". 2 Click the [Print & Fax] icon. 3 Click [+] on the "Print & Fax" window. 4 Click [Default]. Connected printers are detected. % If no printer is detected, turn your printer off then on - Konica Minolta bizhub C452 | bizhub C452/C552/C552DS/C652/C652DS Print Operation - Page 71
X 10.4 is used, select "KONICA MINOLTA" from the "Print Using", and then select the printer driver of the desired model name from the list. 7 Click [Add]. When the selected printer is registered in the "Print & Fax", the setting procedure is completed. % If the "Installable Options" window appears - Konica Minolta bizhub C452 | bizhub C452/C552/C552DS/C652/C652DS Print Operation - Page 72
printer driver manually. % When OS X 10.5 is used, select the "Select a driver to use" from the "Print Using", and then select the printer driver of the desired model name from the list. % When OS X 10.4 is used, select "KONICA MINOLTA" from the "Print Using", and then select the printer driver - Konica Minolta bizhub C452 | bizhub C452/C552/C552DS/C652/C652DS Print Operation - Page 73
For OS X 10.4, you can also add a printer by clicking [Add] in the "Printer Setup Utility" window. Configuring the LPR settings TCP/IP setting for the machine Specify the IP address for the machine. LPD setting for the printer Before using LPR printing, enable LPD printing in "LPD Setting" for the - Konica Minolta bizhub C452 | bizhub C452/C552/C552DS/C652/C652DS Print Operation - Page 74
X 10.4 is used, select "KONICA MINOLTA" from the "Print Using", and then select the printer driver of the desired model name from the list. 8 Click [Add]. When the selected printer is registered in the "Print & Fax", the setting procedure is completed. % If the "Installable Options" window appears - Konica Minolta bizhub C452 | bizhub C452/C552/C552DS/C652/C652DS Print Operation - Page 75
's Guide [Network Administrator]". Configuring the TCP/IP settings for the computer Configure the TCP/IP settings for the Macintosh computer connected to the printer. 1 In the "Apple" menu, select "System Preferences". 2 Click the [Network] icon. 3 The Ethernet setting window appears. % For OS X 10 - Konica Minolta bizhub C452 | bizhub C452/C552/C552DS/C652/C652DS Print Operation - Page 76
X 10.4 is used, select "KONICA MINOLTA" from the "Print Using", and then select the printer driver of the desired model name from the list. 8 Click [Add]. When the selected printer is registered in the "Print & Fax", the setting procedure is completed. % If the "Installable Options" window appears - Konica Minolta bizhub C452 | bizhub C452/C552/C552DS/C652/C652DS Print Operation - Page 77
"User's Guide [Network Administrator]". Adding a printer 1 Select "Macintosh HD" - "Applications" - "Utilities" where the driver was been installed, and then double-click [Printer Setup Utility] or [Print Center] to open it. 2 When the "You have no printers available." window appears, click [Add - Konica Minolta bizhub C452 | bizhub C452/C552/C552DS/C652/C652DS Print Operation - Page 78
6.1 Mac OS X 10.2/10.3/10.4/10.5 6 5 Select the desired printer driver manually. % From "Printer Model", select "KONICA MINOLTA", and then select the desired model from the list of model names. 6 Click [Add]. When the selected printer is registered in the "Printer List", the setting procedure is - Konica Minolta bizhub C452 | bizhub C452/C552/C552DS/C652/C652DS Print Operation - Page 79
in "LPD Setting" for the machine. d Reference For details on specifying the IP address for the machine, refer to the "User's Guide [Network Administrator]". For details on the LPD settings for the machine, refer to the "User's Guide [Network Administrator]". bizhub C652/C652DS/C552/C552DS/C452 - Konica Minolta bizhub C452 | bizhub C452/C552/C552DS/C652/C652DS Print Operation - Page 80
"You have no printers available." window does not appear. 3 Select "IP Printing" for the connection method. 4 For OS X 10.3, select "LPD/LPR" for "Printer Type". 5 In "Printer Address", enter the IP address for the machine. 6 From "Printer Model", select "KONICA MINOLTA", select the desired model - Konica Minolta bizhub C452 | bizhub C452/C552/C552DS/C652/C652DS Print Operation - Page 81
address for the machine. % Leave "Queue Name" blank. 6 From "Printer Model", select "KONICA MINOLTA", select the desired model from the list of model names, and then click [Add]. When the selected printer is registered in the "Printer List", the setting procedure is completed. bizhub C652/C652DS - Konica Minolta bizhub C452 | bizhub C452/C552/C552DS/C652/C652DS Print Operation - Page 82
name, and then click [Create]. The window for selecting a PostScript printer description (PPD) file appears. % If a different PPD file has already been selected, click [Setup] in Step 3, and then click [Select PPD] from the window that is already displayed. bizhub C652/C652DS/C552/C552DS/C452 6-15 - Konica Minolta bizhub C452 | bizhub C452/C552/C552DS/C652/C652DS Print Operation - Page 83
machine Specify the IP address for the machine. LPD setting for the printer Before using LPR printing, enable LPD printing in "LPD Setting" for the machine. d Reference For details on specifying the IP address for the machine, refer to the "User's Guide [Network Administrator]". For details on the - Konica Minolta bizhub C452 | bizhub C452/C552/C552DS/C652/C652DS Print Operation - Page 84
the IP address of the machine, and then click [OK]. The "Untitled" window appears again. 8 Click [Create]. The window for saving the settings appears. 9 Enter the "Desktop Printer Name", and then click [Save]. An icon for the LPR printer is created on the desktop. bizhub C652/C652DS/C552/C552DS - Konica Minolta bizhub C452 | bizhub C452/C552/C552DS/C652/C652DS Print Operation - Page 85
7 Installation when Using NetWare - Konica Minolta bizhub C452 | bizhub C452/C552/C552DS/C652/C652DS Print Operation - Page 86
Guide [Network Administrator]". 7.1.2 Configuring the Windows client For the Windows client that uses a printer, install the printer driver using the "Add Printer Wizard". 0 Administrator authority is required for installation. 1 Insert the printer driver CD-ROM for Windows into the CD-ROM drive - Konica Minolta bizhub C452 | bizhub C452/C552/C552DS/C652/C652DS Print Operation - Page 87
8 Uninstalling the Printer Driver - Konica Minolta bizhub C452 | bizhub C452/C552/C552DS/C652/C652DS Print Operation - Page 88
Click [Start], and then select "All Programs" (or "Programs") - "KONICA MINOLTA" - "C652 Series" - "Uninstall Printer Driver". 2 Select the components to be removed, and the click [Uninstall]. % From then on, follow the instructions on the pages that follow. 3 If the dialog box prompting to restart - Konica Minolta bizhub C452 | bizhub C452/C552/C552DS/C652/C652DS Print Operation - Page 89
the last few lines to confirm it is the file for the corresponding model. The number of the PNF file is the same as that of the inf file. - In Windows Vista/Server 2008, this operation is not required if you have selected "Remove driver and driver package.". bizhub C652/C652DS/C552/C552DS/C452 8-3 - Konica Minolta bizhub C452 | bizhub C452/C552/C552DS/C652/C652DS Print Operation - Page 90
"Print & Fax" (or "Printer Setup Utility"/"Print Center") window. 4 Drag the following files, which are located in "Library" - "Printers" - "PPDs" - "Contents" - "Resources" of the installed "Macintosh HD" ("Resources" - "en.lproj" for OS X 10.2/10.3/10.4) to the "Trash" icon. % "KONICA MINOLTA C652 - Konica Minolta bizhub C452 | bizhub C452/C552/C552DS/C652/C652DS Print Operation - Page 91
9 Print function of PCL/PS/XPS drivers for Windows - Konica Minolta bizhub C452 | bizhub C452/C552/C552DS/C652/C652DS Print Operation - Page 92
] or [Preferences]) in the "Print" window displays the window for configuring printer driver settings where you can configure various functions. For details, refer to page 9-10. % The printer driver settings changed in the "Print" window are not saved, and the original settings are restored when you - Konica Minolta bizhub C452 | bizhub C452/C552/C552DS/C652/C652DS Print Operation - Page 93
9 6 Enter the ID and password of the document, and then click [OK]. Data is sent and saved in the Secure Print User Box of this machine. d Reference For details on the "Configure" tab, refer to page 9-4. For details on secure printing, refer to page 12-5. bizhub C652/C652DS/C552/C552DS/C452 9-3 - Konica Minolta bizhub C452 | bizhub C452/C552/C552DS/C652/C652DS Print Operation - Page 94
" tab, the option functions cannot be used from the printer driver. Be sure to configure the settings for the installed options. 9.2.1 Displaying the Properties window 1 Open the "Printers" window or "Printers and Faxes" window. % In Windows Vista/Server 2008, click [Start], open "Control Panel - Konica Minolta bizhub C452 | bizhub C452/C552/C552DS/C652/C652DS Print Operation - Page 95
you to change the default settings for displaying the confirmation messages or the window for entering the authentication settings. Item EMF Spool Function Select this check box when meta file (EMF) spool is required for use in its own system environment. bizhub C652/C652DS/C552/C552DS/C452 9-5 - Konica Minolta bizhub C452 | bizhub C452/C552/C552DS/C652/C652DS Print Operation - Page 96
My Tab position to copy the printer setting in the Driver Packaging Utility settings. For details on the Driver Packaging Utility settings, refer to the Driver Packaging Utility Help. d Reference For details on the My Tab function, refer to page 9-10. bizhub C652/C652DS/C552/C552DS/C452 9-6 - Konica Minolta bizhub C452 | bizhub C452/C552/C552DS/C652/C652DS Print Operation - Page 97
the printer is used by all of the application software. d Reference For details on the function and settings of the printer driver, refer to page 9-10. The printer driver has the function to save the setting as a "Favorite Setting". For details, refer to page 9-8. bizhub C652/C652DS/C552/C552DS - Konica Minolta bizhub C452 | bizhub C452/C552/C552DS/C652/C652DS Print Operation - Page 98
not selected, its setting is not changed even if "Favorite Setting" is selected. Click this button to change saved settings. In [ Option...], you can change whether to select the [Restore Items] check box. Click this button to return to the default settings. bizhub C652/C652DS/C552/C552DS/C452 9-8 - Konica Minolta bizhub C452 | bizhub C452/C552/C552DS/C652/C652DS Print Operation - Page 99
] displays the sample page layout based on current settings for checking the output result image. Selecting [Printer View] displays a printer figure showing the options installed in the machine such as the paper tray. Paper: Printer: Printer Information Click this button to start PageScope Web - Konica Minolta bizhub C452 | bizhub C452/C552/C552DS/C652/C652DS Print Operation - Page 100
The Printing Preferences window is the window to configure the printer driver functions. Click [Properties] (or [Preferences]) in the Print dialog box, or right-click the printer icon in the "Printers" or "Printers and Faxes" window, and then specify "Print Setting" ("Document Defaults" for Windows - Konica Minolta bizhub C452 | bizhub C452/C552/C552DS/C652/C652DS Print Operation - Page 101
or [to the RIGHT]. % Select the desired function from those indicated in the respective tabs in "Setting Item List". % Clicking [to the LEFT] places the selected function on the left side of "My you want to delete, and then click [Remove]. 4 Click [OK]. bizhub C652/C652DS/C552/C552DS/C452 9-11 - Konica Minolta bizhub C452 | bizhub C452/C552/C552DS/C652/C652DS Print Operation - Page 102
on the option installation status. Select a paper type to be used for printing. It can be changed only when Paper Tray is set to "Auto". When Paper Tray is not set to "Auto", the paper types registered in "Paper Settings for Each Tray" are available. bizhub C652/C652DS/C552/C552DS/C452 9-12 - Konica Minolta bizhub C452 | bizhub C452/C552/C552DS/C652/C652DS Print Operation - Page 103
Offset ON/OFF Paper Settings for Paper Type Settings Each Tray Paper Type Description Select this option to print immediately. Select this option to save the document to be printed in "Secure Print User Box" of the machine. When printing, entering the ID and password is required from the control - Konica Minolta bizhub C452 | bizhub C452/C552/C552DS/C652/C652DS Print Operation - Page 104
the image to prepare the page margin. Specify the binding margin values. For 2-sided printing, clearing the "Same value for Front and Back Sides" check box allows you to specify different values for the front and back sides. Select a unit to be used for specifying the size. bizhub C652/C652DS/C552 - Konica Minolta bizhub C452 | bizhub C452/C552/C552DS/C652/C652DS Print Operation - Page 105
are for printing a sheet of original onto multiple sheets of paper, are available only for the PCL driver. - The "Skip Blank Pages" function is available for the PCL/XPS drivers. - The positions of binding margins vary according to the "Binding Position" setting. 9.4.4 Finish tab Function Name - Konica Minolta bizhub C452 | bizhub C452/C552/C552DS/C652/C652DS Print Operation - Page 106
selected in the drop-down list, in "Paper Size" of the application or printer driver. - If "Half-Fold" or "Tri-Fold" is specified for the "Fold" function and multiple pages are printed, the unit of finishing varies depending on the setting of [User Settings] - [Copier Settings] - [Half-Fold/Tri-Fold - Konica Minolta bizhub C452 | bizhub C452/C552/C552DS/C652/C652DS Print Operation - Page 107
Back Cover from Post Inserter Per Page Setting Edit List Option ON/OFF, Blank/Print Tray 1 to Tray 4, LCT, Bypass Tray ON/OFF, Blank/Print Tray 1 to Tray 4, LCT, Bypass Tray ON/OFF, PI Tray 1/ PI Tray 2 ON/OFF, PI Tray 1/ PI Tray 2 ON/OFF List Name [Edit List Name] [Up]/[Down] [Add] [Delete] Page - Konica Minolta bizhub C452 | bizhub C452/C552/C552DS/C652/C652DS Print Operation - Page 108
box to insert interleaves when printing transparencies. It can be specified when "Transparency" is selected for Paper Type. Select the paper tray for the transparency interleaves. Selectable items vary depending on the option installation status. Reference - Front Cover from Post Inserter or Back - Konica Minolta bizhub C452 | bizhub C452/C552/C552DS/C652/C652DS Print Operation - Page 109
Header/Footer Option ON/OFF None Create Host Image Print Host Image Print Device Image Copy Protect/Repeatable Stamp/Copy Guard/Password Copy ON/OFF ON/OFF Machine Setting 1 to Machine Setting 20 Description Select this check box to print the document with a watermark (character stamp) overlapped - Konica Minolta bizhub C452 | bizhub C452/C552/C552DS/C652/C652DS Print Operation - Page 110
Reference - "Print Device Image" of the "Overlay" function is available only for the PCL driver. - The function of [Acquire Device Information] is available only when your computer is connected to and can communicate with the machine. To use [Acquire Device Information], in Administrator Settings of - Konica Minolta bizhub C452 | bizhub C452/C552/C552DS/C652/C652DS Print Operation - Page 111
for sharing it with other users or clear this check box to register it for private use. Editing overlay The window to be displayed by clicking [Edit] varies depending on the overlay selection ("Print Host Image" or "Print Device Image"). When "Print Host Image" is selected: You can specify - Konica Minolta bizhub C452 | bizhub C452/C552/C552DS/C652/C652DS Print Operation - Page 112
Reference - "Print Device Image" of the "Overlay" function is available only for the PCL driver. - The function of [Acquire Device Information] is available only when your computer is connected to and can communicate with the machine. To use [Acquire Device Information], in Administrator Settings of - Konica Minolta bizhub C452 | bizhub C452/C552/C552DS/C652/C652DS Print Operation - Page 113
a document is copied illegally on the machine that supports this function, the composed pattern is scanned, and you are prompted to enter the password. To copy a document, enter the specified password when printing. Enter the password for "Password Copy". Select this check box to embed the selected - Konica Minolta bizhub C452 | bizhub C452/C552/C552DS/C652/C652DS Print Operation - Page 114
to be printed. Click [Edit] to specify the display type and presence or absence of the time display. Specify the pages to print the date and time. Specify the text color used for printing. Specify the print position. Specify the page to start printing the page number. bizhub C652/C652DS/C552/C552DS - Konica Minolta bizhub C452 | bizhub C452/C552/C552DS/C652/C652DS Print Operation - Page 115
page and the back cover page, when attaching the cover pages. Specify the text color used for printing. Specify the print position. 9.4.7 Quality tab The functions displayed vary depending on which of the PCL/PS/XPS drivers is used. PCL driver PS driver bizhub C652/C652DS/C552/C552DS/C452 9-25 - Konica Minolta bizhub C452 | bizhub C452/C552/C552DS/C652/C652DS Print Operation - Page 116
Parameter details 9 XPS driver Function Name Select Color 2 Color Print with Black Quality Adjustment Color Settings Pattern Image Compression Auto Trapping Option Auto Color Full Color Gray scale 2 Color Black + Red Black + Green Black + Blue Black + Cyan Black + Magenta Black + Yellow ON/OFF - Konica Minolta bizhub C452 | bizhub C452/C552/C552DS/C652/C652DS Print Operation - Page 117
or outline fonts. Also specify whether to replace the TrueType fonts by printer fonts when printing. If garbled characters are detected while printing data using the PCL driver, set download fonts to bitmap fonts, and set printer fonts to OFF. Reference - The "2 Color" option of "Select Color" is - Konica Minolta bizhub C452 | bizhub C452/C552/C552DS/C652/C652DS Print Operation - Page 118
x64, Windows Vista x64, Windows Server 2003 x64, or Windows Server 2008 x64. - You can change the "Excel Job Control" setting only when the printer driver setting dialog is displayed from the "Printer" ("Printers and Faxes" in Windows XP/Server 2003) window. bizhub C652/C652DS/C552/C552DS/C452 - Konica Minolta bizhub C452 | bizhub C452/C552/C552DS/C652/C652DS Print Operation - Page 119
10 Print Functions of Mac OS X - Konica Minolta bizhub C452 | bizhub C452/C552/C552DS/C652/C652DS Print Operation - Page 120
appear, select the printer from "Print & Fax", "Printer Setup Utility" or "Print Center". For details, refer to page 6-3 and page 6-10. % The "Print" window varies depending on the application software. 3 Specify the print range and the number of copies to print. % When the setting items are not - Konica Minolta bizhub C452 | bizhub C452/C552/C552DS/C652/C652DS Print Operation - Page 121
6 Enter the ID and password of the document, and then click [OK]. Data is sent and saved in the Secure Print User Box of this machine. d Reference For details on "Installable Options", refer to page 10-4. For details on secure printing, refer to page 12-5. bizhub C652/C652DS/C552/C552DS/C452 10-3 - Konica Minolta bizhub C452 | bizhub C452/C552/C552DS/C652/C652DS Print Operation - Page 122
the "Print & Fax" window, click [Option & Supplies] (OS X 10.5) or [Printer Setup] (OS X 10.4). % For the "Printer Setup Utility"/"Print Center" window, select "Show Info" of the"Printer" menu. 3 Display the "Installable Options" window. % For Mac OS X 10.5, click [Driver]. % In OS X 10.2/10.3/10 - Konica Minolta bizhub C452 | bizhub C452/C552/C552DS/C652/C652DS Print Operation - Page 123
"Print" window are saved by selecting "Save As" in "Presets". These settings can be used by selecting them in "Presets". Reference - The "Per Page Setting" list is not saved with the preset. d Reference For details on the function and settings of the printer driver, refer to page 10-9. bizhub C652 - Konica Minolta bizhub C452 | bizhub C452/C552/C552DS/C652/C652DS Print Operation - Page 124
settings that are displayed when you specify, in the "Print" window, the functions unique to the machine (Output Method, Layout/Finishing, Paper Tray/Output Tray, Cover Sheet/Transparency Interleave, Per Page Setting, Stamp/Composition and Quality). OS X 10.5: OS X 10.4: bizhub C652/C652DS/C552 - Konica Minolta bizhub C452 | bizhub C452/C552/C552DS/C652/C652DS Print Operation - Page 125
10.3 Common Setting 10 Item Paper View Detailed Information Printer Information Default Cancel Print Function Displays the sample page layout based on current settings for checking the print result image. Displays the current settings in texts. Displays the installation option status. Click this - Konica Minolta bizhub C452 | bizhub C452/C552/C552DS/C652/C652DS Print Operation - Page 126
(or "Paper Setup"). 2 Open the window for registering a custom size. % For Mac OS X 10.4/10.5, select "Manage Custom Sizes" from the Paper Size list. % For Mac OS X 10.2/10.3, select "Custom Paper Sizes" from "Settings". 3 Click [+] (OS X 10.4/10.5) or [Add] (OS X 10.2/10.3). 4 Enter the paper size - Konica Minolta bizhub C452 | bizhub C452/C552/C552DS/C652/C652DS Print Operation - Page 127
the paper size to be used for [Change Size]. - For Mac OS X 10.5, you can specify "Paper Size" and "Orientation" also from the Print window. d Reference For details on the paper sizes loadable in the paper trays, refer to the "User's Guide [Copy Operations]". bizhub C652/C652DS/C552/C552DS/C452 10 - Konica Minolta bizhub C452 | bizhub C452/C552/C552DS/C652/C652DS Print Operation - Page 128
as that available from "Page Attributes". - When the setting items are not displayed in OS X 10.5, click on the right side of "Printer". 10.5.3 Output Method Function Name Collate Option ON/OFF Offset ON/OFF bizhub C652/C652DS/C552/C552DS/C452 Description Select this check box to collate - Konica Minolta bizhub C452 | bizhub C452/C552/C552DS/C652/C652DS Print Operation - Page 129
] displays the "Output Method" functions for which detail settings can be specified. Clicking [Expand All] displays the settings. Selecting a function and clicking [Settings] displays the window for specifying the detail settings for the selected function. bizhub C652/C652DS/C552/C552DS/C452 10-11 - Konica Minolta bizhub C452 | bizhub C452/C552/C552DS/C652/C652DS Print Operation - Page 130
- In "Encryption Passphrase", enter the encryption passphrase that matches the one that configured in "Driver Password Encryption Setting" of the machine. d Reference For details on allowing the user to specify "Encryption Passphrase", refer to page 12-32. bizhub C652/C652DS/C552/C552DS/C452 10-12 - Konica Minolta bizhub C452 | bizhub C452/C552/C552DS/C652/C652DS Print Operation - Page 131
orientations in one job may cause images to be partially lost or overlapped. Specify the presence of overlap width line. It can be specified when Poster Mode is set to an option other than "Off". Select this check box to rotate the document 180° to print. bizhub C652/C652DS/C552/C552DS/C452 10-13 - Konica Minolta bizhub C452 | bizhub C452/C552/C552DS/C652/C652DS Print Operation - Page 132
selected in the drop-down list, in "Paper Size" of the application or printer driver. - If "Half-Fold" or "Tri-Fold" is specified for the "Fold" function and multiple pages are printed, the unit of finishing varies depending on the setting of [User Settings] - [Copier Settings] - [Half-Fold/Tri-Fold - Konica Minolta bizhub C452 | bizhub C452/C552/C552DS/C652/C652DS Print Operation - Page 133
status. Reference - Specify "Duplex 2nd Side" when printing on the back side of paper. - "User Paper" of Paper Type is the frequently used paper type registered on the machine side. For details on registering the user paper, refer to the "User's Guide [Copy Operations]". bizhub C652/C652DS/C552 - Konica Minolta bizhub C452 | bizhub C452/C552/C552DS/C652/C652DS Print Operation - Page 134
The Cover Mode setting window and the OHP Interleave window can be switched. Function Name Front Cover Option ON/OFF Back Cover Off, Print, Blank Off, Tray 1 to Tray 4, LCT, Bypass Tray ON/OFF Off, Print, Blank Off, Tray 1 to Tray 4, LCT, Bypass Tray Front Cover from Post Inserter ON/OFF Off - Konica Minolta bizhub C452 | bizhub C452/C552/C552DS/C652/C652DS Print Operation - Page 135
Back Cover from Post Inserter function is available only if the optional post inserter is installed. - Front Cover from Post Inserter and Front Cover or Back Cover from Post Inserter and Back Cover cannot be specified at the same time. 10.5.7 Per Page Setting The print type and paper tray can be - Konica Minolta bizhub C452 | bizhub C452/C552/C552DS/C652/C652DS Print Operation - Page 136
example, "6-10"). Select Print or Blank and 2-Sided or 1-Sided printing for the selected condition row. Specify the paper tray used to print the selected condition row. Specify the number of staples and the stapling position for the selected condition row. bizhub C652/C652DS/C552/C552DS/C452 10-18 - Konica Minolta bizhub C452 | bizhub C452/C552/C552DS/C652/C652DS Print Operation - Page 137
. For details, refer to page 10-22. Select this check box to print the header and footer. Select the header/footer from the list specified in the main unit. Click [Settings] to specify items and pages to be printed. For details, refer to page 10-22. bizhub C652/C652DS/C552/C552DS/C452 10-19 - Konica Minolta bizhub C452 | bizhub C452/C552/C552DS/C652/C652DS Print Operation - Page 138
when [Password Copy] and [Copy Guard] are set to [Yes] in [Administrator Settings]-[Security Settings]-[Security Details] under this machine while the optional Security Kit SC-507 is installed. For details, refer to the User's Guide [Copy Operations]. bizhub C652/C652DS/C552/C552DS/C452 10-20 - Konica Minolta bizhub C452 | bizhub C452/C552/C552DS/C652/C652DS Print Operation - Page 139
Editing Date/Time Function Name Format Pages Text Color Print Position Description Displays the format of the date and time to be printed. Specify the pages to print the date and time. Specify the text color used for printing. Specify the print position. bizhub C652/C652DS/C552/C552DS/C452 10-21 - Konica Minolta bizhub C452 | bizhub C452/C552/C552DS/C652/C652DS Print Operation - Page 140
in the machine. When printing multiple copies, this function prints the number of copies in the header/footer. The start number or number of digits can be specified. Specify the pages to print the header/footer. Specify the text color used for printing. bizhub C652/C652DS/C552/C552DS/C452 10-22 - Konica Minolta bizhub C452 | bizhub C452/C552/C552DS/C652/C652DS Print Operation - Page 141
to prevent white space being generated around black characters or figures. You can specify to cause the overlapping on the characters alone or on characters and figures. d Reference For details on managing the profile, refer to page 12-36 and page 12-38. bizhub C652/C652DS/C552/C552DS/C452 10-23 - Konica Minolta bizhub C452 | bizhub C452/C552/C552DS/C652/C652DS Print Operation - Page 142
11 Print Functions of Mac OS 9.2 - Konica Minolta bizhub C452 | bizhub C452/C552/C552DS/C652/C652DS Print Operation - Page 143
, refer to page 11-5. % The printer driver settings changed in the "Print" window are not saved, and the original settings are restored when you exit the application. 5 Click [Print]. Printing is executed and the data indicator of the machine flashes. bizhub C652/C652DS/C552/C552DS/C452 11-2 - Konica Minolta bizhub C452 | bizhub C452/C552/C552DS/C652/C652DS Print Operation - Page 144
to be used by the printer driver. Be sure to configure the settings for the installed options. 11.2.1 Option settings 1 In the "Apple" menu, select "Chooser". 2 Select the printer name. 3 Click [Setup]. 4 Click [Configure]. The option setting window appears. % When the printer is specified as the - Konica Minolta bizhub C452 | bizhub C452/C552/C552DS/C652/C652DS Print Operation - Page 145
printer driver settings. For OS 9.2, click [Save Settings] in the "Print" window to save the settings. d Reference For details on the function and settings of the printer driver, refer to page 11-5. Reference - The settings in the "Page Setup" dialog box cannot be saved. bizhub C652/C652DS/C552 - Konica Minolta bizhub C452 | bizhub C452/C552/C552DS/C652/C652DS Print Operation - Page 146
details The printer driver function settings can be configured in "Page Attributes" in the "Page Setup" dialog box or "Layout" or "Finishing Options" in the "Print" window. 11.3.1 Page Attributes From the [File] menu, select in "Page Setup" (or "Print Setup"). Function Name Paper Orientation - Konica Minolta bizhub C452 | bizhub C452/C552/C552DS/C652/C652DS Print Operation - Page 147
. Select this check box to collate pages sequentially when printing multiple sets of copies. Specify the page range to print. Select the paper tray and paper type to be used. 11.3.4 Layout (Combination) Specify this item to print multiple pages on one page. Function Name Page per sheet Layout - Konica Minolta bizhub C452 | bizhub C452/C552/C552DS/C652/C652DS Print Operation - Page 148
Binding Position Print Type Combination Staple Punch Fold Front Cover Front Cover Tray Back Cover Back Cover Tray Front Cover from Post Inserter Back Cover from Post Inserter Transparency Interleave Interleave Tray Output Method Select Color Glossy Mode Color Settings Auto Trapping Black Overprint - Konica Minolta bizhub C452 | bizhub C452/C552/C552DS/C652/C652DS Print Operation - Page 149
selected in the drop-down list, in "Paper Size" of the application or printer driver. - If "Half-Fold" or "Tri-Fold" is specified for the "Fold" function and multiple pages are printed, the unit of finishing varies depending on the setting of [User Settings] - [Copier Settings] - [Half-Fold/Tri-Fold - Konica Minolta bizhub C452 | bizhub C452/C552/C552DS/C652/C652DS Print Operation - Page 150
12 Function Details - Konica Minolta bizhub C452 | bizhub C452/C552/C552DS/C652/C652DS Print Operation - Page 151
and printing of the remaining number of copies can be performed from the control panel. 12.1.1 Setting the printer driver The following five printer drivers support this feature. - KONICA MINOLTA PCL Printer Driver for Windows (PCL driver) - KONICA MINOLTA PostScript Printer Driver for Windows (PS - Konica Minolta bizhub C452 | bizhub C452/C552/C552DS/C652/C652DS Print Operation - Page 152
Recalling a job from the control panel Reference - For details on the functions of the keys on the control panel, refer to the "User's Guide [Copy Operations]". 1 Press [Job List] on the control panel, and then press [Job Details]. The Print window appears. bizhub C652/C652DS/C552/C552DS/C452 12-3 - Konica Minolta bizhub C452 | bizhub C452/C552/C552DS/C652/C652DS Print Operation - Page 153
in the Change Settings screen, and then press [OK]. The Release Held Jobs screen appears again. % To cancel releasing the held job, press [Cancel]. 6 Press [OK] or the [Start] key in the control panel. The stored job is changed to an active job, and then printed. bizhub C652/C652DS/C552/C552DS/C452 - Konica Minolta bizhub C452 | bizhub C452/C552/C552DS/C652/C652DS Print Operation - Page 154
Print User Box] always appears on the screen. For details, refer to the "User's Guide [Box Operations]". 12.2.1 Setting the printer driver The following four printer drivers support this feature. - KONICA MINOLTA PCL Printer Driver for Windows (PCL driver) - KONICA MINOLTA PostScript Printer - Konica Minolta bizhub C452 | bizhub C452/C552/C552DS/C652/C652DS Print Operation - Page 155
ID and password whenever you print, register them in advance so that the screen to prompt entering the ID and password does not appear when you select "Secure Print". For Mac OS X 1 Display the "Output Method" window. 2 Select "Secure Print" in "Output Method". bizhub C652/C652DS/C552/C552DS/C452 - Konica Minolta bizhub C452 | bizhub C452/C552/C552DS/C652/C652DS Print Operation - Page 156
and password that have been specified in the printer driver are required. Reference - Secured documents are automatically deleted after a certain length of time has elapsed since their registration. The default setting for this time is 1 day, and the value can be specified in the administrator mode - Konica Minolta bizhub C452 | bizhub C452/C552/C552DS/C652/C652DS Print Operation - Page 157
User Box], and then press [Use/File]. 3 Enter the ID for the secure print document, and then press [OK]. 4 Enter the password for the secure print document, and then press [OK]. If the specified ID and password match, the list of secure print documents appears. bizhub C652/C652DS/C552/C552DS - Konica Minolta bizhub C452 | bizhub C452/C552/C552DS/C652/C652DS Print Operation - Page 158
press [Print]. The contents and a preview of the document can be checked in [Document Details]. 6 Change the print conditions as necessary. 7 Press [Start] or the [Start] key in the control panel The document is printed. % To stop operations, press [Cancel]. bizhub C652/C652DS/C552/C552DS/C452 - Konica Minolta bizhub C452 | bizhub C452/C552/C552DS/C652/C652DS Print Operation - Page 159
the specified ID appears. 4 Select the document you want to print and then press [Enter Password]. 5 Enter the password for the secure print document, and then press [OK]. The list of secure print documents matching the specified password appears. bizhub C652/C652DS/C552/C552DS/C452 12-10 - Konica Minolta bizhub C452 | bizhub C452/C552/C552DS/C652/C652DS Print Operation - Page 160
Error" in Administrator Settings is set to Mode 2 and a user enters an incorrect password the specified number of times, the document is locked. To release from the operation prohibition status, contact your administrator. 6 Select the document to be printed on the "Print" tab, and then press [Print - Konica Minolta bizhub C452 | bizhub C452/C552/C552DS/C652/C652DS Print Operation - Page 161
User's Guide [Box Operations]". 12.3.1 Setting the printer driver The following four printer drivers support this feature. - KONICA MINOLTA PCL Printer Driver for Windows (PCL driver) - KONICA MINOLTA PostScript Printer Driver for Windows (PS driver) - KONICA MINOLTA XPS Printer Driver for Windows - Konica Minolta bizhub C452 | bizhub C452/C552/C552DS/C652/C652DS Print Operation - Page 162
so that the screen to prompt entering the file name and User Box number does not appear when you select "Save in User Box". For Mac OS X 1 Display the "Output Method" window. 2 Select "Save in User Box" or "Save in User Box and Print" in "Output Method". bizhub C652/C652DS/C552/C552DS/C452 12-13 - Konica Minolta bizhub C452 | bizhub C452/C552/C552DS/C652/C652DS Print Operation - Page 163
. Specify the desired User Box from the classification of the saved User Boxes. The User Box number can be directly specified. % If a password is specified for the User Box, go to Step 3. % If a password is not specified for the User Box, go to Step 4. bizhub C652/C652DS/C552/C552DS/C452 12-14 - Konica Minolta bizhub C452 | bizhub C452/C552/C552DS/C652/C652DS Print Operation - Page 164
fax. For details on the User Box functions of the machine, refer to the "User's Guide [Box Operations]". 5 Change the print conditions as necessary. 6 Press [Start] or the [Start] key in the control panel The document is printed. % To stop operations, press [Cancel]. bizhub C652/C652DS/C552/C552DS - Konica Minolta bizhub C452 | bizhub C452/C552/C552DS/C652/C652DS Print Operation - Page 165
a user name and password must be entered when printing. The following four printer drivers support this feature. - KONICA MINOLTA PCL Printer Driver for Windows (PCL driver) - KONICA MINOLTA PostScript Printer Driver for Windows (PS driver) - KONICA MINOLTA XPS Printer Driver for Windows (XPS driver - Konica Minolta bizhub C452 | bizhub C452/C552/C552DS/C652/C652DS Print Operation - Page 166
in the printer driver in advance as the default value, and individual jobs do not require password entry. % When user authentication is performed with the PageScope Authentication Manager, you must enter the user information specified by the server administrator. The windows and input items - Konica Minolta bizhub C452 | bizhub C452/C552/C552DS/C652/C652DS Print Operation - Page 167
, you must enter the user information specified by the server administrator. The windows and input items that appear vary according to the settings. For details, contact your server administrator. 4 Click [OK] to determine the settings and start printing. If the entered user name is a name enabled - Konica Minolta bizhub C452 | bizhub C452/C552/C552DS/C652/C652DS Print Operation - Page 168
settings are configured on the machine, you must enter the account track code (access code) when printing. The following four printer drivers support this feature. - KONICA MINOLTA PCL Printer Driver for Windows (PCL driver) - KONICA MINOLTA PostScript Printer Driver for Windows (PS driver) - KONICA - Konica Minolta bizhub C452 | bizhub C452/C552/C552DS/C652/C652DS Print Operation - Page 169
can also be specified in the printer driver in advance as the default value, and individual jobs do not require password entry. 4 Click [OK] to determine the settings and start printing. If the entered access code is an access code enabled on the machine, the job is printed and counted as a job for - Konica Minolta bizhub C452 | bizhub C452/C552/C552DS/C652/C652DS Print Operation - Page 170
dialog box does not appear when the function is specified. 4 Click [OK] to determine the settings and start printing. If the entered access code is an access code enabled on the machine, the job is printed and counted as a job for the specified account. bizhub C652/C652DS/C552/C552DS/C452 12-21 - Konica Minolta bizhub C452 | bizhub C452/C552/C552DS/C652/C652DS Print Operation - Page 171
the ID & Print User Box, refer to page 12-26. For details on using the authentication unit for printing or logging in, refer to page 12-28. 12.6.1 Setting the printer driver For Windows 1 Click to display the "Basic" tab. 2 Click [Authentication/Account Track]. bizhub C652/C652DS/C552/C552DS/C452 - Konica Minolta bizhub C452 | bizhub C452/C552/C552DS/C652/C652DS Print Operation - Page 172
[User Authentication Settings] - [Administrative Settings] [ID & Print Settings] - "ID & Print" is set to "ON" in the Administrator Settings of the machine, general print jobs are also saved in the ID & Print User Box. For details, refer to page 13-48. 5 Print the document. bizhub C652/C652DS/C552 - Konica Minolta bizhub C452 | bizhub C452/C552/C552DS/C652/C652DS Print Operation - Page 173
Settings] - [Administrative Settings] - [ID & Print Settings] - "Public User" is set to "Save" in the Administrator Settings of the machine and the public user job is permitted, public user jobs are also saved in the ID & Print User Box. For details, refer to page 13-48. bizhub C652/C652DS/C552 - Konica Minolta bizhub C452 | bizhub C452/C552/C552DS/C652/C652DS Print Operation - Page 174
[User Authentication Settings] - [Administrative Settings] [ID & Print Settings] - "ID & Print" is set to "ON" in the Administrator Settings of the machine, general print jobs are also saved in the ID & Print User Box. For details, refer to page 13-48. 5 Print the document. bizhub C652/C652DS/C552 - Konica Minolta bizhub C452 | bizhub C452/C552/C552DS/C652/C652DS Print Operation - Page 175
[Custom Display Settings] - [User Box Settings] of the machine so that [ID & Print User Box] always appears on the screen. For details, refer to the "User's Guide [Box Operations]". 1 Enter the user name and password from the control panel of the printer. bizhub C652/C652DS/C552/C552DS/C452 12 - Konica Minolta bizhub C452 | bizhub C452/C552/C552DS/C652/C652DS Print Operation - Page 176
Details]. % To stop operations, press [Cancel]. 6 When a screen confirming the deletion of the job appears, select the processing method. % Selecting [Print & Delete] prints and deletes the document in the ID & Print User Box. The document is printed. bizhub C652/C652DS/C552/C552DS/C452 12-27 - Konica Minolta bizhub C452 | bizhub C452/C552/C552DS/C652/C652DS Print Operation - Page 177
/Account Track] - [User Authentication Settings] [Administrative Settings] - [Default Operation Selection]. For details, refer to page 13-50. Reference - For details on the optional authentication units, refer to the "User's Guide [Copy Operations]". bizhub C652/C652DS/C552/C552DS/C452 12-28 - Konica Minolta bizhub C452 | bizhub C452/C552/C552DS/C652/C652DS Print Operation - Page 178
link file for printing an XHTML file, [WebDAV Settings] of this machine is required. To use a proxy for connection, register a proxy server in [Administrator Settings] - [Network Settings] [WebDAV Settings] - [WebDAV Client Settings] - [Proxy Server Address], and set [User Settings] [Cellular Phone - Konica Minolta bizhub C452 | bizhub C452/C552/C552DS/C652/C652DS Print Operation - Page 179
you want to send if it is selectable. 7 Enter the 4-digit PIN code into the cellular phone or PDA. You can check the print setting in [Check Print Settings]. Once the PIN code is verified, connection is established and data transmission and printing start. bizhub C652/C652DS/C552/C552DS/C452 12-30 - Konica Minolta bizhub C452 | bizhub C452/C552/C552DS/C652/C652DS Print Operation - Page 180
12.7 Printing from a cellular phone or PDA 12 d Reference You can configure print settings from the cellular phone or PDA in [User Settings] - [Cellular Phone/PDA Setting] - [Print Settings]. For details, refer to page 13-36. bizhub C652/C652DS/C552/C552DS/C452 12-31 - Konica Minolta bizhub C452 | bizhub C452/C552/C552DS/C652/C652DS Print Operation - Page 181
press [Security Settings]. 2 In the "Security Settings" screen, press [Driver Password Encryption Setting]. 3 Press [User-Defined]. % If you do not specify a user-defined "Encryption Passphrase", press [Use Factory Default]. 4 Press [Encryption Passphrase]. bizhub C652/C652DS/C552/C552DS/C452 12 - Konica Minolta bizhub C452 | bizhub C452/C552/C552DS/C652/C652DS Print Operation - Page 182
Confirmation], and then enter then enter the encryption passphrase again. 7 Press [OK]. This sets the encryption passphrase. 12.8.2 Setting the printer driver The following four printer drivers support this feature. - KONICA MINOLTA PCL Printer Driver for Windows (PCL driver) - KONICA MINOLTA - Konica Minolta bizhub C452 | bizhub C452/C552/C552DS/C652/C652DS Print Operation - Page 183
printer driver can be obtained automatically. 4 Click [OK]. For Mac OS X 1 Display the "Output Method" window. 2 Click [Detail Settings]. The "Detail Settings" window appears. 3 Select "Administrator Settings", and then click [Settings]. The "Administrator Settings" dialog box appears. bizhub C652 - Konica Minolta bizhub C452 | bizhub C452/C552/C552DS/C652/C652DS Print Operation - Page 184
Passphrase" check box. % Enter the encryption passphrase with 20 alphanumeric letters. Specify the same encryption passphrase for the machine and the printer driver. % An encryption passphrase using a series of the same letters is invalid. 5 Click [OK]. bizhub C652/C652DS/C552/C552DS/C452 12-35 - Konica Minolta bizhub C452 | bizhub C452/C552/C552DS/C652/C652DS Print Operation - Page 185
details, refer to page 12-38. 12.9.1 Setting the printer driver The following two printer drivers support this feature. - KONICA MINOLTA PostScript Printer Driver for Windows (PS driver) - KONICA MINOLTA PostScript PPD Printer Driver for Mac OS X For Windows 1 Click to display the "Quality" tab - Konica Minolta bizhub C452 | bizhub C452/C552/C552DS/C652/C652DS Print Operation - Page 186
the "Quality" window. 2 Click [Quality Adjustment]. The "Quality Adjustment" dialog box appears. 3 Configure the settings for "RGB Color", "Output Profile", and "Simulation Profile" according to the type of the document to be printed. % The ICC profiles registered in the printer driver can be - Konica Minolta bizhub C452 | bizhub C452/C552/C552DS/C652/C652DS Print Operation - Page 187
(bizhub)" application. For details, refer to the Help for the application software. 12.10.1 Setting the printer driver The following two printer drivers support this feature. - KONICA MINOLTA PostScript Printer Driver for Windows (PS driver) - KONICA MINOLTA PostScript PPD Printer Driver for Mac - Konica Minolta bizhub C452 | bizhub C452/C552/C552DS/C652/C652DS Print Operation - Page 188
when your computer is connected to and can communicate with the machine. 1 Display the "Quality" window. 2 Click [Quality Adjustment]. The "Quality Adjustment" dialog box appears. 3 Click [Manage Profile]. The "Color Profile Management" dialog box appears. bizhub C652/C652DS/C552/C552DS/C452 12-39 - Konica Minolta bizhub C452 | bizhub C452/C552/C552DS/C652/C652DS Print Operation - Page 189
10 Registering the ICC profiles in the printer driver 12 % Clicking [Download Manager] launches the "Download Manager (bizhub)" application. This function is available only when "Download Manager (bizhub list, and then click [Add Sel]. % To register the current driver settings as the profile, click - Konica Minolta bizhub C452 | bizhub C452/C552/C552DS/C652/C652DS Print Operation - Page 190
systems The following drivers support banner printing. - KONICA MINOLTA PCL Driver for Windows (PCL driver) - KONICA MINOLTA PostScript Driver for Windows (PS driver) - KONICA MINOLTA XPS Printer Driver for Windows (XPS driver) - KONICA MINOLTA PostScript PPD Printer Driver for Mac OS X 12.11 - Konica Minolta bizhub C452 | bizhub C452/C552/C552DS/C652/C652DS Print Operation - Page 191
printing is disabled. 1 From the "File" menu, select "Page Setup". 2 Open the window for registering a custom size. % For Mac OS X 10.4/10.5, select "Manage Custom Sizes..." from the Paper Size list. % For Mac OS X 10.2/10.3, select "Custom Paper Size" from "Settings:". 3 Click [+] (OS X 10.4/10 - Konica Minolta bizhub C452 | bizhub C452/C552/C552DS/C652/C652DS Print Operation - Page 192
the document data of the banner size to be printed from the computer. % If data of non-banner size is sent, the job will be discarded. 5 Open the bypass tray. % When the mount kit is not available, go to step 8. 6 Install the mount kit to the bypass tray. bizhub C652/C652DS/C552/C552DS/C452 12-43 - Konica Minolta bizhub C452 | bizhub C452/C552/C552DS/C652/C652DS Print Operation - Page 193
7 Set the guide of the mount kit. 8 With the side to be printed on facing down, insert the paper as far as possible into the feed slot. Place as many sheets as the specified number of copies to be printed into the tray. % When the mount kit is not available, hold paper with your hand. bizhub C652 - Konica Minolta bizhub C452 | bizhub C452/C552/C552DS/C652/C652DS Print Operation - Page 194
screen appears, press [Complete]. Printing of the data starts. Print while holding by hand the paper to be printed and output. To print another document successively, send its data from the computer. 11 To finish printing, press [Exit]. 12 Press [Yes]. bizhub C652/C652DS/C552/C552DS/C452 12-45 - Konica Minolta bizhub C452 | bizhub C452/C552/C552DS/C652/C652DS Print Operation - Page 195
13 Settings on the Control Panel - Konica Minolta bizhub C452 | bizhub C452/C552/C552DS/C652/C652DS Print Operation - Page 196
1 Press the [Utility/Counter] key. 2 Press [User Settings]. The User Settings screen appears. % It can also be selected by pressing the key in the keypad of the number indicated on the desired button. For [User Settings], press the [2] key in the keypad. bizhub C652/C652DS/C552/C552DS/C452 13-2 - Konica Minolta bizhub C452 | bizhub C452/C552/C552DS/C652/C652DS Print Operation - Page 197
either the Copy, Fax/Scan or User Box screen appears. % To return through the hierarchy of the Utility menu, press [Close] until the desired screen appears. Alternatively, press an item in the upper hierarchy in the sub-menu area to return to the item. bizhub C652/C652DS/C552/C552DS/C452 13-3 - Konica Minolta bizhub C452 | bizhub C452/C552/C552DS/C652/C652DS Print Operation - Page 198
this option to use PCL only. - PS: Select this option to use PS only. 1 In the User Settings screen, press [Printer Settings]. % For details on displaying the User Settings screen, refer to page 13-2. 2 Press [Basic Settings]. 3 Press [PDL Setting]. bizhub C652/C652DS/C552/C552DS/C452 13-4 - Konica Minolta bizhub C452 | bizhub C452/C552/C552DS/C652/C652DS Print Operation - Page 199
of Copies]. 4 Press the [C] key to clear the value, and then use the keypad to enter the number of sets. (1 to 9999) % If a value outside of the allowable range is specified, the message "Input error" appears. Enter a number within the allowable range. bizhub C652/C652DS/C552/C552DS/C452 13-5 - Konica Minolta bizhub C452 | bizhub C452/C552/C552DS/C652/C652DS Print Operation - Page 200
this option to print the image horizontally. 1 In the User Settings screen, press [Printer Settings]. % For details on displaying the User Settings screen, refer to page 13-2. 2 Press [Basic Settings]. 3 Press [Original Direction]. 4 Press the desired button. bizhub C652/C652DS/C552/C552DS/C452 - Konica Minolta bizhub C452 | bizhub C452/C552/C552DS/C652/C652DS Print Operation - Page 201
, normal printing may be interfered. 1 In the User Settings screen, press [Printer Settings]. % For details on displaying the User Settings screen, refer to page 13-2. 2 Press [Basic Settings]. 3 Press [Spool Print Jobs in HDD before RIP]. 4 Press the desired button. bizhub C652/C652DS/C552/C552DS - Konica Minolta bizhub C452 | bizhub C452/C552/C552DS/C652/C652DS Print Operation - Page 202
image may be affected since printing is forced. 1 In the User Settings screen, press [Printer Settings]. % For details on displaying the User Settings screen, refer to page 13-2. 2 Press [Basic Settings]. 3 Select [A4/A3LTR/LGR Auto Switch]. 4 Press the desired button. bizhub C652/C652DS/C552 - Konica Minolta bizhub C452 | bizhub C452/C552/C552DS/C652/C652DS Print Operation - Page 203
the User Settings screen, press [Printer Settings]. % For details on displaying the User Settings screen, refer to page 13-2. 2 Press [Basic Settings]. 3 Switch the page by pressing [ ] or [ ], and then press [Banner Sheet Setting]. 4 Press the desired button. bizhub C652/C652DS/C552/C552DS/C452 - Konica Minolta bizhub C452 | bizhub C452/C552/C552DS/C652/C652DS Print Operation - Page 204
screen, press [Printer Settings]. % For details on displaying the User Settings screen, refer to page 13-2. 2 Press [Basic Settings]. 3 Switch the page by pressing [ ] or [ ], and then press [Binding Direction Adjustment]. 4 Press the desired button. bizhub C652/C652DS/C552/C552DS/C452 13-10 - Konica Minolta bizhub C452 | bizhub C452/C552/C552DS/C652/C652DS Print Operation - Page 205
the User Settings screen, press [Printer Settings]. % For details on displaying the User Settings screen, refer to page 13-2. 2 Press [Basic Settings]. 3 Switch the page by pressing [ ] or [ ], and then press [Line Width Adjustment]. 4 Press the desired button. bizhub C652/C652DS/C552/C552DS/C452 - Konica Minolta bizhub C452 | bizhub C452/C552/C552DS/C652/C652DS Print Operation - Page 206
In the User Settings screen, press [Printer Settings]. % For details on displaying the User Settings screen, refer to page 13-2. 2 Press [Basic Settings]. 3 Switch the page by pressing [ ] or [ ], and then press [Gray Background Text Correction]. 4 Press the desired button. bizhub C652/C652DS/C552 - Konica Minolta bizhub C452 | bizhub C452/C552/C552DS/C652/C652DS Print Operation - Page 207
, press [Printer Settings]. % For details on displaying the User Settings screen, refer to page 13-2. 2 Press [Paper Setting]. 3 Press [Paper Tray]. 4 Press the button for the desired paper tray. % To select the paper tray automatically, press [Auto]. 5 Press [OK]. bizhub C652/C652DS/C552/C552DS - Konica Minolta bizhub C452 | bizhub C452/C552/C552DS/C652/C652DS Print Operation - Page 208
, press [Printer Settings]. % For details on displaying the User Settings screen, refer to page 13-2. 2 Press [Paper Setting]. 3 Select [Paper Size]. 4 Press the desired button. % When selecting other paper size, press [ ] or [ ] to switch the page. 5 Press [OK]. bizhub C652/C652DS/C552/C552DS - Konica Minolta bizhub C452 | bizhub C452/C552/C552DS/C652/C652DS Print Operation - Page 209
the default 2-sided printing setting. (Default: No) 1 In the User Settings screen, press [Printer Settings]. % For details on displaying the User Settings screen, refer to page 13-2. 2 Press [Paper Setting]. 3 Press [2-Sided Print]. 4 Press the desired button. bizhub C652/C652DS/C552/C552DS - Konica Minolta bizhub C452 | bizhub C452/C552/C552DS/C652/C652DS Print Operation - Page 210
for 2-sided printing. (Default: Left Bind) 1 In the User Settings screen, press [Printer Settings]. % For details on displaying the User Settings screen, refer to page 13-2. 2 Press [Paper Setting]. 3 Press [Binding Position]. 4 Press the desired button. bizhub C652/C652DS/C552/C552DS/C452 13 - Konica Minolta bizhub C452 | bizhub C452/C552/C552DS/C652/C652DS Print Operation - Page 211
, press [Printer Settings]. % For details on displaying the User Settings screen, refer to page 13-2. 2 Press [Paper Setting]. 3 Press [Staple]. 4 Press the desired button. Reference - The staple function is available only if the optional finisher is installed. bizhub C652/C652DS/C552/C552DS/C452 - Konica Minolta bizhub C452 | bizhub C452/C552/C552DS/C652/C652DS Print Operation - Page 212
the User Settings screen, refer to page 13-2. 2 Press [Paper Setting]. 3 Switch the page by pressing [ ] or [ ], and then press [Punch]. 4 Press the desired button. Reference - The punch function is available only when the punch kit is installed on the optional finisher. bizhub C652/C652DS/C552 - Konica Minolta bizhub C452 | bizhub C452/C552/C552DS/C652/C652DS Print Operation - Page 213
In the User Settings screen, press [Printer Settings]. % For details on displaying the User Settings screen, refer to page 13-2. 2 Press [Paper Setting]. 3 Switch the page by pressing [ ] or [ ], and then press [Banner Paper Tray]. 4 Press the desired button. 5 Press [OK]. bizhub C652/C652DS/C552 - Konica Minolta bizhub C452 | bizhub C452/C552/C552DS/C652/C652DS Print Operation - Page 214
2 Press [PCL Settings]. 3 Press [Font Settings]. 4 Press [Resident Font]. % If downloaded fonts are available, [Download Font] can also be selected. 5 Press the desired font name. % Switch the page by pressing [ ] or [ ], and then press the desired font name. bizhub C652/C652DS/C552/C552DS/C452 - Konica Minolta bizhub C452 | bizhub C452/C552/C552DS/C652/C652DS Print Operation - Page 215
13.2 User settings 13 % You can check the font number and the font size unit of the selected font. 6 Press [OK]. bizhub C652/C652DS/C552/C552DS/C452 13-21 - Konica Minolta bizhub C452 | bizhub C452/C552/C552DS/C652/C652DS Print Operation - Page 216
For details on displaying the User Settings screen, refer to page 13-2. 2 Press [PCL Settings]. 3 Press [Symbol Set]. 4 Press the desired symbol set name. % Switch the page by pressing [ ] or [ ], and then press the desired symbol set name. 5 Press [OK]. bizhub C652/C652DS/C552/C552DS/C452 13-22 - Konica Minolta bizhub C452 | bizhub C452/C552/C552DS/C652/C652DS Print Operation - Page 217
In the User Settings screen, press [Printer Settings]. % For details on displaying the User Settings screen, refer to page 13-2. 2 Press [PCL Settings]. 3 "Input error" appears. Enter a number within the allowable range. 5 Press [OK]. The font size is set. bizhub C652/C652DS/C552/C552DS/C452 13-23 - Konica Minolta bizhub C452 | bizhub C452/C552/C552DS/C652/C652DS Print Operation - Page 218
use the keypad to enter the number of lines. (5 lines to 128 lines) % If a value outside of the allowable range is specified, the message "Input error" appears. Enter a number within the allowable range. 5 Press [OK]. The number of lines is set. bizhub C652/C652DS/C552/C552DS/C452 13-24 - Konica Minolta bizhub C452 | bizhub C452/C552/C552DS/C652/C652DS Print Operation - Page 219
press [Printer Settings]. % For details on displaying the User Settings screen, refer to page 13-2. 2 Press [PCL Settings]. 3 Press [CR/LF Mapping]. 4 Select [Yes] or [No]. If [Yes] is selected, be sure to also press the button for the desired setting. 5 Press [OK]. bizhub C652/C652DS/C552/C552DS - Konica Minolta bizhub C452 | bizhub C452/C552/C552DS/C652/C652DS Print Operation - Page 220
occurs during PS rasterization. (Default: No) 1 In the User Settings screen, press [Printer Settings]. % For details on displaying the User Settings screen, refer to page 13-2. 2 Press [PS Setting]. 3 Press [Print PS Errors]. 4 Press the desired button. bizhub C652/C652DS/C552/C552DS/C452 13-26 - Konica Minolta bizhub C452 | bizhub C452/C552/C552DS/C652/C652DS Print Operation - Page 221
on the printer driver, refer to page 12-36. 1 In the User Settings screen, press [Printer Settings]. % For details on displaying the User Settings screen, refer to page 13-2. 2 Press [PS Setting]. 3 Press [ICC Profile Settings]. 4 Press the desired setting item. bizhub C652/C652DS/C552/C552DS/C452 - Konica Minolta bizhub C452 | bizhub C452/C552/C552DS/C652/C652DS Print Operation - Page 222
process is specified in the application, select "OFF" on the machine side. 1 In the User Settings screen, press [Printer Settings]. % For details on displaying the User Settings screen, refer to page 13-2. 2 Press [PS Setting]. 3 Press [Auto Trapping]. bizhub C652/C652DS/C552/C552DS/C452 13-28 - Konica Minolta bizhub C452 | bizhub C452/C552/C552DS/C652/C652DS Print Operation - Page 223
process is specified in the application, select "OFF" on the machine side. 1 In the User Settings screen, press [Printer Settings]. % For details on displaying the User Settings screen, refer to page 13-2. 2 Press [PS Setting]. 3 Press [Black Overprint]. bizhub C652/C652DS/C552/C552DS/C452 13-29 - Konica Minolta bizhub C452 | bizhub C452/C552/C552DS/C652/C652DS Print Operation - Page 224
13-2. 2 Press [XPS Settings]. % If an error is detected in the signature verification while "Print XPS Errors" is specified to print the information, the error information is printed. For details, refer to page 13-54. 3 Press [Verify XPS Digital Signature]. bizhub C652/C652DS/C552/C552DS/C452 13 - Konica Minolta bizhub C452 | bizhub C452/C552/C552DS/C652/C652DS Print Operation - Page 225
option to output the PCL font list. - PS Font List: Select this option to output the PS font list. 1 In the User Settings screen, press [Printer Settings]. % For details on displaying the User Settings screen, refer to page 13-2. 2 Press [Print Reports]. bizhub C652/C652DS/C552/C552DS/C452 13-31 - Konica Minolta bizhub C452 | bizhub C452/C552/C552DS/C652/C652DS Print Operation - Page 226
in [User Settings] - [Printer Settings] - [Paper Setting] - [Paper Size]. An image is enlarged or reduced to fit the paper size. 1 In the User Settings screen, press [Printer Settings]. % For details on displaying the User Settings screen, refer to page 13-2. bizhub C652/C652DS/C552/C552DS/C452 - Konica Minolta bizhub C452 | bizhub C452/C552/C552DS/C652/C652DS Print Operation - Page 227
13.2 User settings 13 2 Press [TIFF Image Paper Setting]. 3 Press [Paper Selection]. 4 Press the desired button. bizhub C652/C652DS/C552/C552DS/C452 13-33 - Konica Minolta bizhub C452 | bizhub C452/C552/C552DS/C652/C652DS Print Operation - Page 228
User Settings screen, press [Cellular Phone/PDA Setting]. % For details on displaying the User Settings screen, refer to page 13-2. % [Cellular Phone/PDA Setting] is displayed in the 2/2 screen. Press [Forward ] to switch the screen. 2 Press [Link File Error Notification]. bizhub C652/C652DS/C552 - Konica Minolta bizhub C452 | bizhub C452/C552/C552DS/C652/C652DS Print Operation - Page 229
Guide [Network Administrator]". 1 In the User Settings screen, press [Cellular Phone/PDA Setting]. % For details on displaying the User Settings screen, refer to page 13-2. % [Cellular Phone/PDA Setting] is displayed in the 2/2 screen. Press [Forward ] to switch the screen. bizhub C652/C652DS/C552 - Konica Minolta bizhub C452 | bizhub C452/C552/C552DS/C652/C652DS Print Operation - Page 230
on pages. A pattern to prevent unauthorized copying is printed on pages. Copy Protect: Prints hidden text. Copy Guard: Prints a Copy Guard pattern. Password Copy: Prints a password for Password Copy. Text or an image is repeatedly printed on all pages. bizhub C652/C652DS/C552/C552DS/C452 13-36 - Konica Minolta bizhub C452 | bizhub C452/C552/C552DS/C652/C652DS Print Operation - Page 231
Image Paper Setting] also affect the paper size output when printing from a cellular phone or PDA. For details, refer to page 13-32. - "Copy Guard" or "Password Copy" is displayed when the security kit SC-507 is installed. For details, refer to the "User's Guide [Copy Operations]". 1 In the User - Konica Minolta bizhub C452 | bizhub C452/C552/C552DS/C652/C652DS Print Operation - Page 232
User Settings screen, press [Copier Settings]. % For details on displaying the User Settings screen, refer to page 13-2. 2 Switch the page by pressing [ ] or [ ], and then press [Half-Fold/Tri-Fold Specification] (or [Half- Fold Specification]). 3 Press the desired button. bizhub C652/C652DS/C552 - Konica Minolta bizhub C452 | bizhub C452/C552/C552DS/C652/C652DS Print Operation - Page 233
Settings 13.3.1 Displaying the Administrator Settings screen 1 Press the [Utility/Counter] key. 2 Press [Administrator Settings]. 3 Enter the password, and then press [OK]. % For details on setting or changing the password, refer to the "User's Guide [Copy Operations]". bizhub C652/C652DS/C552 - Konica Minolta bizhub C452 | bizhub C452/C552/C552DS/C652/C652DS Print Operation - Page 234
on the desired button. For [3 Administrator Settings], press the [3] key on the keypad. % To finish configuring the Utility mode settings, press the [Utility/Counter] key. You can also exit the Utility screen by pressing [Close] until either the Copy, Fax/Scan or User Box screen appears. % To return - Konica Minolta bizhub C452 | bizhub C452/C552/C552DS/C652/C652DS Print Operation - Page 235
in the User Settings as well. Press [User Settings] - [System Settings] - [Output Setting] - [Print/Fax Output Setting] to display the Print/Fax Output Setting screen. - For details on the administrator security levels, refer to the "User's Guide [Copy Operations]". bizhub C652/C652DS/C552/C552DS - Konica Minolta bizhub C452 | bizhub C452/C552/C552DS/C652/C652DS Print Operation - Page 236
the Administrator Settings screen, refer to page 13-39. 2 In the System Settings screen, press [Output Settings]. 3 In the Output Settings screen, press [Output Tray Settings]. The Output Tray Settings screen appears. 4 Press the desired button. 5 Press [OK]. The output tray is set. bizhub C652 - Konica Minolta bizhub C452 | bizhub C452/C552/C552DS/C652/C652DS Print Operation - Page 237
the Administrator Settings screen, refer to page 13-39. 2 In the System Settings screen, press [User Box Settings]. 3 In the User Box Settings screen, press [Delete Secure Print Documents]. 4 To delete the secure print documents, press [Yes]. 5 Press [OK]. bizhub C652/C652DS/C552/C552DS - Konica Minolta bizhub C452 | bizhub C452/C552/C552DS/C652/C652DS Print Operation - Page 238
In the System Settings screen, press [User Box Settings]. 3 In the User Box Settings screen, press [Auto Delete Secure Document]. 4 Press the desired button. % To specify the time manually, press [Time] and then enter the time from the keypad. 5 Press [OK]. bizhub C652/C652DS/C552/C552DS/C452 13 - Konica Minolta bizhub C452 | bizhub C452/C552/C552DS/C652/C652DS Print Operation - Page 239
2 In the System Settings screen, press [User Box Settings]. 3 In the User Box Settings screen, press [ID & Print Delete Time]. 4 Press the desired button. % To specify the time manually, press [Time] and then enter the time from the keypad. 5 Press [OK]. bizhub C652/C652DS/C552/C552DS/C452 13-45 - Konica Minolta bizhub C452 | bizhub C452/C552/C552DS/C652/C652DS Print Operation - Page 240
on displaying the Administrator Settings screen, refer to page 13-39. 2 In the System Settings screen, press [User Box Settings]. 3 In the User Box Settings screen, press [ID & Print Delete after Print Setting]. 4 Press the desired button. 5 Press [OK]. bizhub C652/C652DS/C552/C552DS/C452 13 - Konica Minolta bizhub C452 | bizhub C452/C552/C552DS/C652/C652DS Print Operation - Page 241
on displaying the Administrator Settings screen, refer to page 13-39. 2 In the System Settings screen, switch the page by pressing [ ] or [ ], and then press [Skip Job Operation Settings]. 3 Press [Fax] or [Other than Fax]. 4 Press the desired button. bizhub C652/C652DS/C552/C552DS/C452 13 - Konica Minolta bizhub C452 | bizhub C452/C552/C552DS/C652/C652DS Print Operation - Page 242
, refer to page 13-39. 2 In the User Authentication/Account Track screen, press [User Auth. Settings]. 3 In the User Authentication Settings screen, press [Administrative Settings]. 4 In the Administrative Settings screen, press [ID & Print Settings]. bizhub C652/C652DS/C552/C552DS/C452 13-48 - Konica Minolta bizhub C452 | bizhub C452/C552/C552DS/C652/C652DS Print Operation - Page 243
to page 13-39. 2 In the User Authentication/Account Track screen, press [User Auth. Settings]. 3 In the User Authentication Settings screen, press [Administrative Settings]. 4 In the Administrative Settings screen, press [ID & Print Operation Settings]. bizhub C652/C652DS/C552/C552DS/C452 13-49 - Konica Minolta bizhub C452 | bizhub C452/C552/C552DS/C652/C652DS Print Operation - Page 244
13-39. 2 In the User Authentication/Account Track screen, press [User Authentication Settings]. 3 In the User Authentication Settings screen, press [Administrative Settings]. 4 In the Administrative Setting screen, press [Default Operation Selection]. bizhub C652/C652DS/C552/C552DS/C452 13-50 - Konica Minolta bizhub C452 | bizhub C452/C552/C552DS/C652/C652DS Print Operation - Page 245
details on displaying the Administrator Settings screen, refer to page 13-39. 2 In the User Authentication/Account Track screen, press [Print without Authentication]. 3 Press the desired button. 4 Press [OK]. The print without authentication is specified. bizhub C652/C652DS/C552/C552DS/C452 13-51 - Konica Minolta bizhub C452 | bizhub C452/C552/C552DS/C652/C652DS Print Operation - Page 246
the Administrator Settings screen, refer to page 13-39. 2 In the User Authentication/Account Track screen, press [User/Account Common Setting]. 3 In the User/Account Common Setting screen, press [Single Color > 2 Color Output Management]. 4 Press the desired button. bizhub C652/C652DS/C552/C552DS - Konica Minolta bizhub C452 | bizhub C452/C552/C552DS/C652/C652DS Print Operation - Page 247
, and then use the keypad to enter the time. (10 to 1000 sec.) % If a value outside of the allowable range is specified, the message "Input error" appears. Enter a number within the allowable range. The time until a communication timeout occurs is set. bizhub C652/C652DS/C552/C552DS/C452 13-53 - Konica Minolta bizhub C452 | bizhub C452/C552/C552DS/C652/C652DS Print Operation - Page 248
when an error occurs during XPS printing. (Default: No) 1 In the Administrator Settings screen, press [Printer Settings]. % For details on displaying the Administrator Settings screen, refer to page 13-39. 2 Press [Print XPS Errors]. 3 Press the desired button. bizhub C652/C652DS/C552/C552DS/C452 - Konica Minolta bizhub C452 | bizhub C452/C552/C552DS/C652/C652DS Print Operation - Page 249
to allow direct print from PageScope Web Connection. 1 In the Administrator Settings screen, press [Printer Settings]. % For details on displaying the Administrator Settings screen, refer to page 13-39. 2 Press [PSWC Direct Print]. 3 Press the desired button. bizhub C652/C652DS/C552/C552DS/C452 - Konica Minolta bizhub C452 | bizhub C452/C552/C552DS/C652/C652DS Print Operation - Page 250
13.4 Administrator Settings 13 13.4.16 Assign Account to Acquire Device Info Specify whether this machine requests the password from the Windows printer driver when the Windows printer driver acquires device information, for example, which options are installed in this machine. (Default: [No]) - [ - Konica Minolta bizhub C452 | bizhub C452/C552/C552DS/C652/C652DS Print Operation - Page 251
13.4 Administrator Settings 13 % The password is specified. bizhub C652/C652DS/C552/C552DS/C452 13-57 - Konica Minolta bizhub C452 | bizhub C452/C552/C552DS/C652/C652DS Print Operation - Page 252
the Administrator Settings screen, refer to page 13-39. 2 In the System Connection screen, press [OpenAPI Settings]. 3 In the OpenAPI Settings screen, press [Authentication]. 4 Set "Authentication" to [OFF]. 5 Press [OK]. The authentication settings are configured. bizhub C652/C652DS/C552/C552DS - Konica Minolta bizhub C452 | bizhub C452/C552/C552DS/C652/C652DS Print Operation - Page 253
. For details, refer to the "User's Guide [Network Administrator]". To enable a Bluetooth communication, contact your service representative in advance. 1 In the Administrator Settings screen, press [System Connection]. % For details on displaying the Administrator Settings screen, refer to page 13 - Konica Minolta bizhub C452 | bizhub C452/C552/C552DS/C652/C652DS Print Operation - Page 254
the computer should be limited only to the security document. (Default: No) Whenever printing is done from the printer driver, the data must be transmitted using the secure printing. Because this setting requires ID/password for every print job, your job is protected from intercepting by a third - Konica Minolta bizhub C452 | bizhub C452/C552/C552DS/C652/C652DS Print Operation - Page 255
the Administrator Settings screen, refer to page 13-39. 2 In the Security Settings screen, press [Driver Password Encryption Setting]. 3 Press the desired button. d Reference For details on selecting "User-Defined" for the encryption passphrase, refer to page 12-32. bizhub C652/C652DS/C552/C552DS - Konica Minolta bizhub C452 | bizhub C452/C552/C552DS/C652/C652DS Print Operation - Page 256
14 PageScope Web Connection - Konica Minolta bizhub C452 | bizhub C452/C552/C552DS/C652/C652DS Print Operation - Page 257
:2f16 - http://[fe80::220:6bff:fe10:2f16]/ - If IPv6 is set to "ON" while the Internet Explorer is used, add "fe80::220:6bff:fe10:2f IPv6_MFP_1" to the hosts file in advance, and specify the address with the domain name. The main menu or login page appears. bizhub C652/C652DS/C552/C552DS/C452 14-2 - Konica Minolta bizhub C452 | bizhub C452/C552/C552DS/C652/C652DS Print Operation - Page 258
occurs in the administrator mode while the cache is enabled, the timeout page may appear again even when PageScope Web Connection is accessed again. It results in the control panel of this machine being locked, and you cannot handle the control panel. In this case, turn the main power off, and then - Konica Minolta bizhub C452 | bizhub C452/C552/C552DS/C652/C652DS Print Operation - Page 259
as a different user or as an administrator after login, it is necessary to log out first, then log in again. When user authentication or account track is not enabled The user logs in automatically as a public user. To log in as an administrator, log out first. bizhub C652/C652DS/C552/C552DS/C452 - Konica Minolta bizhub C452 | bizhub C452/C552/C552DS/C652/C652DS Print Operation - Page 260
Authentication Manager, contact your server administrator for the necessary information to log in. The User Authentication/Account Track page appears. Enter the required information to log in. To log in as a different user or an administrator, log out. bizhub C652/C652DS/C552/C552DS/C452 14-5 - Konica Minolta bizhub C452 | bizhub C452/C552/C552DS/C652/C652DS Print Operation - Page 261
if the authentication settings are changed from the control panel of the machine while logged in to the user mode, you will automatically be logged out. - For details on specifying the timeout period for the user and administrator mode, refer to page 14-22. bizhub C652/C652DS/C552/C552DS/C452 14 - Konica Minolta bizhub C452 | bizhub C452/C552/C552DS/C652/C652DS Print Operation - Page 262
to log in to PageScope Web Connection as a User Box administrator. For details on the User Box administrator settings, permissions and password settings, refer to the "User's Guide [Box Operations]". - When logged in to the user mode as an administrator, jobs that could not be deleted in the - Konica Minolta bizhub C452 | bizhub C452/C552/C552DS/C652/C652DS Print Operation - Page 263
"Public User", and then click [Login]. Logging in as a registered user If user authentication is enabled on the machine, the name and password for a registered user is required to log in. % In the login page, enter the user name and password, and then click [Login]. bizhub C652/C652DS/C552/C552DS - Konica Minolta bizhub C452 | bizhub C452/C552/C552DS/C652/C652DS Print Operation - Page 264
, it is no longer possible to log in to the administrator mode. For details on the Prohibited Functions When Authentication Error parameter, refer to the [User's Guide Copy Operations]. % The password entry page varies depending on the machine settings. bizhub C652/C652DS/C552/C552DS/C452 14-9 - Konica Minolta bizhub C452 | bizhub C452/C552/C552DS/C652/C652DS Print Operation - Page 265
display mode, the available items are the same. In the default setting, the screen is displayed in [Tab Function Display]. In [Tab Function Display], click the desired icon to change the menu. In [List Function Display], change the menu from the list box. bizhub C652/C652DS/C552/C552DS/C452 14-10 - Konica Minolta bizhub C452 | bizhub C452/C552/C552DS/C652/C652DS Print Operation - Page 266
14.2 Login and Logout 14 Select the desired menu in the drop-down list, click [Display]. bizhub C652/C652DS/C552/C552DS/C452 14-11 - Konica Minolta bizhub C452 | bizhub C452/C552/C552DS/C652/C652DS Print Operation - Page 267
times, it is no longer possible to log in to the administrator mode. For details on the Prohibited Functions When Authentication Error parameter, refer to the "User's Guide [Copy Operations]". - The password input page varies depending on the settings configured on the machine. - You can display the - Konica Minolta bizhub C452 | bizhub C452/C552/C552DS/C652/C652DS Print Operation - Page 268
sections of the machine. If an error occurred, click the icon to display the error information (consumables, paper trays and registered user information) so that the status can be checked. 5 Message display Displays the operating status of the machine. bizhub C652/C652DS/C552/C552DS/C452 14-13 - Konica Minolta bizhub C452 | bizhub C452/C552/C552DS/C652/C652DS Print Operation - Page 269
this button to update the displayed page. 10 Icon Select the category of the item to be displayed. The following ions are displayed in the user mode. • Information • Job • Box • Direct Print • Store Address • Customize 11 Menu Information and settings for the selected icon are listed. The - Konica Minolta bizhub C452 | bizhub C452/C552/C552DS/C652/C652DS Print Operation - Page 270
password for the user who is logged in. Displays the function permission information for users and accounts. Displays the network settings of the machine. Displays the settings for the printer controller of the machine. Allows you to print the font and setting information. bizhub C652/C652DS/C552 - Konica Minolta bizhub C452 | bizhub C452/C552/C552DS/C652/C652DS Print Operation - Page 271
14.4 Overview of the user mode 14 14.4.2 Job Item Current Jobs Job History Communication List Description Displays the currently executed job or queued jobs. Displays the completed jobs. Displays the completed transmission and reception jobs. bizhub C652/C652DS/C552/C552DS/C452 14-16 - Konica Minolta bizhub C452 | bizhub C452/C552/C552DS/C652/C652DS Print Operation - Page 272
Board, Polling TX, Memory RX, or Relay User Box) to enable you to handle a document saved in the User Box or change the User Box setting. Displayed when the optional fax kit is installed. This function enables you to create a new Bulletin Board or Relay User Box. bizhub C652/C652DS/C552/C552DS/C452 - Konica Minolta bizhub C452 | bizhub C452/C552/C552DS/C652/C652DS Print Operation - Page 273
a file saved in the computer to print it using this machine. If necessary, you can save the file to the User Box specified in the application settings. Reference - "Direct Print" may not be displayed depending on settings in the administrator mode. bizhub C652/C652DS/C552/C552DS/C452 14-18 - Konica Minolta bizhub C452 | bizhub C452/C552/C552DS/C652/C652DS Print Operation - Page 274
up to 10 body messages when sending E-mails. 14.4.6 Customize This function enables you to specify the initial screen after logging in. Item Option Description Allows you to configure the settings displayed in the initial page after logging in to this machine. bizhub C652/C652DS/C552/C552DS - Konica Minolta bizhub C452 | bizhub C452/C552/C552DS/C652/C652DS Print Operation - Page 275
of an error. Configure the setting to notify the target user of the total counter by E-mail, and register the E-mail address of the destination. Specify the date and time displayed in this machine. Configure Power Save or Weekly Timer Setting in this machine. bizhub C652/C652DS/C552/C552DS/C452 - Konica Minolta bizhub C452 | bizhub C452/C552/C552DS/C652/C652DS Print Operation - Page 276
dedicated driver software "KONICA MINOLTA TWAIN". For details, refer to the TWAIN driver manual in the CD supplied together with this machine. Item Machine Setting Register Support Information Network TWAIN User Box Setting Stamp Settings Blank Page Print Settings Skip Job Operation Settings Flash - Konica Minolta bizhub C452 | bizhub C452/C552/C552DS/C652/C652DS Print Operation - Page 277
"Administrator Password Setting" is not displayed when: - The SSL certificate is not installed - Enhanced Security Mode is enabled. - "Mode using SSL/TLS" is set to "None" in "Security" - "PKI Settings" - "SSL Setting" even though a device certificate is already registered bizhub C652/C652DS/C552 - Konica Minolta bizhub C452 | bizhub C452/C552/C552DS/C652/C652DS Print Operation - Page 278
. Specify the upper limit of the number of User Boxes. Specify whether to print data in single color or two-color mode. Allows you to configure settings to send files to the Home folder. Configure settings to restrict manual transmission destinations. bizhub C652/C652DS/C552/C552DS/C452 14-23 - Konica Minolta bizhub C452 | bizhub C452/C552/C552DS/C652/C652DS Print Operation - Page 279
, WINS, or SMB print setting. Configure the settings to perform scanning or printing using Web services. Configure Bonjour settings. Configure NetWare settings. Configure AppleTalk settings. Configure the direct SMTP TX or direct SMTP RX settings. Configure the WebDAV settings. Configure the OpenAPI - Konica Minolta bizhub C452 | bizhub C452/C552/C552DS/C652/C652DS Print Operation - Page 280
a document saved in the User Box or change the User Box setting. • The Bulletin Board User Box, or Relay User Box is available when the optional fax kit is installed. Allows you to create a new Bulletin Board User Box/Relay User Box/Annotation User Box. bizhub C652/C652DS/C552/C552DS/C452 14-25 - Konica Minolta bizhub C452 | bizhub C452/C552/C552DS/C652/C652DS Print Operation - Page 281
the timeout period of the interface. Configure the settings to enable direct printing using PageScope Web Connection. Select whether to specify a password to acquire device information through the printer driver. If [ON] is selected, specify the password. bizhub C652/C652DS/C552/C552DS/C452 14-26 - Konica Minolta bizhub C452 | bizhub C452/C552/C552DS/C652/C652DS Print Operation - Page 282
servers enables you to automatically connect to the server of the selected application. • "Application Registration" is not displayed when the optional fax kit is installed. Registers Prefix or Suffix to be added as destination information when E-mailing. bizhub C652/C652DS/C552/C552DS/C452 14-27 - Konica Minolta bizhub C452 | bizhub C452/C552/C552DS/C652/C652DS Print Operation - Page 283
Parameter Setting TX/RX Settings Function Setting PBX Connection Setting Report Settings Multi Line Settings Network Fax Setting Header Information Description Configure the setting to print the sender or receiving information. Specify the fax line such as Dialing Method. Configure the paper, User - Konica Minolta bizhub C452 | bizhub C452/C552/C552DS/C652/C652DS Print Operation - Page 284
14.5 Administrator mode overview 14 14.5.10 Wizard Configure the settings according to the instructions shown in the window for items requiring multiple settings. The available setting items are as follows. - TX Setting for scan documents. - Network print settings. - Restrict users from using this - Konica Minolta bizhub C452 | bizhub C452/C552/C552DS/C652/C652DS Print Operation - Page 285
15 Troubleshooting - Konica Minolta bizhub C452 | bizhub C452/C552/C552DS/C652/C652DS Print Operation - Page 286
to end. Problem A message saying "Printer is not connected" or "Print Error" appears on the computer screen. A postscript error appears on the computer screen. Print processing on the computer finished, but printing does not start. Possible Cause The printer driver specified when printing may not - Konica Minolta bizhub C452 | bizhub C452/C552/C552DS/C652/C652DS Print Operation - Page 287
whether the user name or account name concerned is authorized for printing. Check with the administrator whether printing by public users is permitted. When the above troubleshooting does not eliminate the problem, refer to the "User's Guide [Copy Operations]". bizhub C652/C652DS/C552/C552DS/C452 - Konica Minolta bizhub C452 | bizhub C452/C552/C552DS/C652/C652DS Print Operation - Page 288
of pages to be printed. Check the document. Check the stapling position in the printer driver settings. Check the setting of each item of the printer driver. Install the required options and enable them on the printer driver. Check the orientation setting. bizhub C652/C652DS/C552/C552DS/C452 15-4 - Konica Minolta bizhub C452 | bizhub C452/C552/C552DS/C652/C652DS Print Operation - Page 289
even if Gray Scale is selected with the PCL driver. If garbled characters are detected while printing data using the PCL driver, set download fonts to bitmap fonts, and set printer fonts to OFF. Simplify the images to reduce the data size. Load the paper of the appropriate size and orientation into - Konica Minolta bizhub C452 | bizhub C452/C552/C552DS/C652/C652DS Print Operation - Page 290
16 Appendix - Konica Minolta bizhub C452 | bizhub C452/C552/C552DS/C652/C652DS Print Operation - Page 291
inches (210 to 297 mm) e paper length 18 to 47-1/4 inches (457.3 to 1200 mm) European 80 fonts European 137 fonts IBM PC or compatible, and Macintosh (PowerPC, Intel Processor: Intel Processor is for Mac OS X 10.4/10.5 only) bizhub C652/C652DS/C552/C552DS/C452 16-2 - Konica Minolta bizhub C452 | bizhub C452/C552/C552DS/C652/C652DS Print Operation - Page 292
Printer driver 16 Specifications KONICA MINOLTA PCL Driver (PCL driver) KONICA MINOLTA PostScript Driver (PS driver) Windows NT Workstation Version 4.0 (Service Pack 6 or later) Windows NT Server Version 4.0 (Service Pack 6 or later) Windows 2000 Professional (Service Pack 4 or later) Windows - Konica Minolta bizhub C452 | bizhub C452/C552/C552DS/C652/C652DS Print Operation - Page 293
Home Basic * Windows Vista Home Premium * Windows Vista Ultimate * Windows Server 2008 Standard * Windows Server 2008 Enterprise * * Support 32-bit (x86)/64-bit (x64) environment. PostScript PPD driver (PS-PPD) Mac OS 9.2 or later Mac OS X 10.2.8/10.3/10.4/10.5 Fax driver Windows NT Workstation - Konica Minolta bizhub C452 | bizhub C452/C552/C552DS/C652/C652DS Print Operation - Page 294
of this driver has been confirmed only in the following environments. Server OS: Windows 2000 Advanced server/Windows 2003 Enterprise : Windows 2000/Windows XP ICAClient: ICA32bit * For operating in an environment other than those described above, consult the dealer. bizhub C652/C652DS/C552/C552DS - Konica Minolta bizhub C452 | bizhub C452/C552/C552DS/C652/C652DS Print Operation - Page 295
16.2 Configuration page 16 16.2 Configuration page bizhub C652/C652DS/C552/C552DS/C452 16-6 - Konica Minolta bizhub C452 | bizhub C452/C552/C552DS/C652/C652DS Print Operation - Page 296
16.3 Font list 16 16.3 Font list 16.3.1 PCL font list bizhub C652/C652DS/C552/C552DS/C452 16-7 - Konica Minolta bizhub C452 | bizhub C452/C552/C552DS/C652/C652DS Print Operation - Page 297
16.3 Font list 16 16.3.2 PS font list bizhub C652/C652DS/C552/C552DS/C452 16-8 - Konica Minolta bizhub C452 | bizhub C452/C552/C552DS/C652/C652DS Print Operation - Page 298
16.3 Font list 16 16.3.3 Demo page bizhub C652/C652DS/C552/C552DS/C452 16-9 - Konica Minolta bizhub C452 | bizhub C452/C552/C552DS/C652/C652DS Print Operation - Page 299
driver." list, select "KONICA MINOLTA C652 OpenOffice PPD", and then click [Next]. 8 In the "Choose a command line" window, select the printer registered to CUPS, and then click [Next]. 9 Click [Finish]. Printing with OpenOffice 1 In OpenOffice, select File-Print. 2 Select "KONICA MINOLTA C652 - Konica Minolta bizhub C452 | bizhub C452/C552/C552DS/C652/C652DS Print Operation - Page 300
under the folder to which PageMaker is installed. How to print 1 Select [File] - [Print]. 2 From the "PPD" box in the print window, select this machine. 3 Configure the "Paper" and "Features" settings for the printer. 4 Click the "Print" button to print. bizhub C652/C652DS/C552/C552DS/C452 16-11 - Konica Minolta bizhub C452 | bizhub C452/C552/C552DS/C652/C652DS Print Operation - Page 301
has a folder named "i386" at the same level in the hierarchy as "ntprint.inf". 10 Click [Open]. Installation starts. 11 When the installation completes, click [Close]. This completes the installation process for the additional printer driver for 64-bit OS. bizhub C652/C652DS/C552/C552DS/C452 16-12 - Konica Minolta bizhub C452 | bizhub C452/C552/C552DS/C652/C652DS Print Operation - Page 302
byte indicates a unit of information (data quantity) handled by a computer or printer. A byte consists of eight bits. A computer using services provided by servers via the network. The acronym for Cyan, Magenta, Yellow, and Black. The colors in the toner or ink used for color printing. Changing the - Konica Minolta bizhub C452 | bizhub C452/C552/C552DS/C652/C652DS Print Operation - Page 303
for Line Printer Request/Line Printer Daemon. This is a printing method implemented via networks, used for Windows NT or UNIX based systems. It uses TCP/IP to output printing data from Windows or UNIX to a printer on the network. MAC is the acronym for Media Access Control. A MAC address is an - Konica Minolta bizhub C452 | bizhub C452/C552/C552DS/C652/C652DS Print Operation - Page 304
the system of a computer. Windows, MacOS, or Unix is an OS. A printing to the device via network. • A logical printer name required for LPD/LPR printing. The resolution value indicates how much detail of an object can be reproduced precisely on an image or a print matter. bizhub C652/C652DS/C552 - Konica Minolta bizhub C452 | bizhub C452/C552/C552DS/C652/C652DS Print Operation - Page 305
the name server responsible for conversion between a computer name and an IP address. The abbreviation for XML Paper Specification. This is one of the electronic document formats developed by Microsoft Corporation. It is first supported in Windows Vista. bizhub C652/C652DS/C552/C552DS/C452 16-16 - Konica Minolta bizhub C452 | bizhub C452/C552/C552DS/C652/C652DS Print Operation - Page 306
17 Index - Konica Minolta bizhub C452 | bizhub C452/C552/C552DS/C652/C652DS Print Operation - Page 307
12-32 Error message 15-5 Ethernet 2-7 F Fax driver 3-4 Fax settings 14-28 Finish tab 9-15 Finishing options 11-7 Flow of printing 2-3 Folding 9-15, 10-14, 11-7 Font list 16-7 Font settings 13-20 Font size 13-23 Front cover 9-17, 10-16, 11-7 Front Cover from Post Inserter 9-17, 10-16, 11 - Konica Minolta bizhub C452 | bizhub C452/C552/C552DS/C652/C652DS Print Operation - Page 308
PPD driver 3-3, 16-10 Print 9-2 Print type 9-14, 10-13, 11-7 Print/fax output setting 13-41 Printer controller 2-2 Printer driver 4-3, 15-4 Printer drivers 3-3 Printer setting 14-26 Printer specific options 11-7 Printing 2-6, 10-2, 11-2, 12-43 Printing PS errors 13-26 Printing reports 13 - Konica Minolta bizhub C452 | bizhub C452/C552/C552DS/C652/C652DS Print Operation - Page 309
/IP settings 4-3 TIFF image paper setting 13-32 Time 9-19, 10-19 Timeout 13-53 Troubleshooting 15-2 U Uninstallating 8-2 USB 2-7, 3-5 User authentication 12-16, 14-5 User authentication/account track 14-23 User Box 14-17, 14-25 User Box Administrator 14-12 User mode 14-15 User settings - Konica Minolta bizhub C452 | bizhub C452/C552/C552DS/C652/C652DS Print Operation - Page 310
Account Track 10-11 Add Printer 5-3 Administrator Settings 13-39 Assign Account to Acquire Device Info 13-56 Auth. Unit 12-26 Authentication 13-58 Authentication/Account Track 9-13, 12-19 Auto Delete Secure Document 13-44 Auto Trapping 13-28 B Banner Printing 12-43 Banner Sheet Paper Tray - Konica Minolta bizhub C452 | bizhub C452/C552/C552DS/C652/C652DS Print Operation - Page 311
17 Symbol Set 13-22 T TIFF Image Paper Setting 13-32 To Login Screen 14-6 U USB Timeout 13-53 User Authentication 10-11 User Box 12-7, 12-26 User Settings 9-13 User settings 13-2 Utility/Counter 13-2 V Verify XPS Digital Signature 13-30 X XPS Setting 13-30 bizhub C652/C652DS/C552/C552DS - Konica Minolta bizhub C452 | bizhub C452/C552/C552DS/C652/C652DS Print Operation - Page 312
http://konicaminolta.com A1DM-9585IC-00 2009 Copyright 2009.11
-
 1
1 -
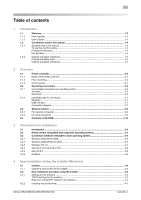 2
2 -
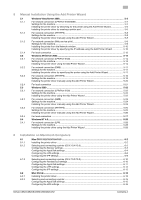 3
3 -
 4
4 -
 5
5 -
 6
6 -
 7
7 -
8
-
9
-
10
-
11
-
12
-
13
-
14
-
15
-
16
-
17
-
18
-
19
-
20
-
21
-
22
-
23
-
24
-
25
-
26
-
27
-
28
-
29
-
30
-
31
-
32
-
33
-
34
-
35
-
36
-
37
-
38
-
39
-
40
-
41
-
42
-
43
-
44
-
45
-
46
-
47
-
48
-
49
-
50
-
51
-
52
-
53
-
54
-
55
-
56
-
57
-
58
-
59
-
60
-
61
-
62
-
63
-
64
-
65
-
66
-
67
-
68
-
69
-
70
-
71
-
72
-
73
-
74
-
75
-
76
-
77
-
78
-
79
-
80
-
81
-
82
-
83
-
84
-
85
-
86
-
87
-
88
-
89
-
90
-
91
-
92
-
93
-
94
-
95
-
96
-
97
-
98
-
99
-
100
-
101
-
102
-
103
-
104
-
105
-
106
-
107
-
108
-
109
-
110
-
111
-
112
-
113
-
114
-
115
-
116
-
117
-
118
-
119
-
120
-
121
-
122
-
123
-
124
-
125
-
126
-
127
-
128
-
129
-
130
-
131
-
132
-
133
-
134
-
135
-
136
-
137
-
138
-
139
-
140
-
141
-
142
-
143
-
144
-
145
-
146
-
147
-
148
-
149
-
150
-
151
-
152
-
153
-
154
-
155
-
156
-
157
-
158
-
159
-
160
-
161
-
162
-
163
-
164
-
165
-
166
-
167
-
168
-
169
-
170
-
171
-
172
-
173
-
174
-
175
-
176
-
177
-
178
-
179
-
180
-
181
-
182
-
183
-
184
-
185
-
186
-
187
-
188
-
189
-
190
-
191
-
192
-
193
-
194
-
195
-
196
-
197
-
198
-
199
-
200
-
201
-
202
-
203
-
204
-
205
-
206
-
207
-
208
-
209
-
210
-
211
-
212
-
213
-
214
-
215
-
216
-
217
-
218
-
219
-
220
-
221
-
222
-
223
-
224
-
225
-
226
-
227
-
228
-
229
-
230
-
231
-
232
-
233
-
234
-
235
-
236
-
237
-
238
-
239
-
240
-
241
-
242
-
243
-
244
-
245
-
246
-
247
-
248
-
249
-
250
-
251
-
252
-
253
-
254
-
255
-
256
-
257
-
258
-
259
-
260
-
261
-
262
-
263
-
264
-
265
-
266
-
267
-
268
-
269
-
270
-
271
-
272
-
273
-
274
-
275
-
276
-
277
-
278
-
279
-
280
-
281
-
282
-
283
-
284
-
285
-
286
-
287
-
288
-
289
-
290
-
291
-
292
-
293
-
294
-
295
-
296
-
297
-
298
-
299
-
300
-
301
-
302
-
303
-
304
-
305
-
306
-
307
-
308
-
309
-
310
-
311
-
312
 |
 |
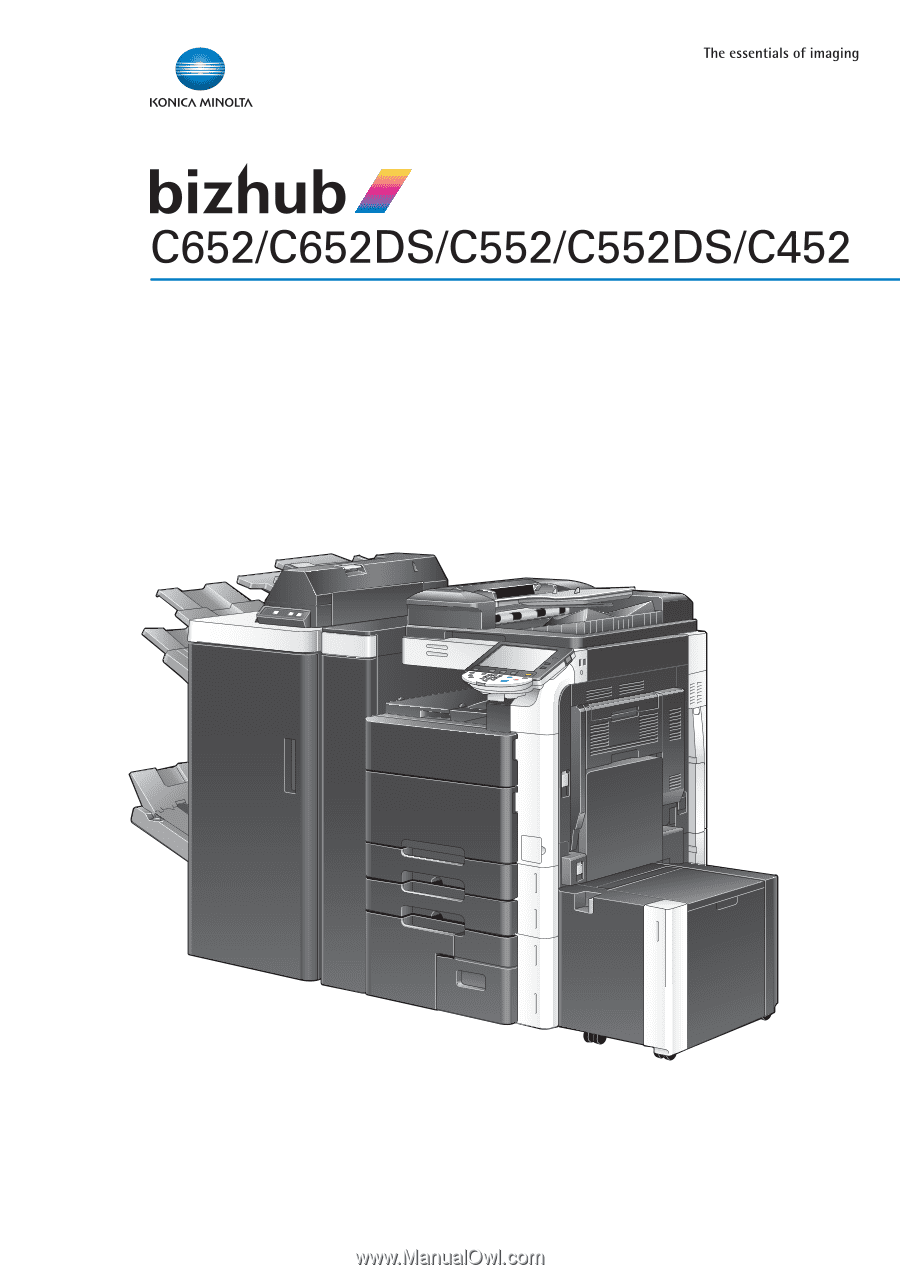
User’s Guide
[Print Operations]