Konica Minolta bizhub C452 bizhub C452/C552/C552DS/C652/C652DS Box Operations
Konica Minolta bizhub C452 Manual
 |
View all Konica Minolta bizhub C452 manuals
Add to My Manuals
Save this manual to your list of manuals |
Konica Minolta bizhub C452 manual content summary:
- Konica Minolta bizhub C452 | bizhub C452/C552/C552DS/C652/C652DS Box Operations - Page 1
User's Guide [Box Operations] - Konica Minolta bizhub C452 | bizhub C452/C552/C552DS/C652/C652DS Box Operations - Page 2
...1-2 User's Guide ...1-3 Conventions used in this manual 1-4 Symbols used in this manual ...1-4 To use this machine safely...1-4 Procedural instruction...1-4 Key symbols...1-5 Original and paper indications ...1-5 Original and paper sizes ...1-5 Original and paper indications ...1-5 To check the - Konica Minolta bizhub C452 | bizhub C452/C552/C552DS/C652/C652DS Box Operations - Page 3
3-13 Use/File - Check Job Settings - Check E-Mail Settings 3-13 Preview ...3-14 Preview ...3-14 Preview (Print/Combine) ...3-15 Preview (Send/Bind TX) ...3-16 4 User Box Operation Flow 4.1 4.2 4.3 4.4 4.5 4.6 4.7 4.8 4.9 4.10 4.10.1 4.10.2 Saving documents in User Boxes 4-2 Printing documents - Konica Minolta bizhub C452 | bizhub C452/C552/C552DS/C652/C652DS Box Operations - Page 4
PDF...6-10 Scan Setting...6-10 Basic - Density...6-11 Basic - Color ...6-11 Scan Size ...6-12 Standard size ...6-12 Custom Size...6-12 Photo Size...6-12 Image Adjustment ...6-12 Background Removal ...6-13 Sharpness ...6-13 Application - Frame Erase ...6-14 Application - Book Copy...6-15 Book copy - Konica Minolta bizhub C452 | bizhub C452/C552/C552DS/C652/C652DS Box Operations - Page 5
7.4.9 7.4.10 7.4.11 7.4.12 7.4.13 7.4.14 7.4.15 7.5 7.5.1 7.5.2 7.5.3 7.6 7.6.1 7.6.2 7.6.3 7.6.4 7.6.5 7.6.6 7.6.7 Print - Application (Public, Personal, or Group User Box 7-14 Page Margin...7-14 Page Margin...7-14 Image Shift ...7-14 Image Shift - Change Back Shift ...7-15 Sheet/Cover/Chapter - Konica Minolta bizhub C452 | bizhub C452/C552/C552DS/C652/C652DS Box Operations - Page 6
43 Next Destination...7-43 Direct Input - WebDAV...7-44 Host Name ...7-44 File Path ...7-44 User Name ...7-44 Password ...7-44 Detail Settings ...7-44 Next Destination...7-44 Job History...7-45 Address Search...7-45 LDAP Search - Search ...7-46 LDAP Search - Advanced Search...7-46 Name...7-46 E-mail - Konica Minolta bizhub C452 | bizhub C452/C552/C552DS/C652/C652DS Box Operations - Page 7
7.9.3 7.9.4 7.10 7.10.1 7.10.2 7.10.3 7.11 7.11.1 7.11.2 7.11.3 7.11.4 Password transmission (Password TX 7-58 F-Code transmission (F-Code TX 7-58 Communication Settings - E-mail Encryption 7-59 Communication Settings - Digital Signature 7-59 Communication Settings - Fax Header Settings 7-60 - Konica Minolta bizhub C452 | bizhub C452/C552/C552DS/C652/C652DS Box Operations - Page 8
Position...7-89 Filing Settings ...7-89 Application - Register Overlay ...7-90 Fax Retransmit User Box (System User Box 7-91 Overview of the Fax Retransmit User Box 7-91 Print - Proof Print ...7-91 Send - Fax...7-91 Filing Settings - Delete...7-92 bizhub C652/C652DS/C552/C552DS/C452 Contents-7 - Konica Minolta bizhub C452 | bizhub C452/C552/C552DS/C652/C652DS Box Operations - Page 9
Empty User Box(es) (Administrator Settings 8-6 Bulletin Board User Box...8-7 Relay User Box ...8-8 8.2.2 Custom Display Settings - User Box Setting 8-9 Default Tab...8-9 Shortcut key...8-9 8.2.3 Cellular Phone/PDA Setting - Link File Error Notification 8-10 bizhub C652/C652DS/C552/C552DS - Konica Minolta bizhub C452 | bizhub C452/C552/C552DS/C652/C652DS Box Operations - Page 10
in to this machine as the User Box administrator 8-25 Administrator's available functions 8-25 Security Details ...8-26 Security Print Only ...8-26 HDD Settings ...8-26 Check HDD Capacity ...8-26 Overwrite Temporary Data...8-27 Overwrite All Data ...8-28 HDD Lock Password...8-29 Format HDD ...8-30 - Konica Minolta bizhub C452 | bizhub C452/C552/C552DS/C652/C652DS Box Operations - Page 11
as a User Box administrator 9-13 Page Configuration ...9-15 User Mode Overview ...9-17 Information ...9-17 Job ...9-18 User Boxes...9-19 Direct Print ...9-20 Store Address ...9-21 Customize ...9-22 Handling a document in a User Box 9-23 Listing the documents saved in a User Box 9-23 Open User Box - Konica Minolta bizhub C452 | bizhub C452/C552/C552DS/C652/C652DS Box Operations - Page 12
1 Introduction - Konica Minolta bizhub C452 | bizhub C452/C552/C552DS/C652/C652DS Box Operations - Page 13
. Please be sure to read this manual before using this machine. User's guide CD manuals Copy Operations Enlarge Display Operations Print Operations Box Operations Network Scan/Fax/Network Fax Operations Fax Driver Operations Network Administrator Overview This manual describes details on copy mode - Konica Minolta bizhub C452 | bizhub C452/C552/C552DS/C652/C652DS Box Operations - Page 14
the product is required to enable users to perform maintenance work or troubleshooting operations. Limit your troubleshooting operations to the areas explained in this manual. Should you experience any problems, please contact our service representative. bizhub C652/C652DS/C552/C552DS/C452 1-3 - Konica Minolta bizhub C452 | bizhub C452/C552/C552DS/C652/C652DS Box Operations - Page 15
Follow the instructions to avoid damage to property. Procedural instruction 0 This check mark instruction. A procedural operation is illustrated. % This symbol indicates transition of the control panel to access a desired menu item. This symbol indicates a desired page. bizhub C652/C652DS/C552 - Konica Minolta bizhub C452 | bizhub C452/C552/C552DS/C652/C652DS Box Operations - Page 16
control panel, touch panel or the computer screen, or power switch, etc. 1.2.2 Original and paper indications Original and paper sizes The following explains the indication for originals and paper described in this manual being shorter than the width (Y). bizhub C652/C652DS/C552/C552DS/C452 1-5 - Konica Minolta bizhub C452 | bizhub C452/C552/C552DS/C652/C652DS Box Operations - Page 17
you understand the general flow of operations such as saving and printing data. Clicking the link in the flow chart takes you to the relevant function setting pages where you can see more detail. Using "Menu Tree" Various functions can be configured for this machine. For information on what button - Konica Minolta bizhub C452 | bizhub C452/C552/C552DS/C652/C652DS Box Operations - Page 18
2 User Box Function Overview - Konica Minolta bizhub C452 | bizhub C452/C552/C552DS/C652/C652DS Box Operations - Page 19
p. 6-2 p. 6-2 p. 6-2 p. 7-101 *1. For details on how to send documents for print job from a computer and save them in the User Box, refer to the "User's Guide [Print Operations]". Cellular Phone/PDA Fax Computer FTP server, etc. Original External memory bizhub C652/C652DS/C552/C552DS/C452 2-2 - Konica Minolta bizhub C452 | bizhub C452/C552/C552DS/C652/C652DS Box Operations - Page 20
, refer to the "User's Guide [Network Scan/Fax/Network Fax Operations]". *3 For details on how to save documents to the Secure Print User Box, refer to the "User's Guide [Print Operations]". *4 For print instruction of an encrypted PDF, refer to the PageScope Direct Print manual or the direct print - Konica Minolta bizhub C452 | bizhub C452/C552/C552DS/C652/C652DS Box Operations - Page 21
Polling TX User Box o - - Secure Print User o o - Box Memory RX User Box o o - Annotation User Box o o - Fax Retransmit User o - - Box Password Encrypted o - - PDF User Box ID & Print User Box o - - External Memory, - - - Mobile/PDA Copy o - Save in User Box - Save in - Konica Minolta bizhub C452 | bizhub C452/C552/C552DS/C652/C652DS Box Operations - Page 22
is saved for memory reception If the optional fax kit is installed, and you do not want to print while receiving data, configure the memory reception settings. d Reference For details on how to configure memory reception settings, refer to the "User's Guide [Network Scan/Fax/Network Fax Operations - Konica Minolta bizhub C452 | bizhub C452/C552/C552DS/C652/C652DS Box Operations - Page 23
account or user name available for using the devices, contact your administrator. MFP authentication Enter the user name and password, and then press either [Login] in the touch panel or the [Access] key on the control panel. External server authentication Enter the user name and password, and then - Konica Minolta bizhub C452 | bizhub C452/C552/C552DS/C652/C652DS Box Operations - Page 24
boxes accessible by the logged in users are displayed. For details, refer to page 2-9. - When "Prohibited Functions When Authentication Error" in Administrator Settings is set to Mode 2 and a user enters an incorrect password the specified number of times, that user is locked out and can no longer - Konica Minolta bizhub C452 | bizhub C452/C552/C552DS/C652/C652DS Box Operations - Page 25
mode when the document is saved. "S" appears for documents saved in the Fax/Scan mode screen or the User Box screen. C: Copy S: Fax/Scan, Box P: Print This represents the name of the device that scanned the data. The factory default is "KMBT_(product name)". You can change this name in "Device Name - Konica Minolta bizhub C452 | bizhub C452/C552/C552DS/C652/C652DS Box Operations - Page 26
Box administrator. - A User Box administrator can access all Public User Boxes and all Personal User Boxes. - If you delete authentication data by canceling user authentication settings or changing authentication methods, all Personal User Boxes become Public User Boxes. bizhub C652/C652DS/C552 - Konica Minolta bizhub C452 | bizhub C452/C552/C552DS/C652/C652DS Box Operations - Page 27
Boxes. 2.3.4 When user authentication and account track are enabled and synchronized Account A Account B User 1 User 2 As the account for users has been registered in advance, users cannot access Group User Boxes of accounts that they do not belong to. bizhub C652/C652DS/C552/C552DS/C452 2-10 - Konica Minolta bizhub C452 | bizhub C452/C552/C552DS/C652/C652DS Box Operations - Page 28
access all Public User Boxes, all Personal User Boxes and all Group User Boxes. - If you delete authentication data by canceling user authentication settings or changing authentication methods, all Personal User Boxes and all group boxes become Public User Boxes. bizhub C652/C652DS/C552/C552DS/C452 - Konica Minolta bizhub C452 | bizhub C452/C552/C552DS/C652/C652DS Box Operations - Page 29
access all Public User Boxes, all Personal User Boxes and all Group User Boxes. - If you delete authentication data by canceling user authentication settings or changing authentication methods, all Personal User Boxes and all group boxes become Public User Boxes. bizhub C652/C652DS/C552/C552DS/C452 - Konica Minolta bizhub C452 | bizhub C452/C552/C552DS/C652/C652DS Box Operations - Page 30
3 Control Panel/Liquid Crystal Display - Konica Minolta bizhub C452 | bizhub C452/C552/C552DS/C652/C652DS Box Operations - Page 31
Use the control panel for User Box mode operation. The following describes the buttons and switches in the control panel. 1 2 3 4 22 21 5 20 6 19 7 18 17 8 16 9 15 14 13 12 11 10 No. Name 1 Touch panel 2 Power indicator 3 [Sub power switch] 4 [Power Save] 5 [Mode Memory - Konica Minolta bizhub C452 | bizhub C452/C552/C552DS/C652/C652DS Box Operations - Page 32
or copying. • This key is not available when saving documents by pressing the [Us- er Box] key. • To check the preview image when saving in a User Box, press the [Fax/Scan] key. For checking preview procedure, refer to the "User's Guide [Network Scan/Fax/Network Fax Operations]". Press this key to - Konica Minolta bizhub C452 | bizhub C452/C552/C552DS/C652/C652DS Box Operations - Page 33
to be performed, and [Check Job] to display the result of the specified settings. For details on the display and description of the left panel, refer to page 3-5. 5 Toner supply indicators Show the amount of toner remaining for yellow (Y), magenta (M), cyan (C), and black (K). Icons that appear - Konica Minolta bizhub C452 | bizhub C452/C552/C552DS/C652/C652DS Box Operations - Page 34
with the G3 Fax or IP Address Fax function. 3.2.2 Display and operation of Left panel In the left panel of the touch panel, there are buttons for checking the status of jobs and the configuration of the machine. The following buttons are available in the left panel in the User Box mode. 1 2 3 No - Konica Minolta bizhub C452 | bizhub C452/C552/C552DS/C652/C652DS Box Operations - Page 35
delete the job. No documents in a User Box will be deleted even if the job currently being run is deleted. Job List - Job Details Press this button to view the list of jobs being performed and the job log for confirmation. There are the following four types of jobs: bizhub C652/C652DS/C552/C552DS - Konica Minolta bizhub C452 | bizhub C452/C552/C552DS/C652/C652DS Box Operations - Page 36
, computer printing, and received faxes. Lists scanner and fax transmission jobs. Lists fax reception jobs. Lists jobs with documents being saved in User Boxes. Item List items [ ][ ] [Delete] [Increase Priority] [Release Held Job] [Check Job Set.] [Detail] Description No - Konica Minolta bizhub C452 | bizhub C452/C552/C552DS/C652/C652DS Box Operations - Page 37
been saved by logged in users cannot be viewed. - The names of confidential documents are not displayed. - To view scanned images, you must set "Job History Thumbnail Display" to "ON" in Administrator Settings in advance. For details, refer to the "User's Guide [Copy Operations]". - Konica Minolta bizhub C452 | bizhub C452/C552/C552DS/C652/C652DS Box Operations - Page 38
registered in the address book or by entering directly. Press this button to check the registration source/user name, file name, output tray, stored time, transmission time, and number of original pages for the selected job. To delete a job, press [Delete]. bizhub C652/C652DS/C552/C552DS/C452 3-9 - Konica Minolta bizhub C452 | bizhub C452/C552/C552DS/C652/C652DS Box Operations - Page 39
documents are not displayed. - To view received images, you must set "Job History Thumbnail Display" to "ON" in Administrator Settings in advance. For details, refer to the "User's Guide [Copy Operations]". Item List items [ ][ ] [Delete] [Detail] Description No - Konica Minolta bizhub C452 | bizhub C452/C552/C552DS/C652/C652DS Box Operations - Page 40
. - To view saved images, you must set "Job History Thumbnail Display" to "ON" in Administrator Settings in advance. For details, refer to the "User's Guide [Copy Operations]". User Box information Displays the User Box information when you select a User Box. bizhub C652/C652DS/C552/C552DS/C452 - Konica Minolta bizhub C452 | bizhub C452/C552/C552DS/C652/C652DS Box Operations - Page 41
check the preview image of the saved document. Reference - When you select multiple documents, use [ ][ ] to switch pages. d Reference For checking preview image, refer to page 3-14. Use/File - Check Job Settings Select [Send] or [Bind TX] in the Send tab to display the address entry screen. [Check - Konica Minolta bizhub C452 | bizhub C452/C552/C552DS/C652/C652DS Box Operations - Page 42
to the address book, refer to the "User's Guide [Network Scan/Fax/Network Fax Operations]". Use/File - Check Job Settings - Document Setting Contents View the list of resolution, file type, and color settings. Use/File - Check Job Settings - Communication Settings Check the line settings and - Konica Minolta bizhub C452 | bizhub C452/C552/C552DS/C652/C652DS Box Operations - Page 43
enlarge the preview image. Enlarge the image of the document to check details. The image can be magnified 2 times, 4 times or 8 times. To view the desired portion of the enlarged image, use the scroll bars located in the right and the bottom of the image. bizhub C652/C652DS/C552/C552DS/C452 3-14 - Konica Minolta bizhub C452 | bizhub C452/C552/C552DS/C652/C652DS Box Operations - Page 44
check details. The image can be magnified 2 times, 4 times or 8 times. To view the desired portion of the enlarged image, use the scroll bars located in the right and the bottom of the image. : Rotates the currently displayed page by 180 degrees to show the image. [Rotate Pages]: Select if the saved - Konica Minolta bizhub C452 | bizhub C452/C552/C552DS/C652/C652DS Box Operations - Page 45
button to display the preview for G3 fax, IP address fax, or Internet fax operations. If the saved document contains multiple pages, use these buttons to switch the display to another page. Enlarge the image of the document to check details. The image can be magnified 2 times, 4 times or 8 times - Konica Minolta bizhub C452 | bizhub C452/C552/C552DS/C652/C652DS Box Operations - Page 46
3.2 Touch panel 3 Reference - If you select [Bind TX], the Delete Page function becomes unavailable. - If you select [Send] for multiple documents, the rotate page and delete page functions become unavailable. bizhub C652/C652DS/C552/C552DS/C452 3-17 - Konica Minolta bizhub C452 | bizhub C452/C552/C552DS/C652/C652DS Box Operations - Page 47
4 User Box Operation Flow - Konica Minolta bizhub C452 | bizhub C452/C552/C552DS/C652/C652DS Box Operations - Page 48
the steps for saving documents in Public User Boxes. Press the [User Box] key in the control panel Select the desired User Box, and then press [Save Document] Configure the document name (p. 6-4), scan settings (p. 6-5) and original settings (p. 6-18) bizhub C652/C652DS/C552/C552DS/C452 4-2 - Konica Minolta bizhub C452 | bizhub C452/C552/C552DS/C652/C652DS Box Operations - Page 49
Press [Start] or the [Start] key in the control panel Reference - When saving an original with an embedded password, the password entry screen appears. Enter the password and press [OK] to start saving. - You cannot save an original with copy guard embedded. bizhub C652/C652DS/C552/C552DS/C452 4-3 - Konica Minolta bizhub C452 | bizhub C452/C552/C552DS/C652/C652DS Box Operations - Page 50
documents from a User Box This section describes the steps for printing documents saved in Public User Boxes. Press the [User Box] key in the control panel Select the desired User Box, and then press [Use/File] Select the "Print" tab Select documents bizhub C652/C652DS/C552/C552DS/C452 4-4 - Konica Minolta bizhub C452 | bizhub C452/C552/C552DS/C652/C652DS Box Operations - Page 51
, press [Combine]. (p. 7-5) Configure the printing order (bind order) (p. 7-6) Configure basic and application settings (p. 7-7, p. 7-14) Configure basic and application settings (p. 7-7, p. 7-14) To confirm the contents, display the preview (p. 3-15). bizhub C652/C652DS/C552/C552DS/C452 4-5 - Konica Minolta bizhub C452 | bizhub C452/C552/C552DS/C652/C652DS Box Operations - Page 52
4.2 Printing documents from a User Box 4 Press [Start] or the [Start] key in the control panel bizhub C652/C652DS/C552/C552DS/C452 4-6 - Konica Minolta bizhub C452 | bizhub C452/C552/C552DS/C652/C652DS Box Operations - Page 53
documents from a User Box This section describes the steps for sending documents saved in Public User Boxes. Press the [User Box] key in the control panel Select the desired User Box, and then press [Use/File] Select the "Send" tab Select documents bizhub C652/C652DS/C552/C552DS/C452 4-7 - Konica Minolta bizhub C452 | bizhub C452/C552/C552DS/C652/C652DS Box Operations - Page 54
Book Direct Input Job History (The job history of fax, Internet fax, or IP address fax is not displayed when Bind TX is selected.) Address Search Also specify a scan/fax program. For details on scan/fax programs, refer to the "User's Guide [Network Scan/Fax/Network Fax Operations]". bizhub - Konica Minolta bizhub C452 | bizhub C452/C552/C552DS/C652/C652DS Box Operations - Page 55
a User Box 4 Configure document, communication, and application settings (p. 7-47) Configure document, communication, and application settings (p. 7-47) To confirm the contents, display the preview (p. 3-16). Press [Start], or the [Start] key on the control panel bizhub C652/C652DS/C552/C552DS - Konica Minolta bizhub C452 | bizhub C452/C552/C552DS/C652/C652DS Box Operations - Page 56
for saving scanned images in the external memory. Press [User Box] in the control panel while the ex- Connect the external memory to this machine, and ternal memory is connected to this machine. then press [Save a document to External Memory] Press [Save Document]. Press [User Box] bizhub C652 - Konica Minolta bizhub C452 | bizhub C452/C552/C552DS/C652/C652DS Box Operations - Page 57
Saving a document in an external memory Select the "System User Box" tab. Press [External Memory], then [OK]. Configure the document name (p. 6-4), scan settings (p. 6-5) and original settings (p. 6-18) Load the original Press [Start] or the [Start] key in the control panel bizhub C652/C652DS/C552 - Konica Minolta bizhub C452 | bizhub C452/C552/C552DS/C652/C652DS Box Operations - Page 58
, it is set to OFF (cannot be saved) by the user function settings when user authentication is enabled. To save a document in external memory, change the setting to enable you to save a document in Administrator Settings. For details, refer to page 8-21. bizhub C652/C652DS/C552/C552DS/C452 4-12 - Konica Minolta bizhub C452 | bizhub C452/C552/C552DS/C652/C652DS Box Operations - Page 59
control panel while the external memory is connected to this machine. Connect the external memory to this machine, and then press [Save a document from External Memory to a User Box] Select the [System User Box] tab. Press [External Memory], then [Use/File] Press the [Filing Settings] tab bizhub - Konica Minolta bizhub C452 | bizhub C452/C552/C552DS/C652/C652DS Box Operations - Page 60
OFF (cannot be saved) by the user function settings when user authentication is enabled. To save a document from the external memory into a User Box, change the setting to enable you to save a document in Administrator Settings. For details, refer to page 8-22. bizhub C652/C652DS/C552/C552DS/C452 - Konica Minolta bizhub C452 | bizhub C452/C552/C552DS/C652/C652DS Box Operations - Page 61
[User Box] in the control panel while the external memory is connected to this machine. Connect the external memory to this machine, and then press [Print a document from External Memory] Select the "System User Box" tab, and then press [External Memory]. Press [Use/File] bizhub C652/C652DS/C552 - Konica Minolta bizhub C452 | bizhub C452/C552/C552DS/C652/C652DS Box Operations - Page 62
in Administrator Settings, you may not be able to print a document located in an external memory. To print a document located in an external memory, change the setting to enable you to print a document in Administrator Settings. For details, refer to page 8-22. bizhub C652/C652DS/C552/C552DS - Konica Minolta bizhub C452 | bizhub C452/C552/C552DS/C652/C652DS Box Operations - Page 63
the steps for filing documents saved in Public User Boxes. Press the [User Box] key in the control panel Select the desired User Box, and then press [Use/File] Select the [Filing Settings] tab Select documents, and then select a function (p. 7-62) bizhub C652/C652DS/C552/C552DS/C452 4-17 - Konica Minolta bizhub C452 | bizhub C452/C552/C552DS/C652/C652DS Box Operations - Page 64
documents to other User Boxes, refer to page 7-63. To copy the documents to other User Boxes, refer to page 7-64. To save a document in an external memory, refer to page 7-64. To check information of the documents or preview the documents, refer to page 7-66. bizhub C652/C652DS/C552/C552DS/C452 - Konica Minolta bizhub C452 | bizhub C452/C552/C552DS/C652/C652DS Box Operations - Page 65
steps to print a document saved in a cellular phone or PDA. Press the [User Box] key in the control panel Select the [System User Box] tab. Press [Mobile/PDA], then [Use/File] Press [Print List]. To check print settings, press [Check printing Settings]. bizhub C652/C652DS/C552/C552DS/C452 4-19 - Konica Minolta bizhub C452 | bizhub C452/C552/C552DS/C652/C652DS Box Operations - Page 66
4.8 Printing a Document Saved in a Cellular Phone or PDA 4 Enter the PIN code displayed in the control panel to the cellular phone or PDA (page 7-101) d Reference To configure print settings from a cellular phone or PDA, refer to page 8-10. bizhub C652/C652DS/C552/C552DS/C452 4-20 - Konica Minolta bizhub C452 | bizhub C452/C552/C552DS/C652/C652DS Box Operations - Page 67
steps to save a document stored in a cellular phone or PDA to a User Box. Press the [User Box] key in the control panel Select the [System User Box] tab. Press [Mobile/PDA], then [Use/File] Press [Save in User Box] Select the desired User Box, and then press [OK] bizhub C652/C652DS/C552/C552DS - Konica Minolta bizhub C452 | bizhub C452/C552/C552DS/C652/C652DS Box Operations - Page 68
4.9 Saving a document stored in a cellular phone or PDA to a User Box 4 Enter the PIN code displayed in the control panel to the cellular phone or PDA (p. 7-101) bizhub C652/C652DS/C552/C552DS/C452 4-22 - Konica Minolta bizhub C452 | bizhub C452/C552/C552DS/C652/C652DS Box Operations - Page 69
Menu tree of the User Box mode 4 4.10 Menu tree of the User Box mode This section describes the configuration and settings for the functions available in the User Box mode. 4.10.1 Save Document Public, Personal, or Group User Box The following shows the menu tree for saving documents in Public - Konica Minolta bizhub C452 | bizhub C452/C552/C552DS/C652/C652DS Box Operations - Page 70
6-7) Encryption (p. 6-8) Outline PDF (p. 6-10) Scan Setting (p. 6-10) Density (p. 6-11) Color (p. 6-11) Scan Size (p. 6-12) Image Adjustment Background Removal (p. 6-13) Sharpness (p. 6-13) Application Frame Erase (p. 6-14) Book Copy (p. 6-15) Separate Scan (p. 6-17) Original Settings - Konica Minolta bizhub C452 | bizhub C452/C552/C552DS/C652/C652DS Box Operations - Page 71
6-7) Encryption (p. 6-8) Outline PDF (p. 6-10) Scan Setting (p. 6-10) Density (p. 6-11) Color (p. 6-11) Scan Size (p. 6-12) Image Adjustment Background Removal (p. 6-13) Sharpness (p. 6-13) Application Frame Erase (p. 6-14) Book Copy (p. 6-15) Separate Scan (p. 6-17) Original Settings - Konica Minolta bizhub C452 | bizhub C452/C552/C552DS/C652/C652DS Box Operations - Page 72
Color Setting Sort (p. 7-9) Group (p. 7-9) Offset (p. 7-9) Staple (p. 7-9) Punch (p. 7-9) Fold/Bind (p. 7-10) Half-Fold Center Staple & Fold Tri-Fold Z-Fold Combine Pages Combine Direction Existing Setting Manual Full Size Minimal Fixed Zoom User Preset Zoom bizhub C652/C652DS/C552 - Konica Minolta bizhub C452 | bizhub C452/C552/C552DS/C652/C652DS Box Operations - Page 73
Type/Preset Stamps Pages Text Size Text Color Print Position Copy Protect (p. 7-23) Copy Guard (p. 7-24) Password Copy (p. 7-26) Stamp Repeat Type (p. 7-28) Detail Settings (p. 7-29) Position (p. 7-29) Recall Header/Footer Mode Check Recall Overlay Image Pages bizhub C652/C652DS/C552/C552DS/C452 - Konica Minolta bizhub C452 | bizhub C452/C552/C552DS/C652/C652DS Box Operations - Page 74
Color Setting Finishing (p. 7-8) Offset (p. 7-9) Staple (p. 7-9) Punch (p. 7-9) Fold/Bind (p. 7-10) Half-Fold Center Staple & Fold Tri-Fold Z-Fold Continuous Print (p. 7-13) Page Margin (p. 7-14) Margin Position Adjust Value Image Shift (p. 7-14) Vertical Shift Horizontal Shift Change - Konica Minolta bizhub C452 | bizhub C452/C552/C552DS/C652/C652DS Box Operations - Page 75
30) Recall Overlay Image Pages Send (for Public/Personal/Group User Boxes) The following shows the Use/File - Send menu tree for Public, Personal, or Group User Boxes. The following describes items available using the framed buttons. First level Send Second level Address Book Direct Input Third - Konica Minolta bizhub C452 | bizhub C452/C552/C552DS/C652/C652DS Box Operations - Page 76
4.10 Menu tree of the User Box mode First level Second level Third level Fourth level FTP (p. 7-43) Host Name File Path User Name Password Detailed Settings WebDAV (p. 7-44) Host Name File Path User Name Password Detailed Settings Job History (p. 7-45) Address Search (p. 7-45) - Konica Minolta bizhub C452 | bizhub C452/C552/C552DS/C652/C652DS Box Operations - Page 77
User Name Password Detailed Settings Job History (p. 7-45) Address Search (p. 7-45) Search (p. 7-46) Advanced Search (p. 7-46) Document Settings File Type (p. 7-48) File Type (p. 7-48) Encryption (p. 7-48) Stamp Composition (p. 7-50) Outline PDF (p. 7-51) Scan Setting (p. 7-51) bizhub - Konica Minolta bizhub C452 | bizhub C452/C552/C552DS/C652/C652DS Box Operations - Page 78
User Boxes. The following describes items available using the framed buttons. First level Second level Delete (p. 7-63) Edit Name (p. 7-63) Move (p. 7-63) Copy (p. 7-64) Save to External Memory (p. 7-64) Document Details Preview (p. 7-67) Third level Fourth level bizhub C652/C652DS/C552 - Konica Minolta bizhub C452 | bizhub C452/C552/C552DS/C652/C652DS Box Operations - Page 79
level Fourth level Delete Page (p. 7-69) Rotate Page (p. 7-70) Move Page (p. 7-72) Preview/Specify by Input (p. 7-74) Preview/Set Range (p. 7-73) Overlay Image Edit New (p. 7-76) Overwrite (p. 7-77) Detail Settings (p. 7-78) Density Color Preview System User Box The following shows - Konica Minolta bizhub C452 | bizhub C452/C552/C552DS/C652/C652DS Box Operations - Page 80
1-Sided 2-Sided Full Color Black Use Existing Color Setting Sort Group Offset Staple Punch Fold/Bind (p. 7-10) Combine Pages Combine Direction Existing Setting Manual Full Size Minimal Fixed Zoom User Preset Zoom Margin Position Adjust Value Image Shift Cover Sheet Insert Sheet Chapters Date/Time - Konica Minolta bizhub C452 | bizhub C452/C552/C552DS/C652/C652DS Box Operations - Page 81
2-Sided Full Color Black Use Existing Color Setting Sort Group Offset Staple Punch Fold/Bind (p. 7-10) Combine Pages Combine Direction Existing Setting Manual Full Size Minimal Fixed Zoom User Preset Zoom Margin Position Adjust Value Image Shift Cover Sheet (p. 7-15) Insert Sheet (p. 7-17) Chapters - Konica Minolta bizhub C452 | bizhub C452/C552/C552DS/C652/C652DS Box Operations - Page 82
Password Encrypted PDF User Box ID & Print User Box Second level Send - Send Filing Settings (p. 7-89) Application Document Details Print Send Filing Settings Document Details Print/Save Filing Settings Document Details Print Filing Settings Document Details Third level Fourth level Address Book - Konica Minolta bizhub C452 | bizhub C452/C552/C552DS/C652/C652DS Box Operations - Page 83
Punch Fold/Bind Paper (p. 7-99) Stamp/Composi- Date/Time tion (p. 7-19) Page Number (p. 7-20) Stamp (p. 7-21) Copy Security (p. 7-22) Stamp Repeat (p. 7-28) Document Details Print List Check Print Settings (p. 7-102) Save in User Box (p. 7-103) bizhub C652/C652DS/C552/C552DS/C452 4-37 - Konica Minolta bizhub C452 | bizhub C452/C552/C552DS/C652/C652DS Box Operations - Page 84
5 Accessing the User Box mode - Konica Minolta bizhub C452 | bizhub C452/C552/C552DS/C652/C652DS Box Operations - Page 85
data, the basic settings screen appears. To access the User Box mode, press the [User Box] key in the control panel. The User Box mode window appears. Lightly press the desired button in the window to display menus or functions. Then select the target one. bizhub C652/C652DS/C552/C552DS/C452 5-2 - Konica Minolta bizhub C452 | bizhub C452/C552/C552DS/C652/C652DS Box Operations - Page 86
menus below. 5.2.1 Save Document Scan the original loaded on this machine and save it in a User Box. You can specify the name or image quality of an original when saving it. d Reference For details on the Save Document function, refer to page 6-3. For details on the Save Document menu structure - Konica Minolta bizhub C452 | bizhub C452/C552/C552DS/C652/C652DS Box Operations - Page 87
6 Save Document - Konica Minolta bizhub C452 | bizhub C452/C552/C552DS/C652/C652DS Box Operations - Page 88
when user authentication is enabled. To save a document in external memory, change the setting to enable you to save a document in Administrator Settings. For details, refer to page 8-22. d Reference For information on the available external memory, refer to page 7-96. bizhub C652/C652DS/C552 - Konica Minolta bizhub C452 | bizhub C452/C552/C552DS/C652/C652DS Box Operations - Page 89
Specify the desired User Box. System User Box Select the [System User Box] tab to display a list of User Boxes you can save a document in. Specify the desired User Box. Reference - If [Annotation User Box] is selected, further specify the desired User Box. bizhub C652/C652DS/C552/C552DS/C452 6-3 - Konica Minolta bizhub C452 | bizhub C452/C552/C552DS/C652/C652DS Box Operations - Page 90
Document Overview 6 6.1.3 Save Document window The available setting items in the Save Document screen are as follows. Reference - For the external memory, you cannot change the destination User Box. - To save a document in external memory, change the setting to enable you to save a document in - Konica Minolta bizhub C452 | bizhub C452/C552/C552DS/C652/C652DS Box Operations - Page 91
Scan Settings 6 6.2 Scan Settings Press [Scan Settings] in the Save Document tab to configure the detailed scan settings. 6.2.1 Basic - Original Type Select the original type based on the original contents. The available a copier or books or magazines. bizhub C652/C652DS/C552/C552DS/C452 6-5 - Konica Minolta bizhub C452 | bizhub C452/C552/C552DS/C652/C652DS Box Operations - Page 92
in the single-sided mode, and also scans the remaining pages in the double-sided mode. 6.2.3 Basic - Resolution Select the resolution for scanning. Reference - The amount of data increases depending on the selected resolution, and you may not be able to save data in an external memory. If you - Konica Minolta bizhub C452 | bizhub C452/C552/C552DS/C652/C652DS Box Operations - Page 93
saving a scanned full color data. Saves data in TIFF format. Saves data in JPEG format. Saves data in XPS format. Saves data in further compressed XPS file. d Reference You can specify the compression format when saving a TIFF file in color. For details, refer to the "User's Guide [Network Scan/Fax - Konica Minolta bizhub C452 | bizhub C452/C552/C552DS/C652/C652DS Box Operations - Page 94
to change document permissions (up to 32 characters). For confirmation, enter the password twice. Encryption - Detail Settings Configure the detailed permission settings when the document permission is specified in "Encryption". bizhub C652/C652DS/C552/C552DS - Konica Minolta bizhub C452 | bizhub C452/C552/C552DS/C652/C652DS Box Operations - Page 95
Resolution] appears when the Encryption Level is set to "High Level". Select whether to allow or restrict extracting text images. Press [Forward ] to further configure Changes Allowed settings. bizhub C652/C652DS/C552/C552DS/C452 6-9 - Konica Minolta bizhub C452 | bizhub C452/C552/C552DS/C652/C652DS Box Operations - Page 96
outline PDF data. For details, refer to the "User's Guide [Network Scan/Fax/Network Fax Operations]". Scan Setting Specify whether to save all pages of a document to one file, or to save each page to one file. Item Multi Page Page Separation E-mail Attachment Method Description Creates all the - Konica Minolta bizhub C452 | bizhub C452/C552/C552DS/C652/C652DS Box Operations - Page 97
the original setting. Scans the original in full color. Select this setting for originals with high-level halftone such as black-and-white photos. Select this setting for originals with distinct black and white areas, such as line drawings. Some color settings may not be available, depending on the - Konica Minolta bizhub C452 | bizhub C452/C552/C552DS/C652/C652DS Box Operations - Page 98
page in the original when scanning. To scan the original with a predetermined paper size, select that size. Custom Size Enter the dimensions e 3-1/4 photo size. 6.2.8 Image Adjustment Adjust the background density or sharpness for the scanned document. bizhub C652/C652DS/C552/C552DS/C452 6-12 - Konica Minolta bizhub C452 | bizhub C452/C552/C552DS/C652/C652DS Box Operations - Page 99
of the scanned original. When scanning a colored-paper original, the background color may be scanned resulting in the entire image becoming dark. dark part in the back side from being scanned as shade, select [Bleed Removal]. - To scan an original with the colored background such as a map, select [ - Konica Minolta bizhub C452 | bizhub C452/C552/C552DS/C652/C652DS Box Operations - Page 100
6.2 Scan Settings 6 6.2.9 Application - Frame Erase Configure the setting for erasing frames on a two-page spread. Reference - If you have specified the frame width to be erased in the "Frame Erase" setting of the Book Copy function, the same value is automatically configured for this "Frame - Konica Minolta bizhub C452 | bizhub C452/C552/C552DS/C652/C652DS Box Operations - Page 101
6.2 Scan Settings 6 6.2.10 Application - Book Copy Configure settings to scan a two-page spread. Settings include scanning method, binding positions and erasing unwanted areas. For paper size of the original, select the size of the spread. Book copy method Select the scanning method. Item Book - Konica Minolta bizhub C452 | bizhub C452/C552/C552DS/C652/C652DS Box Operations - Page 102
6.2 Scan Settings 6 Book Erase - Center Erase Configure settings to erase the shaded part around the binding position in the center of the original. Front Cover, or Front + Back Covers, press [Binding Position], and then select the binding position. bizhub C652/C652DS/C552/C552DS/C452 6-16 - Konica Minolta bizhub C452 | bizhub C452/C552/C552DS/C652/C652DS Box Operations - Page 103
of originals, for example, when all pages of originals cannot be loaded into the ADF, when the originals are placed on the original glass, or when singlesided originals and double-sided originals are mixed. Press [Separate Scan] to highlight the display. bizhub C652/C652DS/C552/C552DS/C452 6-17 - Konica Minolta bizhub C452 | bizhub C452/C552/C552DS/C652/C652DS Box Operations - Page 104
Special Original The available setting items are as follows. Item Mixed Original Z-Folded Original Long Original Contents Select this setting when loading originals with different sizes together into the ADF. The scanning speed will be lowered because the size of each page is detected before - Konica Minolta bizhub C452 | bizhub C452/C552/C552DS/C652/C652DS Box Operations - Page 105
of a dirt of the slit glass upon the scanned image when loading an original in the ADF. Reference - Specifying Despeckle will drop the scanning speed. - If the slit glass is too dirty, clean it. For details, refer to the "User's Guide [Copy Operations]". bizhub C652/C652DS/C552/C552DS/C452 6-19 - Konica Minolta bizhub C452 | bizhub C452/C552/C552DS/C652/C652DS Box Operations - Page 106
7 Use/File - Konica Minolta bizhub C452 | bizhub C452/C552/C552DS/C652/C652DS Box Operations - Page 107
print a document that was saved in a User Box in the Copy, Fax/Scan, print instruction, or Fax reception mode. You can User Box as an example. 1 2 3 4 5 6 7 No. Name 1 [Print] 8 12 9 10 13 11 Description Configure settings to print the selected documents. (p. 7-4) bizhub C652/C652DS/C552 - Konica Minolta bizhub C452 | bizhub C452/C552/C552DS/C652/C652DS Box Operations - Page 108
] Press this button to check the detailed information or preview image of the document. 7.1.3 If a password is specified for a User Box If a password is specified for a User Box, the password entry screen appears. Enter the password, and press [OK]. bizhub C652/C652DS/C552/C552DS/C452 7-3 - Konica Minolta bizhub C452 | bizhub C452/C552/C552DS/C652/C652DS Box Operations - Page 109
multiple documents, the document print setting function is not available. (p. 7-5) Configure the printing order or other setting to print two or more document selected. (p. 7-6) d Reference For details on other items, refer to page 7-2. Print Press [Print] to display the following screen. In - Konica Minolta bizhub C452 | bizhub C452/C552/C552DS/C652/C652DS Box Operations - Page 110
margin and stamp. 7.2.2 Print In the Print - Print Details screen, configure or change the following functions. Item Copies Print Color Finishing Combine Zoom Page Margin Sheet/Cover/Chapter Insert Stamp/Composition Description Specify the number of copies. Select either 1-Sided Print or 2-Sided - Konica Minolta bizhub C452 | bizhub C452/C552/C552DS/C652/C652DS Box Operations - Page 111
items to combine and print documents In the Combine - Print Details screen, configure or change the settings for the following functions. Item Copies Print Color Finishing Continuous Print Page Margin Stamp/Composition Description Specify the number of copies. Select either 1-Sided Print - Konica Minolta bizhub C452 | bizhub C452/C552/C552DS/C652/C652DS Box Operations - Page 112
User Box) 7.3.1 Copies Use the keypad to enter the number of copies. The allowable range is 1 to 9999. Reference - To reset the setting to 1, press the [C] key on the control panel. 7.3.2 1-Sided/2-Sided Select whether to print one side or both sides of sheets of paper. bizhub C652/C652DS/C552 - Konica Minolta bizhub C452 | bizhub C452/C552/C552DS/C652/C652DS Box Operations - Page 113
with the color settings used when it was saved. 7.3.4 Finishing Configure sorting, grouping, finishing and other settings. d Reference When the finisher is installed, you can change the ejection method in Administrator Settings. For the Offset function, refer to the "User's Guide [Copy Operations - Konica Minolta bizhub C452 | bizhub C452/C552/C552DS/C652/C652DS Box Operations - Page 114
Selecting Sort feeds copies by set. Selecting Group feeds copies by page. Offset Select Yes to sort sheets by set or page so that the user knows where the document is separated. When the finisher is installed, the printed sheets are fed while shifting them for each separation. When the finisher - Konica Minolta bizhub C452 | bizhub C452/C552/C552DS/C652/C652DS Box Operations - Page 115
and folds them in two before being fed. Tri-Fold Select this setting when you use width-direction w paper. The long side of the printed sheets are folded in three. • This item is available when the optional finisher FS-526 is installed. bizhub C652/C652DS/C552/C552DS/C452 7-10 - Konica Minolta bizhub C452 | bizhub C452/C552/C552DS/C652/C652DS Box Operations - Page 116
. The long side of the printed sheets is Z-folded. • This item is available when the optional Z Folding unit ZU-606 is installed. Select the desired function. When finisher FS-527 is installed: When finisher FS-526 and Z Folding unit ZU-606 are installed: bizhub C652/C652DS/C552/C552DS/C452 7-11 - Konica Minolta bizhub C452 | bizhub C452/C552/C552DS/C652/C652DS Box Operations - Page 117
combining order of original pages. 7.3.6 Zoom The images can be enlarged or reduced when they are printed. Specify the magnification. Item Existing Setting Manual Full size Minimal +/Fixed Zoom Description Prints A document with the magnification that was specified when it was saved. Specify the - Konica Minolta bizhub C452 | bizhub C452/C552/C552DS/C652/C652DS Box Operations - Page 118
to the "User's Guide [Copy Operations]". Reference - Regardless of the Use Existing Color Setting or Original Type setting, you can print documents saved in 5-1/2 e 8-1/2 v size in enlarged 8-1/2 e 14 w size or saved in A4 v size in enlarged A3 w size. To rotate and enlarge the image as shown in - Konica Minolta bizhub C452 | bizhub C452/C552/C552DS/C652/C652DS Box Operations - Page 119
the image to the left, right, top, or bottom within 1/16 to 10 inches (0.1 to 250.0 mm) fit the page margin position. Reference - Specify the page margin width on a 1/16 inch (0.1 mm) basis by pressing [-] or [+]. - To set the margin width to 0 inch (0 mm), press [No Shift]. bizhub C652/C652DS/C552 - Konica Minolta bizhub C452 | bizhub C452/C552/C552DS/C652/C652DS Box Operations - Page 120
, or Group User Box) 7 Image Shift - Change Back Shift To create a page margin in 2-Sided printing mode, press [Change Back Shift] to specify the image shift length on the back side. You can specify the shift length to move the image to the left, right, top, or bottom within 1/16 to 10 inches - Konica Minolta bizhub C452 | bizhub C452/C552/C552DS/C652/C652DS Box Operations - Page 121
. - To add cover sheet setting when printing the document that you copied and saved in a User Box, either one of the following conditions must have been satisfied when you saved the document. - A paper tray was specified - Cover Sheets were configured bizhub C652/C652DS/C552/C552DS/C452 7-16 - Konica Minolta bizhub C452 | bizhub C452/C552/C552DS/C652/C652DS Box Operations - Page 122
User Box) 7 7.4.4 Sheet/Cover/Chapter Insert - Insert Sheet Colored sheets or other type of paper are inserted before the specified pages when documents are printed. You can configure the setting to insert sheets into up to 30 positions in an original of up to 999 pages. The available setting - Konica Minolta bizhub C452 | bizhub C452/C552/C552DS/C652/C652DS Box Operations - Page 123
desired page number. To sort the entered pages in ascending order, press [Sort]. To copy document data on chapter sheets, select [Copy Insert] and select a chapter paper tray. Check that sheets are loaded with the same size and orientation as for the printing paper. bizhub C652/C652DS/C552/C552DS - Konica Minolta bizhub C452 | bizhub C452/C552/C552DS/C652/C652DS Box Operations - Page 124
how to register a header or footer, refer to the "User's Guide [Copy Operations]" or "User's Guide [Network Scan/Fax/Network Fax Operations]". A registered image is overlaid on printed pages. • This item is not displayed when no overlay image is registered. d Reference For details on how to register - Konica Minolta bizhub C452 | bizhub C452/C552/C552DS/C652/C652DS Box Operations - Page 125
color from black, red, blue, green, yellow, cyan, or magenta. • Text Size: Select the printing text size from 8 pt, 10 pt, 12 pt, or 14 pt. • Text Type: Select the font type from Times Roman or Helvetica. Insert Sheet Setting Specify whether to print a page number on inserted sheets. bizhub - Konica Minolta bizhub C452 | bizhub C452/C552/C552DS/C652/C652DS Box Operations - Page 126
DO NOT COPY. Select whether to print the date and time on all pages or the first page only. Select the printing text size from Minimal or Standard. Select the printing color from black, red, blue, green, yellow, cyan, or magenta. Specify the print position. To fine-adjust the print position, press - Konica Minolta bizhub C452 | bizhub C452/C552/C552DS/C652/C652DS Box Operations - Page 127
User Box) 7 7.4.10 Stamp/Composition - Copy Security - Copy Protect Hidden text is printed on all pages 4. In the Copy Protect screen, you can configure the following settings. Item Copy Protect Type Detail be printed. Press this button to specify the color, density, and text size of copy protect - Konica Minolta bizhub C452 | bizhub C452/C552/C552DS/C652/C652DS Box Operations - Page 128
Background Pattern Description Select the text and background colors from black, magenta, or cyan. Select the density from the light, standard, Change Position/Delete Description Select a copy protect to be changed, and then press [Change Position]/[Insert Space]/[Delete]. bizhub C652/C652DS/C552 - Konica Minolta bizhub C452 | bizhub C452/C552/C552DS/C652/C652DS Box Operations - Page 129
as a copy guard (copy inhibit information) when copying. A page with a copy guard printed on it cannot be copied or saved in a User Box. REPORT RDDDDErrrraaaaPffffttttODDDDRrrrraaaaTfffftttt RDDDDErrrraaaaPffffttttODDDDRrrrraaaaTfffftttt Configure the setting for the copy guard to be applied - Konica Minolta bizhub C452 | bizhub C452/C552/C552DS/C652/C652DS Box Operations - Page 130
text and background colors from black, magenta, or cyan. Specify the contrast of a copy guard. [Emboss Background] is selected for the pattern. Select the printing text size from Minimal, Standard, or Large. Select the background pattern from eight types. bizhub C652/C652DS/C552/C552DS/C452 7-25 - Konica Minolta bizhub C452 | bizhub C452/C552/C552DS/C652/C652DS Box Operations - Page 131
this function configures stamp settings with text such as "Copy" or "Private" or information such as the date and time on all pages of paper, and copies with an embedded password. When a sheet of paper with an embedded password is copied, scanned, or saved in a User Box, the currently running job is - Konica Minolta bizhub C452 | bizhub C452/C552/C552DS/C652/C652DS Box Operations - Page 132
the text and background colors from black, magenta, or cyan. Specify the contrast of a pattern. [Emboss Background] is selected for the pattern. Select the printing text size from Minimal, Standard, or Large. Select the background pattern from eight types. bizhub C652/C652DS/C552/C552DS/C452 7-27 - Konica Minolta bizhub C452 | bizhub C452/C552/C552DS/C652/C652DS Box Operations - Page 133
service representative. • [Distribution Control Number]: The entered number of copies is printed. A distribution control number requires one area. Enter the distribution control number, and select "Number Only" or "Put zeros in front(total 8-digits)" as the output format. bizhub C652/C652DS/C552 - Konica Minolta bizhub C452 | bizhub C452/C552/C552DS/C652/C652DS Box Operations - Page 134
and footer. d Reference For details on how to register the header or footer, refer to the "User's Guide [Network Scan/Fax/Network Fax Operations]". Item Recall Header/Footer [Check/Change Temporarily] [Reset] Description Select the desired ones from the registered headers and footers. Press this - Konica Minolta bizhub C452 | bizhub C452/C552/C552DS/C652/C652DS Box Operations - Page 135
page only. Specify the details of text to be printed. • Text Color: Select the printing color from black, red, blue, green, yellow, cyan, or magenta. • Text Size: Select the printing text size from 8 pt, 10 pt, 12 pt, or 14 pt. • Text Type: Select the font type from Times Roman or Helvetica. bizhub - Konica Minolta bizhub C452 | bizhub C452/C552/C552DS/C652/C652DS Box Operations - Page 136
configure it settings. You can also preview the image. Item [Thumb-nail View]/[Display Name] Description In the thumb-nail view, you can check overlay images. In the Display Name mode, you can check overlay images using their file names. Select the desired overlay image. bizhub C652/C652DS/C552 - Konica Minolta bizhub C452 | bizhub C452/C552/C552DS/C652/C652DS Box Operations - Page 137
between 20 to 100%). • Color: Select the color of overlay image from full color, black, red, blue, green, yellow, cyan, or magenta. • Composition: Select Transparent, Background Composition (Original) or Back to specify how to compose an overlay image. Press this button to check the details of the - Konica Minolta bizhub C452 | bizhub C452/C552/C552DS/C652/C652DS Box Operations - Page 138
have selected multiple documents, [Document Settings] and [Application] are not available. (p. 7-35) Configure the printing order or other setting to print two or more document selected. (p. 7-36) d Reference For details on other items, refer to page 7-2. bizhub C652/C652DS/C552/C552DS/C452 7-33 - Konica Minolta bizhub C452 | bizhub C452/C552/C552DS/C652/C652DS Box Operations - Page 139
displayed since multiple documents are sent. 1 2 No. Item 1 Configure the desti- nations 2 Configure the func- tions Description Configure the destinations. (p. 7-37) Configure the functions that can be added when transmitting documents. (p. 7-47) bizhub C652/C652DS/C552/C552DS/C452 7-34 - Konica Minolta bizhub C452 | bizhub C452/C552/C552DS/C652/C652DS Box Operations - Page 140
specify the resolution, file type, or color when send- ing a document. 8 [Communication Set- Press this button to configure communication settings. tings] 9 [Application] Press this button to specify additional functions such as Stamp or Page Print. bizhub C652/C652DS/C552/C552DS/C452 7-35 - Konica Minolta bizhub C452 | bizhub C452/C552/C552DS/C652/C652DS Box Operations - Page 141
in the order they are displayed in this screen. When this screen appears, the documents are displayed in the order they were selected. Reference - To change the order, select a reorder source document, then a reorder destination document. bizhub C652/C652DS/C552/C552DS/C452 7-36 - Konica Minolta bizhub C452 | bizhub C452/C552/C552DS/C652/C652DS Box Operations - Page 142
are available to search for the registered destinations. Address Type Press this button to search for the destination by address type that was specified when the destination is registered. d Reference For details on the [Default Address Book] setting, refer to the "User's Guide [Network Scan/Fax - Konica Minolta bizhub C452 | bizhub C452/C552/C552DS/C652/C652DS Box Operations - Page 143
when you press [Search] if [Default Address Book] is set to "Address Type" in [User Settings] - [Custom Display Settings] - [Scan/Fax Settings] in the Utility menu. Press [Index] to display addresses by registered index. Detail Search Enter the address name or a part of the address to search for the - Konica Minolta bizhub C452 | bizhub C452/C552/C552DS/C652/C652DS Box Operations - Page 144
"User's Guide [Network Scan/Fax/Network Fax Operations]". 7.6.2 Direct Input Directly enter an unregistered destination as a recipient. Reference - When Manual Destination Input is set to Individual Management in [Security Setting] in Administrator Settings, Direct Input is not available except - Konica Minolta bizhub C452 | bizhub C452/C552/C552DS/C652/C652DS Box Operations - Page 145
can be selected on the second input screen. d Reference For details on the Confirm Address (TX) function, refer to the "User's Guide [Network Scan/Fax/Network Fax Operations]". 7.6.4 Direct Input - E-mail Enter the E-mail address in the touch panel. Reference - You can register the frequently used - Konica Minolta bizhub C452 | bizhub C452/C552/C552DS/C652/C652DS Box Operations - Page 146
"Administrator Settings". For details on the prefix and suffix, refer to the "User's Guide [Network Administrator]". Next IP Address Fax Enter the IP Address Fax destination. Item [Address] Description Enter the IP address (host name) or E-mail address of the destination. bizhub C652/C652DS/C552 - Konica Minolta bizhub C452 | bizhub C452/C552/C552DS/C652/C652DS Box Operations - Page 147
the host name or IP address of the destination in the touch panel. File Path Enter the path of the destination folder in the touch panel. User Name Enter the login user name in the touch panel. Password Enter the login user password in the touch panel. Reference Check the folder information on - Konica Minolta bizhub C452 | bizhub C452/C552/C552DS/C652/C652DS Box Operations - Page 148
the host name or IP address of the destination in the touch panel. File Path Enter the path of the destination folder in the touch panel. User Name Enter the login user name in the touch panel. Press [Anonymous] to enter "anonymous". Password Enter the login user password in the touch panel - Konica Minolta bizhub C452 | bizhub C452/C552/C552DS/C652/C652DS Box Operations - Page 149
name or IP address of the destination in the touch panel. File Path Enter the path of the destination folder in the touch panel. User Name Enter the login user name in the touch panel. Password Enter the login user password in the touch panel. Detail Settings Press this button to configure the - Konica Minolta bizhub C452 | bizhub C452/C552/C552DS/C652/C652DS Box Operations - Page 150
LDAP server setting, refer to the "User's Guide [Network Administrator]" - "Enabling LDAP". - The display position of [Address Search] tab varies depending on user settings. For details, refer to the "User's Guide [Network Scan/Fax/Network Fax Operations]". bizhub C652/C652DS/C552/C552DS/C452 7-45 - Konica Minolta bizhub C452 | bizhub C452/C552/C552DS/C652/C652DS Box Operations - Page 151
Addr. Enter the E-mail address in the touch panel. Fax Number Enter the fax number in the touch panel. Last Name Enter the last name in the touch panel. First Name Enter the first name in the touch panel. City Enter the city name in the touch panel. bizhub C652/C652DS/C552/C552DS/C452 7-46 - Konica Minolta bizhub C452 | bizhub C452/C552/C552DS/C652/C652DS Box Operations - Page 152
(Public, Personal, or Group User Box) 7 Company Name Enter Configure document settings such as the resolution or file type. 7.6.15 Document Settings - Resolution Select the resolution for sending faxes. Reference - This function is not available when performing Bind TX. bizhub C652/C652DS/C552 - Konica Minolta bizhub C452 | bizhub C452/C552/C552DS/C652/C652DS Box Operations - Page 153
Separation" is automatically selected and set to "By Page" in Scan Setting. - You can specify the compression format when saving a TIFF file in color. For details, refer to the "User's Guide [Network Scan/Fax/Network Fax Operations]". Encryption When you select "PDF" or "Compact PDF" for the file - Konica Minolta bizhub C452 | bizhub C452/C552/C552DS/C652/C652DS Box Operations - Page 154
32 characters). For confirmation, enter the password twice. Required when [Password] is selected in "Encryption Type". Enter the password necessary to change document permissions (up to 32 characters). For confirmation, enter the password twice. Encryption - Detail Settings Configure the detailed - Konica Minolta bizhub C452 | bizhub C452/C552/C552DS/C652/C652DS Box Operations - Page 155
7.6 Send (Public, Personal, or Group User Box) 7 Press [Forward ] to further configure Changes Allowed settings. Item Changes Allowed Description Select the permission level about changes to the document, including signing, entering - Konica Minolta bizhub C452 | bizhub C452/C552/C552DS/C652/C652DS Box Operations - Page 156
outline PDF data. For details, refer to the "User's Guide [Network Scan/Fax/Network Fax Operations]". Scan Setting Specify a collection of data. Item Multi Page Page Separation E-mail Attachment Method Description Creates all the scanned originals as one file. This item cannot be specified - Konica Minolta bizhub C452 | bizhub C452/C552/C552DS/C652/C652DS Box Operations - Page 157
black and white using a different machine does not contain the full color data; therefore, it cannot be changed to full color when it is sent. 7.6.18 Overview of the Communication Settings Configure communication lines, digital signature, and other communication settings. bizhub C652/C652DS/C552 - Konica Minolta bizhub C452 | bizhub C452/C552/C552DS/C652/C652DS Box Operations - Page 158
7.6 Send (Public, Personal, or Group User Box) 7 7.6.19 Communication Settings - Line Setting Description of Line Settings Configure line settings for fax transmission. Overseas TX Faxes are sent to locations with poor communication conditions at a lower baud rate. Reference - This function - Konica Minolta bizhub C452 | bizhub C452/C552/C552DS/C652/C652DS Box Operations - Page 159
2 Setting" is set to "RX Only" in "Multi Line Usage". For details on the Multi Line Usage function, refer to the "User's Guide [Network Scan/Fax/Network Fax Operations]". - To use two lines as external and extension lines, be sure to specify the line to be used. If you select "Not Set", a sending - Konica Minolta bizhub C452 | bizhub C452/C552/C552DS/C652/C652DS Box Operations - Page 160
" is set to Restrict in [Administrator Settings] - [System Settings] - [Restrict User Access] - [Restrict Access to Job Settings]. For details on the "Change the "From" Address" setting, refer to the "User's Guide [Network Scan/Fax/Network Fax Operations]". bizhub C652/C652DS/C552/C552DS/C452 7-55 - Konica Minolta bizhub C452 | bizhub C452/C552/C552DS/C652/C652DS Box Operations - Page 161
sending E-mails or faxes. - If the authentication mode or User Box password is enabled, the password input screen corresponding to each respective authentication status appears. On completion of all authentication processing, the User Box screen appears. bizhub C652/C652DS/C552/C552DS/C452 7-56 - Konica Minolta bizhub C452 | bizhub C452/C552/C552DS/C652/C652DS Box Operations - Page 162
must register the prefix and suffix in "Administrator Settings". For details on the prefix and suffix, refer to the "User's Guide [Network Administrator]". 7.6.22 Communication Settings - Communication Method Settings Specify how to send or receive data. bizhub C652/C652DS/C552/C552DS/C452 7-57 - Konica Minolta bizhub C452 | bizhub C452/C552/C552DS/C652/C652DS Box Operations - Page 163
must support the F-Code function. Item Confidential TX Description Documents are sent to the Confidential RX User Box of the remote machine. Enter the destination User Box number in the SUB Address box and the confidential transmission password in the Password box. bizhub C652/C652DS/C552/C552DS - Konica Minolta bizhub C452 | bizhub C452/C552/C552DS/C652/C652DS Box Operations - Page 164
machine supports the relay distribution function. Enter the Relay Distribution User Box number in the SUB Address box and the password in the Password box. 7.6.23 Communication Settings - E-mail Encryption This item is displayed when "S/MIME Communication Settings" is set to "ON" in "Administrator - Konica Minolta bizhub C452 | bizhub C452/C552/C552DS/C652/C652DS Box Operations - Page 165
in the Utility menu. For details, refer to the "User's Guide [Network Scan/Fax/Network Fax Operations]". 7.6.26 Overview of the Application settings Configure the other settings (Stamp/Composition, and Send & Print) that are available for sending documents. 7.6.27 Application - Stamp/Composition - Konica Minolta bizhub C452 | bizhub C452/C552/C552DS/C652/C652DS Box Operations - Page 166
/Duplex Staple Staple - Position Setting Description Use the keypad to enter the number of copies. A number between 1 and 9999 can be specified. Select 1-Sided or 2-Sided. Select whether to staple the printed sheets. If you select the type of stapling, specify the position. bizhub C652/C652DS/C552 - Konica Minolta bizhub C452 | bizhub C452/C552/C552DS/C652/C652DS Box Operations - Page 167
document. Renames the selected document. Configure settings to move the selected document. Configure settings to copy the selected document. Saves the selected document in the external memory. d Reference For details on other items, refer to page 7-2. bizhub C652/C652DS/C552/C552DS/C452 7-62 - Konica Minolta bizhub C452 | bizhub C452/C552/C552DS/C652/C652DS Box Operations - Page 168
[Start] on the control panel or [Start] in the touch panel. Reference - The contents displayed in a Personal or Group User Box vary depending on the logged in user. - You do not need to enter the password even if it is specified in the destination User Box. bizhub C652/C652DS/C552/C552DS/C452 7-63 - Konica Minolta bizhub C452 | bizhub C452/C552/C552DS/C652/C652DS Box Operations - Page 169
to be saved. Reference - For information on the external memory, refer to page 7-101. - Multiple documents can be saved collectively. - A document cannot be renamed while it is being saved. Before saving a document, change the file name as appropriate. bizhub C652/C652DS/C552/C552DS/C452 7-64 - Konica Minolta bizhub C452 | bizhub C452/C552/C552DS/C652/C652DS Box Operations - Page 170
- Resolution Select the resolution of the document to be saved. Document Settings-File Type When specifying the file type, select [Yes]. The available setting items are as follows. Item File Type Description Select the file type for the file to be saved. bizhub C652/C652DS/C552/C552DS/C452 7-65 - Konica Minolta bizhub C452 | bizhub C452/C552/C552DS/C652/C652DS Box Operations - Page 171
. Displays the number of pages in the document. Displays the job number when the document was registered. If multiple documents are selected, use [ ] or [ ] to switch them. Press this button to change to the Preview screen. For details, refer to page 7-67. bizhub C652/C652DS/C552/C552DS/C452 7-66 - Konica Minolta bizhub C452 | bizhub C452/C552/C552DS/C652/C652DS Box Operations - Page 172
the normal size. After you have changed the display size, use the scroll bars located in the right and the bottom of the image to view to the desired portion. Reference - For a document with multiple pages, only the image of the first page can be viewed. bizhub C652/C652DS/C552/C552DS/C452 7-67 - Konica Minolta bizhub C452 | bizhub C452/C552/C552DS/C652/C652DS Box Operations - Page 173
Application settings You can edit a document saved in a Public, Personal, or Group User Box by changing the order of or delete pages in the document. You can also register the image of a saved document to be overlaid on the printed data. The available functions are as follows. Item Edit Document - Konica Minolta bizhub C452 | bizhub C452/C552/C552DS/C652/C652DS Box Operations - Page 174
data. % In this example, the specified pages (pages 1, 3, and 4) have been deleted. 3 To completely delete the pages, press [Start] or the [Start] key on the control panel. % To cancel the deletion, press [Cancel] to return to the Application screen. bizhub C652/C652DS/C552/C552DS/C452 7-69 - Konica Minolta bizhub C452 | bizhub C452/C552/C552DS/C652/C652DS Box Operations - Page 175
Page]. % To select only even pages, press [Even Page]. % After selecting [Odd Page] or [Even Page], you can use a page key to select the desired page or cancel the selection. The preview images of the selected pages are displayed together with the rotation setting screen. bizhub C652/C652DS/C552 - Konica Minolta bizhub C452 | bizhub C452/C552/C552DS/C652/C652DS Box Operations - Page 176
document data is not changed. 5 Check the information of the displayed screen. To rotate the pages, select [Save]. % To cancel the rotation, press [Don't Save] to return to the Edit Document screen. The selected pages are rotated and the document is saved. bizhub C652/C652DS/C552/C552DS/C452 7-71 - Konica Minolta bizhub C452 | bizhub C452/C552/C552DS/C652/C652DS Box Operations - Page 177
7.8 Application 7 Edit Document - Move Page You can change the order of the pages within a saved document by moving the specified pages. 0 You cannot rotate the only page of a document. 0 You will be unable to restore the pages because they are overwritten when they are moved. If you will need the - Konica Minolta bizhub C452 | bizhub C452/C552/C552DS/C652/C652DS Box Operations - Page 178
and the document is saved. Preview/Set Range You can specify a range of pages and check preview images when the selected document consists of multiple pages. You can also change the display size. Item [ Prev. Page] Description Moves to the previous page. bizhub C652/C652DS/C552/C552DS/C452 7-73 - Konica Minolta bizhub C452 | bizhub C452/C552/C552DS/C652/C652DS Box Operations - Page 179
]. % You can use [Zoom] to view the selected pages at full size or at a size of 2, 4 or 8 times the normal size. After you have changed the display size, use the scroll bars located in the right and the bottom of the image to view to the desired portion. bizhub C652/C652DS/C552/C552DS/C452 7-74 - Konica Minolta bizhub C452 | bizhub C452/C552/C552DS/C652/C652DS Box Operations - Page 180
position. % To move before the displayed page, press [Before]. % To move after the displayed page, press [After]. 4 Press [OK]. 7.8.3 Register Overlay Register a document saved in a User Box as an overlay image. You can overlay the selected image to a printed document using [Stamp/Composition - Konica Minolta bizhub C452 | bizhub C452/C552/C552DS/C652/C652DS Box Operations - Page 181
a new overlay image. 1 Select a document and press [Register Overlay]. 2 Press an unregistered image button and press [New]. 3 Enter the name of the overlay image to be registered, and press [OK]. % You can enter up to 16 characters. 4 Press [Start]. bizhub C652/C652DS/C552/C552DS/C452 7-76 - Konica Minolta bizhub C452 | bizhub C452/C552/C552DS/C652/C652DS Box Operations - Page 182
registered overlay image with new one. 1 Select a document and press [Register Overlay]. 2 Press the image button to be overwritten, and press [Overwrite]. 3 Check the displayed message, and press [Overwrite]. 4 Press [Start]. The overlay image is overwritten. bizhub C652/C652DS/C552/C552DS/C452 - Konica Minolta bizhub C452 | bizhub C452/C552/C552DS/C652/C652DS Box Operations - Page 183
Density] [Color] Description Specify the density of the image. Use the keypad to enter the density using a value between 20 and 100%. Specify the color of the overlay image. [Full Color]: Prints a document in full color. [Black]: Prints a document in black and white. bizhub C652/C652DS/C552/C552DS - Konica Minolta bizhub C452 | bizhub C452/C552/C552DS/C652/C652DS Box Operations - Page 184
a new document in the Bulletin Board User Box, delete the existing document, and send a new document to the Bulletin Board User Box. To delete the document saved in the Bulletin Board User Box, check its registration time or source, and press [Delete]. bizhub C652/C652DS/C552/C552DS/C452 7-79 - Konica Minolta bizhub C452 | bizhub C452/C552/C552DS/C652/C652DS Box Operations - Page 185
. To delete the document saved in the Polling TX User Box, check its registration time or source, and press [Delete]. d Reference For details on the polling transmission procedure, refer to the "User's Guide [Network Scan/Fax/Network Fax Operations]". bizhub C652/C652DS/C552/C552DS/C452 7-80 - Konica Minolta bizhub C452 | bizhub C452/C552/C552DS/C652/C652DS Box Operations - Page 186
User Box The Secure Print User Box is used to save a document that was printed with the specified ID and password. To print a document, you must enter the ID and password. The authentication procedure varies depending on the Prohibited Functions When Authentication Error setting in [Administrator - Konica Minolta bizhub C452 | bizhub C452/C552/C552DS/C652/C652DS Box Operations - Page 187
to page 7-12. Zoom For the setting procedure, refer to page 7-12. Page Margin For the setting procedure, refer to page 7-14. Sheet/Cover/Chapter Insert For the setting procedure, refer to page 7-15. Stamp/Composition For the setting procedure, refer to page 7-19. bizhub C652/C652DS/C552/C552DS - Konica Minolta bizhub C452 | bizhub C452/C552/C552DS/C652/C652DS Box Operations - Page 188
You can handle a document saved in the Secure Print User Box. Reference - To delete all documents in the Secure Print User Box at a time, select "User Box Settings" - "Delete Secure Print Documents" in Administrator Settings. For details, refer to page 8-19. The available setting items are as - Konica Minolta bizhub C452 | bizhub C452/C552/C552DS/C652/C652DS Box Operations - Page 189
User's Guide [Network Scan/Fax/Network Fax Operations]". 7.12.2 Print Select a document to be printed, and press [Print]. After the specified document has been printed, data is deleted automatically. 7.12.3 Filing Settings You can handle a document saved in the Memory RX User Box. The available - Konica Minolta bizhub C452 | bizhub C452/C552/C552DS/C652/C652DS Box Operations - Page 190
to a saved documents and add the number when printing or sending the document. You can pre-register the number to be assigned when creating the User Box and change it when printing or sending documents. For the functions you can configure when printing or sending documents, refer to page 7-7 and - Konica Minolta bizhub C452 | bizhub C452/C552/C552DS/C652/C652DS Box Operations - Page 191
7.13.16 Send - Address Book - Search For the setting procedure, refer to page 7-37. 7.13.17 Send - Direct Input - E-mail For the setting procedure, refer to page 7-40. 7.13.18 Send - Direct Input - PC (SMB) For the setting procedure, refer to page 7-42. bizhub C652/C652DS/C552/C552DS/C452 7-86 - Konica Minolta bizhub C452 | bizhub C452/C552/C552DS/C652/C652DS Box Operations - Page 192
7.13 Annotation User Box (System User Box) 7 7.13.19 Send - Direct Input - FTP For the setting procedure, refer to page 7-43. 7.13.20 Send - Direct Input - WebDAV For the setting procedure, refer to page 7-44. 7.13.21 Send - Job History For the setting procedure, refer to page 7-45. 7.13.22 - Konica Minolta bizhub C452 | bizhub C452/C552/C552DS/C652/C652DS Box Operations - Page 193
User Box (System User Box) 7 7.13.33 Send - Application - Stamp/Composition - Stamp For the setting procedure, refer to page 7-60. 7.13.34 Send - Application - Send & Print For the setting procedure, refer to page for the annotation numbers to be printed. bizhub C652/C652DS/C552/C552DS/C452 7-88 - Konica Minolta bizhub C452 | bizhub C452/C552/C552DS/C652/C652DS Box Operations - Page 194
numbers to be printed. Print Position Select the printing position. 7.13.36 Filing Settings You can handle a document saved in an Annotation User Box. The available setting items are as follows. Item Delete Description Deletes an unnecessary document such as a document that you have printed - Konica Minolta bizhub C452 | bizhub C452/C552/C552DS/C652/C652DS Box Operations - Page 195
User Box) 7 Item Edit Name Document Details Description Renames a saved document. Enables you to check the date and time a document has been saved as well as a preview image. 7.13.37 Application - Register Overlay For the setting procedure, refer to page 7-75. bizhub C652/C652DS/C552/C552DS - Konica Minolta bizhub C452 | bizhub C452/C552/C552DS/C652/C652DS Box Operations - Page 196
Book, Direct Input, or Job History. - You can configure transmission settings when you retransmit a saved document. You can also configure line and fax header settings. For details, refer to page 7-53 and page 7-60. - After document sending has been completed, data is deleted automatically. bizhub - Konica Minolta bizhub C452 | bizhub C452/C552/C552DS/C652/C652DS Box Operations - Page 197
7.14 Fax Retransmit User Box (System User Box) 7 7.14.4 Filing Settings - Delete Stop retransmission and delete the target document. Select a document, select the [Filing Settings] tab, and press [Delete]. bizhub C652/C652DS/C552/C552DS/C452 7-92 - Konica Minolta bizhub C452 | bizhub C452/C552/C552DS/C652/C652DS Box Operations - Page 198
has been completed, documents in the Password Encrypted PDF User Box are deleted automatically. Reference - Whether to print or save is specified in the direct print instruction issued from your computer. You cannot change a print instruction to a save instruction or vice versa. 7.15.3 Filing - Konica Minolta bizhub C452 | bizhub C452/C552/C552DS/C652/C652DS Box Operations - Page 199
is not enabled. In addition, jobs saved by public users can be saved in the ID & Print User Box. For details, refer to page 8-24. - After printing documents has been completed, the data in the ID & Print User Box is deleted automatically. A confirmation screen for confirming if you are sure to - Konica Minolta bizhub C452 | bizhub C452/C552/C552DS/C652/C652DS Box Operations - Page 200
7.16 ID & Print User Box (System User Box) 7 2 Select whether to delete the document after printing. 7.16.3 Filing Settings - Delete Select a document to be deleted, and press [Delete]. bizhub C652/C652DS/C552/C552DS/C452 7-95 - Konica Minolta bizhub C452 | bizhub C452/C552/C552DS/C652/C652DS Box Operations - Page 201
near the control panel. Do not use the USB connector near the rear side because it is used for optional devices. 0 Do not disconnect the external memory device while saving a document memory to be displayed varies depending on the administrator settings. bizhub C652/C652DS/C552/C552DS/C452 7-96 - Konica Minolta bizhub C452 | bizhub C452/C552/C552DS/C652/C652DS Box Operations - Page 202
PDF User Box, refer to page 7-93. Moving to the parent folder To move to the parent folder, press [Up]. Opening a folder To check the contents of a specific folder, press [Open]. Print Select a document to be printed, and press [Print]. The Print Details screen is displayed. bizhub C652/C652DS/C552 - Konica Minolta bizhub C452 | bizhub C452/C552/C552DS/C652/C652DS Box Operations - Page 203
color or black and white. Print Select 1-Sided or 2-Sided. Binding Position When you select 2-Sided in "Print", select the binding position. Finishing For the setting procedure, refer to page 7-8. Reference - 2-sided printing, punching, or stapling are not supported for JPEG and XPS files. bizhub - Konica Minolta bizhub C452 | bizhub C452/C552/C552DS/C652/C652DS Box Operations - Page 204
- Copy Security - Copy Guard For the setting procedure, refer to page 7-24. Stamp/Composition - Copy Security - Password Copy For the setting procedure, refer to page 7-26. Stamp/Composition - Stamp Repeat For the setting procedure, refer to page 7-28. bizhub C652/C652DS/C552/C552DS/C452 7-99 - Konica Minolta bizhub C452 | bizhub C452/C552/C552DS/C652/C652DS Box Operations - Page 205
] key on the control panel. Item [User Box] [Document Name] Description Select the Public, Personal, or Group User Box to save data in. Specify the name of the document to be saved. • If you select multiple files, you cannot specify the document name. bizhub C652/C652DS/C552/C552DS/C452 7-100 - Konica Minolta bizhub C452 | bizhub C452/C552/C552DS/C652/C652DS Box Operations - Page 206
PDA. 7.18.2 Mobile/PDA - Print List Reference - To save a file stored in a cellular phone or PDA in a User Box, or to print such a file, configure the appropriate setting in Administrator Settings in advance. For details, refer to page 8-25. To use a Bluetooth communication, the Bluetooth setting - Konica Minolta bizhub C452 | bizhub C452/C552/C552DS/C652/C652DS Box Operations - Page 207
instructions of the cellular phone or PDA. Check printing preferences You can check the overview of the settings to print the received data. d Reference To configure print settings, select [Cellular Phone/PDA Setting] in the Utility menu. For details, refer to page 8-10. bizhub C652/C652DS/C552 - Konica Minolta bizhub C452 | bizhub C452/C552/C552DS/C652/C652DS Box Operations - Page 208
4-digit PIN code from a cellular phone or PDA, a connection is established, and data is sent to this machine to be saved in a User Box. Reference - Check the PIN code in the instruction manual or in the setting instructions of the cellular phone or PDA. bizhub C652/C652DS/C552/C552DS/C452 7-103 - Konica Minolta bizhub C452 | bizhub C452/C552/C552DS/C652/C652DS Box Operations - Page 209
8 User Box Settings - Konica Minolta bizhub C452 | bizhub C452/C552/C552DS/C652/C652DS Box Operations - Page 210
3 Relay User Box (p. 8-8) New Edit Delete 3 User Box Settings (p. 8-9) Default Tab Shortcut Key 1 Shortcut Key 2 Link File Error Notification (p. 8-10) Proxy Server Use (p. 8-10) Print (p. 8-11) Print Color Paper Finishing Page Margin Stamp/Composition bizhub C652/C652DS/C552/C552DS - Konica Minolta bizhub C452 | bizhub C452/C552/C552DS/C652/C652DS Box Operations - Page 211
& Print Delete Time (p. 8-21) 6 Document Hold Setting (p. 8-21) 7 External Memory Function Settings (p. 8-22) Save Document Print Document External Memory Document Scan 8 Allow/Restrict User Box (p. 8-22) 9 ID & Print Delete after Print Setting (p. 8-23) 0 Document Delete Time Setting (p. 8-23 - Konica Minolta bizhub C452 | bizhub C452/C552/C552DS/C652/C652DS Box Operations - Page 212
Settings 2 User Box Administrator Setting (p. 8-25) 4 Security Details Security Print Only(p. 8-26) 6 HDD Settings 1 Check HDD Password (p. 8-29) 5 Format HDD (p. 8-30) 6 HDD Encryption Setting (p. 8-30) 8 Stamp Settings 1 Apply Stamps (p. 8-31) Printing Sending bizhub C652/C652DS/C552 - Konica Minolta bizhub C452 | bizhub C452/C552/C552DS/C652/C652DS Box Operations - Page 213
on User Authentication or Account Track settings. If [Personal] is selected, specify the owner user. To select the owner user, use the owner user change page. If [Group] is selected, specify the owner account. To select the owner account, use the Change Owner screen. bizhub C652/C652DS/C552/C552DS - Konica Minolta bizhub C452 | bizhub C452/C552/C552DS/C652/C652DS Box Operations - Page 214
RX password again. Delete Empty User Box(es) (Administrator Settings) Automatically searches for and deletes an empty User Box if the Public, Personal, or Group User Box is created in Administrator Settings. Press [Delete Empty User Box(es)] in the Create User Box screen. bizhub C652/C652DS/C552 - Konica Minolta bizhub C452 | bizhub C452/C552/C552DS/C652/C652DS Box Operations - Page 215
on User Authentication or Account Track settings. If [Personal] is selected, specify the owner user. To select the owner user, use the owner user change page. If [Group] is selected, specify the owner account. To select the owner account, use the Change Owner screen. bizhub C652/C652DS/C552/C552DS - Konica Minolta bizhub C452 | bizhub C452/C552/C552DS/C652/C652DS Box Operations - Page 216
. Specify a password to limit access to the User Box. Press [Relay TX Password], and then enter the password (up to 8 characters). d Reference For details on how to register the header or footer, refer to the "User's Guide [Network Scan/Fax/Network Fax Operations]". bizhub C652/C652DS/C552/C552DS - Konica Minolta bizhub C452 | bizhub C452/C552/C552DS/C652/C652DS Box Operations - Page 217
in the area on the lower right of the page. It is available when registering the frequently used System User Box as a shortcut key. Reference - A shortcut key is displayed only in the User Box mode after pressing the [User Box] key. Switching the Fax/Scan key or Copy key does not display the target - Konica Minolta bizhub C452 | bizhub C452/C552/C552DS/C652/C652DS Box Operations - Page 218
proxy server for connection, select [Administrator Settings] - [Network Settings] - [WebDAV Settings] - [WebDAV Client Settings] - [Proxy Server Address] to register the desired proxy server. For details, refer to the "User's Guide [Network Administrator]". bizhub C652/C652DS/C552/C552DS/C452 8-10 - Konica Minolta bizhub C452 | bizhub C452/C552/C552DS/C652/C652DS Box Operations - Page 219
to print a document through this machine, configure print settings. Basic - Print Select 1-Sided or 2-Sided. Basic - Color Select Full Color or Black. Basic - Paper Select the printing paper size if the sent data does not contain paper size information. bizhub C652/C652DS/C552/C552DS/C452 8-11 - Konica Minolta bizhub C452 | bizhub C452/C552/C552DS/C652/C652DS Box Operations - Page 220
Protect For the setting procedure, refer to page 7-22. Application - Stamp/Composition - Copy Security - Copy Guard For the setting procedure, refer to page 7-24. Application - Stamp/Composition - Password Copy For the setting procedure, refer to page 7-26. bizhub C652/C652DS/C552/C552DS/C452 8-12 - Konica Minolta bizhub C452 | bizhub C452/C552/C552DS/C652/C652DS Box Operations - Page 221
8.2 User mode settings 8 Application - Stamp/Composition - Stamp Repeat For the setting procedure, refer to page 7-28. bizhub C652/C652DS/C552/C552DS/C452 8-13 - Konica Minolta bizhub C452 | bizhub C452/C552/C552DS/C652/C652DS Box Operations - Page 222
available User Box types. Reference - To log in to this machine as the User Box administrator, execute the following steps when setting User Authentication. - Enter "boxadmin" in the User Name box. - Enter the password specified in page 8-25 in the Password box. Item Public user Registered user - Konica Minolta bizhub C452 | bizhub C452/C552/C552DS/C652/C652DS Box Operations - Page 223
is available when the optional fax kit is installed. User Box used to print or send a saved document with the date/time or filing number image. Specify the type of the text to be added when using this User Box. When registering this User Box, specify the administrator mode. Reference - If "Password - Konica Minolta bizhub C452 | bizhub C452/C552/C552DS/C652/C652DS Box Operations - Page 224
is less than eight characters. - When the registered User Box password contains less than eight characters, change it to eight characters before setting Password Rules to ON. For details on "Password Rules", refer to the "User's Guide [Copy Operations]". bizhub C652/C652DS/C552/C552DS/C452 8-16 - Konica Minolta bizhub C452 | bizhub C452/C552/C552DS/C652/C652DS Box Operations - Page 225
8.3 Administrator Settings 8 Page (2/3) Item Count Up Secondary Field Date/Time Density Number Type Print Position Primary Field Page (3/3) Description Select whether to count the annotation number by job or by page. Adds text to the number to be printed (up to 20 characters). Select the format - Konica Minolta bizhub C452 | bizhub C452/C552/C552DS/C652/C652DS Box Operations - Page 226
] to determine it. Reference - If the maximum number of User Boxes is set to "0", you cannot create new ones. - When the selected user already sets the number of User Boxes to 3, the allowable range of the maximum number of User Boxes changes "3 to 1000". bizhub C652/C652DS/C552/C552DS/C452 8-18 - Konica Minolta bizhub C452 | bizhub C452/C552/C552DS/C652/C652DS Box Operations - Page 227
saved, as an unnecessary User Box. To delete a User Box, confirm the message that appears and select [Yes]. Delete Secure Print Documents This function deletes all documents saved in the Secure Print User Box. To delete the User Box, confirm the message and select [Yes]. bizhub C652/C652DS/C552 - Konica Minolta bizhub C452 | bizhub C452/C552/C552DS/C652/C652DS Box Operations - Page 228
was saved or last retrieved to the date/time when it is to be deleted automatically. Reference - In Delete Time, specify 5 minutes to 12 hours (on a 1-minute basis), 1 day, 2 days, 3 days, 7 days, or 30 days. - When not deleting a document, select [Save]. bizhub C652/C652DS/C552/C552DS/C452 - Konica Minolta bizhub C452 | bizhub C452/C552/C552DS/C652/C652DS Box Operations - Page 229
8.3 Administrator Settings 8 ID & Print Delete Time Specify the period from the date/time when a document was saved in or last retrieved from the ID & Print User Box to the date/time when it is to be deleted automatically. Reference - In Delete Time, specify 5 minutes to 12 hours (on a 1-minute - Konica Minolta bizhub C452 | bizhub C452/C552/C552DS/C652/C652DS Box Operations - Page 230
document in external memory, change the setting to enable you to save a document in Administrator Settings. Item Save Document Print Document External Memory Document Scan Description Select whether to save (ON) or not save (OFF) scanned documents or documents stored in a User Box to the external - Konica Minolta bizhub C452 | bizhub C452/C552/C552DS/C652/C652DS Box Operations - Page 231
8.3 Administrator Settings 8 ID & Print Delete after Print Setting Select whether to check that the document saved in the ID & Print User Box has been deleted after printed. Reference - To check with the user whether to delete the target document, select [Confirm with User]. - To delete the target - Konica Minolta bizhub C452 | bizhub C452/C552/C552DS/C652/C652DS Box Operations - Page 232
8.3 Administrator Settings 8 ID & Print Settings Configure settings for ID & Print User Box. Item ID & print Public User Description [ON]: Saves all the Normal Print and Authentication & Print jobs, which were requested from a registered user, in the ID & Print User Box. [OFF]: Saves the - Konica Minolta bizhub C452 | bizhub C452/C552/C552DS/C652/C652DS Box Operations - Page 233
following functions are available when you log in as the User Box administrator. - Creating Public, Personal, or Group User Box - Checking, downloading, or deleting documents saved in all User Boxes - Changing all User Box settings - Deleting all User Boxes bizhub C652/C652DS/C552/C552DS/C452 8-25 - Konica Minolta bizhub C452 | bizhub C452/C552/C552DS/C652/C652DS Box Operations - Page 234
setting to specify to enable only Secure Print when issuing the print command from the printer driver. To print a document, you must enter the ID and password. 8.3.12 HDD Settings Check HDD Capacity You can check the occupied and free spaces in the HDD. bizhub C652/C652DS/C552/C552DS/C452 8-26 - Konica Minolta bizhub C452 | bizhub C452/C552/C552DS/C652/C652DS Box Operations - Page 235
. Reference - When changing Encryption Priority or Overwrite Priority setting, format the HDD after rebooting this machine. However, be careful that data is erased by formatting the HDD. - For the data erased by formatting the HDD, refer to page 8-30. bizhub C652/C652DS/C552/C552DS/C452 8-27 - Konica Minolta bizhub C452 | bizhub C452/C552/C552DS/C652/C652DS Box Operations - Page 236
function is available when disposing of this machine. Before performing this function, be sure to consult your service representative. 0 While overwriting and deleting data, do not turn the main power switch off approximately 40 minutes to execute Mode 1. bizhub C652/C652DS/C552/C552DS/C452 8-28 - Konica Minolta bizhub C452 | bizhub C452/C552/C552DS/C652/C652DS Box Operations - Page 237
The HDD password is specified. Reference - Enter the HDD password using 20 characters. Note that all the characters must not be the same. - If you have already specified the HDD password, [Edit] and [Release] appears. You can change or release the HDD password. bizhub C652/C652DS/C552/C552DS/C452 - Konica Minolta bizhub C452 | bizhub C452/C552/C552DS/C652/C652DS Box Operations - Page 238
HDD prevents the user from easily reading the data saved in the HDD. 0 Be sure to keep the specified encryption passphrase carefully so that you will never forget it. 0 The encryption passphrase setting must be configured by the administrator of this machine. 0 To turn the main power switch off and - Konica Minolta bizhub C452 | bizhub C452/C552/C552DS/C652/C652DS Box Operations - Page 239
, Password Copy) - Stamp Repeat - Header/Footer - Registered Overlay - The following shows the types of the stamps that can be applied to the transmitted data. - Date/Time - Page Number - Stamp - Header/Footer d Reference For details on the stamp setting, refer to page 7-19. bizhub C652/C652DS/C552 - Konica Minolta bizhub C452 | bizhub C452/C552/C552DS/C652/C652DS Box Operations - Page 240
9 PageScope Web Connection - Konica Minolta bizhub C452 | bizhub C452/C552/C552DS/C652/C652DS Box Operations - Page 241
browser to access PageScope Web Connection. 0 If User Authentication is enabled, enter the user name and password. For details, refer to page 9-10. 0 For details on specifying the IP address for the machine, refer to the "User's Guide [Network Administrator]". 0 PageScope Web Connection has two view - Konica Minolta bizhub C452 | bizhub C452/C552/C552DS/C652/C652DS Box Operations - Page 242
in the administrator mode, and after that, how many time you try to access, just timeout recurs. It results in the control panel of this machine being locked, and you cannot handle the control panel. In this case, turn the main power off, and then turn it on again. To avoid this problem, disable the - Konica Minolta bizhub C452 | bizhub C452/C552/C552DS/C652/C652DS Box Operations - Page 243
re-logging in to this machine as a different user or as an administrator, log out once, and log in again. When User Authentication or Account Track is not enabled You are automatically logged in as a public user. To log in as an administrator, log out once. bizhub C652/C652DS/C552/C552DS/C452 9-4 - Konica Minolta bizhub C452 | bizhub C452/C552/C552DS/C652/C652DS Box Operations - Page 244
9.2 Login and logout 9 Login as an administrator again. bizhub C652/C652DS/C552/C552DS/C452 9-5 - Konica Minolta bizhub C452 | bizhub C452/C552/C552DS/C652/C652DS Box Operations - Page 245
Manager is used for authentication, ask your server administrator about the login procedure. The User Authentication or Account Track page appears. Enter the required items to log in. To log in as a different user or as an administrator, log out once. bizhub C652/C652DS/C552/C552DS/C452 9-6 - Konica Minolta bizhub C452 | bizhub C452/C552/C552DS/C652/C652DS Box Operations - Page 246
9.2 Login and logout 9 Log in again. bizhub C652/C652DS/C552/C552DS/C452 9-7 - Konica Minolta bizhub C452 | bizhub C452/C552/C552DS/C652/C652DS Box Operations - Page 247
when the User Box administrator is enabled using the control panel. For details on the User Box administrator setting, permissions, and password, refer to the page 8-25. - Logging in to the user mode as an administrator enables you to perform job deletion processing, which is not available in the - Konica Minolta bizhub C452 | bizhub C452/C552/C552DS/C652/C652DS Box Operations - Page 248
9.2 Login and logout 9 Logging in as a public user If user authentication is not enabled on the machine, you will be logging in as a public user. In the login page, select "Public User", and click [Login]. bizhub C652/C652DS/C552/C552DS/C452 9-9 - Konica Minolta bizhub C452 | bizhub C452/C552/C552DS/C652/C652DS Box Operations - Page 249
use the control panel. For details on how to disable Prohibit Functions When Authentication Error, contact your administrator. - [User List] is available only when "User Name List" is set to "ON". For details, refer to the "User's Guide [Copy Operations]". bizhub C652/C652DS/C552/C552DS/C452 9-10 - Konica Minolta bizhub C452 | bizhub C452/C552/C552DS/C652/C652DS Box Operations - Page 250
of times, it is no longer possible to log in to the administrator mode. For details on the Prohibited Functions When Authentication Error parameter, refer to the "User's Guide Copy Operations". % The password entry page varies depending on the machine settings. % You can display the explanation of - Konica Minolta bizhub C452 | bizhub C452/C552/C552DS/C652/C652DS Box Operations - Page 251
display mode in the administrator mode can be selected from "Tab Function Display" or "List Function Display". This manual shows an example where the "List Function Display" is set as the display mode. In either display mode, the available items are the same. In the default setting, the screen is - Konica Minolta bizhub C452 | bizhub C452/C552/C552DS/C652/C652DS Box Operations - Page 252
user mode as a User Box administrator, select "User Box Administrator", and enter the User Box administrator's password. Reference - To log in to the user mode as an administrator, select [Administrator] - [Administrator (User Mode)], and enter the administrator password. bizhub C652/C652DS/C552 - Konica Minolta bizhub C452 | bizhub C452/C552/C552DS/C652/C652DS Box Operations - Page 253
of times, it is no longer possible to log in to the administrator mode. For details on the Prohibited Functions When Authentication Error parameter, refer to the "User's Guide [Copy Operations]". - The password entry page varies depending on the machine settings. - You can display the explanation of - Konica Minolta bizhub C452 | bizhub C452/C552/C552DS/C652/C652DS Box Operations - Page 254
messages. Clicking the desired icon when an error occurs displays the information (Consumable Info, Paper Tray, or user registration page) associated with the icon to enable you to check the status. 5 Message display Displays the operating status of this machine. 6 [To Login Screen]/ [Logout - Konica Minolta bizhub C452 | bizhub C452/C552/C552DS/C652/C652DS Box Operations - Page 255
9.3 Page Configuration No. Item 7 [Change Password] 8 Help 9 Refresh 10 Icon 11 Menu 12 Information and settings 9 Description Click this button to jump to the user password change page. This button appears only in the user mode page in which you logged in as a registered user. You can - Konica Minolta bizhub C452 | bizhub C452/C552/C552DS/C652/C652DS Box Operations - Page 256
. Changes the password of the login user. Enables you to check the function permission information about the user or account. Enables you to check the network settings of this machine. Enables you to check the printer controller settings of this machine. Prints font or configuration information - Konica Minolta bizhub C452 | bizhub C452/C552/C552DS/C652/C652DS Box Operations - Page 257
9.4 User Mode Overview 9 9.4.2 Job Item Current Jobs Job History Communication List Description Enables you to check the currently executed job or queued jobs. Enables you to check the executed jobs. Enables you to check the completed transmission and reception jobs. bizhub C652/C652DS/C552/ - Konica Minolta bizhub C452 | bizhub C452/C552/C552DS/C652/C652DS Box Operations - Page 258
Polling TX, Memory RX, or Relay User Box) to enable you to handle a document saved in the User Box or change the User Box setting. Displayed when the optional fax kit is installed. This function enables you to create a new Bulletin Board or Relay User Box. bizhub C652/C652DS/C552/C552DS/C452 9-19 - Konica Minolta bizhub C452 | bizhub C452/C552/C552DS/C652/C652DS Box Operations - Page 259
Specify a file saved in the computer to print it using this machine. If necessary, you can select Application to save a document in the specified User Box. Reference - [Direct Print] may not be displayed depending on settings in the administrator mode. bizhub C652/C652DS/C552/C552DS/C452 9-20 - Konica Minolta bizhub C452 | bizhub C452/C552/C552DS/C652/C652DS Box Operations - Page 260
and change an address. Enables you to check the temporary program address book registered in this machine or to register and change an address. Registers or changes up to 10 subjects when sending E-mails. Registers or changes up to 10 body messages when sending E-mails. bizhub C652/C652DS/C552 - Konica Minolta bizhub C452 | bizhub C452/C552/C552DS/C652/C652DS Box Operations - Page 261
9.4 User Mode Overview 9 9.4.6 Customize You can specify the initial screen after logging in. Item Option Description Enables you to configure the settings displayed in the initial page after logging in to this machine. bizhub C652/C652DS/C552/C552DS/C452 9-22 - Konica Minolta bizhub C452 | bizhub C452/C552/C552DS/C652/C652DS Box Operations - Page 262
Handling a document in a User Box 9 9.5 Handling a document in a User Box The [Open User Box] menu supports the following functions. - Listing the documents saved in a User Box - Printing a document - Sending a document to another machine - Downloading and saving document data in your computer - Konica Minolta bizhub C452 | bizhub C452/C552/C552DS/C652/C652DS Box Operations - Page 263
extension, or password setting. Click this button to delete the displayed User Box. • Deleting a User Box erases all the documents saved in the User Box. To view a thumbnail image for each document, click [ON]. When you do not view thumbnail images, click [OFF]. bizhub C652/C652DS/C552/C552DS/C452 - Konica Minolta bizhub C452 | bizhub C452/C552/C552DS/C652/C652DS Box Operations - Page 264
. Reference - If 11 or more documents are saved, [Page (Display by 10 cases)] is displayed. 9.5.2 Printing a document 1 Select "Specify operation" - "Print", and click [Change the display]. The "Select" check box is displayed for the printable documents. bizhub C652/C652DS/C552/C552DS/C452 9-25 - Konica Minolta bizhub C452 | bizhub C452/C552/C552DS/C652/C652DS Box Operations - Page 265
9.5 Handling a document in a User Box 9 2 Select the check box of the target document, and click [Print Setting]. bizhub C652/C652DS/C552/C552DS/C452 9-26 - Konica Minolta bizhub C452 | bizhub C452/C552/C552DS/C652/C652DS Box Operations - Page 266
the selected documents as one. Configure the number of sets, 2-sided printing, color, and finishing settings. Configure more detailed setting such as Page Margin or Stamp. When using this function, click [Display]. Select whether to save print setting. bizhub C652/C652DS/C552/C552DS/C452 9-27 - Konica Minolta bizhub C452 | bizhub C452/C552/C552DS/C652/C652DS Box Operations - Page 267
while Combine is set to "OFF", Basic Setting and Application Setting will become unavailable. % [Save Print Settings] is not displayed when multiple documents are selected. 4 Click [OK]. Printing starts. 5 Click [OK]. You then return to the File List page. bizhub C652/C652DS/C552/C552DS/C452 9-28 - Konica Minolta bizhub C452 | bizhub C452/C552/C552DS/C652/C652DS Box Operations - Page 268
9.5 Handling a document in a User Box 9 9.5.3 Sending a document to another machine 1 Select "Specify operation" - "Send to other Device", and click [Change the display]. The "Select" check box is displayed for documents that can be sent. bizhub C652/C652DS/C552/C552DS/C452 9-29 - Konica Minolta bizhub C452 | bizhub C452/C552/C552DS/C652/C652DS Box Operations - Page 269
9.5 Handling a document in a User Box 9 2 Select the check box of the target document, and click [TX Setting]. bizhub C652/C652DS/C552/C552DS/C452 9-30 - Konica Minolta bizhub C452 | bizhub C452/C552/C552DS/C652/C652DS Box Operations - Page 270
9.5 Handling a document in a User Box 9 3 Configure send settings. bizhub C652/C652DS/C552/C552DS/C452 9-31 - Konica Minolta bizhub C452 | bizhub C452/C552/C552DS/C652/C652DS Box Operations - Page 271
starts. 5 Click [OK]. You then return to the File List page. 9.5.4 Downloading document data to your computer 1 Select "Specify operation" - "Download to PC", and click [Change the display]. The "Select" check box is displayed for the available documents. bizhub C652/C652DS/C552/C552DS/C452 9-32 - Konica Minolta bizhub C452 | bizhub C452/C552/C552DS/C652/C652DS Box Operations - Page 272
9.5 Handling a document in a User Box 9 2 Select the check box of the target document, and click [Download Setting]. 3 Configure settings. bizhub C652/C652DS/C552/C552DS/C452 9-33 - Konica Minolta bizhub C452 | bizhub C452/C552/C552DS/C652/C652DS Box Operations - Page 273
one document. If necessary, you can change that order. Click the target document, and select [Top], [Up], [Down], [Bottom], or [Undo]. When checking a thumbnail image for each document, click [Thumbnail View]. Select the file type for the file to be saved. Download all pages or specify the range of - Konica Minolta bizhub C452 | bizhub C452/C552/C552DS/C652/C652DS Box Operations - Page 274
9.5 Handling a document in a User Box 9 9.5.5 Moving or copying a document to another User Box 1 Select "Specify operation" - "Move/Copy", and click [Change the display]. The "Select" check box is displayed for the available documents. bizhub C652/C652DS/C552/C552DS/C452 9-35 - Konica Minolta bizhub C452 | bizhub C452/C552/C552DS/C652/C652DS Box Operations - Page 275
Copy Description Select the User Box to move or copy a document from the User Box List. Select this check box to copy a document to the target User Box. 4 Click [OK]. This moves or copies the document. 5 Click [OK]. You then return to the File List page. bizhub C652/C652DS/C552/C552DS/C452 9-36 - Konica Minolta bizhub C452 | bizhub C452/C552/C552DS/C652/C652DS Box Operations - Page 276
9.5 Handling a document in a User Box 9 9.5.6 Deleting a document 1 Select "Specify operation" - "Delete", and click [Change the display]. The "Select" check box is displayed for the available documents. bizhub C652/C652DS/C552/C552DS/C452 9-37 - Konica Minolta bizhub C452 | bizhub C452/C552/C552DS/C652/C652DS Box Operations - Page 277
, select the "Check/Uncheck" check box. 3 Check the document name to be deleted, and click [OK]. % When checking a thumbnail image for each document, click [Thumbnail View]. 4 Click [OK]. This deletes a document(s), and returns you to the File List page. bizhub C652/C652DS/C552/C552DS/C452 9-38 - Konica Minolta bizhub C452 | bizhub C452/C552/C552DS/C652/C652DS Box Operations - Page 278
of an error. Configure the setting to notify the target user of the total counter by E-mail, and register the E-mail address of the destination. Specify the date and time displayed in this machine. Configure Power Save or Weekly Timer Setting in this machine. bizhub C652/C652DS/C552/C552DS/C452 - Konica Minolta bizhub C452 | bizhub C452/C552/C552DS/C652/C652DS Box Operations - Page 279
9.6 Administrator Mode Overview 9 Item Network Error Code Display Setting Reset License Settings Edit Font/Macro Job Log Description Specify whether to display the network error code. Clears all settings for the network, controller and destinations. Allows you to issue a license and enable - Konica Minolta bizhub C452 | bizhub C452/C552/C552DS/C652/C652DS Box Operations - Page 280
9 9.6.3 Security Item PKI Settings Certificate Verification Settings Address Reference Setting Restrict User Access Copy Security Auto Logout Administrator Password Setting Description Register device certificates and configure the SSL, protocol, or external certificate settings. Specify - Konica Minolta bizhub C452 | bizhub C452/C552/C552DS/C652/C652DS Box Operations - Page 281
, register the external server. Specify the upper limit of the number of User Boxes. Specify whether to print data in single color or two-color mode. Configure the setting to send a file to the Home folder. Restricts manual transmission destinations. bizhub C652/C652DS/C552/C552DS/C452 9-42 - Konica Minolta bizhub C452 | bizhub C452/C552/C552DS/C652/C652DS Box Operations - Page 282
9.6 Administrator Mode Overview 9 9.6.5 Network Item TCP/IP Setting E-Mail Setting LDAP Setting IPP Setting FTP Setting SNMP Setting SMB Setting Web Service Settings Bonjour Setting NetWare Setting AppleTalk Setting Network Fax Setting WebDAV Settings OpenAPI Setting TCP Socket Setting IEEE802.1x - Konica Minolta bizhub C452 | bizhub C452/C552/C552DS/C652/C652DS Box Operations - Page 283
you to handle a document saved in the User Box or change the User Box setting. • The Bulletin Board and Relay User Boxes are available when the op- tional fax kit is installed. Enables you to create a new Bullet in Board, Relay, or Annotarion User Box. bizhub C652/C652DS/C552/C552DS/C452 9-44 - Konica Minolta bizhub C452 | bizhub C452/C552/C552DS/C652/C652DS Box Operations - Page 284
the timeout period of the interface. Configure the settings to enable direct printing using PageScope Web Connection. Select whether to specify a password to obtain device information through the printer driver. If "ON" is selected, specify the password. bizhub C652/C652DS/C552/C552DS/C452 9-45 - Konica Minolta bizhub C452 | bizhub C452/C552/C552DS/C652/C652DS Box Operations - Page 285
to register and change an address. Enables you to check the program address book registered in this machine or to register and change an address. Enables you to check the temporary program address book registered in this machine or to register and change an address. Registers up to 10 subjects when - Konica Minolta bizhub C452 | bizhub C452/C552/C552DS/C652/C652DS Box Operations - Page 286
be output when sending or receiving data. Specify the parameters and functions of the extended line. • This item is displayed when a line is extended. Configure the setting to use network fax. Registers sender information and fax number when sending data. bizhub C652/C652DS/C552/C552DS/C452 9-47 - Konica Minolta bizhub C452 | bizhub C452/C552/C552DS/C652/C652DS Box Operations - Page 287
9.6 Administrator Mode Overview 9 9.6.10 Wizard Configure the settings according to the instructions shown in the window for items requiring multiple settings. The available setting items are as follows - TX Setting for scan documents. - Network print settings. - Restrict users from using this - Konica Minolta bizhub C452 | bizhub C452/C552/C552DS/C652/C652DS Box Operations - Page 288
10 Appendix - Konica Minolta bizhub C452 | bizhub C452/C552/C552DS/C652/C652DS Box Operations - Page 289
try saving the document again. The number of jobs that can be programmed has reached the maximum number possible. Wait until a job has been completed, or delete a current job. d Reference For details on the network settings, refer to "User's Guide [Network Administrator]". bizhub C652/C652DS/C552 - Konica Minolta bizhub C452 | bizhub C452/C552/C552DS/C652/C652DS Box Operations - Page 290
you to construct a network without an IP address duplication or other troubles. A method of presenting the quasi-shading of gray using black and white colors. This method is easier to process than error diffusion, but may stir some unevenness on the image. The acronym for Domain Name System. DNS - Konica Minolta bizhub C452 | bizhub C452/C552/C552DS/C652/C652DS Box Operations - Page 291
, adopts 128-bit of the IP address. The IP address is assigned to every computer or other device connected to the Internet. The acronym for Joint Photographic Experts Group, one of the file formats used to save image data. (The file extension is ".jpg".) The compression ratio is generally 1/10 to - Konica Minolta bizhub C452 | bizhub C452/C552/C552DS/C652/C652DS Box Operations - Page 292
Term Plug-andplay Port Number PPI Preview Print Job Printer driver Property Protocol Proxy server Resolution Scanning Screen frequency Single-page TIFF SMB SSL/TLS Subnet Mask TCP/IP Thumbnail TIFF TWAIN Uninstallation USB Web browser 10 Description A mechanism of detecting a peripheral device - Konica Minolta bizhub C452 | bizhub C452/C552/C552DS/C652/C652DS Box Operations - Page 293
11 Index - Konica Minolta bizhub C452 | bizhub C452/C552/C552DS/C652/C652DS Box Operations - Page 294
7-13 Control panel 3-2 Copies 7-7 Copy 7-64 Copy Guard 7-19 Copy Protect 7-22 Cover Sheet 7-15 Creating a User Box 8-5, 8-15 Custom Display Settings 8-9 Custom Size 6-12 Customize 9-22 D Date/Time 7-19 Default Tab 8-9 Delete Empty User Box(es) (Administrator Settings 8-6 Delete Page - Konica Minolta bizhub C452 | bizhub C452/C552/C552DS/C652/C652DS Box Operations - Page 295
Print User Box 7-94 Image Adjustment 6-12 Image Shift - Change Back Shift 7-15 Index 7-38 Information 9-17 Insert Sheet 7-17 Insert Sheet Setting 7-20 Internet Fax 7-41 IP Address Fax 7-41 J Job 9-18 Job History 7-45 Job List 3-6 Job List - Delete 3-6 Job List - Job Details 3-6 L Last - Konica Minolta bizhub C452 | bizhub C452/C552/C552DS/C652/C652DS Box Operations - Page 296
Resolution 7-47 Rotate Page 7-70 S Saving 4-2, 4-10 Saving documents 2-2, 6-2 Scan Setting 6-10, 7-51 Scan Settings 6-5 Scan Size 6-12 Search options 7-39 Secondary Field 7-88 Secure Print User Box 7-81 Security 9-41 Security Details 8-26 Security Print Only 8-26 Select Line 7-54 Send - Konica Minolta bizhub C452 | bizhub C452/C552/C552DS/C652/C652DS Box Operations - Page 297
19 Black 6-11, 7-52 Blank 7-17 Body 7-56 Book Copy 6-15 Book Spread 6-15 Bulletin Board User Box 7-79, 8-7 C Center Erase 6-16 Center Staple & Fold 7-10 Change Position/Delete 7-23, 7-29 Chapter Paper 7-18 Chapters 7-15 Check HDD Capacity 8-26 Check Job 3-5 Check Job Set 3-7, 3-8 Check - Konica Minolta bizhub C452 | bizhub C452/C552/C552DS/C652/C652DS Box Operations - Page 298
7-17 Insert Sheet 7-15 Insert Sheet Setting 7-20 Insert Type 7-17 Internet Fax 7-41 IP Address Fax 7-41 J Job Details 3-6 Job List 3-5, 3-6 JPEG 6-7, 7-48 11 L L1 3-8 L2 3-8 Last Name 7-46 Left 6-19 Line Setting 7-53 Long Original 6-18 M Manual 7-12 Maximum Number of User Boxes 8-18 - Konica Minolta bizhub C452 | bizhub C452/C552/C552DS/C652/C652DS Box Operations - Page 299
transmission 7-58 Timer TX Job 3-8 Top 6-19 Tri-Fold 7-10 U URL Notification Setting 7-56 Use Existing Color Setting 7-52 User Box 6-4 User Box Administrator Setting 8-25 User Box Name 8-5, 8-7, 8-8, 8-16 User Box No 8-5, 8-7, 8-8, 8-16 User Box Setting 8-19 User Name 7-42, 7-43, 7-44 - Konica Minolta bizhub C452 | bizhub C452/C552/C552DS/C652/C652DS Box Operations - Page 300
http://konicaminolta.com A1DM-9585BO-00 2009 Copyright 2009.11
-
 1
1 -
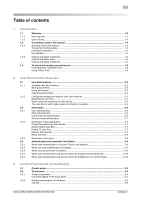 2
2 -
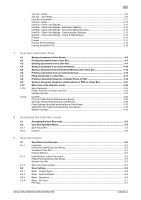 3
3 -
 4
4 -
 5
5 -
 6
6 -
 7
7 -
8
-
9
-
10
-
11
-
12
-
13
-
14
-
15
-
16
-
17
-
18
-
19
-
20
-
21
-
22
-
23
-
24
-
25
-
26
-
27
-
28
-
29
-
30
-
31
-
32
-
33
-
34
-
35
-
36
-
37
-
38
-
39
-
40
-
41
-
42
-
43
-
44
-
45
-
46
-
47
-
48
-
49
-
50
-
51
-
52
-
53
-
54
-
55
-
56
-
57
-
58
-
59
-
60
-
61
-
62
-
63
-
64
-
65
-
66
-
67
-
68
-
69
-
70
-
71
-
72
-
73
-
74
-
75
-
76
-
77
-
78
-
79
-
80
-
81
-
82
-
83
-
84
-
85
-
86
-
87
-
88
-
89
-
90
-
91
-
92
-
93
-
94
-
95
-
96
-
97
-
98
-
99
-
100
-
101
-
102
-
103
-
104
-
105
-
106
-
107
-
108
-
109
-
110
-
111
-
112
-
113
-
114
-
115
-
116
-
117
-
118
-
119
-
120
-
121
-
122
-
123
-
124
-
125
-
126
-
127
-
128
-
129
-
130
-
131
-
132
-
133
-
134
-
135
-
136
-
137
-
138
-
139
-
140
-
141
-
142
-
143
-
144
-
145
-
146
-
147
-
148
-
149
-
150
-
151
-
152
-
153
-
154
-
155
-
156
-
157
-
158
-
159
-
160
-
161
-
162
-
163
-
164
-
165
-
166
-
167
-
168
-
169
-
170
-
171
-
172
-
173
-
174
-
175
-
176
-
177
-
178
-
179
-
180
-
181
-
182
-
183
-
184
-
185
-
186
-
187
-
188
-
189
-
190
-
191
-
192
-
193
-
194
-
195
-
196
-
197
-
198
-
199
-
200
-
201
-
202
-
203
-
204
-
205
-
206
-
207
-
208
-
209
-
210
-
211
-
212
-
213
-
214
-
215
-
216
-
217
-
218
-
219
-
220
-
221
-
222
-
223
-
224
-
225
-
226
-
227
-
228
-
229
-
230
-
231
-
232
-
233
-
234
-
235
-
236
-
237
-
238
-
239
-
240
-
241
-
242
-
243
-
244
-
245
-
246
-
247
-
248
-
249
-
250
-
251
-
252
-
253
-
254
-
255
-
256
-
257
-
258
-
259
-
260
-
261
-
262
-
263
-
264
-
265
-
266
-
267
-
268
-
269
-
270
-
271
-
272
-
273
-
274
-
275
-
276
-
277
-
278
-
279
-
280
-
281
-
282
-
283
-
284
-
285
-
286
-
287
-
288
-
289
-
290
-
291
-
292
-
293
-
294
-
295
-
296
-
297
-
298
-
299
-
300
 |
 |
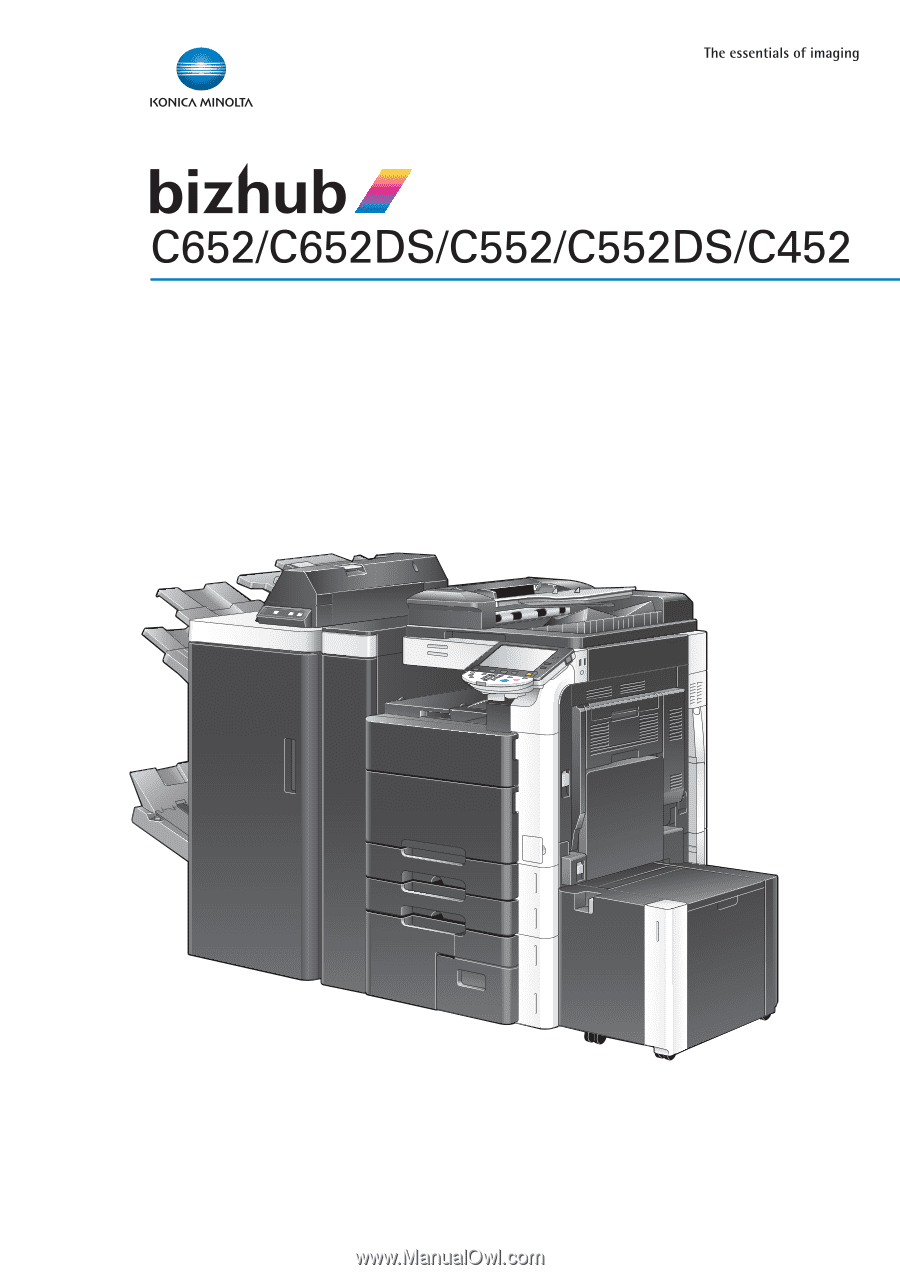
User’s Guide
[Box Operations]