Konica Minolta PS7000 Twain Driver and Overlay Manager Software Installation a - Page 34
Using, the Overlay Manager Software
 |
View all Konica Minolta PS7000 manuals
Add to My Manuals
Save this manual to your list of manuals |
Page 34 highlights
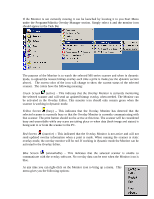
prints. To toggle the indicator, continue to hold down the Clear/Shift button and release and press the Paper Select button a second time. Dynamic: In Dynamic mode, the MS 6000 and MS 7000 can annotate an overlay with changing information such as page number, date and time from print to print. In order to do so, the scanners use temporary on-board storage that, in between prints, is repeatedly populated by the Overlay Manager software. In order to use dynamic overlays the scanner must have a SCSI connection to a PC that has the Overlay Monitor active. The only way to active dynamic mode is to enable it in the Overlay Configuration Editor and make sure the Overlay Monitor is active. When all these criteria are met, the scanner is automatically placed in dynamic mode. This can be verified by pressing the Clear/Shift button and the Paper Select button for one second. When in dynamic mode the LED will display a 2c setting. When using dynamic overlays the overlay cannot be disabled via the front panel but instead must be done through the software. Using the Overlay Manager Software To begin using overlays on output you will need to follow these steps -- the details of which are explained fully in the following subsections. 1) Launch the Overlay Monitor (if not done so during the install) - once launched it may still be inactive/disabled. 2) Create an overlay in the Overlay Editor and then enable the Overlay Monitor. 3) Use the Configuration Editor to select the scanner, select the overlay bitmap, select the overlay location and to set the overlay mode as dynamic or static. 4) Make a print. Once these steps have been followed, the selected scanner has stored the static overlay internally. It can now be used as is until cleared or changed by the Overlay Manager. The PC no longer needs to be connected or used to utilize that overlay. If you desire to have a dynamically changing overlay with date, time or page number then the scanner must stay connected to a PC that has the Overlay Monitor active and running. Each of the Overlay Manager modules is explained in detail below with further instructions for using dynamic overlays. The Overlay Monitor The first step to creating and using overlays is to ensure that the Overlay Monitor is active and running in the Status Area of the Windows Task Bar. The Task Bar is typically located along the bottom edge of your monitor and the icon itself will be to the far right-hand side of the Task Bar (next to the clock display). It can be identified as a small MS 7000 scanner icon with a colored screen. If you wish to have the Monitor automatically start each time Windows is launch then you will need to indicate this in the Overlay Configuration Editor (see below).
-
 1
1 -
2
-
3
-
4
-
5
-
6
-
7
-
8
-
9
-
10
-
11
-
12
-
13
-
14
-
15
-
16
-
17
-
18
-
19
-
20
-
21
-
22
-
23
-
24
-
25
-
26
-
27
-
28
-
 29
29 -
 30
30 -
 31
31 -
 32
32 -
 33
33 -
 34
34 -
 35
35 -
 36
36 -
 37
37 -
 38
38 -
 39
39 -
40
-
41
-
42
-
43
-
44
-
45
-
46
-
47
-
48
-
49
-
50
-
51
-
52
-
53
-
54
-
55
-
56
-
57
-
58
-
59
 |
 |