Konica Minolta PS7000 Twain Driver and Overlay Manager Software Installation a - Page 42
Preview Window
 |
View all Konica Minolta PS7000 manuals
Add to My Manuals
Save this manual to your list of manuals |
Page 42 highlights
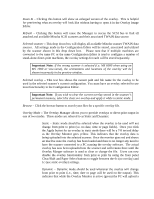
new overly bitmap with the current dynamic information as each print is made. In order to select and use dynamic overlay mode you will need to have the PC connected to the appropriate MS scanner and the Overlay Manager icon active in the Windows tray. Disable - Select Disable if you do not want the connected MS scanner to utilize any overlays during output. This is the only way to disable overlays while the machine is running in dynamic mode. It can also be used to duplicate the front panel toggle while running in Static mode. Overlay Position - This drop down box lets you select one of the eight possible page locations where you can place the overlay itself. These locations all assume an orientation of portrait and will always be printed horizontally - in other words if you place the overlay on the right side of the page the text will not be rotated to be printed along the edge. Once selected click the apply button and the preview window will update to show the approximate layout of the annotate print. The overlay position is not affected if the MS 6000 is set for automatic 90degree rotation as all overlays are added prior to rotation. Note: the MS 7000 and MS 6000 use different position designations so make sure you have the correct scanner selected prior to assigning an overlay location. Page count - If using dynamic text that includes a page number in the selected overlay, this text box is used to select the starting page number for the next print. This display will increment by one each time a print is made while the scanner is in dynamic mode. While in static mode - This dropdown box will only enable when using overlays in static mode. Its purpose is to configure how any dynamic text on an overlay will be handled if that overlay is uploaded for use in static mode. You can select from one of these two choices: Render all dynamic strings - This indicated that you wish to create the static overlay with all dynamic text present and to use the current settings (i.e. date, time, and page) for that text at the time of upload. These text settings will remain constant over every print. Do not render any dynamic strings - This indicates that you wish to remove any dynamic text from an overlay being used in static mode. Thus, only static text and bitmaps will be displayed. Preview Window - The preview window is used to give you an idea of what output will look like with the annotation included. To ensure that the preview gives an accurate representation make sure to select the proper paper size and scanner in the drop down boxes at the top of the window. Please note the paper size and orientation selection are only available as a tool to help you envision the final output, these selections will in no way affect the actual output. All output will be printed in an orientation and size as selected on the front panel of the scanner.
-
 1
1 -
2
-
3
-
4
-
5
-
6
-
7
-
8
-
9
-
10
-
11
-
12
-
13
-
14
-
15
-
16
-
17
-
18
-
19
-
20
-
21
-
22
-
23
-
24
-
25
-
26
-
27
-
28
-
29
-
30
-
31
-
32
-
33
-
34
-
35
-
36
-
 37
37 -
 38
38 -
 39
39 -
 40
40 -
 41
41 -
 42
42 -
 43
43 -
 44
44 -
 45
45 -
 46
46 -
 47
47 -
48
-
49
-
50
-
51
-
52
-
53
-
54
-
55
-
56
-
57
-
58
-
59
 |
 |