Konica Minolta PS7000 Twain Driver and Overlay Manager Software Installation a - Page 50
Clicking the Preview button will cause the PS 7000 to perform a low-resolution
 |
View all Konica Minolta PS7000 manuals
Add to My Manuals
Save this manual to your list of manuals |
Page 50 highlights
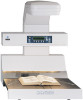
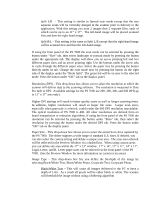
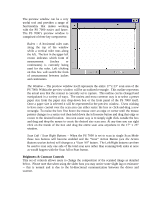
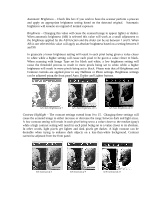
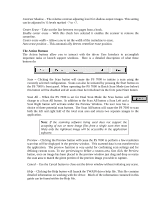
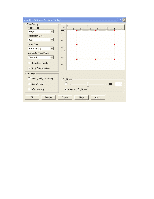
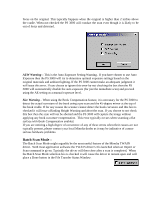
Contrast Shadow - The relative contrast adjusting level for shadow output images. This setting can be adjusted in 15 levels marked -7 to +7. Center Erase - Take out the line between two pages from a book. Enable center erase - With this check box selected it enables the scanner to remove the centerline. Center erase width - Allows you to set the width of the centerline to erase. Auto erase position - This automatically detects centerline erase position. The Action Buttons The Action buttons allow you to interact with the driver User Interface to accomplish important tasks or launch support windows. Here is a detailed description of what these buttons do: Scan - Clicking the Scan button will cause the PS 7000 to initiate a scan using the currently selected configuration. Scans can also be initiated by pressing the Start button on the PS 7000's front panel. When operating the PS 7000 in Batch Scan Mode (see below) this button will be disabled and all scans must be initialized via the front panel Start button. Scan All - When the PS 7000 is set for Dual Scan Mode the Scan button will change to a Scan All button. In addition to the Scan All button a Scan Left and a Scan Right button will activate under the Preview Window. The user now has a choice of three potential scan buttons. The Scan All button will cause the PS 7000 to scan both the left and right half of the total scan area and return two separate images to the application. Note: If the scanning software being used does not support the accepting of two or more image files from a single scan then most likely only the rightmost image will be accessible in the application software. Preview - Clicking the Preview button will cause the PS 7000 to perform a low-resolution scan that will be displayed in the preview window. This scanned data is not transferred to the application. The preview function is very useful for confirming scan settings and for defining custom scans. To use previewing to define a custom area, first click the Preview button, once an image has been placed in the preview window just drag and drop or resize the scan area to match the given portion of the preview image you wish to capture. Cancel - Use the Cancel button to close out the driver window without initiating any scans. Help - Clicking the Help button will launch the TWAIN driver help file. This file contains detailed information on working with the driver. Much of the information contained in this guide can be found within the Help file.
-
 1
1 -
2
-
3
-
4
-
5
-
6
-
7
-
8
-
9
-
10
-
11
-
12
-
13
-
14
-
15
-
16
-
17
-
18
-
19
-
20
-
21
-
22
-
23
-
24
-
25
-
26
-
27
-
28
-
29
-
30
-
31
-
32
-
33
-
34
-
35
-
36
-
37
-
38
-
39
-
40
-
41
-
42
-
43
-
44
-
 45
45 -
 46
46 -
 47
47 -
 48
48 -
 49
49 -
 50
50 -
 51
51 -
 52
52 -
 53
53 -
 54
54 -
 55
55 -
56
-
57
-
58
-
59
 |
 |