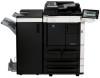
Konica Minolta bizhub 601 bizhub 751/601 Print Operations User Manual - IC-208 - Page 19
Setting up the system
 |
View all Konica Minolta bizhub 601 manuals
Add to My Manuals
Save this manual to your list of manuals |
Page 19 highlights
Overview of printer functions 1 1.3 1.3.1 1.3.2 Setting up the system In order to use this printing system, it must first be set up. The setup procedure refers to a series of steps for connecting this machine to a computer and installing the printer driver on the computer. The setup procedure consists of the following steps. 2 Note It is possible to use the point and print install. However, please note that the server does not support any OS other than the Windows NT when the client employs the Windows NT. Network connection 1 Connect this machine to a computer. 2 Make sure the computer is connected to the network. 3 Specify the IP address of the machine to connect it to the network. 4 Depending on the connection method and protocol, change the network settings of this machine. - LPR: Enable LPD print in the LPD Setting screen. - Port9100: Enable the RAW port number (9100 at default), in the TCP/IP Setting screen. - SMB: Specify "Print Setting" in the SMB Setting screen. - IPP/IPPS: Enable IPP print in the IPP Setting screen. For IPPS print, install the certificate in advance. - Web Service Print: In Web Service Settings screen, enable the print function. - Bonjour: Enable Bonjour in the Bonjour Setting screen. - AppleTalk: Enable AppleTalk in the AppleTalk Setting screen. 5 Install the printer driver. - Specify the network port of the printer driver according to the connection method and protocol. 6 Install the screen fonts. - The Driver CD contains the Latin TrueType fonts as screen fonts. The ScreenFont or Screen Fonts folder in the CD-ROM contains the screen fonts. - Install the screen fonts after adding the operating system standard fonts. For details, refer to Help of the operating system. - Macintosh fonts are compressed. Decompress them before installing. Local connection 2 Note When a connection is made with the USB port, the local interface kit is required. 1 Connect this machine to a computer. 2 Install the printer driver. 3 Install the screen fonts. - - 2 The Driver CD contains the Latin TrueType fonts as screen fonts. The ScreenFont or Screen Fonts folder in the CD-ROM contains the screen fonts. Install the screen fonts after adding the operating system standard fonts. For details, refer to Help of the operating system. Reminder After installing the printer driver, perform test print to make sure that the connections are made properly. IC-208 1-7
-
 1
1 -
2
-
3
-
4
-
5
-
6
-
7
-
8
-
9
-
10
-
11
-
12
-
13
-
 14
14 -
 15
15 -
 16
16 -
 17
17 -
 18
18 -
 19
19 -
 20
20 -
 21
21 -
 22
22 -
 23
23 -
 24
24 -
25
-
26
-
27
-
28
-
29
-
30
-
31
-
32
-
33
-
34
-
35
-
36
-
37
-
38
-
39
-
40
-
41
-
42
-
43
-
44
-
45
-
46
-
47
-
48
-
49
-
50
-
51
-
52
-
53
-
54
-
55
-
56
-
57
-
58
-
59
-
60
-
61
-
62
-
63
-
64
-
65
-
66
-
67
-
68
-
69
-
70
-
71
-
72
-
73
-
74
-
75
-
76
-
77
-
78
-
79
-
80
-
81
-
82
-
83
-
84
-
85
-
86
-
87
-
88
-
89
-
90
-
91
-
92
-
93
-
94
-
95
-
96
-
97
-
98
-
99
-
100
-
101
-
102
-
103
-
104
-
105
-
106
-
107
-
108
-
109
-
110
-
111
-
112
-
113
-
114
-
115
-
116
-
117
-
118
-
119
-
120
-
121
-
122
-
123
-
124
-
125
-
126
-
127
-
128
-
129
-
130
-
131
-
132
-
133
-
134
-
135
-
136
-
137
-
138
-
139
-
140
-
141
-
142
-
143
-
144
-
145
-
146
-
147
-
148
-
149
-
150
-
151
-
152
-
153
-
154
-
155
-
156
-
157
-
158
-
159
-
160
-
161
-
162
-
163
-
164
-
165
-
166
-
167
-
168
-
169
-
170
-
171
-
172
-
173
-
174
-
175
-
176
-
177
-
178
-
179
-
180
-
181
-
182
-
183
-
184
-
185
-
186
-
187
-
188
-
189
-
190
-
191
-
192
-
193
-
194
-
195
-
196
-
197
-
198
-
199
-
200
-
201
-
202
-
203
-
204
-
205
-
206
-
207
-
208
-
209
-
210
-
211
-
212
-
213
-
214
-
215
-
216
-
217
-
218
-
219
-
220
-
221
-
222
-
223
-
224
-
225
-
226
-
227
-
228
-
229
-
230
-
231
-
232
-
233
-
234
-
235
-
236
-
237
-
238
-
239
-
240
-
241
-
242
-
243
-
244
-
245
-
246
-
247
-
248
-
249
-
250
-
251
-
252
-
253
-
254
-
255
-
256
-
257
-
258
-
259
-
260
-
261
-
262
-
263
-
264
-
265
-
266
-
267
-
268
-
269
-
270
-
271
-
272
-
273
 |
 |