Konica Minolta bizhub 601 bizhub 751/601 Print Operations User Manual - IC-208 - Page 40
Network connection SMB
 |
View all Konica Minolta bizhub 601 manuals
Add to My Manuals
Save this manual to your list of manuals |
Page 40 highlights
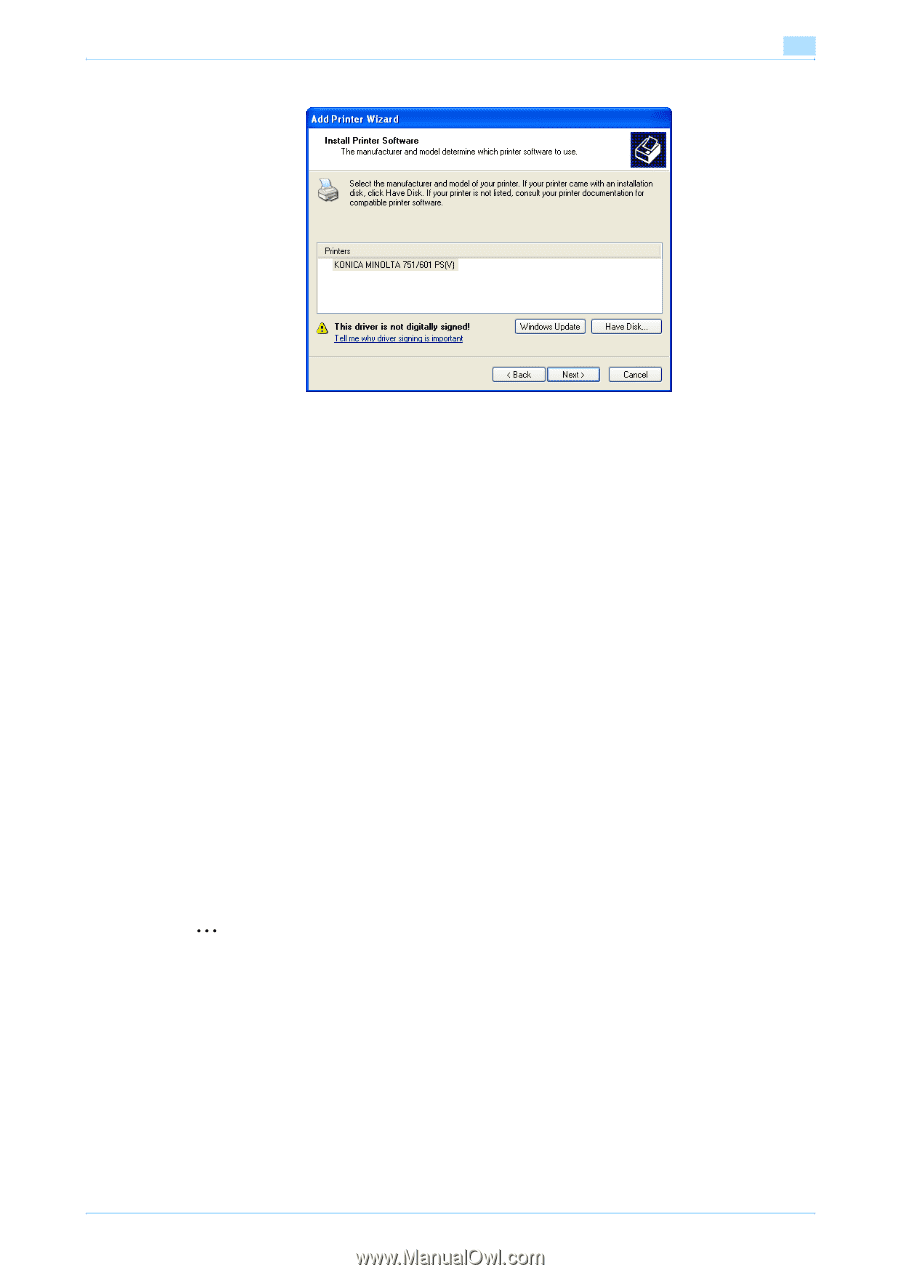
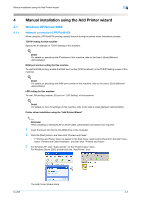
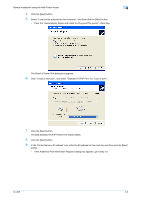
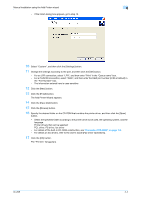
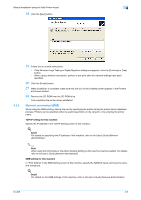
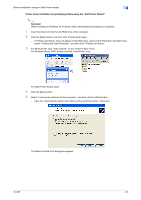
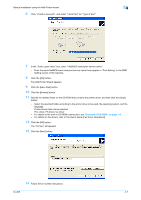
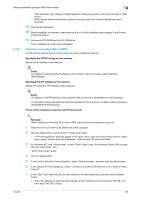
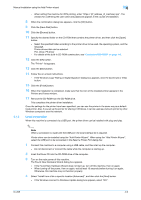
Manual installation using the Add Printer wizard 4 18 Click the [Next] button. 4.1.2 19 Follow the on-screen instructions. - If the Windows Logo Testing or Digital Signature dialog box appears, click the [Continue] or [Yes] button. - When using a network connection, perform a test print after the network settings have been specified. 20 Click the [Finish] button. 21 When installation is complete, make sure that the icon of the installed printer appears in the Printers and Faxes window. 22 Remove the CD-ROM from the CD-ROM drive. This completes the printer driver installation. Network connection (SMB) When using the SMB printing, specify the port by specifying the printer during the printer driver installation process. Printers can be specified either by searching printers on the network, or by entering the printer name. TCP/IP setting for this machine Specify the IP address in the TCP/IP Setting screen of this machine. ! Detail For details on specifying the IP address of this machine, refer to the User's Guide [Network Administrator]. 2 Note When using the IPv6 protocol, the Direct Hosting Setting on the machine must be enabled. For details, refer to the User's Guide [Network Administrator]. SMB setting for this machine In "Print Setting" in the SMB Setting screen of this machine, specify the NetBIOS name, print service name, and workgroup. ! Detail For details on the SMB settings of this machine, refer to the User's Guide [Network Administrator]. IC-208 4-5
-
 1
1 -
2
-
3
-
4
-
5
-
6
-
7
-
8
-
9
-
10
-
11
-
12
-
13
-
14
-
15
-
16
-
17
-
18
-
19
-
20
-
21
-
22
-
23
-
24
-
25
-
26
-
27
-
28
-
29
-
30
-
31
-
32
-
33
-
34
-
 35
35 -
 36
36 -
 37
37 -
 38
38 -
 39
39 -
 40
40 -
 41
41 -
 42
42 -
 43
43 -
 44
44 -
 45
45 -
46
-
47
-
48
-
49
-
50
-
51
-
52
-
53
-
54
-
55
-
56
-
57
-
58
-
59
-
60
-
61
-
62
-
63
-
64
-
65
-
66
-
67
-
68
-
69
-
70
-
71
-
72
-
73
-
74
-
75
-
76
-
77
-
78
-
79
-
80
-
81
-
82
-
83
-
84
-
85
-
86
-
87
-
88
-
89
-
90
-
91
-
92
-
93
-
94
-
95
-
96
-
97
-
98
-
99
-
100
-
101
-
102
-
103
-
104
-
105
-
106
-
107
-
108
-
109
-
110
-
111
-
112
-
113
-
114
-
115
-
116
-
117
-
118
-
119
-
120
-
121
-
122
-
123
-
124
-
125
-
126
-
127
-
128
-
129
-
130
-
131
-
132
-
133
-
134
-
135
-
136
-
137
-
138
-
139
-
140
-
141
-
142
-
143
-
144
-
145
-
146
-
147
-
148
-
149
-
150
-
151
-
152
-
153
-
154
-
155
-
156
-
157
-
158
-
159
-
160
-
161
-
162
-
163
-
164
-
165
-
166
-
167
-
168
-
169
-
170
-
171
-
172
-
173
-
174
-
175
-
176
-
177
-
178
-
179
-
180
-
181
-
182
-
183
-
184
-
185
-
186
-
187
-
188
-
189
-
190
-
191
-
192
-
193
-
194
-
195
-
196
-
197
-
198
-
199
-
200
-
201
-
202
-
203
-
204
-
205
-
206
-
207
-
208
-
209
-
210
-
211
-
212
-
213
-
214
-
215
-
216
-
217
-
218
-
219
-
220
-
221
-
222
-
223
-
224
-
225
-
226
-
227
-
228
-
229
-
230
-
231
-
232
-
233
-
234
-
235
-
236
-
237
-
238
-
239
-
240
-
241
-
242
-
243
-
244
-
245
-
246
-
247
-
248
-
249
-
250
-
251
-
252
-
253
-
254
-
255
-
256
-
257
-
258
-
259
-
260
-
261
-
262
-
263
-
264
-
265
-
266
-
267
-
268
-
269
-
270
-
271
-
272
-
273
 |
 |