Konica Minolta bizhub C35 bizhub C35 Facsimile User Guide - Page 89
[Basic] tab, [Recipient] tab, of [Recipient List] in the [FAX Transmission
 |
View all Konica Minolta bizhub C35 manuals
Add to My Manuals
Save this manual to your list of manuals |
Page 89 highlights
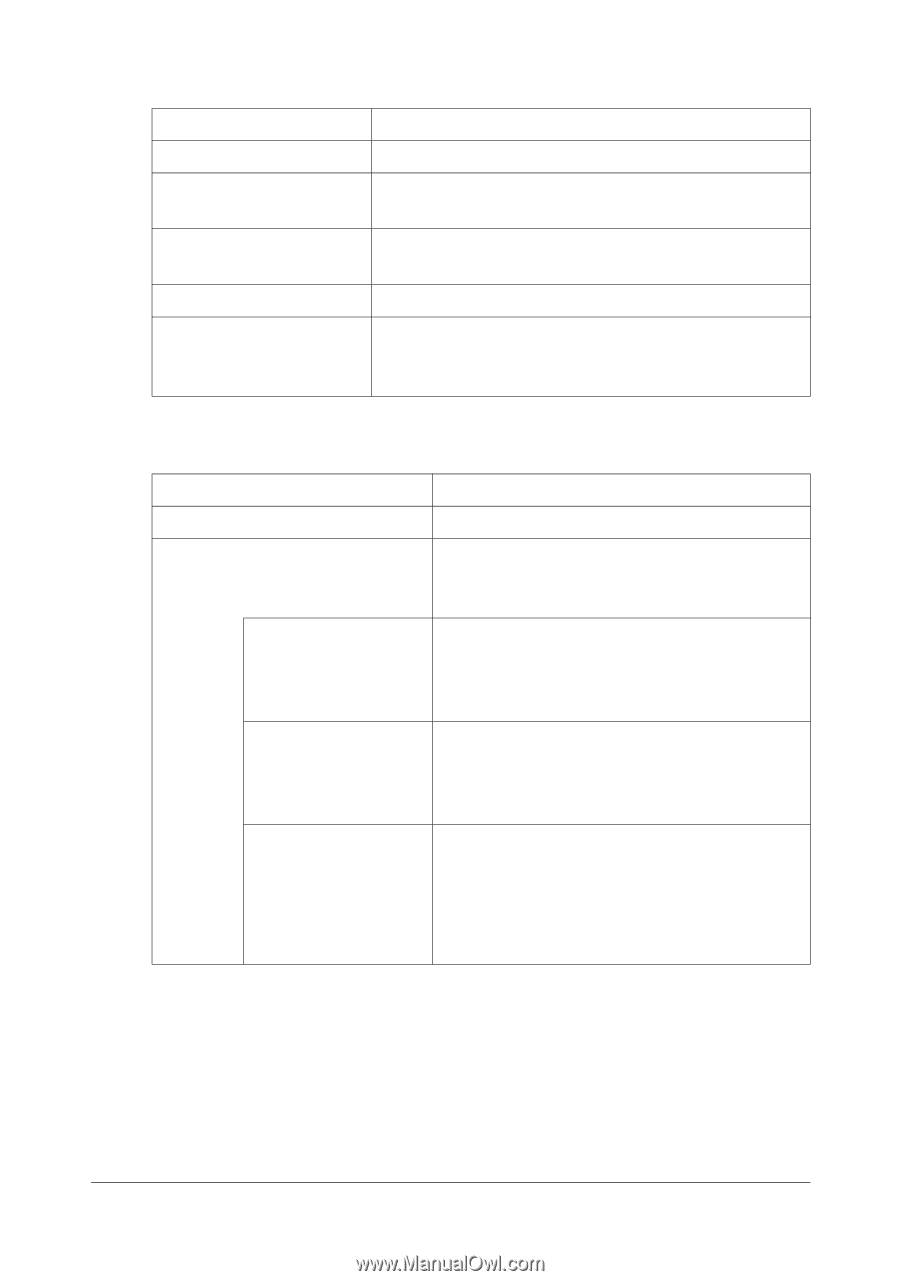
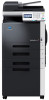
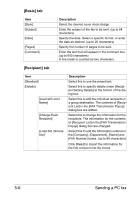
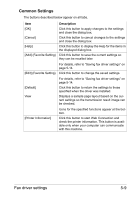
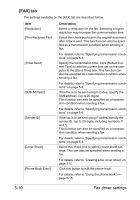
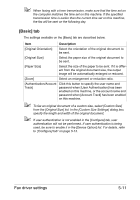
[Basic] tab Item [Style] [Subject] [Date] [Pages] [Comment] Description Select the desired cover sheet design. Enter the subject of the fax to be sent. (up to 64 characters) Specify the date. Select a specific format, or enter the date as desired. (up to 20 characters) Specify the number of pages to be sent. Enter the text that will appear in the comment box. (up to 640 characters) A line break is counted as two characters. [Recipient] tab Item [Standard] [Details] [Load with Joint Name] [Change Each Recipient] [Load Set Information] Description Select this to use the preset text. Select this to specify details under [Recipient Setting Details] at the bottom of the dialog box. Select this to add the individual recipients in a group destination. The contents of [Recipient List] in the [FAX Transmission Popup] dialog box are added. Select this to change the information for the recipients. The information for the contents of [Recipient List] in the [FAX Transmission Popup] dialog box are changed. Select this to add the information entered in the [Company], [Department], [Name] and [FAX Number] boxes. (up to 80 characters) Click [Read] to import the information for the first recipient into the boxes. 5-6 Sending a PC fax
-
 1
1 -
2
-
3
-
4
-
5
-
6
-
7
-
8
-
9
-
10
-
11
-
12
-
13
-
14
-
15
-
16
-
17
-
18
-
19
-
20
-
21
-
22
-
23
-
24
-
25
-
26
-
27
-
28
-
29
-
30
-
31
-
32
-
33
-
34
-
35
-
36
-
37
-
38
-
39
-
40
-
41
-
42
-
43
-
44
-
45
-
46
-
47
-
48
-
49
-
50
-
51
-
52
-
53
-
54
-
55
-
56
-
57
-
58
-
59
-
60
-
61
-
62
-
63
-
64
-
65
-
66
-
67
-
68
-
69
-
70
-
71
-
72
-
73
-
74
-
75
-
76
-
77
-
78
-
79
-
80
-
81
-
82
-
83
-
 84
84 -
 85
85 -
 86
86 -
 87
87 -
 88
88 -
 89
89 -
 90
90 -
 91
91 -
 92
92 -
 93
93 -
 94
94 -
95
-
96
-
97
-
98
-
99
-
100
-
101
-
102
-
103
-
104
-
105
-
106
-
107
-
108
-
109
-
110
-
111
-
112
-
113
-
114
-
115
-
116
-
117
-
118
-
119
-
120
-
121
-
122
-
123
-
124
-
125
-
126
-
127
-
128
-
129
-
130
-
131
-
132
-
133
-
134
-
135
-
136
-
137
-
138
-
139
-
140
 |
 |