Konica Minolta bizhub C652 bizhub C452/C552/C552DS/C652/C652DS Enlarge Display - Page 38
Density, Background Removal
 |
View all Konica Minolta bizhub C652 manuals
Add to My Manuals
Save this manual to your list of manuals |
Page 38 highlights
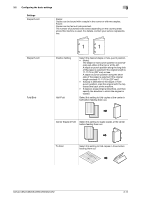
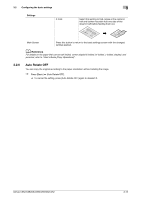
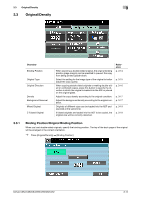
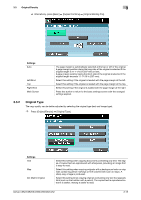
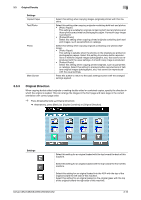
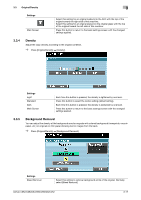
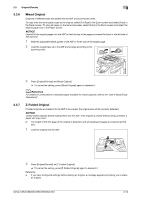
3.3 Original/Density Settings Main Screen 3 Select this setting for an original loaded into the ADF with the top of the original toward the right side of this machine. Select this setting for an original placed on the original glass with the top of the original toward the left side of this machine. Press this button to return to the basic settings screen with the changed settings applied. 3.3.4 Density Adjust the copy density according to the original condition. % Press [Original/Density] ö [Density]. Settings Light Standard Dark Main Screen Each time this button is pressed, the density is lightened by one level. Press this button to select the center setting (default setting). Each time this button is pressed, the density is darkened by one level. Press this button to return to the basic settings screen with the changed settings applied. 3.3.5 Background Removal You can adjust the density of the background area for originals with colored background (newsprints, recycle paper, etc.) or originals on thin paper showing text or images from the back. % Press [Original/Density] ö [Background Removal]. Settings Bleed Removal Select this setting to remove background prints of the original. Normally, select [Bleed Removal]. bizhub C652/C652DS/C552/C552DS/C452 3-17
-
 1
1 -
2
-
3
-
4
-
5
-
6
-
7
-
8
-
9
-
10
-
11
-
12
-
13
-
14
-
15
-
16
-
17
-
18
-
19
-
20
-
21
-
22
-
23
-
24
-
25
-
26
-
27
-
28
-
29
-
30
-
31
-
32
-
 33
33 -
 34
34 -
 35
35 -
 36
36 -
 37
37 -
 38
38 -
 39
39 -
 40
40 -
 41
41 -
 42
42 -
 43
43 -
44
-
45
-
46
-
47
-
48
-
49
-
50
-
51
-
52
-
53
-
54
-
55
-
56
-
57
-
58
-
59
-
60
-
61
-
62
-
63
-
64
 |
 |
