Kyocera Ai2310 3010/2310 Instruction Handbook - Page 40
Basic Operation
 |
View all Kyocera Ai2310 manuals
Add to My Manuals
Save this manual to your list of manuals |
Page 40 highlights
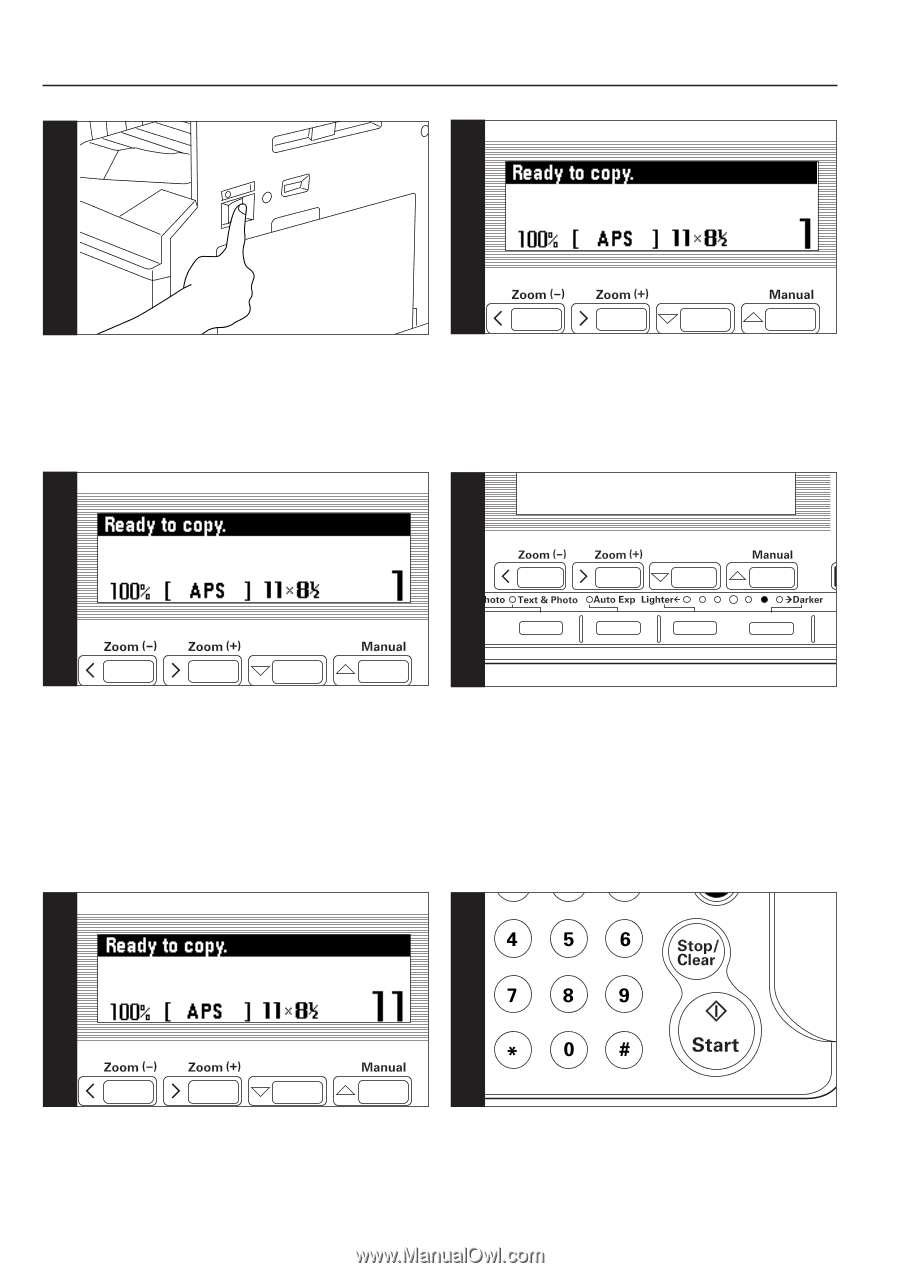
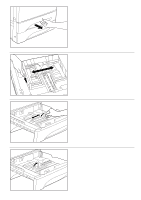
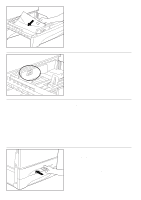
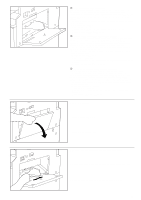
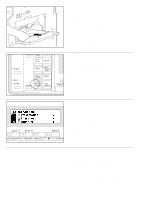
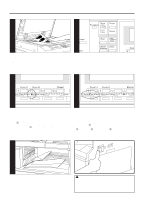
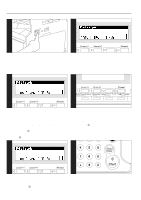
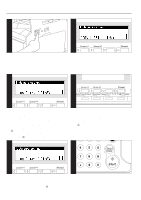
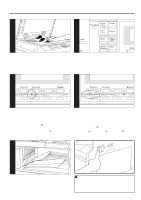
BASIC OPERATION q Basic copying procedure 1 2 1. Turn the main switch ON ( ‚ ). 5 2. Warm-up At the end of warm-up, "Ready to copy." will appear on the message display. * If originals are set and the Start key is pressed while the copier is still warming up, copying will begin as soon as warm-up ends. 6-1 5. Paper size selection When "APS" appears on the display selection, paper of the same size as the original is automatically selected. To copy the original's image onto a different size paper without changing the size of the image, press the Paper Select key for the desired size of paper, and press the Manual key. To make copies of the same size as the originals with images of the same size, no special settings are required. * Automatic paper selection can also be turned off. (See "8 Paper selection" on page 115.) * A drawer (paper feed drawer) to be selected automatically can be specified without setting any originals. (See "9 Default drawer" on page 115.) 6. Copy exposure adjustment In the initial mode, manual exposure is the default exposure mode. One of the Copy exposure indicators will be lit. By moving the cursor on the exposure scale to the right, copies become darker. By moving it to the left, copies become lighter. * Exposure adjustment is selected from 7 or 13 levels. (See "2 Exposure step" on page 114.) 8 9 8. Setting the number of copies Use the numeric keys to enter the desired number of copies on the message display. Up to 999 copies can be set. * It is possible to lower the limit on the number of copies that can be set at a time. (See "! Copy limit" on page 116.) 9. Starting copying Press the Start key. If "Ready to copy." is displayed on the message display, copying is possible. 35
-
 1
1 -
2
-
3
-
4
-
5
-
6
-
7
-
8
-
9
-
10
-
11
-
12
-
13
-
14
-
15
-
16
-
17
-
18
-
19
-
20
-
21
-
22
-
23
-
24
-
25
-
26
-
27
-
28
-
29
-
30
-
31
-
32
-
33
-
34
-
 35
35 -
 36
36 -
 37
37 -
 38
38 -
 39
39 -
 40
40 -
 41
41 -
 42
42 -
 43
43 -
 44
44 -
 45
45 -
46
-
47
-
48
-
49
-
50
-
51
-
52
-
53
-
54
-
55
-
56
-
57
-
58
-
59
-
60
-
61
-
62
-
63
-
64
-
65
-
66
-
67
-
68
-
69
-
70
-
71
-
72
-
73
-
74
-
75
-
76
-
77
-
78
-
79
-
80
-
81
-
82
-
83
-
84
-
85
-
86
-
87
-
88
-
89
-
90
-
91
-
92
-
93
-
94
-
95
-
96
-
97
-
98
-
99
-
100
-
101
-
102
-
103
-
104
-
105
-
106
-
107
-
108
-
109
-
110
-
111
-
112
-
113
-
114
-
115
-
116
-
117
-
118
-
119
-
120
-
121
-
122
-
123
-
124
-
125
-
126
-
127
-
128
-
129
-
130
-
131
-
132
-
133
-
134
-
135
-
136
-
137
-
138
-
139
-
140
-
141
-
142
-
143
-
144
-
145
-
146
-
147
-
148
-
149
-
150
-
151
-
152
-
153
-
154
-
155
-
156
-
157
-
158
-
159
-
160
-
161
-
162
-
163
-
164
-
165
-
166
-
167
-
168
-
169
-
170
-
171
-
172
-
173
-
174
-
175
-
176
-
177
-
178
-
179
-
180
-
181
-
182
-
183
-
184
 |
 |