Kyocera Ai2310 3010/2310 Instruction Handbook - Page 41
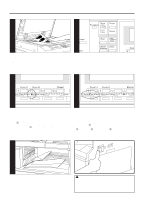
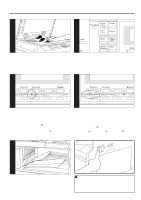
used for an extended period of time vacations, etc., remove
 |
View all Kyocera Ai2310 manuals
Add to My Manuals
Save this manual to your list of manuals |
Page 41 highlights
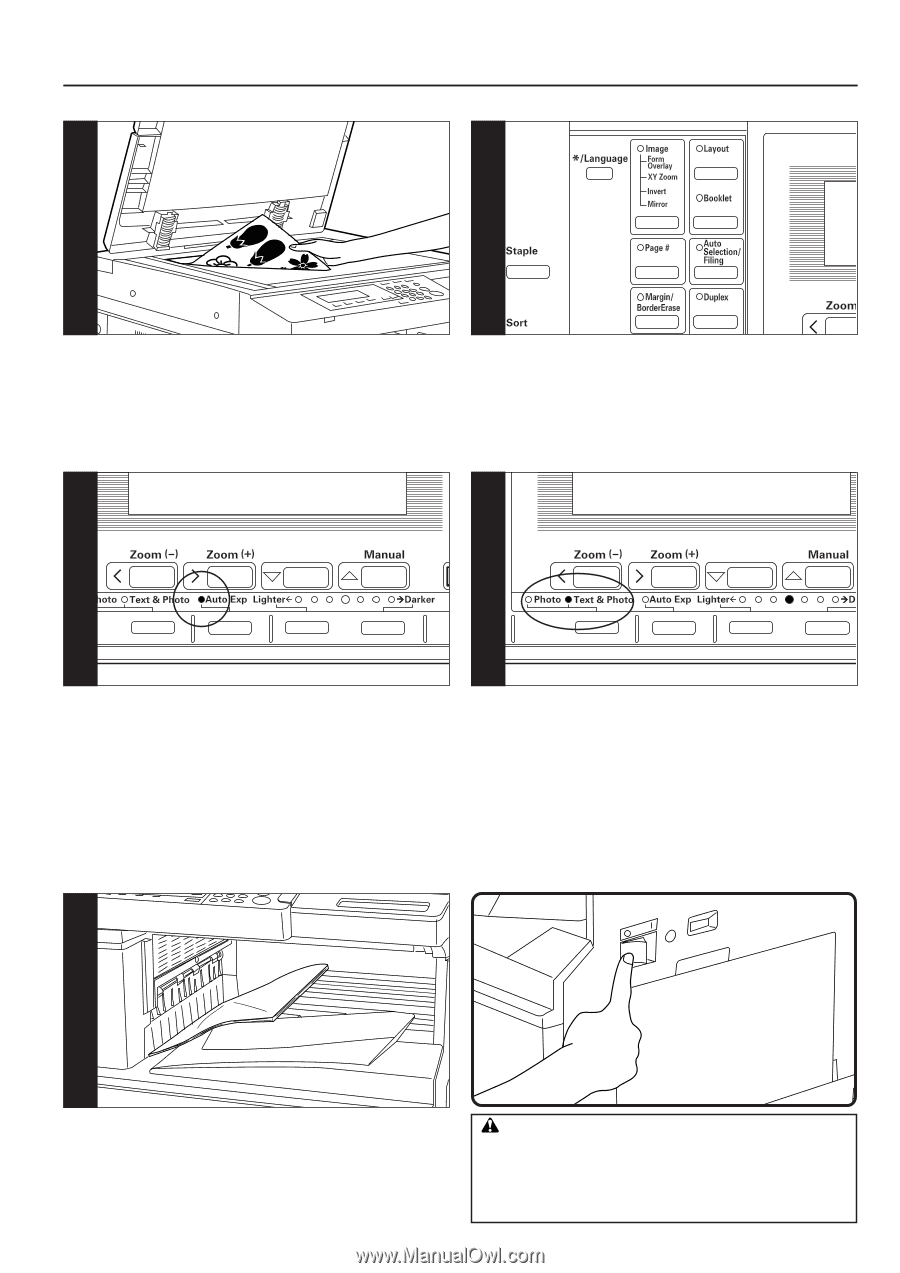
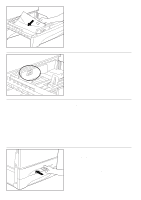
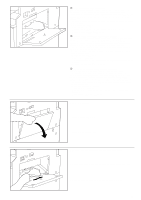
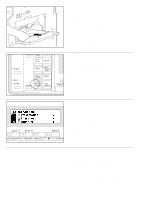
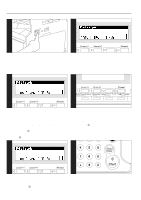
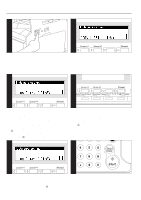
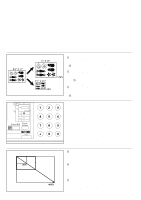
3 4 3. Setting originals Set originals on the platen or in the DF (document feeder). When setting the original on the platen, adjust it with the original size scales based on the left rear position. * See the instruction handbook provided with the DF for instructions on how to set originals in the DF. 4. Function selection (page 41 to 96) Select from the copier's various functions. 6-2 7 To have the copy exposure adjusted automatically, press the Auto Exp. key and set the auto exposure mode. The Auto Exp. indicator will light. In the auto exposure mode, the brightness of the original is detected and the most suitable exposure selected. It is also possible to make clean copies without the original background or color. * When the overall copies are too dark/light, exposure will be adjusted. (See "3 Auto exposure" on page 114.) * The default setting of the copy exposure adjustment can be set to auto exposure. (See "1 Exposure mode" on page 113.) 7. Copy quality selection Copy quality is selected according to the original. Press the copy quality selection key to light the following indicators. However, for originals with just text, neither of the indicators needs to be lit. Photo mode: Photo indicator Text & Photo mode: Text & Photo indicator * The default copy quality mode used in the initial mode can be selected. (See "7 Orig quality" on page 115.) * The copy exposure can be adjusted in all copy quality modes. (See "4 Mix size den., 5 Txt ori density and 6 Pho ori density" on page 114 or 115.) 10 10. At the end of copying Finished copies are ejected onto the copy store section. * Up to 250 sheets can be stored. CAUTION If the copier will not be used for a short period of time (overnight, etc.), turn the main switch OFF (O). If it will not be used for an extended period of time (vacations, etc.), remove the power plug from the outlet for safety purposes during the time the copier is not in use. 36
-
 1
1 -
2
-
3
-
4
-
5
-
6
-
7
-
8
-
9
-
10
-
11
-
12
-
13
-
14
-
15
-
16
-
17
-
18
-
19
-
20
-
21
-
22
-
23
-
24
-
25
-
26
-
27
-
28
-
29
-
30
-
31
-
32
-
33
-
34
-
35
-
 36
36 -
 37
37 -
 38
38 -
 39
39 -
 40
40 -
 41
41 -
 42
42 -
 43
43 -
 44
44 -
 45
45 -
 46
46 -
47
-
48
-
49
-
50
-
51
-
52
-
53
-
54
-
55
-
56
-
57
-
58
-
59
-
60
-
61
-
62
-
63
-
64
-
65
-
66
-
67
-
68
-
69
-
70
-
71
-
72
-
73
-
74
-
75
-
76
-
77
-
78
-
79
-
80
-
81
-
82
-
83
-
84
-
85
-
86
-
87
-
88
-
89
-
90
-
91
-
92
-
93
-
94
-
95
-
96
-
97
-
98
-
99
-
100
-
101
-
102
-
103
-
104
-
105
-
106
-
107
-
108
-
109
-
110
-
111
-
112
-
113
-
114
-
115
-
116
-
117
-
118
-
119
-
120
-
121
-
122
-
123
-
124
-
125
-
126
-
127
-
128
-
129
-
130
-
131
-
132
-
133
-
134
-
135
-
136
-
137
-
138
-
139
-
140
-
141
-
142
-
143
-
144
-
145
-
146
-
147
-
148
-
149
-
150
-
151
-
152
-
153
-
154
-
155
-
156
-
157
-
158
-
159
-
160
-
161
-
162
-
163
-
164
-
165
-
166
-
167
-
168
-
169
-
170
-
171
-
172
-
173
-
174
-
175
-
176
-
177
-
178
-
179
-
180
-
181
-
182
-
183
-
184
 |
 |