Kyocera Ai2310 3010/2310 Instruction Handbook - Page 66
Press the cursor down or up key to select the type of original.
 |
View all Kyocera Ai2310 manuals
Add to My Manuals
Save this manual to your list of manuals |
Page 66 highlights
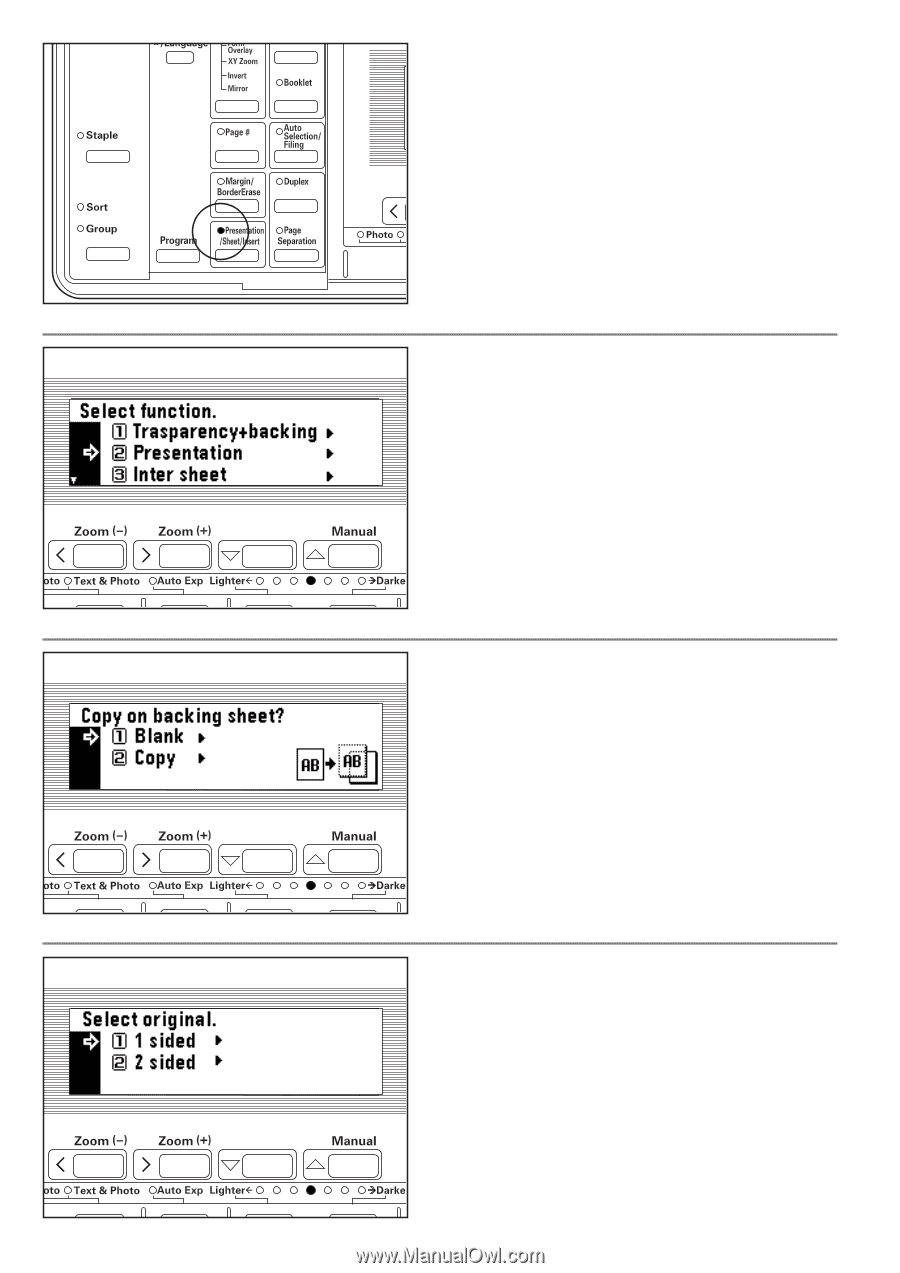
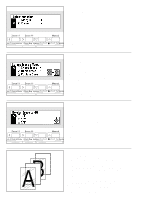
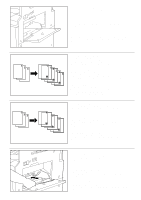
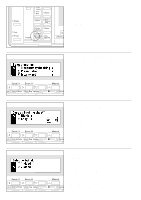
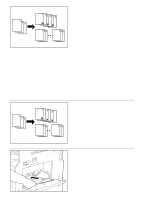
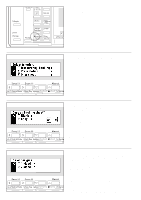
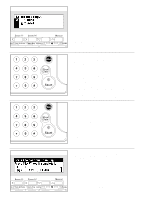
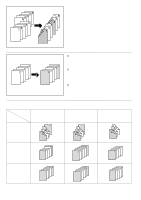
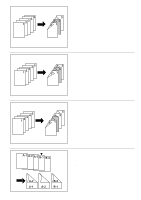
2. Set the original(s). 3. Press the Presentation/Sheet/Insert key to light the indicator. The function selection screen will appear. 2. Mettre l'original (les originaux) en place. 3. Appuyer sur la touche Présentation/Feuille/Intercalaire pour allumer l'indicateur. L'écran de sélection des fonctions apparaît. 2. Coloque el/los original(es). 3. Presione la tecla de presentación/hoja/inserción para que se encienda el indicador. Aparecerá la pantalla de selección de función. 4. Press the cursor down key to select "Presentation". 5. Press the enter key. The presentation mode setting screen will appear. 4. Appuyer sur la touche curseur vers le bas pour sélectionner "Présentation". 5. Appuyer sur la touche d'entrée. L'écran du mode présentation apparaît. 4. Presione la tecla de cursor abajo para seleccionar "Presentación". 5. Presione la tecla de entrada. Aparecerá la pantalla de ajuste de modo de presentación. 6. Press the cursor down or up key to specify whether to copy onto the backing sheet or not. Select "Copy" to copy onto the backing sheet and "Blank" not to. 7. Press the enter key. 6. Appuyer sur la touche curseur vers le haut ou vers le bas pour spécifier si la copie doit être effectuée sur la feuille dorsale ou non. Sélectionner "Copie" pour copier sur la feuille dorsale et "Blanc" pour ne pas copier. 7. Appuyer sur la touche d'entrée. 6. Presione la tecla de cursor abajo o arriba para especificar si se va a copiar o no en la hoja de fondo. Seleccione "Copia" para copiar en la hoja de fondo y "En blanco" para no copiar. 7. Presione la tecla de entrada. 8. Press the cursor down or up key to select the type of original. Select "1 sided" for a 1-sided original and "2 sided" for a 2-sided original. 9. Press the enter key. When not using the duplex unit, the message display will return to the "Ready to copy." screen. Go to step 12. When using the duplex unit, go to the next step. 8. Appuyer sur la touche curseur vers le haut ou vers le bas pour sélectionner le type d'original. Sélectionner "Recto" pour un original recto et "Rec/verso" pour un original recto/verso. 9. Appuyer sur la touche d'entrée. Lorsque l'unité recto/verso n'est pas utilisée, l'affichage des messages retourne à l'écran "Prêt à copier.". Aller à l'étape 12. Lors de l'utilisation de l'unité recto/verso, aller à l'étape suivante. 8. Presione la tecla de cursor abajo o arriba para seleccionar el tipo de original. Seleccione "1 cara" para un original de 1 cara y "2 caras" para un original de 2 caras. 9. Presione la tecla de entrada. Cuando no utilice la unidad duplex, el visualizador de mensajes volverá a la indicación "Lista para copiar.". Vaya al paso 12. Cuando utilice la unidad duplex, vaya al siguiente paso. 61
-
 1
1 -
2
-
3
-
4
-
5
-
6
-
7
-
8
-
9
-
10
-
11
-
12
-
13
-
14
-
15
-
16
-
17
-
18
-
19
-
20
-
21
-
22
-
23
-
24
-
25
-
26
-
27
-
28
-
29
-
30
-
31
-
32
-
33
-
34
-
35
-
36
-
37
-
38
-
39
-
40
-
41
-
42
-
43
-
44
-
45
-
46
-
47
-
48
-
49
-
50
-
51
-
52
-
53
-
54
-
55
-
56
-
57
-
58
-
59
-
60
-
 61
61 -
 62
62 -
 63
63 -
 64
64 -
 65
65 -
 66
66 -
 67
67 -
 68
68 -
 69
69 -
 70
70 -
 71
71 -
72
-
73
-
74
-
75
-
76
-
77
-
78
-
79
-
80
-
81
-
82
-
83
-
84
-
85
-
86
-
87
-
88
-
89
-
90
-
91
-
92
-
93
-
94
-
95
-
96
-
97
-
98
-
99
-
100
-
101
-
102
-
103
-
104
-
105
-
106
-
107
-
108
-
109
-
110
-
111
-
112
-
113
-
114
-
115
-
116
-
117
-
118
-
119
-
120
-
121
-
122
-
123
-
124
-
125
-
126
-
127
-
128
-
129
-
130
-
131
-
132
-
133
-
134
-
135
-
136
-
137
-
138
-
139
-
140
-
141
-
142
-
143
-
144
-
145
-
146
-
147
-
148
-
149
-
150
-
151
-
152
-
153
-
154
-
155
-
156
-
157
-
158
-
159
-
160
-
161
-
162
-
163
-
164
-
165
-
166
-
167
-
168
-
169
-
170
-
171
-
172
-
173
-
174
-
175
-
176
-
177
-
178
-
179
-
180
-
181
-
182
-
183
-
184
 |
 |