Kyocera Ai2310 3010/2310 Instruction Handbook - Page 74
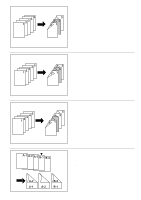
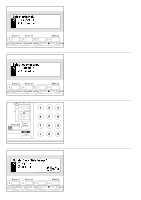
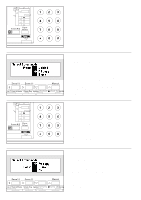
the next step. When having selected others, go to step 10.
 |
View all Kyocera Ai2310 manuals
Add to My Manuals
Save this manual to your list of manuals |
Page 74 highlights
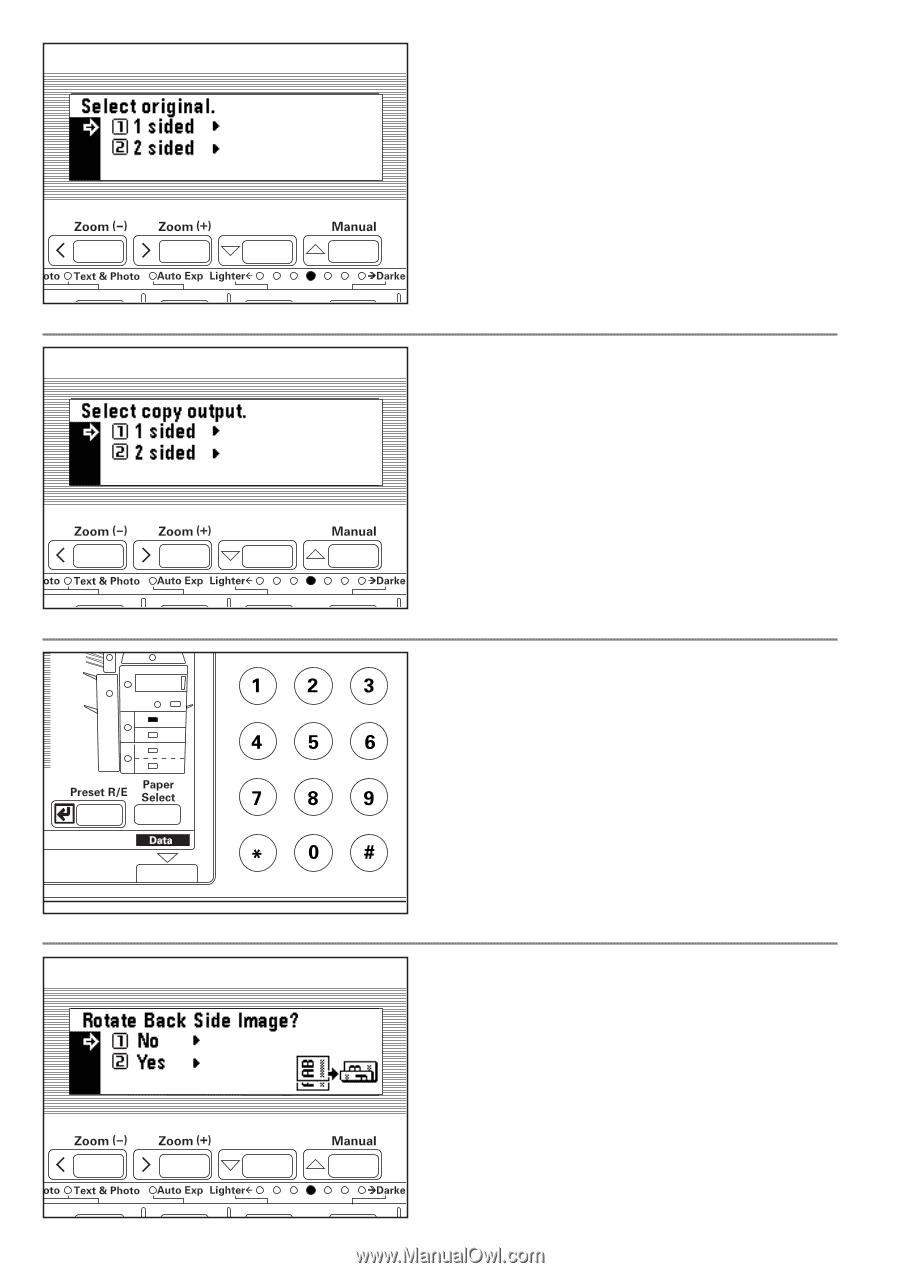
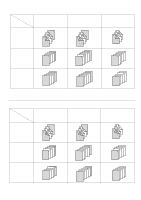
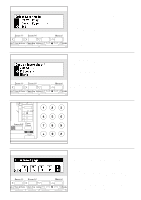
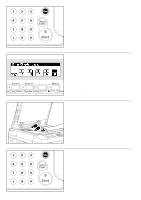
4. Press the cursor down or up key to specify the type of original. Select "1 sided" for a 1-sided original and "2 sided" for a 2-sided original. 5. Press the enter key. 4. Appuyer sur la touche curseur vers le haut ou vers le bas pour spécifier la finition des copies. Sélectionner "Recto" pour un original recto et "Rec/verso" pour un original recto/verso. 5. Appuyer sur la touche d'entrée. 4. Presione la tecla de cursor abajo o arriba para especificar cómo se terminan las copias. Seleccione "1 cara" para una copia de 1 cara y "2 caras" para un original de 2 caras. 5. Presione la tecla de entrada. 6. Press the cursor down or up key to specify how copies to be finished. Select "1 sided" for a 1-sided and "2 sided" for a 2-sided copy. 6. Appuyer sur la touche curseur vers le haut ou vers le bas pour spécifier le type de finition. Sélectionner "Recto" pour une copie recto et "Rec/verso" pour une copie recto/verso. 6. Presione la tecla de cursor abajo o arriba para especificar el tipo de terminación. Seleccione "1 cara" para un original de 1 cara y "2 caras" para una copia de 2 caras. 7. Press the enter key. * When having selected "1 sided" in step 4 and "2 sided" in step 6, go to the next step. When having selected others, go to step 10. 7. Appuyer sur la touche d'entrée. * Après avoir sélectionné "Recto" dans l'étape 4 et "Rec/verso" dans l'étape 6, aller à l'étape suivante. Après avoir sélectionné les autres, aller à l'étape 10. 7. Presione la tecla de entrada. * Cuando se ha seleccionado "1 cara" en el paso 4 y "2 caras" en el paso 6, vaya al siguiente paso. Cuando se ha seleccionado otros, vaya al paso 10. 8. Select whether to rotate the back side or not. 9. Press the enter key. 8. Sélectionner si le côté arrière doit être tourné ou non. 9. Appuyer sur la touche d'entrée. 8. Seleccione si desea rotar el lado trasero o no. 9. Presione la tecla de entrada. 69
-
 1
1 -
2
-
3
-
4
-
5
-
6
-
7
-
8
-
9
-
10
-
11
-
12
-
13
-
14
-
15
-
16
-
17
-
18
-
19
-
20
-
21
-
22
-
23
-
24
-
25
-
26
-
27
-
28
-
29
-
30
-
31
-
32
-
33
-
34
-
35
-
36
-
37
-
38
-
39
-
40
-
41
-
42
-
43
-
44
-
45
-
46
-
47
-
48
-
49
-
50
-
51
-
52
-
53
-
54
-
55
-
56
-
57
-
58
-
59
-
60
-
61
-
62
-
63
-
64
-
65
-
66
-
67
-
68
-
 69
69 -
 70
70 -
 71
71 -
 72
72 -
 73
73 -
 74
74 -
 75
75 -
 76
76 -
 77
77 -
 78
78 -
 79
79 -
80
-
81
-
82
-
83
-
84
-
85
-
86
-
87
-
88
-
89
-
90
-
91
-
92
-
93
-
94
-
95
-
96
-
97
-
98
-
99
-
100
-
101
-
102
-
103
-
104
-
105
-
106
-
107
-
108
-
109
-
110
-
111
-
112
-
113
-
114
-
115
-
116
-
117
-
118
-
119
-
120
-
121
-
122
-
123
-
124
-
125
-
126
-
127
-
128
-
129
-
130
-
131
-
132
-
133
-
134
-
135
-
136
-
137
-
138
-
139
-
140
-
141
-
142
-
143
-
144
-
145
-
146
-
147
-
148
-
149
-
150
-
151
-
152
-
153
-
154
-
155
-
156
-
157
-
158
-
159
-
160
-
161
-
162
-
163
-
164
-
165
-
166
-
167
-
168
-
169
-
170
-
171
-
172
-
173
-
174
-
175
-
176
-
177
-
178
-
179
-
180
-
181
-
182
-
183
-
184
 |
 |