Kyocera ECOSYS FS-6525MFP KM-NET ADMIN Operation Guide for Ver 3.0
Kyocera ECOSYS FS-6525MFP Manual
 |
View all Kyocera ECOSYS FS-6525MFP manuals
Add to My Manuals
Save this manual to your list of manuals |
Kyocera ECOSYS FS-6525MFP manual content summary:
- Kyocera ECOSYS FS-6525MFP | KM-NET ADMIN Operation Guide for Ver 3.0 - Page 1
- Kyocera ECOSYS FS-6525MFP | KM-NET ADMIN Operation Guide for Ver 3.0 - Page 2
this guide is prohibited. The information in this guide is subject to change without notice. We cannot be held liable for any problems arising their respective companies. Examples of the operations given in this guide support the Microsoft Windows Server 2008 R2 printing environment. Essentially the - Kyocera ECOSYS FS-6525MFP | KM-NET ADMIN Operation Guide for Ver 3.0 - Page 3
Admin Login ...1-1 Starting and Logging In ...1-1 Log Off ...1-1 Consoles ...1-2 Choosing a Console ...1-2 Changing the Default Console 1-2 Chapter 2 Administration Roles and Users ...2-1 Adding a Role ...2-1 Adding a User ...2-1 User Properties ...2-2 Changing the Password ...2-2 Subscriptions - Kyocera ECOSYS FS-6525MFP | KM-NET ADMIN Operation Guide for Ver 3.0 - Page 4
Window 3-6 Set Rows per Page ...3-6 Edit Default List Views ...3-6 Add Tab ...3-7 Import Default Tab ...3-7 Edit Tab ...3-8 Deleting a Tab 3-16 Multi-Set Log File ...3-16 Firmware Upgrade ...3-17 Risks and Recovery Options 3-17 Upgrading the Firmware ...3-18 Send Data ...3-20 Sending Data - Kyocera ECOSYS FS-6525MFP | KM-NET ADMIN Operation Guide for Ver 3.0 - Page 5
On the login page, you can use the following default login credentials: Administrator User name: admin Password: admin Read-only user User name: guest Password: guest For greater security, we recommend changing the default passwords immediately after the first login. Note: To prevent the browser - Kyocera ECOSYS FS-6525MFP | KM-NET ADMIN Operation Guide for Ver 3.0 - Page 6
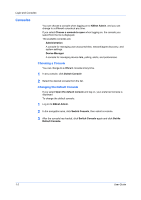
console and log on, your preferred console is displayed. To change the default console: 1 Log on to KMnet Admin. 2 In the navigation area, click Switch Console, then select a console. 3 After the console has loaded, click Switch Console again and click Set As Default Console. 1-2 User Guide - Kyocera ECOSYS FS-6525MFP | KM-NET ADMIN Operation Guide for Ver 3.0 - Page 7
use invisible Unicode or extended ASCII characters. The name must be unique. 4 For Based on, you can select a default role to base this new role on, or select None. If you select an existing role, the Privileges for the Delete role icon. Adding a User You can add a new user. KMnet Admin 3.0 2-1 - Kyocera ECOSYS FS-6525MFP | KM-NET ADMIN Operation Guide for Ver 3.0 - Page 8
password, and type again to confirm. 5 Click OK. Subscriptions Subscriptions can be created for groups, and child groups inherit subscriptions from parent groups. Inheritance is only available for dynamic groups, and not for manual in the Administration or Device Manager consoles. 2-2 User Guide - Kyocera ECOSYS FS-6525MFP | KM-NET ADMIN Operation Guide for Ver 3.0 - Page 9
dialog box, in the Groups area, select a group of devices. 5 Under Reports, select from the reports list. 6 Select the file format for the report: PDF, HTML, XML, and CSV. File format options are limited for some reports. 7 Under Destinations, select at least one e-mail address. Reports can be sent - Kyocera ECOSYS FS-6525MFP | KM-NET ADMIN Operation Guide for Ver 3.0 - Page 10
Networks and Agents lets you create printing system networks on both IPv4 and IPv6. (IPv4 is the default selection.) Properties can be displayed for the selected network, and discovery of printing devices can be started server is multihomed, you can choose and name a local network. 2-4 User Guide - Kyocera ECOSYS FS-6525MFP | KM-NET ADMIN Operation Guide for Ver 3.0 - Page 11
IPv6 options are not available if the IPv6 protocol is disabled or not supported on the server. Specify as much of the specific address and prefix subnet mask. Prefixes in the list range from 112 to 127. The default selection is 120. For example, prefix 120 is selected. The first 120 Admin 3.0 2-5 - Kyocera ECOSYS FS-6525MFP | KM-NET ADMIN Operation Guide for Ver 3.0 - Page 12
network. 1 In the Enter the SNMP Information page, accept the defaults or type the number of Retries and the Timeout (seconds) period network card, support is limited to the DES privacy option. The password in Network Properties must match the device's SNMP v3 password. Scheduling User Guide - Kyocera ECOSYS FS-6525MFP | KM-NET ADMIN Operation Guide for Ver 3.0 - Page 13
the SNMP options for the selected network. Discovery Select the Discovery tab to view and modify the device discovery schedules for the selected network. KMnet Admin 3.0 2-7 - Kyocera ECOSYS FS-6525MFP | KM-NET ADMIN Operation Guide for Ver 3.0 - Page 14
scanning a network for IP addresses of network printers to identify what devices are currently on the and manages USB-supported Kyocera devices that are locally connected. USB connections require KMnet Admin installed and operating version, Model update package, and Model support version that Guide - Kyocera ECOSYS FS-6525MFP | KM-NET ADMIN Operation Guide for Ver 3.0 - Page 15
appears. Click Close. 6 On the Authorization page, select an option for User login and Password. Click Next. 7 If Use user login, password and domain from the KMnet Admin server was selected, click Next. If Manually enter user login, password and domain for each agent was selected, type User Login - Kyocera ECOSYS FS-6525MFP | KM-NET ADMIN Operation Guide for Ver 3.0 - Page 16
. 3 Under Authentication, enter the User name and Password, when a SMTP server connection is required. 4 to save the e-mail settings, or click Reset to clear the settings. Device Communication Device Communication Device Communication Mode is changed, KMnet Admin will not work until after the Guide - Kyocera ECOSYS FS-6525MFP | KM-NET ADMIN Operation Guide for Ver 3.0 - Page 17
copy of a backup file, click Download Backup File, click Save, select Admin operations. Log files can be created for maintenance tasks such as replacing toner. Once created, the log files can be saved for a maximum of three months. The log file default location is C:\Program Files\Kyocera\KMnet Admin - Kyocera ECOSYS FS-6525MFP | KM-NET ADMIN Operation Guide for Ver 3.0 - Page 18
Firmware Upgrade Agents Upgrade Model Support Update . 6 Click OK. The default location for log files is C:\Program Files\Kyocera\KMnet Admin\log. To edit a log file, select it from the Log view list and click the Edit Log File icon. To delete a log file manually - Kyocera ECOSYS FS-6525MFP | KM-NET ADMIN Operation Guide for Ver 3.0 - Page 19
console. Multi-Set Set in the Multi-Set wizard in the Device Manager console. Firmware Upgrade Set in the Firmware Upgrade wizard in the Device Manager console. To view scheduled jobs, in the navigation area To delete a scheduled job, select it and click Delete Scheduled Job. KMnet Admin 3.0 2-13 - Kyocera ECOSYS FS-6525MFP | KM-NET ADMIN Operation Guide for Ver 3.0 - Page 20
settings, delete a group, or convert a dynamic group to a manual group. Groups is located in the navigation area toolbar. Two additional features are available: Upgrade firmware A guided method for installing the most current printer or engine firmware on devices. Send data Lets you send files, text - Kyocera ECOSYS FS-6525MFP | KM-NET ADMIN Operation Guide for Ver 3.0 - Page 21
convert a dynamic group to a manual group. After conversion, you can drag and drop devices into the group or manually remove devices. 1 In the navigation . Manual Groups A manual group requires devices be added by drag and drop. It does not support device filters. Devices must be manually deleted - Kyocera ECOSYS FS-6525MFP | KM-NET ADMIN Operation Guide for Ver 3.0 - Page 22
a manual group. 1 In the navigation area, select the group you want to edit. 2 Click Groups > Edit group. 3 In the Edit group dialog box, edit the group name and then click OK. Preferences You can set preferences for KMnet Admin in the navigation area toolbar. Polling defaults Set default times - Kyocera ECOSYS FS-6525MFP | KM-NET ADMIN Operation Guide for Ver 3.0 - Page 23
Polling, and Toner Level Polling are selected by default. 3 Under Default Interval, enter the default time within the range displayed under Minimum Range and Maximum Range. 4 You can click Reset to display default settings. Click Apply. Alert Configuration KMnet Admin polls supported devices for - Kyocera ECOSYS FS-6525MFP | KM-NET ADMIN Operation Guide for Ver 3.0 - Page 24
click Reset to list. You can click Reset to go back to the delete tabs. Changes to the default List view can be made by a tab or import a system default tab. Edit tab Edit an existing administrator-defined default tabs are automatically displayed. default list views are displayed. Guest users cannot edit the default - Kyocera ECOSYS FS-6525MFP | KM-NET ADMIN Operation Guide for Ver 3.0 - Page 25
tabs. The default tabs in List View are displayed for the first time when you log in or use a guest account, or when you select Reset all tabs to system defaults in the Edit Tab dialog box. Users with the Full Control, Default List Views privilege can modify the default tabs. KMnet Admin 3.0 3-6 - Kyocera ECOSYS FS-6525MFP | KM-NET ADMIN Operation Guide for Ver 3.0 - Page 26
default list views do not affect that user's saved preferences. If that user chooses to reset all tabs to system defaults, List View displays the new default tabs. Editing Default List View Tabs You can edit default , or import and edit one of the system default tabs. There is a maximum of 32 tabs. - Kyocera ECOSYS FS-6525MFP | KM-NET ADMIN Operation Guide for Ver 3.0 - Page 27
become immediately available to all new users. However, existing users must import the new tab. Importing a Default Tab You can import a system default tab. 1 Select Add tab from the Manage tabs list on the toolbar. 2 In the Add the tab you want to edit in the List view pane. KMnet Admin 3.0 3-8 - Kyocera ECOSYS FS-6525MFP | KM-NET ADMIN Operation Guide for Ver 3.0 - Page 28
and down arrows to move the column to another position. 6 Click OK. Resetting System Defaults You can remove all tab customizations and revert back to the system default tabs. 1 From the Manage tabs list on the toolbar, select Edit lets you view and make changes to the Map View. 3-9 User Guide - Kyocera ECOSYS FS-6525MFP | KM-NET ADMIN Operation Guide for Ver 3.0 - Page 29
to the default white background replace background. 2 In the Add/replace background dialog box, select an option for finding an image. Select image from server provides a list of previously selected images. With Select local image (and copy to server) you can browse for a new image file. KMnet Admin - Kyocera ECOSYS FS-6525MFP | KM-NET ADMIN Operation Guide for Ver 3.0 - Page 30
size, you can edit the image outside of the application and add it again (Background options > Add/replace background). You can also resize the map viewer by dragging the divider between the map viewer and the navigation size changes. Icon Label Descriptive text below the icon. 3-11 User Guide - Kyocera ECOSYS FS-6525MFP | KM-NET ADMIN Operation Guide for Ver 3.0 - Page 31
view them by groups. This is useful for managing a large number of printers. You can create links with the parent group and its subgroup in Create link dialog box, select a group from the Linked group list. 5 Accept the default Link name, or type your choice of name. Click OK. The linked group icon - Kyocera ECOSYS FS-6525MFP | KM-NET ADMIN Operation Guide for Ver 3.0 - Page 32
For example, a user can be notified when toner or paper is low in a particular device. Alert e- mails can be sent to any user. In addition to Administrators and Help Desk users, Subscribers can be added even if they do not have access to KMnet Admin Guide - Kyocera ECOSYS FS-6525MFP | KM-NET ADMIN Operation Guide for Ver 3.0 - Page 33
device can be added manually if is not automatically and toner levels, are automatically updated according to the polling schedule. At any time, you can manually update this . Port 80 is used by default to access the home page through HTTP. Port 443 is used by default to access the home page through - Kyocera ECOSYS FS-6525MFP | KM-NET ADMIN Operation Guide for Ver 3.0 - Page 34
configure device settings for a single device, multiple devices or groups of Kyocera devices listed on the Supported Model List in the release notes. It does not support all device models. To start Multi-Set, select a group of with the Multi-Set Template Editor tool. Schedule 3-15 User Guide - Kyocera ECOSYS FS-6525MFP | KM-NET ADMIN Operation Guide for Ver 3.0 - Page 35
you can select Override settings on target device. When selected, settings from the source device replace settings on the target device. Click Next. 7 Depending on the selection in Step 5, Result (including the reason for any update failure), IP Address, Model/Group Name, KMnet Admin 3.0 3-16 - Kyocera ECOSYS FS-6525MFP | KM-NET ADMIN Operation Guide for Ver 3.0 - Page 36
in a group update. For the latest firmware files, consult your administrator or dealer. Note: For models using the firmware master file format, place the upgrade files on the KMnet Admin server. The default location is C:\Program Files\Kyocera\KMnet Admin\firmwares. Before sending firmware files to - Kyocera ECOSYS FS-6525MFP | KM-NET ADMIN Operation Guide for Ver 3.0 - Page 37
firmware version in List view or Map view. Open the device's Properties page, and then view the firmware You must replace the DIMM You must replace the firmware file. Upgrading the Firmware If the firmware file version is older than the installed version, then the application downgrades the firmware - Kyocera ECOSYS FS-6525MFP | KM-NET ADMIN Operation Guide for Ver 3.0 - Page 38
located on the KMnet Admin server. With Select file from local client selected, click Browse to find the file on your local system or network. With Type the absolute URL of the firmware file selected, type the path for the firmware file. Click Next. Note: Firmware files are provided or updated by an - Kyocera ECOSYS FS-6525MFP | KM-NET ADMIN Operation Guide for Ver 3.0 - Page 39
It can be done by TCP port or IPPS URL transmission. The KMnet Admin server saves the last ten files or strings sent to a device in a You can select the default TCP port or specify a different port on the device. The port number must match that of one of the logical printers defined in the Command - Kyocera ECOSYS FS-6525MFP | KM-NET ADMIN Operation Guide for Ver 3.0 - Page 40
tab Displays device errors and troubleshooting advice. Monitoring tab Lets you set a polling schedule or configures SNMP traps to monitor a device. Communication tab A user with privileges can change Simple Network Management Protocol (SNMP) and Web Services Description Language (WSDL) settings for - Kyocera ECOSYS FS-6525MFP | KM-NET ADMIN Operation Guide for Ver 3.0 - Page 41
hours. General The General section applies only to Kyocera devices. SNMP With any option selected for the is available if at least one device supports SSL or Device Login. Any changed graphics, using default or custom report templates. Reports are available in HTML, PDF, XML, or Admin 3.0 3-22 - Kyocera ECOSYS FS-6525MFP | KM-NET ADMIN Operation Guide for Ver 3.0 - Page 42
date is the last day of the previous month. 5 Under Format, select a file format for your report: HTML, PDF, XML, or CSV. 6 When all report options are set, click Generate Now to create the report. Editing Device Save. 3 In the Save Report Template dialog box, type a template name. 3-23 User Guide - Kyocera ECOSYS FS-6525MFP | KM-NET ADMIN Operation Guide for Ver 3.0 - Page 43
, select one or more file types as available report formats: HTML, PDF, XML, or CSV. 5 Click OK to save the template. The 5 You can change the file type of the template. Some templates support limited file types. 6 Under Schedule, select interval settings for the subscription Admin 3.0 3-24 - Kyocera ECOSYS FS-6525MFP | KM-NET ADMIN Operation Guide for Ver 3.0 - Page 44
Search Type, select an operator to define the search logic. 4 Under Search Criteria, select device properties to find in the search. 5 Click OK. 3-25 User Guide - Kyocera ECOSYS FS-6525MFP | KM-NET ADMIN Operation Guide for Ver 3.0 - Page 45
groups of devices that are managed by KMnet Admin. The Multi-Set function in KMnet Admin applies the templates to printing systems on a > Save as. Editing a Multi-Set Template You can edit an existing template with updated settings. 1 Click File > Open. 2 Select a template file. 3 In the - Kyocera ECOSYS FS-6525MFP | KM-NET ADMIN Operation Guide for Ver 3.0 - Page 46
Close. 6 Click File > Save to save updated settings to the template file. Multi-Set Template Options Each template supports a set of custom device settings. For , security, and network protocols. Device Default Settings View and edit select device default settings for print, copy, scan, User Guide - Kyocera ECOSYS FS-6525MFP | KM-NET ADMIN Operation Guide for Ver 3.0 - Page 47
Rev. 3.0 2011.10
-
 1
1 -
 2
2 -
 3
3 -
 4
4 -
 5
5 -
 6
6 -
 7
7 -
8
-
9
-
10
-
11
-
12
-
13
-
14
-
15
-
16
-
17
-
18
-
19
-
20
-
21
-
22
-
23
-
24
-
25
-
26
-
27
-
28
-
29
-
30
-
31
-
32
-
33
-
34
-
35
-
36
-
37
-
38
-
39
-
40
-
41
-
42
-
43
-
44
-
45
-
46
-
47
 |
 |