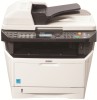
Kyocera FS-1035MFP/DP KM-NET Viewer Operation Guide Rev-5.3 2011.7 - Page 8
Device Discovery, Adding Devices, Custom Options for Adding Devices - manual
 |
View all Kyocera FS-1035MFP/DP manuals
Add to My Manuals
Save this manual to your list of manuals |
Page 8 highlights
Quick Start 3 In the New password text box, type a password for a local user. A password is a maximum of 32 characters. A blank password is allowed. 4 In Confirm password, type the password again. 5 Click OK to save the password. Device Discovery Device Discovery is a process that checks networks for printing devices. If new devices are found, then the application updates its database with information about the device. This process can be performed manually for single or multiple devices, or it can be scheduled to run automatically according to a set schedule. It is also possible to exclude devices from being discovered. When the application is launched for the first time, or when a new workspace is opened, the Add Devices wizard automatically launches. Adding Devices You can use the Add Devices wizard to add devices to the view list. 1 Click Device > Discovery > Add devices. 2 In the Add Devices wizard, select a method for adding devices: Express Uses predefined communication settings to find devices in the local network. Custom Lets you select settings to find devices on any network. 3 For the selected method, complete the wizard and click Finish to begin discovery. Custom Options for Adding Devices With Custom selected in the Add Devices wizard, you can select the discovery process to run on your local network, a specific IP address, or a range of IP addresses. Continue through the wizard to select the following options: On your local network Select discovery type, TCP/IP port, SNMP options, SSL options, and discovery start time. By IP address Type specific IPv4 or IPv6 addresses or host names and click Add to add them to the Selected targets list. You can also click Import to search for a valid IP address list (.CSV or .TXT). An entry can be removed from the Selected targets list by selecting it and clicking Remove. Click Next to continue through the wizard and select TCP/IP port, SNMP options, SSL options, and discovery start time. By IP address range Type valid starting and ending IPv4 addresses and click Add to add them to the Selected network segments list. An entry can be removed from the Selected network segments list by selecting it and clicking Remove. Click 1-2 User Guide
-
 1
1 -
2
-
 3
3 -
 4
4 -
 5
5 -
 6
6 -
 7
7 -
 8
8 -
 9
9 -
 10
10 -
 11
11 -
 12
12 -
 13
13 -
14
-
15
-
16
-
17
-
18
-
19
-
20
-
21
-
22
-
23
-
24
-
25
-
26
-
27
-
28
-
29
-
30
-
31
-
32
-
33
-
34
-
35
-
36
-
37
-
38
-
39
-
40
-
41
-
42
-
43
-
44
-
45
-
46
-
47
-
48
-
49
-
50
-
51
-
52
-
53
-
54
-
55
-
56
-
57
-
58
-
59
-
60
-
61
-
62
-
63
-
64
-
65
-
66
-
67
-
68
-
69
-
70
-
71
-
72
-
73
-
74
-
75
-
76
-
77
-
78
-
79
-
80
-
81
-
82
-
83
-
84
-
85
-
86
 |
 |