Kyocera FS-1135MFP KM-NET ADMIN Operation Guide for Ver 2.0 - Page 54
Device Manager Report, Creating a Device Manager Report, Editing Device IDs and Device Properties
 |
View all Kyocera FS-1135MFP manuals
Add to My Manuals
Save this manual to your list of manuals |
Page 54 highlights
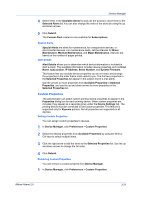
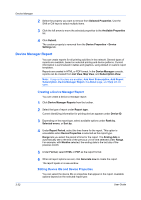
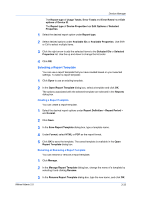
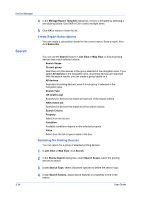
Device Manager 2 Select the property you want to remove from Selected Properties. Use the Shift or Ctrl keys to select multiple items. 3 Click the left arrow to move the selected properties to the Available Properties list. 4 Click Submit. The custom property is removed from the Device Properties > Device Settings tab. Device Manager Report You can create reports for all printing activities in the network. Several types of reports are available, based on selected printing and device patterns. Current information is summarized in tables and graphics, using default or custom report templates. Reports are created in HTML or PDF format. In the Device Manager console, reports can be created from List View, Map View, and Subscription View. Note: If pop-up blockers are enabled, Add Alert Subscription, Add Report Subscription, Device Manager Report, the About page, and Help will not open. Creating a Device Manager Report You can create a device a manager report. 1 Click Device Manager Reports from the toolbar. 2 Select the type of report under Report type. Current identifying information for printing devices appears under Device ID. 3 Depending on the report type, select available options under Rank by, Selected errors, or Sort by. 4 Under Report Period, select the time frame for the report. This option is unavailable when Device Properties is selected as the report type. Range lets you select the period of time for the report. The Ending date is automatically set to the end of the previous unit of time selected under Range. For example, with Months selected, the ending date is the last day of the previous month. 5 Under Format, select HTML or PDF as the report format. 6 When all report options are set, click Generate now to create the report. The report opens in a new window. Editing Device IDs and Device Properties You can select the device IDs or properties that appear in the report. Available options depend on the selected report type: 3-32 User Guide
-
 1
1 -
2
-
3
-
4
-
5
-
6
-
7
-
8
-
9
-
10
-
11
-
12
-
13
-
14
-
15
-
16
-
17
-
18
-
19
-
20
-
21
-
22
-
23
-
24
-
25
-
26
-
27
-
28
-
29
-
30
-
31
-
32
-
33
-
34
-
35
-
36
-
37
-
38
-
39
-
40
-
41
-
42
-
43
-
44
-
45
-
46
-
47
-
48
-
 49
49 -
 50
50 -
 51
51 -
 52
52 -
 53
53 -
 54
54 -
 55
55 -
 56
56 -
 57
57 -
 58
58 -
 59
59 -
60
-
61
-
62
-
63
-
64
-
65
-
66
-
67
-
68
-
69
-
70
-
71
-
72
-
73
-
74
-
75
-
76
-
77
-
78
-
79
-
80
-
81
-
82
-
83
-
84
-
85
-
86
-
87
-
88
-
89
-
90
-
91
-
92
-
93
-
94
-
95
-
96
-
97
-
98
-
99
-
100
-
101
-
102
-
103
-
104
-
105
-
106
-
107
 |
 |