Kyocera FS-1135MFP KM-NET ADMIN Operation Guide for Ver 2.0 - Page 72
Export Accounting Data, Quick Filter, Filtering with Quick Filter
 |
View all Kyocera FS-1135MFP manuals
Add to My Manuals
Save this manual to your list of manuals |
Page 72 highlights
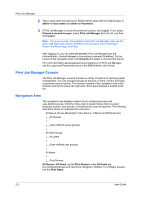
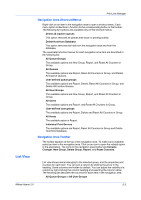
Accounting Manager 8 If the report is in PDF, name and save the report document. Export Accounting Data The currently displayed List View information can be exported and saved in Comma Separated Value (CSV) or XML format for use in databases and accounting applications. There are some differences when exporting in CSV or XML: CSV: Only the currently displayed information is exported. XML: The information from each tab is exported, with each tab appearing as a separate worksheet when opened in Microsoft Excel. Exporting the Accounting Data You can export and save the currently displayed List View information for use in databases and accounting applications. 1 Select any device or account option in the navigation area. 2 Select List View, if necessary. 3 Click Export Accounting Data. The Export Accounting Data dialog box opens. 4 Under Type of report, select XML or CSV. If you chose XML, go to step 6. 5 Select a default separator in the Separator list, or select Other separator and type a custom separator in the Other separator box. 6 Click Generate to create the file. 7 In the File Download dialog box, select Open to open the file in Microsoft Excel, or select Save to name and save the file. 8 After the report is generated, click Close to close the Export Accounting Data dialog box. Quick Filter Use the Quick Filter to select which printers or accounts are displayed in the list pane. The criteria available in the Quick Filter depend on whether a device or an account is selected in the list pane. Filtering with Quick Filter Using the Quick Filter, you can select which devices or accounts are displayed in the window, based on various criteria. The criteria available in the Quick filter depend on whether a device or an account is selected in the left-hand pane. 1 Click the Quick Filter icon. 4-15 2 Enter the criteria to apply to the list display. Click Apply when done. User Guide
-
 1
1 -
2
-
3
-
4
-
5
-
6
-
7
-
8
-
9
-
10
-
11
-
12
-
13
-
14
-
15
-
16
-
17
-
18
-
19
-
20
-
21
-
22
-
23
-
24
-
25
-
26
-
27
-
28
-
29
-
30
-
31
-
32
-
33
-
34
-
35
-
36
-
37
-
38
-
39
-
40
-
41
-
42
-
43
-
44
-
45
-
46
-
47
-
48
-
49
-
50
-
51
-
52
-
53
-
54
-
55
-
56
-
57
-
58
-
59
-
60
-
61
-
62
-
63
-
64
-
65
-
66
-
 67
67 -
 68
68 -
 69
69 -
 70
70 -
 71
71 -
 72
72 -
 73
73 -
 74
74 -
 75
75 -
 76
76 -
 77
77 -
78
-
79
-
80
-
81
-
82
-
83
-
84
-
85
-
86
-
87
-
88
-
89
-
90
-
91
-
92
-
93
-
94
-
95
-
96
-
97
-
98
-
99
-
100
-
101
-
102
-
103
-
104
-
105
-
106
-
107
 |
 |