Kyocera FS-3540MFP FS-3540MFP/3640MFP Operation Guide - Page 166
Confirm the information., For send to folder FTP - review
 |
View all Kyocera FS-3540MFP manuals
Add to My Manuals
Save this manual to your list of manuals |
Page 166 highlights
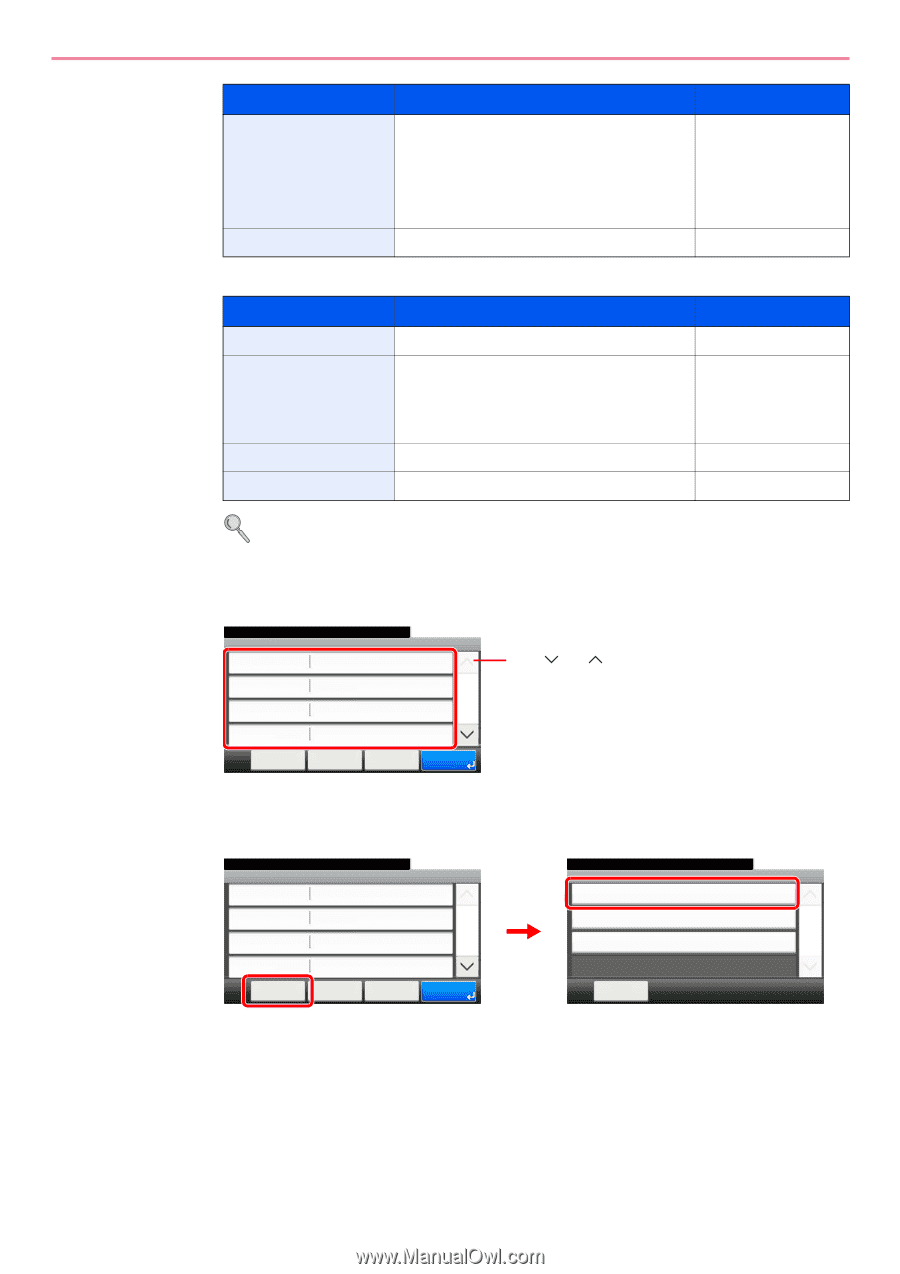
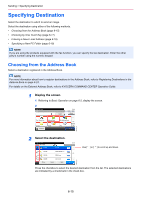
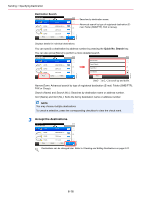
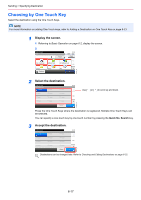
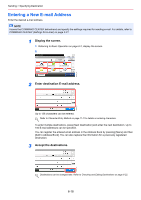
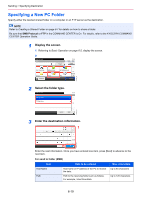
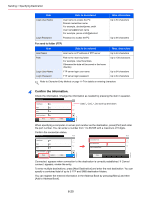
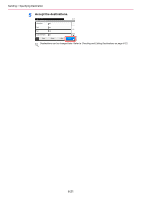
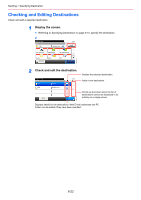
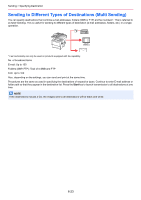
Sending > Specifying Destination Item Login User Name Login Password Data to be entered User name to access the PC Domain name/User name For example, abcdnet\james.smith. User name@Domain name For example, james.smith@abcdnet Password to access the PC Max. characters Up to 64 characters Up to 64 characters For send to folder (FTP) Item Data to be entered Host Name Host name or IP address of FTP server Path Path to the receiving folder. For example, \User\ScanData. Otherwise the data will be saved in the home directory. Login User Name FTP server login user name Login Password FTP server login password Max. characters Up to 64 characters Up to 128 characters Up to 64 characters Up to 64 characters Refer to Character Entry Method on page 11-7 for details on entering characters. 4 Confirm the information. Check the information. Change the information as needed by pressing the item in question. Ready to send. Folder - Confirmation Host Name abc 10:10 Use [ ] or [ ] to scroll up and down. Path abc 1/2 Port 139 Login User Name abc Menu Cancel < Back OK GB0128_00 When specifying a computer or server port number as the destination, press [Port] and enter the port number. You can enter a number from 1 to 65,535 with a maximum of 5 digits. Confirm the connection status. Ready to send. Folder - Confirmation Host Name abc Path abc Port 139 1 Login User Name abc 10:10 1/2 Menu Connection Test Next Destination 2 Add to Address Book 10:10 1/1 Menu Cancel < Back OK Close GB0020_00 GB0128_00 Connected. appears when connection to the destination is correctly established. If Cannot connect. appears, review the entry. To enter multiple destinations, press [Next Destination] and enter the next destination. You can specify a combined total of up to 5 FTP and SMB destination folders. You can register the entered information in the Address Book by pressing [Menu] and then [Add to Address Book]. 6-20
-
 1
1 -
2
-
3
-
4
-
5
-
6
-
7
-
8
-
9
-
10
-
11
-
12
-
13
-
14
-
15
-
16
-
17
-
18
-
19
-
20
-
21
-
22
-
23
-
24
-
25
-
26
-
27
-
28
-
29
-
30
-
31
-
32
-
33
-
34
-
35
-
36
-
37
-
38
-
39
-
40
-
41
-
42
-
43
-
44
-
45
-
46
-
47
-
48
-
49
-
50
-
51
-
52
-
53
-
54
-
55
-
56
-
57
-
58
-
59
-
60
-
61
-
62
-
63
-
64
-
65
-
66
-
67
-
68
-
69
-
70
-
71
-
72
-
73
-
74
-
75
-
76
-
77
-
78
-
79
-
80
-
81
-
82
-
83
-
84
-
85
-
86
-
87
-
88
-
89
-
90
-
91
-
92
-
93
-
94
-
95
-
96
-
97
-
98
-
99
-
100
-
101
-
102
-
103
-
104
-
105
-
106
-
107
-
108
-
109
-
110
-
111
-
112
-
113
-
114
-
115
-
116
-
117
-
118
-
119
-
120
-
121
-
122
-
123
-
124
-
125
-
126
-
127
-
128
-
129
-
130
-
131
-
132
-
133
-
134
-
135
-
136
-
137
-
138
-
139
-
140
-
141
-
142
-
143
-
144
-
145
-
146
-
147
-
148
-
149
-
150
-
151
-
152
-
153
-
154
-
155
-
156
-
157
-
158
-
159
-
160
-
 161
161 -
 162
162 -
 163
163 -
 164
164 -
 165
165 -
 166
166 -
 167
167 -
 168
168 -
 169
169 -
 170
170 -
 171
171 -
172
-
173
-
174
-
175
-
176
-
177
-
178
-
179
-
180
-
181
-
182
-
183
-
184
-
185
-
186
-
187
-
188
-
189
-
190
-
191
-
192
-
193
-
194
-
195
-
196
-
197
-
198
-
199
-
200
-
201
-
202
-
203
-
204
-
205
-
206
-
207
-
208
-
209
-
210
-
211
-
212
-
213
-
214
-
215
-
216
-
217
-
218
-
219
-
220
-
221
-
222
-
223
-
224
-
225
-
226
-
227
-
228
-
229
-
230
-
231
-
232
-
233
-
234
-
235
-
236
-
237
-
238
-
239
-
240
-
241
-
242
-
243
-
244
-
245
-
246
-
247
-
248
-
249
-
250
-
251
-
252
-
253
-
254
-
255
-
256
-
257
-
258
-
259
-
260
-
261
-
262
-
263
-
264
-
265
-
266
-
267
-
268
-
269
-
270
-
271
-
272
-
273
-
274
-
275
-
276
-
277
-
278
-
279
-
280
-
281
-
282
-
283
-
284
-
285
-
286
-
287
-
288
-
289
-
290
-
291
-
292
-
293
-
294
-
295
-
296
-
297
-
298
-
299
-
300
-
301
-
302
-
303
-
304
-
305
-
306
-
307
-
308
-
309
-
310
-
311
-
312
-
313
-
314
-
315
-
316
-
317
-
318
-
319
-
320
-
321
-
322
-
323
-
324
-
325
-
326
-
327
-
328
-
329
-
330
-
331
-
332
-
333
-
334
-
335
-
336
-
337
-
338
-
339
-
340
-
341
-
342
-
343
-
344
-
345
-
346
-
347
-
348
-
349
-
350
-
351
-
352
 |
 |