Kyocera FS-6530MFP Fax System (U) Operation Guide Rev-4.2012.3
Kyocera FS-6530MFP Manual
 |
View all Kyocera FS-6530MFP manuals
Add to My Manuals
Save this manual to your list of manuals |
Kyocera FS-6530MFP manual content summary:
- Kyocera FS-6530MFP | Fax System (U) Operation Guide Rev-4.2012.3 - Page 1
FAX System(U) OPERATION GUIDE - Kyocera FS-6530MFP | Fax System (U) Operation Guide Rev-4.2012.3 - Page 2
Safety Conventions in This Guide This Operation Guide is intended to help you operate the machine correctly, perform routine maintenance and take a simple troubleshooting action as necessary, so that you can always use the machine in good condition. Please read the Operation Guide before using the - Kyocera FS-6530MFP | Fax System (U) Operation Guide Rev-4.2012.3 - Page 3
in This Guide xi Originals and Paper Sizes xii 1 Before Using the Fax Machine 1-1 Part Names and Functions 1-2 Machine ...1-2 Operation Panel ...1-4 Touch Panel ...1-5 Enter key and Quick No. Search key 1-5 Quick Setup Wizard (Fax Setup 1-7 Fax setup items ...1-7 Fax setup procedure - Kyocera FS-6530MFP | Fax System (U) Operation Guide Rev-4.2012.3 - Page 4
the Send Status 4-3 Priority Override Send 4-4 Cancelling the Transmission 4-5 Fax transmission functions 4-7 Original scan settings ...4-8 ...4-14 Continuous Scan ...4-14 FAX Direct Transmission ...4-15 Cancelling Direct Transmission 4-15 Manual Send ...4-16 FAX Delayed Transmission 4-17 - Kyocera FS-6530MFP | Fax System (U) Operation Guide Rev-4.2012.3 - Page 5
6-42 Network FAX ...6-43 Flow of Network FAX Sending 6-43 Flow of Network FAX Receiving 6-43 Setup ...6-44 Installing the Network Fax Driver 6-45 Basic Transmission 6-47 Configuring the Driver Default Settings 6-50 Changing Transmit Settings 6-54 Using Cover Pages 6-58 Cover Page Registration - Kyocera FS-6530MFP | Fax System (U) Operation Guide Rev-4.2012.3 - Page 6
Settings 9-1 Default fax settings ...9-2 Operation method ...9-2 System Menu Settings 9-3 Report ...9-4 Cassette/MP Tray Settings 9-5 Common Settings ...9-5 FAX ...9-6 Adjustment/Maintenance 9-9 Transmission Restriction ...9-10 Registering Permit FAX No 9-11 Changing and Deleting Permit FAX No - Kyocera FS-6530MFP | Fax System (U) Operation Guide Rev-4.2012.3 - Page 7
. During use, refer to the Operation Guide for your machine for information regarding the sections listed below. Environment Precautions for Use Loading Paper Toner Container Replacement Waste Toner Box Replacement Cleaning Solving Malfunctions Responding to Error Messages Clearing Paper Jams v - Kyocera FS-6530MFP | Fax System (U) Operation Guide Rev-4.2012.3 - Page 8
information: KYOCERA Document Solutions America, Inc. 225 Sand Road, Fairfield, New Jersey 07004-0008, USA Phone: +1-973-808-8444 Fax: +1-973-882-6000 If the equipment is causing harm to the telephone network, the telephone company may request that you disconnect the equipment until the problem is - Kyocera FS-6530MFP | Fax System (U) Operation Guide Rev-4.2012.3 - Page 9
the following steps: (Insure that it will be transmitted, see Local FAX Name on page 1-7, Local FAX Number on page 1-7, TTI on page 1-7 and Setting Date and Time on page 1-10.) IMPORTANT SAFETY INSTRUCTIONS When using your telephone equipment, basic safety precautions should always be followed - Kyocera FS-6530MFP | Fax System (U) Operation Guide Rev-4.2012.3 - Page 10
(TE); Attachment requirements for pan-European approval for connection to the analogue Public Switched Telephone Networks (PSTNs) of TE (excluding TE supporting the voice telephony service) in which network addressing, if provided, is by means of Dual Tone Multi Frequency (DTMF) signalling EN55024 - Kyocera FS-6530MFP | Fax System (U) Operation Guide Rev-4.2012.3 - Page 11
National AN for P Network Compatibility Declaration The manufacturer declares that the equipment has been designed to operate in the public switched telephone networks (PSTN) in the „Poland „Portugal „Romania „Slovakia „Slovenia „Spain „Sweden „Switzerland „The Netherlands „United Kingdom ix - Kyocera FS-6530MFP | Fax System (U) Operation Guide Rev-4.2012.3 - Page 12
About this Operation Guide This Operation Guide contains the following chapters. Chapter Contents 1 Before Using the Fax Machine Explains the part names and the quick setup wizard. 2 Registering Destinations Explains the procedures for registering destinations in the address book and - Kyocera FS-6530MFP | Fax System (U) Operation Guide Rev-4.2012.3 - Page 13
. For more information refer to Sleep and Auto Sleep on page 2-9. NOTE Indicates supplemental information or operations for reference. NOTE IMPORTANT Indicates items that are required or prohibited so as to avoid problems. IMPORTANT Caution Indicates what must be observed to prevent injury - Kyocera FS-6530MFP | Fax System (U) Operation Guide Rev-4.2012.3 - Page 14
Sizes This section explains the notation used in this guide when referring to sizes of originals or paper sizes. can be used depends on the function and source tray. For details, refer to the appropriate pages of the function or source tray. Icons on the Touch Panel The following icons are used - Kyocera FS-6530MFP | Fax System (U) Operation Guide Rev-4.2012.3 - Page 15
explains the following topics: Part Names and Functions ...1-2 Machine ...1-2 Operation Panel ...1-4 Touch Panel ...1-5 Enter key and Quick No. Search key ...1-5 Quick Setup Wizard (Fax Setup) ...1-7 Fax setup items ...1-7 Fax setup procedure ...1-8 Setting Date and Time ...1-10 PBX Setting (Europe - Kyocera FS-6530MFP | Fax System (U) Operation Guide Rev-4.2012.3 - Page 16
are used, refer to the machine's Operation Guide. 2 3 4 1 1 Operation panel 2 Main power switch 3 LINE connector (L1) 4 TEL connector (T1) * The operation panel may differ from the above illustration depending on the type of your machine. Perform the fax operation with this panel. Set this switch - Kyocera FS-6530MFP | Fax System (U) Operation Guide Rev-4.2012.3 - Page 17
56 7 8 10 9 * The operation panel may differ from the above illustration depending on the type of your machine. 5 Original loaded indicator 6 Top cover 7 Original width guides 8 Original table 9 Original eject table 10 Opening handle Indicates the original status in the Document Processor. The - Kyocera FS-6530MFP | Fax System (U) Operation Guide Rev-4.2012.3 - Page 18
* The operation panel may differ from the above illustration depending on the type of your machine. Processing: Blinks during fax transmission and reception. Memory: Blinks while the machine is accessing the fax memory or USB memory (general-purpose item). Attention: Lights or blinks when an error - Kyocera FS-6530MFP | Fax System (U) Operation Guide Rev-4.2012.3 - Page 19
to send. FAX On Hook Chain Direct Recall 10:10 Dest. : Check Add Dest. Displays the date and time and number of destinations. Configures function settings. Displays the status of the equipment as well as necessary operation messages. Displays available functions and settings. Address Book Ext - Kyocera FS-6530MFP | Fax System (U) Operation Guide Rev-4.2012.3 - Page 20
Before Using the Fax Machine > Part Names and Functions One Touch Key 001 123456 004 None 007 None 010 None 002 None 005 None 008 None 011 None 003 - Kyocera FS-6530MFP | Fax System (U) Operation Guide Rev-4.2012.3 - Page 21
for the received FAX. 9-6 Reduces the received FAX size before printing if the 9-7 size is larger than the current paper size. Set the number of redials. 9-7 NOTE The settings can be changed in the system menu. Refer to Default fax settings on page 9-2 or the Operation Guide for the machine - Kyocera FS-6530MFP | Fax System (U) Operation Guide Rev-4.2012.3 - Page 22
Machine > Quick Setup Wizard (Fax Setup) Fax setup procedure 1 Display the screen. 1 System Menu/Counter. System Menu 2 Quick Setup Wizard Language Report Counter 10:10 1/5 2 Select a function. System Menu/Counter. Quick Setup Wizard FAX Setup Energy Saver Setup Network Setup < Back 10 - Kyocera FS-6530MFP | Fax System (U) Operation Guide Rev-4.2012.3 - Page 23
Before Using the Fax Machine > Quick Setup Wizard (Fax Setup) 4 Finish System Menu/Counter. Complete 1. Dialing/RX Mode 2. Local FAX Info. 3. Sound Volume 4. Rings 5. Output 6. Redial To close this wizard, press [Finish]. The setting will be changed after restarting the system. * All items can - Kyocera FS-6530MFP | Fax System (U) Operation Guide Rev-4.2012.3 - Page 24
login user name and password, and press [Login]. Refer to Adding a User in the machine's Operation Guide for the default login user name and password. Be sure to set the time difference before setting the date and time. The date and time are set using the Quick Setup Zone Auto Panel Reset 10:10 10 - Kyocera FS-6530MFP | Fax System (U) Operation Guide Rev-4.2012.3 - Page 25
Before Using the Fax Machine > Setting Date and Time 4 Set the time. System Menu/Counter. Date/Time - Time 1 10:10 Hour Minute : Second : : GB0612_00 2 Cancel < Back OK Press [+] or [-] to set each of Hour, Minute, and Second. 1-11 - Kyocera FS-6530MFP | Fax System (U) Operation Guide Rev-4.2012.3 - Page 26
Using the Fax Machine > system to request connection of this machine. Note that correct operation cannot be guaranteed in environment in which this machine is connected Use when connecting this machine to a public switched telephone network (default). Use when connecting this machine to PBX. Set a - Kyocera FS-6530MFP | Fax System (U) Operation Guide Rev-4.2012.3 - Page 27
Destinations This chapter explains the following topics: Registering Destinations in the Address Book 2-2 Adding a contact ...2-2 Adding a Group ...2-6 Editing and Deleting Address Book Entries 2-9 Printing Address List ...2-11 Adding a Destination on One Touch Key ...2-12 Adding a Destination - Kyocera FS-6530MFP | Fax System (U) Operation Guide Rev-4.2012.3 - Page 28
Book. Adding a contact A maximum of 200 contact addresses can be registered. Destination name, fax number, sub address communication, encryption, transmission start speed, and ECM can be registered for each destination. NOTE If user login administration is enabled, you can only edit destinations in - Kyocera FS-6530MFP | Fax System (U) Operation Guide Rev-4.2012.3 - Page 29
1 FAX E-mail Address SMB Cancel < Back 10:10 1/2 Save FAX 2 Pause Sub Address Space fax number, press [Backspace] on the touch panel, and delete the digits one by one before reentering the fax number. To delete the number entirely, press the Clear key on the operation panel. Enter the fax - Kyocera FS-6530MFP | Fax System (U) Operation Guide Rev-4.2012.3 - Page 30
GB0172_01 GB0168_01 NOTE Normally the default setting should be used. 3 Turn on ECM. FAX - Detail Settings TX Start Speed Union) that retransmits data when an error occurs. Fax machines that have ECM mode check for errors as they communicate, preventing distortion Encryption on page 6-36. 2-4 - Kyocera FS-6530MFP | Fax System (U) Operation Guide Rev-4.2012.3 - Page 31
OK Cancel OK To use sub address communication, a sub address and password must be registered. For the procedure for setting a sub address, refer to Sub Address Transmission on page 6-23. 9 Register the destination. 10:10 FAX Sub Address Detail Settings 0123456789 Pause Space Backspace - Kyocera FS-6530MFP | Fax System (U) Operation Guide Rev-4.2012.3 - Page 32
must be added first. NOTE If user login administration is enabled, you can only edit destinations in the Address Book by logging in with administrator 1 Ready to send. FAX On Hook 2 Chain Direct Recall 10:10 Dest. : Check Add Dest. GB0669_00 Address Book Functions Ext AAddddrreessss BBooookk - Kyocera FS-6530MFP | Fax System (U) Operation Guide Rev-4.2012.3 - Page 33
page 11-2. 5 Enter the address number. Select the item that you want to change. Add - Confirmation Name Support department Member 1 Member: 0 Address Number Auto 10:10 1/1 Cancel < Back Save Address destination (E1/2 mail, Folder (SMB/FTP) or FAX). 002 Support department BOX Use [ ] - Kyocera FS-6530MFP | Fax System (U) Operation Guide Rev-4.2012.3 - Page 34
type of registered destination (E-mail, Folder (SMB/FTP) or FAX). Search (Name) and Search (No.): Searches by destination name or address number. Sort (Name) and Address Book (All) 001 Sales department 1 0123456 001 Sales department 1 abc 002 Support department 0234567 002 Support - Kyocera FS-6530MFP | Fax System (U) Operation Guide Rev-4.2012.3 - Page 35
1 Edit Delete Close 10:10 2/2 Address Book (All) 2 019 Sales department 1 002 Support department 001 SYSTEM DEP. 003 Sales department destination by address number by pressing the Quick No. Search key. 2 Address:Sales department 1 Name Sales department 1 FAX E-mail Address SMB - Kyocera FS-6530MFP | Fax System (U) Operation Guide Rev-4.2012.3 - Page 36
Sales department 1 FAX E-mail Address SMB Cancel < Back 10:10 1/2 Save GB0786_00 To delete a member (group) To delete a member from a group, select the destination you wish to delete and press [(Delete)] (the trash can icon). Address:Support department Name 1 Support department 10:10 - Kyocera FS-6530MFP | Fax System (U) Operation Guide Rev-4.2012.3 - Page 37
Book/One Touch 4/5 User Login/Job Accounting Printer System Menu/Counter. Address Book/One Touch Address Book One Touch Key Address Book Defaults 3 Print List < Back GB0054_03 10:10 1/1 2 Print System Menu/Counter. Address Book/One Touch - Print List FAX List (Index) FAX List (No.) 10 - Kyocera FS-6530MFP | Fax System (U) Operation Guide Rev-4.2012.3 - Page 38
address. Address Book (All) 001 Sales department 1 0123456 002 Sales department 1 abc 003 Support department 0234567 004 Support department BOX Menu Cancel < Back 10:10 1/2 Next > Searches by destination name. Advanced search by type of registered destination (Email, Folder (SMB/FTP) or FAX - Kyocera FS-6530MFP | Fax System (U) Operation Guide Rev-4.2012.3 - Page 39
. For details on character entry, refer to Character Entry Method on page 11-2. GB0057_18 5 Register the destination. Select the item that you want to change. Add - Confirmation Name Sales department 1 FAX Number 0123456 Sub Address TX Start Speed 33600bps Cancel < Back 10:10 1/2 Save - Kyocera FS-6530MFP | Fax System (U) Operation Guide Rev-4.2012.3 - Page 40
to scroll up and down. System Menu/Counter. System Menu Internet 2 10:10 Address Book/One Touch 4/5 User Login/Job Accounting Printer System Menu/Counter. Address Book/One Touch Address Book 3 One Touch Key Address Book Defaults Print List < Back GB0754_03 10:10 1/1 2 Edit or delete the - Kyocera FS-6530MFP | Fax System (U) Operation Guide Rev-4.2012.3 - Page 41
3 Methods For Entering the Destination This chapter explains the following topics: Entering the destination fax number with the numeric keys 3-2 Choosing from the Address Book ...3-4 Choosing by One Touch Key ...3-6 Using the Speed Dial key ...3-7 Broadcast Transmission ...3-8 Using redial ...3-10 - Kyocera FS-6530MFP | Fax System (U) Operation Guide Rev-4.2012.3 - Page 42
the Clear key on the operation panel. Enter the fax number of the receiving system using the numeric keys. Up to 64 digits can be entered as the fax number of the receiving system. 3 Select transmission settings. Ready to send. FAX On Hook Sub Address 10:10 Detail Settings 1234567890 Pause - Kyocera FS-6530MFP | Fax System (U) Operation Guide Rev-4.2012.3 - Page 43
, refer to Entry Check for New Dest. in the Operation Guide for the machine. Press [Next Dest.] to enter the next fax number. For details, refer to Broadcast Transmission on page 3-8. In addition to a fax, you can include e-mail transmission and folder (SMB/FTP) transmission to send as one job. For - Kyocera FS-6530MFP | Fax System (U) Operation Guide Rev-4.2012.3 - Page 44
information about how to register destinations in the Address Book, refer to Registering Destinations in the Address Book on page 2-2. For details on the external address book, refer to Command Center RX User Guide. 1 Display the screen. Ready to send. FAX On Hook Chain Direct Recall 10:10 - Kyocera FS-6530MFP | Fax System (U) Operation Guide Rev-4.2012.3 - Page 45
) Search(No.) Sort (Name) Menu Cancel < Back OK Close 10:10 1/2 Narrow Down: Advanced search by type of registered destination (All, FAX or Group). Search (Name) and Search (No.): Searches by destination name or address number. Sort (Name) and Sort (No.): Sorts the list by destination name or - Kyocera FS-6530MFP | Fax System (U) Operation Guide Rev-4.2012.3 - Page 46
Touch keys, refer to Adding a Destination on One Touch Key on page 2-12. 1 Display the screen. Ready to send. FAX On Hook Chain Direct Recall 10:10 Dest. : Check Add Dest. GB0669_00 Address Book Functions Ext Address Book One Touch Key Favorites 2 Select the destination. One Touch Key - Kyocera FS-6530MFP | Fax System (U) Operation Guide Rev-4.2012.3 - Page 47
Touch keys, refer to Adding a Destination on One Touch Key on page 2-12. 1 Display the screen. Ready to send. FAX On Hook Chain Direct Recall 10:10 Dest. : Check Add Dest. GB0669_00 Address Book Functions Ext Address Book One Touch Key Favorites 2 Enter a speed dial number. One Touch - Kyocera FS-6530MFP | Fax System (U) Operation Guide Rev-4.2012.3 - Page 48
to up to 100 destinations in one operation. You can use this function together with sub address communication and delayed transmission. When direct the entered FAX number. Re-enter the same FAX number and press [OK]. For details, refer to Entry Check for New Dest. in the Operation Guide for the - Kyocera FS-6530MFP | Fax System (U) Operation Guide Rev-4.2012.3 - Page 49
[OK]. Select the destination from the One-touch keys 1 Select the destination. Ready to send. FAX On Hook Chain Direct 10:10 Dest. : Check Recall Add Dest. 1 Address Book Functions Ext Address Book One Touch Key Favorites Select all destinations and press [OK]. GB0669_00 One Touch Key - Kyocera FS-6530MFP | Fax System (U) Operation Guide Rev-4.2012.3 - Page 50
call the receiving system you dialed on the destination list. 1 Press [Recall]. Ready to send. FAX On Hook Chain Direct Recall 10:10 Dest. : Check Add Dest. Address Book Functions Ext Address Book One Touch Key Favorites GB0669_00 2 Press the Start key. The transmission will start. NOTE - Kyocera FS-6530MFP | Fax System (U) Operation Guide Rev-4.2012.3 - Page 51
Book, select the destination in which "212" is registered as explained in Choosing from the Address Book on page 3-4. To enter using the numeric keys, press [Add Dest.], enter "212", and press [OK]. 2 Press [Chain]. Ready to send. FAX On Hook Chain Direct 212 212 10:10 Dest. : Check Add Dest - Kyocera FS-6530MFP | Fax System (U) Operation Guide Rev-4.2012.3 - Page 52
destinations. For the procedure for selecting a destination in the address book, refer to Choosing from the Address Book on page 3-4. Select fax number from One-touch key Ready to send. Chain Address Book Ext. Address Book One Touch Address Entry 10:10 1 1/1 Cancel < Back Next > One Touch Key - Kyocera FS-6530MFP | Fax System (U) Operation Guide Rev-4.2012.3 - Page 53
to the machine's Operation Guide. 1 Display the screen. 2 Select a favorite. Select the function. Favorites 10:10 ID Card Copy Paper Saving Copy Scan to PC (Address Entry) 1/1 Scan to PC (Address Book) Menu Scan to E-mail (Address Entry) Scan to E-mail (Address Book) Application GB0056_00 - Kyocera FS-6530MFP | Fax System (U) Operation Guide Rev-4.2012.3 - Page 54
Methods For Entering the Destination > Using favorites When using the program mode Select a favorite to call up registered settings. 3-14 - Kyocera FS-6530MFP | Fax System (U) Operation Guide Rev-4.2012.3 - Page 55
Send Status ...4-3 Priority Override Send ...4-4 Cancelling the Transmission ...4-5 Fax transmission functions ...4-7 Original scan settings ...4-14 Continuous Scan ...4-14 FAX Direct Transmission ...4-15 Cancelling Direct Transmission ...4-15 Manual Send ...4-16 FAX Delayed Transmission ...4-17 - Kyocera FS-6530MFP | Fax System (U) Operation Guide Rev-4.2012.3 - Page 56
the originals Refer to the machine's Operation Guide for placing originals. 3 Specifing destination Ready to send. FAX On Hook Chain Direct Recall 10:10 Dest. : Check Add Dest. Specify the transmission destination. Address Book Functions Ext Address Book One Touch Key Favorites GB0669_00 - Kyocera FS-6530MFP | Fax System (U) Operation Guide Rev-4.2012.3 - Page 57
in memory. Every time one page is scanned, you perform an operation to allow continued scanning, and after all the originals have been stored in memory, the receiving system is dialed. For details, refer to Continuous Scan on page 4-14. Checking the Send Status 1 Press the Status/Job Cancel key - Kyocera FS-6530MFP | Fax System (U) Operation Guide Rev-4.2012.3 - Page 58
2 0006 7890123 0007 5678901 3 Menu Cancel 10:10 Sending Waiting 1/1 Waiting Close GB0183-01 GB0052-00 Status/Job Cancel. Menu Priority Override 10:10 4 1/1 5 GB0203-00 Close Select the fax job to be sent by priority override and press [Menu] and then [Priority Override]. Press [Yes - Kyocera FS-6530MFP | Fax System (U) Operation Guide Rev-4.2012.3 - Page 59
Faxes operation panel, or press [Cancel] on the touch panel. Scanning of originals is canceled, and the originals are ejected. When originals remain in the document processor, take them out from the original output table. Cancelling Memory Transmission (during communication) 1 Press the Status - Kyocera FS-6530MFP | Fax System (U) Operation Guide Rev-4.2012.3 - Page 60
Status/Job Cancel key. 2 Disconnection of communication. Status/Job Cancel. Status 1Printer Running 10:10 FAX Toner Status Waiting 3/4 OK Status/Job Cancel. FAX Receiving... Paper Status Direct Transmission on page 4-15. To cancel a delayed transmission or send a fax by immediate transmission - Kyocera FS-6530MFP | Fax System (U) Operation Guide Rev-4.2012.3 - Page 61
Image X page 4-13 Zoom X page 4-14 Continuous Scan X page 4-14 File Name Entry X page 4-23 Job Finish Notice X page 4-22 FAX Delayed Transmission X page 4-17 FAX Direct Transmission X page 4-15 Standby Transmission X page 4-20 Interrupt Send X page 4-21 Sub Address Transmission X page 6-23 Polling - Kyocera FS-6530MFP | Fax System (U) Operation Guide Rev-4.2012.3 - Page 62
, refer to the machine's Operation Guide. NOTE Be sure to always specify the original size when using custom size originals. 1 Display the screen. Ready to send. FAX On Hook Chain Direct Recall 10:10 Dest. : Check Add Dest. 1Address Book Functions Ext Address Book One Touch Key Favorites - Kyocera FS-6530MFP | Fax System (U) Operation Guide Rev-4.2012.3 - Page 63
up and down. GB0673_00 For details, refer to the machine's Operation Guide. Mixed Sized Originals Scans all sheets in the document processor, even if they are of different to send. FAX On Hook Chain Direct Recall 10:10 Dest. : Check Add Dest. 1 Address Book Functions Ext Address Book One - Kyocera FS-6530MFP | Fax System (U) Operation Guide Rev-4.2012.3 - Page 64
Select the orientation of the original document top edge to scan correct direction. * Requires the document processor. ** This function to send. FAX On Hook Chain Direct Recall 10:10 Dest. : Check Add Dest. 1 Address Book Functions Ext Address Book One to the machine's Operation Guide. 4-10 - Kyocera FS-6530MFP | Fax System (U) Operation Guide Rev-4.2012.3 - Page 65
10:10 Dest. : Check Add Dest. 1 Address Book Functions Ext Address Book One Touch Key Favorites Ready to send. Functions 2 Sending Size FAX TX Resolution Density Original Image Close Use [ ] or [ For details, refer to the machine's Operation Guide. GB0669_00 GB0673_01 10:10 Same as - Kyocera FS-6530MFP | Fax System (U) Operation Guide Rev-4.2012.3 - Page 66
NOTE The default setting is 200 × 100 dpi (Normal). The higher the resolution, the clearer the image , but the fax transmission time is longer. The scan resolution must to equal to or higher than the fax resolution. If the fax resolution is higher than the scan resolution, the scan resolution will - Kyocera FS-6530MFP | Fax System (U) Operation Guide Rev-4.2012.3 - Page 67
10:10 Dest. : Check Add Dest. 1 Address Book Functions Ext Address Book One Touch Key Favorites Ready to send. Functions Sending Size FAX TX Resolution Density 2 Original Image Close Use [ ] or [ For details, refer to the machine's Operation Guide. 10:10 Same as Original Size 200x100dpi - Kyocera FS-6530MFP | Fax System (U) Operation Guide Rev-4.2012.3 - Page 68
10:10 Dest. : Check Add Dest. 1 Address Book Functions Ext Address Book One Touch Key Favorites Ready to send. Functions Zoom 2 Continuous Scan File Name Entry Job Finish Notice Close GB0669_00 Use [ ] or [ For details, refer to the machine's Operation Guide. 10:10 100% Off 3/4 doc Off - Kyocera FS-6530MFP | Fax System (U) Operation Guide Rev-4.2012.3 - Page 69
transmission, to cancel communication during transmission, press the Stop key on the operation panel or [Cancel] on the touch panel. The originals that have been scanned are ejected, and the screen returns to the send default screen. When originals remain in the document processor, take them out - Kyocera FS-6530MFP | Fax System (U) Operation Guide Rev-4.2012.3 - Page 70
Address Book One Touch Key Favorites 4 Dial the destination. Ready to send. On Hook 10:10 0123456 GB0694_00 Manual RX Line Off Use the numeric keys to enter the number of the receiving system. NOTE To cancel the operation, press [Line Off]. 5 Press the Start key. When you hear the fax - Kyocera FS-6530MFP | Fax System (U) Operation Guide Rev-4.2012.3 - Page 71
and Sending Delayed Transmissions (Queued) on page 4-19.) Batch Transmission Function When fax originals to be sent to the same Dest. 1 Address Book Functions Ext Address Book One Touch Key Favorites Ready to send. Functions 2 FAX Delayed Transmission FAX Direct Transmission FAX Polling RX - Kyocera FS-6530MFP | Fax System (U) Operation Guide Rev-4.2012.3 - Page 72
Delayed Transmission 2 Configure the function. Ready to send. 10:10 FAX Delayed Transmission 1 Off On Ready to send. FAX Delayed Transmission - Start Time 2 (00 - 23) : (00 - 59) 10:10 Cancel OK Cancel Use [+]/[-] or the numeric keys to enter the transmission start time. 3 < Back - Kyocera FS-6530MFP | Fax System (U) Operation Guide Rev-4.2012.3 - Page 73
Sending Faxes > FAX Delayed Transmission Cancelling and Sending Delayed Transmissions (Queued) To cancel delayed transmissions that are queued, or to send delayed transmissions immediately rather than waiting for the specified time, use the procedure below. 1 Display the screen. 1 Status/Job - Kyocera FS-6530MFP | Fax System (U) Operation Guide Rev-4.2012.3 - Page 74
Sending Faxes > Standby Transmission Standby Transmission During a communication, you can scan originals and schedule a next transmission. When the details, refer to Confirmation Screen of Destinations on page 8-12. 5 When the communication is completed, the scheduled transmission will begin. 4-20 - Kyocera FS-6530MFP | Fax System (U) Operation Guide Rev-4.2012.3 - Page 75
Sending Faxes > Interrupt Send Interrupt Send During communication, when you scan originals by selecting direct Add Dest. GB0669_00 Address Book Functions Ext Address Book One Touch Key Favorites For operation of direct transmission, refer to FAX Direct Transmission on page 4-15. 4 Set - Kyocera FS-6530MFP | Fax System (U) Operation Guide Rev-4.2012.3 - Page 76
Ext Address Book One Touch Key Favorites GB0669_00 GB0673_02 Ready to send. Functions Zoom Continuous Scan File Name Entry 2 Job Finish Notice Close Use [ ] or [ 10:10 100% Off 3/4 doc Off Add/Edit Shortcut ] to scroll up and down. For details, refer to the machine's Operation Guide - Kyocera FS-6530MFP | Fax System (U) Operation Guide Rev-4.2012.3 - Page 77
Ext Address Book One Touch Key Favorites GB0669_00 GB0673_02 Ready to send. Functions Zoom Continuous Scan 2 File Name Entry Job Finish Notice Close Use [ ] or [ 10:10 100% Off 3/4 doc Off Add/Edit Shortcut ] to scroll up and down. For details, refer to the machine's Operation Guide. 4-23 - Kyocera FS-6530MFP | Fax System (U) Operation Guide Rev-4.2012.3 - Page 78
Reception ...5-4 Flow of reception ...5-4 Canceling reception (Disconnection of communication 5-6 Manual Reception ...5-7 Flow of reception ...5-7 Fax reception functions ...5-8 Fax reception settings ...5-9 Duplex Print Output ...5-9 2 in 1 Print ...5-9 Batch Print ...5-9 Reduced Reception - Kyocera FS-6530MFP | Fax System (U) Operation Guide Rev-4.2012.3 - Page 79
the functions of the connected answering machine. Therefore, when the user is absent, the other party can leave a message on the answering machine. Manual Reception Manual This method allows you to receive faxes by pressing [Manual 5-7 RX] after confirming that the telephone line has connected - Kyocera FS-6530MFP | Fax System (U) Operation Guide Rev-4.2012.3 - Page 80
GB0316_00 2 Select the reception method. System Menu/Counter. Reception - Reception Mode Auto (Normal) Auto (FAX/TEL) Auto (Answering Machine) Manual 10:10 1/1 Cancel OK GB0337_00 For FAX Automatic Reception, select [Auto (Normal)]. 10:10 2ring(s) Auto(Normal) 3/3 55 Off < Back GB0327_02 - Kyocera FS-6530MFP | Fax System (U) Operation Guide Rev-4.2012.3 - Page 81
can be held varies with the output tray. Refer to the machine's Operation Guide. When the number of sheets to be printed exceeds the number of sheets receive faxes (memory reception). NOTE The output tray for received faxes can be set. For details, refer to Default fax settings on page 9-2. 5-4 - Kyocera FS-6530MFP | Fax System (U) Operation Guide Rev-4.2012.3 - Page 82
machine returns to the printable state, printing starts. During memory reception, FAX Reception Printing Jobs are displayed on Printing Jobs of the Status screen. To print the received originals, supply paper or remove jammed paper. For the Status screen, refer to the machine's Operation Guide. 5-5 - Kyocera FS-6530MFP | Fax System (U) Operation Guide Rev-4.2012.3 - Page 83
communication, use the following procedure. 1 Press the Status/Job Cancel key. 2 Disconnection of communication. Status/Job Cancel. Status Printer 1 Running 10:10 FAX Toner Status Waiting 3/4 OK Status/Job Cancel. FAX Receiving... Paper Status No Paper Pause All Print Jobs Menu Use - Kyocera FS-6530MFP | Fax System (U) Operation Guide Rev-4.2012.3 - Page 84
a call, it rings. 2 Press [On Hook]. Ready to send. FAX On Hook Chain Direct Recall 10:10 Dest. : Check Add Dest. Address Book Functions Ext Address Book One Touch Key Favorites Press [On Hook] to establish the connection. 3 Press [Manual RX]. Ready to send. On Hook 10:10 GB0669_00 - Kyocera FS-6530MFP | Fax System (U) Operation Guide Rev-4.2012.3 - Page 85
Print X page 5-9 Batch Print X page 5-9 Reduced Reception X page 5-9 Reception Date/Time X page 5-9 Media Type for Print Output X page 5-10 PBX Setting (Europe only) X page 1-12 Memory Forwarding X page 6-2 Sub Address Box Function X page 6-13 Polling Communication X page 6-26 Encryption X page 6-36 - Kyocera FS-6530MFP | Fax System (U) Operation Guide Rev-4.2012.3 - Page 86
. Off Do not print on both sides. For more information about configuring settings, refer to Default fax settings on page 9-2. 2 in 1 Print When you receive a multi-page Statement or A5 size original, this function prints 2 pages of the original at a time on one Letter or A4 size sheet of paper - Kyocera FS-6530MFP | Fax System (U) Operation Guide Rev-4.2012.3 - Page 87
be used for print output of the received fax. Supported paper types All Media Types, Plain, Vellum, Rough, Recycled, Bond, Color, Thick, High Quality, Custom 1-8 For more information about configuring settings, refer to Default fax settings on page 9-2. Setting the cassette for the print output - Kyocera FS-6530MFP | Fax System (U) Operation Guide Rev-4.2012.3 - Page 88
Receiving Faxes > Fax reception settings 3 Selecting the paper type. System Menu/Counter. Cassette/MP Tray Preprinted 3 Cancel OK GB0137_00 GB0221_00 4 Set the paper type. Configure paper settings for fax reception. When selecting the paper type, select the same paper type as you selected in - Kyocera FS-6530MFP | Fax System (U) Operation Guide Rev-4.2012.3 - Page 89
42 Network FAX ...6-43 Flow of Network FAX Sending ...6-43 Flow of Network FAX Receiving ...6-43 Setup ...6-44 Installing the Network Fax Driver ...6-45 Basic Transmission ...6-47 Configuring the Driver Default Settings 6-50 Changing Transmit Settings ...6-54 Using Cover Pages ...6-58 Cover Page - Kyocera FS-6530MFP | Fax System (U) Operation Guide Rev-4.2012.3 - Page 90
all received documents will be forwarded to the specified destination. You can forward the document to other fax machines or Sub Address Boxes, or for e-mail transmission or folder (SMB or FTP) transmission. Setting Forwarding Use the procedure below to set forwarding. 1 Display the screen. 1 Use - Kyocera FS-6530MFP | Fax System (U) Operation Guide Rev-4.2012.3 - Page 91
from Address Book 1 Press [Address Book] or [Ext. Address Book]. 2 Select the destination(individual) you want to register as a forwarding destination. Entering Forwarding Destination Directly 1 Press [Address Entry (FAX)], [Address Entry (Email)], [Address Entry (Folder)]. 2 Enter the address to - Kyocera FS-6530MFP | Fax System (U) Operation Guide Rev-4.2012.3 - Page 92
Using Convenient Fax Functions > Memory Forwarding If [Address Entry (E-mail)] or [Address Entry (Folder)] is selected for the forwarding destination, refer to the Operation Guide for the machine to enter the address. NOTE For details on character entry, refer to Character Entry Method on page 11 - Kyocera FS-6530MFP | Fax System (U) Operation Guide Rev-4.2012.3 - Page 93
> Memory Forwarding To delete System Menu/Counter. FAX - Forward Settings Forwarding Forward Destination File Format 1 ] to scroll up and down. 10:10 Document Box 3/5 2 FAX Favorites/Application System Menu/Counter. FAX 3 Forward Settings GB0054_02 10:10 2/2 < Back GB0316_01 6-5 - Kyocera FS-6530MFP | Fax System (U) Operation Guide Rev-4.2012.3 - Page 94
on the 24 hours system. File Format Setting If you are sending the file as an E-mail attachment or transferring it to a folder (SMB or FTP), select PDF, TIFF, or XPS as the file format. 1 Display the screen. 1 Use [ ] or [ System Menu/Counter. System Menu Send ] to scroll up and down. 10:10 - Kyocera FS-6530MFP | Fax System (U) Operation Guide Rev-4.2012.3 - Page 95
. Forward Settings - File Format 2 PDF TIFF XPS Select [PDF], [TIFF], or [XPS]. If PDF is selected, select [Off], [PDF/A-1a], or [PDF/A-1b]. 10:10 1/1 Cancel OK File Separation When sending by e-mail transmission, folder (SMB) transmission, or folder (FTP) transmission, specify whether File - Kyocera FS-6530MFP | Fax System (U) Operation Guide Rev-4.2012.3 - Page 96
Menu Send ] to scroll up and down. 10:10 Document Box 3/5 2 FAX Favorites/Application System Menu/Counter. FAX 3 Forward Settings GB0054_02 10:10 2/2 2 Configure the function. System Menu/Counter. FAX - Forward Settings E-mail Subject Add. Info. FTP Encrypted TX 1 Print Schedule - Kyocera FS-6530MFP | Fax System (U) Operation Guide Rev-4.2012.3 - Page 97
settings. For details, refer to the Operation Guide for the machine. 1 Display the screen. 1 Use [ ] or [ System Menu/Counter. System Menu Send ] to scroll up and down. 10:10 Document Box 3/5 2 FAX Favorites/Application System Menu/Counter. FAX 3 Forward Settings GB0054_02 10:10 - Kyocera FS-6530MFP | Fax System (U) Operation Guide Rev-4.2012.3 - Page 98
. 1 Display the screen. 1 Use [ ] or [ System Menu/Counter. System Menu Send ] to scroll up and down. 10:10 Document Box 3/5 2 FAX Favorites/Application System Menu/Counter. FAX 3 Forward Settings GB0054_02 10:10 2/2 GB0316_01 < Back 2 Configure the function. System Menu/Counter - Kyocera FS-6530MFP | Fax System (U) Operation Guide Rev-4.2012.3 - Page 99
System Menu/Counter. FAX - Forward Settings File refer to Character Entry Method on page 11-2. Please note that when you folder (SMB) transmission and folder ], and set [None] or [FAX No.] for sender name information addition pdf doc (file name) + 6-digit job number + year/month/day/ - Kyocera FS-6530MFP | Fax System (U) Operation Guide Rev-4.2012.3 - Page 100
to the machine's Operation Guide for information on the network settings. Accessing Command Center RX 1 Display Command Center RX 1 Open the web browser. 2 In the Address or Location bar, enter the machine's IP address as the URL, e.g. 192.168.48.21/. The web page displays basic information about - Kyocera FS-6530MFP | Fax System (U) Operation Guide Rev-4.2012.3 - Page 101
Use the numbers from 0 to 9, ' (space)', and '#' and '*' characters to enter a sub address of up to 20 digits. When the machine receives faxes, a sub address is used to specify the Sub Address Box. Sub Address Password Use the numbers from 0 to 9, alphabets, ' (space)', and '#' and '*' characters to - Kyocera FS-6530MFP | Fax System (U) Operation Guide Rev-4.2012.3 - Page 102
Using Convenient Fax Functions > Sub Address Box Function Registering a Sub Address Box Up to 20 Sub Address Boxes can be registered. NOTE If user login administration is enabled, you can only edit destinations in the Address Book by logging in with administrator privileges. Sub Address Boxes can - Kyocera FS-6530MFP | Fax System (U) Operation Guide Rev-4.2012.3 - Page 103
GB0296_00 GB0305_01 Using Convenient Fax Functions > Sub Address Box Function 2 Set the owner Document Box. Add - Confirmation Box Name Box Box No. Auto Sub Address 1111 Owner User A Cancel 10:10 1 1/2 < Back Save Document Box. Owner 2 Local User Network User No Owner 10:10 - Kyocera FS-6530MFP | Fax System (U) Operation Guide Rev-4.2012.3 - Page 104
Using Convenient Fax Functions > Sub Address Box Function Up to 16 digits can be entered for the box password. Numbers from 0 to 9, alphabetical letters, spaces, "#", and "*" can be used. The password is required when printing the files from the box. NOTE If user accounting is turned on but an [ - Kyocera FS-6530MFP | Fax System (U) Operation Guide Rev-4.2012.3 - Page 105
GB0829-00 Using Convenient Fax Functions > Sub Address Box Function 2 Changing/Deleting Changing 1 Select the box Document Box. Sub Address Box 10:10 Box Method on page 11-2. 3 Change the box number. Document Box. Box:Box Box Name Box Box No. 01 Sub Address 1111 Owner User A Cancel - Kyocera FS-6530MFP | Fax System (U) Operation Guide Rev-4.2012.3 - Page 106
GB0662-01 Using Convenient Fax Functions > Sub Address Box Function 4 Change the sub address. Document Box. Box:Box Box Name Box Box No. 01 Sub Address 1111 Owner User A Cancel < Back 10:10 1/2 1 Save Document Box. Sub Address 2 1111 Space 10:10 Backspace 3 Cancel OK GB0830_00 - Kyocera FS-6530MFP | Fax System (U) Operation Guide Rev-4.2012.3 - Page 107
Print GB0656_01 NOTE When the password is set to a Sub Address Box, you need to enter the password in the following situations: If user login is disabled If user login is enabled but the Sub Address Box has been selected by another user when you login with user privileges 3 Print Ready to print - Kyocera FS-6530MFP | Fax System (U) Operation Guide Rev-4.2012.3 - Page 108
Box. Sub Address Box 10:10 Box 1 1/1 Menu Cancel OK Next > GB0656_01 Document Box. Box:Box doc00006420100908144604 10:10 2 1/1 Menu Cancel < Back Print Document Box. File: doc00006420100908144604 File Name doc00006420100908144604 Number of Pages 1 page Resolution 200x100dpi - Kyocera FS-6530MFP | Fax System (U) Operation Guide Rev-4.2012.3 - Page 109
GB0051_00 GB0657_00 Using Convenient Fax Functions > Sub Address Box Function Deleting Originals after Printing from a Sub Address Box To automatically delete the originals printed form the Sub Address Box, use the following operation. 1 Display the screen. 1 Document Box. Box 10:10 Job Box 2 - Kyocera FS-6530MFP | Fax System (U) Operation Guide Rev-4.2012.3 - Page 110
which the list of Box No.'s and Box names of the registered Sub Address Boxes are described. When there are originals in the Sub Address Boxes, the number of pages is displayed. NOTE The list can be printed when user login has been enabled and the machine is logged in with administrator privileges - Kyocera FS-6530MFP | Fax System (U) Operation Guide Rev-4.2012.3 - Page 111
, check that a sub address and password have been set in the receiving system in advance. Encrypted transmission cannot be used in sub address transmission. For the setting method when the machine receives originals, refer to Sub Address Box Function on page 6-13. 1 Press the FAX key. 2 Place the - Kyocera FS-6530MFP | Fax System (U) Operation Guide Rev-4.2012.3 - Page 112
Detail Settings Backspace GB0703_00 Menu Next Dest. Cancel OK 2 Enter the sub address. FAX - Sub Address Sub Address Password 10:10 1 1111 ********** 1/1 Cancel OK Ready to send. Sub Address - Sub Address 2 1111 Space 10:10 Backspace 3 Cancel OK GB0170_00 GB0169_02 You can use - Kyocera FS-6530MFP | Fax System (U) Operation Guide Rev-4.2012.3 - Page 113
5 Send Start. Ready to send. FAX 10:10 On Hook Sub Address Detail Settings 2 1234567890 Pause Space Backspace is displayed for the entered FAX number. Re-enter the same FAX number and press [OK]. For details, refer to Entry Check for New Dest. in the Operation Guide for the machine. 6-25 - Kyocera FS-6530MFP | Fax System (U) Operation Guide Rev-4.2012.3 - Page 114
own circumstances. This machine supports both polling transmission and (Refer to Deleting Originals After Polling Transmission on page 6-26.) NOTE You can store up to 10 Document Box FAX ] to scroll up and down. 10:10 3/5 Favorites/Application System Menu/Counter. Document Box Sub Address Box Job - Kyocera FS-6530MFP | Fax System (U) Operation Guide Rev-4.2012.3 - Page 115
Display the screen. 1 Use [ ] or [ System Menu/Counter. System Menu Send 2 Document Box FAX ] to scroll up and down. 10:10 3/5 Favorites/Application System Menu/Counter. Document Box Sub Address Box Job Box 3 Polling Box GB0054_02 10:10 1/1 < Back 2 Configure the function. System Menu - Kyocera FS-6530MFP | Fax System (U) Operation Guide Rev-4.2012.3 - Page 116
10:10 Job Box Removable Memory 1/1 1 Sub Address Box Polling Box Document Box. Polling Box test Menu 10:10 1/1 2OK Cancel Store File GB0051_00 4 Select the functions Ready to store in Box. Store File 10:10 2-sided/ Book 1-sided Scan Resolution 200x200dpi Fine Density Normal 0 File - Kyocera FS-6530MFP | Fax System (U) Operation Guide Rev-4.2012.3 - Page 117
Zoom Select the enlarged/reduced default when paper size/ sending size changed after the originals set. Continuous Scan Allows you to divide originals refer to Sending Faxes on page 4-1 or the machine's Operation Guide. 5 Start storing. Press the Start key. The originals are scanned and stored - Kyocera FS-6530MFP | Fax System (U) Operation Guide Rev-4.2012.3 - Page 118
. (On this machine, the sub address and sub address password.) Sub Address: 3333 External FAX IMPORTANT The recipient's machine must also be equipped with a sub address bulletin board function. Some fax machines cannot store originals and some do not support polling transmission. Check both the - Kyocera FS-6530MFP | Fax System (U) Operation Guide Rev-4.2012.3 - Page 119
the Start key. The operations for reception begin. NOTE When On is selected in Entry Check for New Dest., a confirmation screen is displayed for the entered FAX number. Re-enter the same FAX number and press [OK]. For details, refer to Entry Check for New Dest. in the Operation Guide for the machine - Kyocera FS-6530MFP | Fax System (U) Operation Guide Rev-4.2012.3 - Page 120
For Entering the Destination on page 3-1. NOTE You can select destinations using a combination of numeric keys input, One-touch keys selection and selection from the Address Book containing registered sub addresses. 4 Press the Start key. Press the Start key. The operations for reception begin. NOTE - Kyocera FS-6530MFP | Fax System (U) Operation Guide Rev-4.2012.3 - Page 121
GB0051_00 Using Convenient Fax Functions > Polling Communication Printing from a Polling Box Use this procedure to print an original stored in a Polling box. 1 Display the screen. 1 Document Box. Box Job Box Sub Address Box Removable Memory 2 Polling Box 10:10 1/1 2 Select the original. - Kyocera FS-6530MFP | Fax System (U) Operation Guide Rev-4.2012.3 - Page 122
2 Sub Address Box Polling Box 2 Select the original. Document Box. Polling Box 10:10 doc00006520100908150414 doc00006620100908151210 1/1 Menu Cancel Store File Document Box. File: doc00006420100908144604 File Name doc00006420100908144604 Number of Pages 1 page Resolution 200x100dpi - Kyocera FS-6530MFP | Fax System (U) Operation Guide Rev-4.2012.3 - Page 123
Transmitted File is set to [On], originals are automatically deleted following polling transmitted. (Refer to page 6-26.) 1 Display the screen. 1 Document Box. Box Job Box Sub Address Box Removable Memory 2 Polling Box 10:10 1/1 2 To delete Document Box. Polling Box doc00006520100908150414 - Kyocera FS-6530MFP | Fax System (U) Operation Guide Rev-4.2012.3 - Page 124
order to use encryption communication, the fax of the other party needs to be Encrypt Decrypt Scan originals Encryption Key No. in reception setting ― (B) 2 digits Reference page 6-36 6-36 6-39 6-39 ― 6-42 * is required when registering the Address Book used for encryption communication - Kyocera FS-6530MFP | Fax System (U) Operation Guide Rev-4.2012.3 - Page 125
. 1 Use [ ] or [ System Menu/Counter. System Menu Send ] to scroll up and down. 10:10 Document Box 2 FAX 3/5 Favorites/Application GB0054_02 GB0317_00 GB0057_50 System Menu/Counter. FAX TX/RX Common Transmission 3 Reception TX/RX Restriction < Back 10:10 1/2 System Menu/Counter - Kyocera FS-6530MFP | Fax System (U) Operation Guide Rev-4.2012.3 - Page 126
Key 1 Display the screen. 1 Use [ ] or [ System Menu/Counter. System Menu Send ] to scroll up and down. 10:10 Document Box 2 FAX 3/5 Favorites/Application GB0054_02 System Menu/Counter. FAX TX/RX Common Transmission Reception TX/RX Restriction 3 < Back 10:10 1/2 System Menu/Counter - Kyocera FS-6530MFP | Fax System (U) Operation Guide Rev-4.2012.3 - Page 127
to Registering an Encryption Key on page 6-36. 2 Press the FAX key. 3 Place the originals. 4 Specifying destination. Ready to send. FAX On Hook Chain Direct 10:10 Dest. : 1 Check Recall Add Dest. Ready to send. FAX On Hook 2 1234567890 Pause Sub Address Space 10:10 Detail Settings - Kyocera FS-6530MFP | Fax System (U) Operation Guide Rev-4.2012.3 - Page 128
Encryption 5 Turn on encrypted transmission. 1 Display the screen. Ready to send. FAX On Hook Sub Address 1234567890 Pause Space 10:10 1 Detail Settings Backspace GB0703_00 Menu Next Dest. Cancel registering an encryption key, refer to Registering an Encryption Key on page 6-36. 6-40 - Kyocera FS-6530MFP | Fax System (U) Operation Guide Rev-4.2012.3 - Page 129
No.:0000 2 㪦㪢 GB0174_02 Press [OK]. 6 Send Start Ready to send. FAX:1234567890 10:10 Sub Address Detail Settings 2 Pause Space Menu Backspace 1 Cancel OK GB703_03 Press the Start key key. For details, refer to Confirmation Screen of Destinations on page 8-12. GB0168_02 6-41 - Kyocera FS-6530MFP | Fax System (U) Operation Guide Rev-4.2012.3 - Page 130
Fax Functions > Encryption Setting the Encrypted Reception To conduct encryption communication operating page 6-36. 2 Display the screen. 1 Use [ ] or [ System Menu/Counter. System Menu Send ] to scroll up and down. 10:10 Document Box 3/5 2 FAX Favorites/Application System Menu/Counter. FAX - Kyocera FS-6530MFP | Fax System (U) Operation Guide Rev-4.2012.3 - Page 131
a desired destination. • Addition of a cover page. • Transmission and printing can be done simultaneously. • E-mail reporting of the transmission result. • Sub address transmission is available. • Operation is as simple as printing. Flow of Network FAX Sending Network FAX sending is performed in the - Kyocera FS-6530MFP | Fax System (U) Operation Guide Rev-4.2012.3 - Page 132
Using Convenient Fax Functions > Network FAX Setup Flow of Setup The following preparation is needed before using Network FAX. Connection to a PC Connect the machine to a PC using the network cable. For details, refer to the machine's Operation Guide. Machine Registration Using the memory - Kyocera FS-6530MFP | Fax System (U) Operation Guide Rev-4.2012.3 - Page 133
Network Fax Driver The procedure for installing the Network Fax Driver is explained below. (The screens in Windows 7 are shown.) NOTE Plug and Play is disabled on this device when in Sleep. Wake the device from Low Power Mode or Sleep before continuing. Installation on Windows must be done by a user - Kyocera FS-6530MFP | Fax System (U) Operation Guide Rev-4.2012.3 - Page 134
Using Convenient Fax Functions > Network FAX 4 Select FAX Driver. 1 Remove the checkmark. 2 3 Remove the [KX DRIVER] checkmark, select the [FAX Driver] checkbox, and click [Next >]. NOTE If the machine is not turned on, it will not be found. If the machine is not found, make sure - Kyocera FS-6530MFP | Fax System (U) Operation Guide Rev-4.2012.3 - Page 135
Using Convenient Fax Functions > Network FAX Basic Transmission 1 Create the document to be sent. 1 settings in the Print dialog box. 1 Select the product name of the machine (Kyocera XXX XXX NW-FAX) to be used in the printer name list. 2 Set the print range and other settings. NOTE Make sure that - Kyocera FS-6530MFP | Fax System (U) Operation Guide Rev-4.2012.3 - Page 136
Using Convenient Fax Functions > Network FAX 3 Select settings on the FAX Setting tab. 1 Specify fax settings such as the original size on the FAX Setting tab, and click [OK]. 1 2 For detailed information on the settings on the tab, refer to Configuring the Driver Default Settings on page 6-50. 2 - Kyocera FS-6530MFP | Fax System (U) Operation Guide Rev-4.2012.3 - Page 137
> Network FAX 6 Set the destination. 1 Use the keyboard to enter the destination fax number in the [Address Setting] tab. 2 Click [Add to Destination List]. The destination information will appear in the address list. To send to multiple destinations, repeat this operation. 3 To use the Address Book - Kyocera FS-6530MFP | Fax System (U) Operation Guide Rev-4.2012.3 - Page 138
Fax Functions > Network FAX Configuring the Driver Default Settings Use the FAX Setting tab of the print settings screen to set the original size and other transmission conditions. 1 Display the screen. 1 From the start button, click [Control Panel], [Hardware and Sound], and [Devices and Printers - Kyocera FS-6530MFP | Fax System (U) Operation Guide Rev-4.2012.3 - Page 139
printers. 2 Right click the name of the machine to be used as the network fax and select Printing preferences from the resulting drop-down menu. Click the FAX TX Setting button in the Printing Preferences window. (1) Sending Options Tab Item FAX fax machine itself, the transmission operation will be - Kyocera FS-6530MFP | Fax System (U) Operation Guide Rev-4.2012.3 - Page 140
Fax Functions > Network FAX (2) Cover Page Tab Item Attach Cover Page checkbox (3) Authentication Tab Description Check the checkbox when you want to add a cover page to your transmission. Item User Login checkbox Job Accounting checkbox Description If the fax machine is set to User Login - Kyocera FS-6530MFP | Fax System (U) Operation Guide Rev-4.2012.3 - Page 141
Using Convenient Fax Functions > Network FAX (4) Sender Information Tab Enter your own information into fields explained below to send a cover page with your faxes. Item Company Department Name Telephone Number FAX Number E-Mail Address Description A maximum of 64 characters can be entered. A - Kyocera FS-6530MFP | Fax System (U) Operation Guide Rev-4.2012.3 - Page 142
fax machine's Address Book, Windows Address Book, and the Address Book for the Network FAX data file (.fdt). When using the fax machine's Address Book, the party must be registered in the fax machine's Address Book. Refer to Registering Destinations in the Address Book on page 2-2. 1 To enter a fax - Kyocera FS-6530MFP | Fax System (U) Operation Guide Rev-4.2012.3 - Page 143
Using Convenient Fax Functions > Network FAX 3 Select the Destination. The destinations registered in the Address Book are shown in on the list item by which you want to sort the list (No., Recipient, Fax Number, Address). U or V are displayed next to the sorted items. In addition, the corresponding - Kyocera FS-6530MFP | Fax System (U) Operation Guide Rev-4.2012.3 - Page 144
Using Convenient Fax Functions > Network FAX (2) Subaddress-Based Communication NOTE In order to conduct sub address communication, the other party's system also needs to be equipped with sub address communication functions of the same type. 1 Open the Option Settings dialog box. Click on the Option - Kyocera FS-6530MFP | Fax System (U) Operation Guide Rev-4.2012.3 - Page 145
Using Convenient Fax Functions > Network FAX (3) Cover Page Settings A Cover Page can be set as the first page of a fax transmission. In addition to the standard templates for Cover Pages, original templates can be created and used. To attach and transmit a Cover Page, place a check in the check box - Kyocera FS-6530MFP | Fax System (U) Operation Guide Rev-4.2012.3 - Page 146
Using Convenient Fax Functions > Network FAX Using Cover Pages Cover Page Selection (Transmission Settings) The Cover Page is attached to the fax and sent as the first page. About Cover Pages The Cover Page can be selected from a template. The Cover Page contains such destination information and - Kyocera FS-6530MFP | Fax System (U) Operation Guide Rev-4.2012.3 - Page 147
Using Convenient Fax Functions > Network FAX Attaching and Transmitting a Cover Page The procedure for attaching and transmitting a Cover Page is shown below. 1 Open the Transmit Settings dialog box. Perform Steps 1 to 7 of the Basic Transmission method given on page 6-47 to display the Transmit - Kyocera FS-6530MFP | Fax System (U) Operation Guide Rev-4.2012.3 - Page 148
Using Convenient Fax Functions > Network FAX 4 Add the destination to the destination list. 1 Add the sender information. Refer to (4) Sender Information Tab on page 6-53. Item Company Department Name Telephone Number FAX Number E-mail Address Description A maximum of 64 characters can be entered. - Kyocera FS-6530MFP | Fax System (U) Operation Guide Rev-4.2012.3 - Page 149
Convenient Fax Functions > Network FAX 5 Attach a Cover Page. Click on the Cover Page tab and place a check in the Attach Cover Page checkbox. 6 Select the Cover Page to be attached. Select a Cover Page template from the Cover Page Templates list. NOTE If the Cover Page is registered in the Default - Kyocera FS-6530MFP | Fax System (U) Operation Guide Rev-4.2012.3 - Page 150
Using Convenient Fax Functions > Network FAX 8 Edit the Message. 1 Click on the Edit Message button. 2 Enter the message to be added to the Cover Page and click on the OK button. Item Message Description A maximum of 1,000 characters can be entered. 9 Transmit. Click on the Send button to begin - Kyocera FS-6530MFP | Fax System (U) Operation Guide Rev-4.2012.3 - Page 151
Convenient Fax Functions > Network FAX Cover Page Registration (Default Settings) If the Cover Page is registered in the Default Settings, the action of selecting the Cover Page for each transmission can be omitted. Template Selection Select the Cover Page template to be registered in the Default - Kyocera FS-6530MFP | Fax System (U) Operation Guide Rev-4.2012.3 - Page 152
Using Convenient Fax Functions > Network FAX 4 Check the contents of the Cover Page. 1 Click on the Preview button. A preview of the the Edit Message button. 2 Enter the message to be added to the Cover Page and click on the OK button. A maximum of 1,000 characters can be entered. 6 Click on the OK - Kyocera FS-6530MFP | Fax System (U) Operation Guide Rev-4.2012.3 - Page 153
Using Convenient Fax Functions > Network FAX Sender Information Registration Please register the sender information to be included on the Cover Page. NOTE For information regarding the registration method, refer to (4) Sender Information Tab on page 6-53. Creating New Cover Page Templates Perform - Kyocera FS-6530MFP | Fax System (U) Operation Guide Rev-4.2012.3 - Page 154
Using Convenient Fax Functions > Network FAX 2 Enter the characters. From the Menu bar, click the inserted information will fit in the field box. NOTE When a fax is transmitted, the information entered in the Default Settings and Destination Settings will automatically be entered in the fields. The - Kyocera FS-6530MFP | Fax System (U) Operation Guide Rev-4.2012.3 - Page 155
name Sender information sender name Sender information FAX number Sender information telephone number Message entered in the Cover Page tab 4 Position the figures, textboxes, etc., to create a Cover Page. NOTE For information regarding the operation method, refer to Help. 5 From the Menu - Kyocera FS-6530MFP | Fax System (U) Operation Guide Rev-4.2012.3 - Page 156
Using Convenient Fax Functions > Network FAX Transmission Control Perform the following procedure when you want to use your computer to verify the status of a fax transmission currently being processed, or to actually terminate that transmission. Once a fax transmission starts being processed, a - Kyocera FS-6530MFP | Fax System (U) Operation Guide Rev-4.2012.3 - Page 157
7 Using a Connected Telephone This chapter explains the following topics: FAX/TEL Auto Switch Reception ...7-2 FAX/Answering Machine Auto Switch Reception 7-4 DRD Reception (Available for inch versions only 7-6 Manual Send ...7-8 Manual Reception ...7-9 Remote Switch Function ...7-10 7-1 - Kyocera FS-6530MFP | Fax System (U) Operation Guide Rev-4.2012.3 - Page 158
the machine makes a ringing tone urging the user to respond. IMPORTANT In order to use FAX/TEL Auto Switch Reception, it is necessary to can receive the fax. NOTE At the end of the conversation, you can also manually receive the originals. (Refer to Manual Reception on page 7-9.) Preparation: Refer - Kyocera FS-6530MFP | Fax System (U) Operation Guide Rev-4.2012.3 - Page 159
. NOTE If you do not lift the handset within 30 seconds, the machine switches to fax reception. 2 Talk to the other party. NOTE At the end of the conversation, you can manually receive the originals. (Refer to Manual Reception on page 7-9.) When the call is from a fax The machine starts receiving - Kyocera FS-6530MFP | Fax System (U) Operation Guide Rev-4.2012.3 - Page 160
as responding to messages, refer to the Operation Guide of each answering machine. Set the number of rings to be made by the machine more than the number of rings to be made by the answering machine. (Refer to Reception on page 9-7.) Flow of reception FAX When the other party has sent originals - Kyocera FS-6530MFP | Fax System (U) Operation Guide Rev-4.2012.3 - Page 161
telephone set is still making the ringing tone, the machine enters a status the same as manual reception. (Refer to Manual Reception on page 7-9.) 2 The answering machine responds. When the call is from a telephone, but the user is absent The answering machine plays a response message, and starts - Kyocera FS-6530MFP | Fax System (U) Operation Guide Rev-4.2012.3 - Page 162
: Refer to Reception on page 9-8 to select [Auto (DRD)]. 1 The telephone rings. When a call comes in, the telephone will ring. NOTE If you lift the handset while the telephone is still ringing, the machine will deal with the call in the same manner as standard Manual FAX Reception. For details - Kyocera FS-6530MFP | Fax System (U) Operation Guide Rev-4.2012.3 - Page 163
using the predetermined ring pattern. When the call is from a telephone Lift the handset and speak with the other party. When the conversation is over, fax reception can be initiated manually. When the call is from a fax Once the ringing tone stops, fax reception will start automatically. 7-7 - Kyocera FS-6530MFP | Fax System (U) Operation Guide Rev-4.2012.3 - Page 164
> Manual Send Manual Send When you want to talk to the person at the receiving system or the receiving system needs to switch to fax, use 1 Ready to send. FAX 2 On Hook Chain Direct Recall 10:10 Dest. : Check Add Dest. Address Book Functions Ext Address Book One Touch Key Favorites - Kyocera FS-6530MFP | Fax System (U) Operation Guide Rev-4.2012.3 - Page 165
If a person answers, you can talk to that person. 4 Press [On Hook]. Ready to send. 1 FAX 2 On Hook Chain Direct Recall 10:10 Dest. : Check Add Dest. Address Book Functions Ext Address Book One Touch Key Favorites GB0669_00 5 Press [Manual RX]. Ready to send. On Hook 10:10 GB0694_01 - Kyocera FS-6530MFP | Fax System (U) Operation Guide Rev-4.2012.3 - Page 166
switch dial is set to 55 at the factory. The remote switch dial number can be changed. Refer to Reception on page 9-7. Using the Remote Switch Dial To start fax reception by operation from the connected telephone set, use the following operation. 1 The connected telephone set makes a ringing tone - Kyocera FS-6530MFP | Fax System (U) Operation Guide Rev-4.2012.3 - Page 167
...8-4 Send Result Reports ...8-4 Report for Job Canceled before Sending 8-5 FAX RX Result Reports ...8-6 Activity Report ...8-7 Printing Activity Reports ...8-7 Automatic Printout ...8-8 Status Page ...8-9 Reporting FAX Receipt Result by E-mail ...8-10 Confirmation Screen of Destinations ...8-12 - Kyocera FS-6530MFP | Fax System (U) Operation Guide Rev-4.2012.3 - Page 168
operation (No Print Output or Error Only is also optionally available.) Activity report Report printing Latest 50 send or receipt Any time, and automatic 8-7 results printout after every 50 sending/receiving Status page Report printing Registration status of Local Any time 8-9 FAX - Kyocera FS-6530MFP | Fax System (U) Operation Guide Rev-4.2012.3 - Page 169
ID. For details of the job history check, refer to the machine's Operation Guide. Displaying Job Log Screen 1 Display the screen. Status/Job Cancel. 10:10 1 Status 2 Print Job Log Send Job Log 2/4 Store Job Log GB0052_01 Scanner Use [ ] or [ Pause All Print Jobs ] to scroll up and down - Kyocera FS-6530MFP | Fax System (U) Operation Guide Rev-4.2012.3 - Page 170
whether the fax was sent successfully. You can also print the transmitted image in the send result report. 1 Display the screen. 1 System Menu/Counter. System Menu Quick Setup Wizard Language 2 Report Counter 10:10 1/5 System Menu/Counter. Report Report Print 3 Admin Report Settings - Kyocera FS-6530MFP | Fax System (U) Operation Guide Rev-4.2012.3 - Page 171
Registration Status > Setup Wizard Language 2 Report Counter Use [ ] or [ ] to scroll up and down. 10:10 1/5 System Menu/Counter. Report Report Print 3 Admin Report - Send Result Report E-mail/Folder FAX 5 Canceled before Sending 10:10 Error Only Error Only 1/1 Off < Back GB0570_00 - Kyocera FS-6530MFP | Fax System (U) Operation Guide Rev-4.2012.3 - Page 172
be notified by e-mail instead of checking the receipt result report. (Refer to Reporting FAX Receipt Result by E-mail on page 8-10.) 1 Display the screen. 1 System Menu/Counter. System Menu Quick Setup Wizard Language 2 Report Counter Use [ ] or [ ] to scroll up and down. 10:10 1/5 System - Kyocera FS-6530MFP | Fax System (U) Operation Guide Rev-4.2012.3 - Page 173
sent or received. Printing Activity Reports The latest 50 sent or received fax data are printed as a report. 1 Display the screen. 1 Status/Job Cancel. Status Printer 2 FAX Toner Status Paper Status Use [ ] or [ ] to scroll up and down. 10:10 Running Waiting 3/4 OK No Paper Pause All Print - Kyocera FS-6530MFP | Fax System (U) Operation Guide Rev-4.2012.3 - Page 174
report is printed out automatically after every 50 faxes sent or received. 1 Display the screen. 1 System Menu/Counter. System Menu Quick Setup Wizard Language 2 Report Counter 10:10 1/5 System Menu/Counter. Report Report Print 3 Admin Report Settings Result Report Setting Sending Log - Kyocera FS-6530MFP | Fax System (U) Operation Guide Rev-4.2012.3 - Page 175
Setup Wizard Language 2 Report Counter System Menu/Counter. Report 3 Report Print Admin Report Settings Result Report Setting Sending Log History GB0054_00 10:10 1/5 10:10 1/1 < Back 2 Print System Menu/Counter. Report - Report Print Status Page Font List Network Status Service Status - Kyocera FS-6530MFP | Fax System (U) Operation Guide Rev-4.2012.3 - Page 176
FAX RX Result Report setting is [On] or [Error and Forward Only]. For details, refer to FAX RX Result Reports on page 8-6. Fax error occurs or the received original is forwarded to other faxes and computers. 1 Display the screen. 1 System Menu/Counter. System Menu Quick Setup Wizard Language - Kyocera FS-6530MFP | Fax System (U) Operation Guide Rev-4.2012.3 - Page 177
GB0574_00 GB0398_01 Checking Transmission Results and Registration Status > Reporting FAX Receipt Result by E-mail 2 Select the destination. Select from the address book System Menu/Counter. RX Result Report - RX Result Report Type Print Report E-mail 1 Cancel 10:10 1/1 OK System Menu/Counter. - Kyocera FS-6530MFP | Fax System (U) Operation Guide Rev-4.2012.3 - Page 178
Registration Status > Confirmation Screen of Destinations Confirmation Screen of Destinations When selecting [On] for Dest. Check before Send, the confirmation screen of destinations appears after pressing the Start key. For details, refer to Dest. Check before Send in the machine's Operation Guide - Kyocera FS-6530MFP | Fax System (U) Operation Guide Rev-4.2012.3 - Page 179
Checking Transmission Results and Registration Status > Confirmation Screen of Destinations 3 Press [Check]. Check the destinations and press [Check]. Destinations Check 123 123 3333 3333 44444 44444 99999 Menu 99999 Cancel 10: - Kyocera FS-6530MFP | Fax System (U) Operation Guide Rev-4.2012.3 - Page 180
explains the following topics: Default fax settings ...9-2 Operation method ...9-2 System Menu Settings ...9-3 Report ...9-4 Cassette/MP Tray Settings ...9-5 Common Settings ...9-5 FAX ...9-6 Adjustment/Maintenance ...9-9 Transmission Restriction ...9-10 Registering Permit FAX No...9-11 Changing and - Kyocera FS-6530MFP | Fax System (U) Operation Guide Rev-4.2012.3 - Page 181
in with administrator privileges. Refer to Adding a User in the machine's Operation Guide for the default login user name and password. Enter login user name and password. 10:10 Login User Name Login Password Menu Keyboard Keyboard Login GB0723_00 2 Configure the function. System Menu/Counter - Kyocera FS-6530MFP | Fax System (U) Operation Guide Rev-4.2012.3 - Page 182
than fax settings, refer to the Operation Guide for the machine. Item Report Cassette/MP Tray Settings Common Settings Document Box FAX Address Book/One Touch Date/Timer Adjustment/Maintenance Description Reference Page Print reports to check the machine settings and status. Default settings - Kyocera FS-6530MFP | Fax System (U) Operation Guide Rev-4.2012.3 - Page 183
. Report Print Item Status Page Description A status page provides information on a number of user setups. FAX-related information includes the Local FAX Number, Local FAX Name, fax line setting, etc. You can print it out as necessary. Refer to Status Page on page 8-9. Sub Address Box List You - Kyocera FS-6530MFP | Fax System (U) Operation Guide Rev-4.2012.3 - Page 184
operation. Sound Item Buzzer Job Finish FAX Speaker Volume FAX Monitor Volume Description Set options for buzzer sound during the machine operations (Maximum), [0] (Mute). Function Defaults Item FAX TX Resolution Description Select the default scanning resolution. Value: 400×400dpi Ultra Fine - Kyocera FS-6530MFP | Fax System (U) Operation Guide Rev-4.2012.3 - Page 185
Encryption on page 6-36. FAX Remote Diagnosis Remote Diagnostics ID If a problem arises with this machine and you contact our service representative, this feature enables our Service Center computer to access the machine over the phone and check the machine's status or look for problems. NOTE:To - Kyocera FS-6530MFP | Fax System (U) Operation Guide Rev-4.2012.3 - Page 186
item is included in the Quick Setup Wizard. Refer to Quick Setup Wizard (Fax Setup) on page 1-7. Set whether ECM TX is performed. ECM is a communication mode specified by the ITU-T (International Telecommunication Union) that retransmits data when an error occurs. Fax machines that have ECM mode - Kyocera FS-6530MFP | Fax System (U) Operation Guide Rev-4.2012.3 - Page 187
page 6-36. ECM RX RX Start Speed Set whether ECM RX is performed. ECM is a communication mode specified by the ITU-T (International Telecommunication Union) that retransmits data when an error occurs. Fax Normally this should be used with the default setting. TX/RX Restriction This function allows - Kyocera FS-6530MFP | Fax System (U) Operation Guide Rev-4.2012.3 - Page 188
computers or specify a number of copies. For details, refer to Memory Forwarding on page 6-2. Adjustment/Maintenance Adjust printing quality and conduct machine maintenance. Service Setting Item Description FAX Call Settings(Europe only) When using this machine in environment in which PBX for - Kyocera FS-6530MFP | Fax System (U) Operation Guide Rev-4.2012.3 - Page 189
on page 9-19.) • When the number was dialed using the Address Book or Onetouch keys, the last 4 digits • Register the Local FAX Numbers of the dialed number match the or Local FAX IDs of other parties. last 4 digits of the recipient's Local FAX Number. (Excludes manual transmissions - Kyocera FS-6530MFP | Fax System (U) Operation Guide Rev-4.2012.3 - Page 190
on the machine. Reception Restrictions. (Refer to Setting Reception Restriction on page 9-20.) * If there are no Reject FAX numbers registered, calls are only rejected from senders whose Local FAX Numbers (Indicates local FAX information entries, not the actual line numbers.) are not registered - Kyocera FS-6530MFP | Fax System (U) Operation Guide Rev-4.2012.3 - Page 191
or [Z] to move the cursor. Pressing [Backspace] deletes the character to the left of the cursor. 3 To register another permit fax number, repeat step 2. Changing and Deleting Permit FAX No. 1 Display the screen. 1 Use [ ] or [ System Menu/Counter. System Menu Send ] to scroll up and down. 10:10 - Kyocera FS-6530MFP | Fax System (U) Operation Guide Rev-4.2012.3 - Page 192
. you want to change, and enter the new number. NOTE For the procedure for entering a number, refer to Registering Permit FAX No. on page 9-11. Deleting System Menu/Counter. FAX - TX/RX Restriction TX Restriction RX Restriction 1 Permit No. List Permit ID List 10:10 Off Off 1/2 < Back System - Kyocera FS-6530MFP | Fax System (U) Operation Guide Rev-4.2012.3 - Page 193
1 Display the screen. 1 Use [ ] or [ System Menu/Counter. System Menu Send ] to scroll up and down. 10:10 Document Box 2 FAX 3/5 Favorites/Application System Menu/Counter. FAX TX/RX Common Transmission Reception 3 TX/RX Restriction < Back GB0054_02 10:10 1/2 GB0316_00 2 Add a Reject - Kyocera FS-6530MFP | Fax System (U) Operation Guide Rev-4.2012.3 - Page 194
10:10 Document Box 2 FAX 3/5 Favorites/Application System Menu/Counter. FAX TX/RX Common Transmission Change/Delete. Changing System Menu/Counter. FAX - TX/RX Restriction Reject No. List 4 Cancel OK GB0356_80 GB0357_80 5 Press [...] for Reject FAX No. you want to change, and enter the new - Kyocera FS-6530MFP | Fax System (U) Operation Guide Rev-4.2012.3 - Page 195
Reject 2/2 < Back Use [ ] or [ ] to scroll up and down. System Menu/Counter. TX/RX Restriction - Reject No. List 2 6543 Menu 10:10 3 1/1 End 4 Select Reject FAX No. you want to delete, and press [(Delete)] (the trash can icon). Registering Permit ID No. NOTE Up to 10 Permit ID numbers can be - Kyocera FS-6530MFP | Fax System (U) Operation Guide Rev-4.2012.3 - Page 196
List < Back 10:10 Off Off 1/2 System Menu/Counter. TX/RX Restriction - Permit ID List 1111 Menu 10:10 2 1/1 End GB0345_00 System Menu/Counter. Add - FAX ID 3 (0000 - 9999) 10:10 Cancel 4 OK Use [+]/[-] or the numeric keys to enter Permit ID No. (0000 to 9999), and press [OK]. 3 To - Kyocera FS-6530MFP | Fax System (U) Operation Guide Rev-4.2012.3 - Page 197
to change, and enter the new number. NOTE For the procedure for entering a number, refer to Registering Permit ID No. on page 9-16. Deleting System Menu/Counter. FAX - TX/RX Restriction TX Restriction RX Restriction Permit No. List 1 Permit ID List 10:10 Off Off 1/2 < Back System Menu/Counter - Kyocera FS-6530MFP | Fax System (U) Operation Guide Rev-4.2012.3 - Page 198
Send Restriction Restrict the other parties to which you send originals only to the ones registered in Permit FAX No. and Permit ID No. as well as the ones registered in the Address Book. To change the sending restriction, follow the steps below. 1 Display the screen. 1 Use [ ] or [ System Menu - Kyocera FS-6530MFP | Fax System (U) Operation Guide Rev-4.2012.3 - Page 199
Address Book. This mode also allows you to set a [Reject List] for Reception Restriction so that reception from senders on the list of Rejected FAX numbers or from senders whose Local FAX whose local fax number is not registered is allowed or rejected in Unknown Number Reception on page 9-21.) To - Kyocera FS-6530MFP | Fax System (U) Operation Guide Rev-4.2012.3 - Page 200
Use [ ] or [ System Menu/Counter. System Menu Send ] to scroll up and down. 10:10 Document Box 2 FAX 3/5 Favorites/Application System Menu/Counter. FAX TX/RX Common Transmission Reception 3 TX/RX Restriction < Back GB0054_02 10:10 1/2 GB0316_00 2 Configure the function. System Menu - Kyocera FS-6530MFP | Fax System (U) Operation Guide Rev-4.2012.3 - Page 201
a User in the machine's Operation Guide for the default login user name and password. 1 Display the screen. 1 Use [ ] or [ ] to scroll up and down. System Menu/Counter. System Menu 10:10 System 2 Date/Timer 5/5 Adjustment/Maintenance GB0054_04 System Menu/Counter. Date/Timer Panel Reset - Kyocera FS-6530MFP | Fax System (U) Operation Guide Rev-4.2012.3 - Page 202
Fax Settings > Unusable Time 2 Configure the function. Set the unusable time System Menu/Counter. Date/Timer - Unusable Time Off On 1 10:10 1/1 Cancel Code (0000 to 9999), and press [OK]. NOTE To use the machine temporarily during unusable time, enter the Unlock Code and press [Login]. 9-23 - Kyocera FS-6530MFP | Fax System (U) Operation Guide Rev-4.2012.3 - Page 203
Operation Guide. Communication modes subject to job accounting • Normal transmission • Delayed transmission • Broadcast transmission • Sub address transmission • Encrypted transmission • Manual send when dialed from this machine to the receiving system • Polling reception • Network FAX transmission - Kyocera FS-6530MFP | Fax System (U) Operation Guide Rev-4.2012.3 - Page 204
OK GB0723_00 If this screen is displayed during operations, press [Keyboard] to enter the login user name. Refer to Character Entry Method on page 11-2 for details on entering characters. GB0057_00 2 Enter the login password. Login User Name 2500 ABC A/a Input: 4 Limit: 64 Del. qwe - Kyocera FS-6530MFP | Fax System (U) Operation Guide Rev-4.2012.3 - Page 205
Fax Settings > Account Management 3 Log in. Enter login user name and password. Login User Name 2500 Login Password **** Menu 10:10 Keyboard Keyboard Login GB0723_01 NOTE If Network Authentication is selected as the user authentication method, either Local or Network can be selected as the - Kyocera FS-6530MFP | Fax System (U) Operation Guide Rev-4.2012.3 - Page 206
correct account ID. By pressing [Check Counter], you can refer to the number of pages printed and the number of pages scanned. 2 Log in. Enter the account ID. Enter the account ID. ******** 10:10 GB0725_01 Check Counter Login NOTE When the operation is completed, press the Logout key. 9-27 - Kyocera FS-6530MFP | Fax System (U) Operation Guide Rev-4.2012.3 - Page 207
10 Troubleshooting This chapter explains the following topics: Indicators During Sending/Receiving Operation 10-2 Responding to an Attention Indicator Flashes 10-2 Precautions When Turning Power OFF ...10-3 Messages ...10-4 Error Code List ...10-6 Troubleshooting ...10-9 10-1 - Kyocera FS-6530MFP | Fax System (U) Operation Guide Rev-4.2012.3 - Page 208
Troubleshooting > Indicators During Sending/Receiving Operation Indicators During Sending/Receiving Operation The Processing and Memory indicators show the fax transmission status. • The processing indicator blinks during fax transmission and reception. • The Memory indicator blinks when source data - Kyocera FS-6530MFP | Fax System (U) Operation Guide Rev-4.2012.3 - Page 209
Troubleshooting > Precautions When Turning Power OFF Precautions When Turning Power OFF To receive faxes with the power turned off, press the Power key on the operation panel. You cannot automatically receive a fax when the main power switch is turned off. Before turning off the main power switch, - Kyocera FS-6530MFP | Fax System (U) Operation Guide Rev-4.2012.3 - Page 210
repeat the operation. Is the fax machine turned on? Turn on the machine. 1-2 Does an error occur on the Clear the error and then perform 10-4 machine? transmission. Is the IP address of the machine Check the port setting in the Network FAX ― set in the Network FAX driver driver properties - Kyocera FS-6530MFP | Fax System (U) Operation Guide Rev-4.2012.3 - Page 211
machine? For network FAX transmission, install the ― Fax Kit. The phone receiver is off the Is the phone (commercially Hang up the handset. ― hook. available) connected to the machine off the hook? This driver don't correspond to the connected model. Is the Network FAX driver for this Check - Kyocera FS-6530MFP | Fax System (U) Operation Guide Rev-4.2012.3 - Page 212
of the sender or recipient machine. Page(s) not sent correctly. Send again. If you still have trouble, reduce TX Start Speed and send again. NOTE If the communication error occurs frequently, change the default setting of TX Start Speed in System Menu. Page(s) not received correctly. Ask the sender - Kyocera FS-6530MFP | Fax System (U) Operation Guide Rev-4.2012.3 - Page 213
the transmission speed and send again. NOTE If the communication error occurs frequently, change the default setting of RX Start Speed in System Menu. Communication error occurred during high-speed transmission. Send again. If you still have trouble, reduce TX Start Speed and send again. NOTE If the - Kyocera FS-6530MFP | Fax System (U) Operation Guide Rev-4.2012.3 - Page 214
Troubleshooting > Error Code List Error Code U04100 U04200 U04300 U04400 U04500 U05100 U05200 U05300 U14000 U14100 U19000 U19100 U19300 Possible Cause/Action Recipient machine is not equipped with a sub address box function, or the sub address does not match. Encrypted transmission was canceled - Kyocera FS-6530MFP | Fax System (U) Operation Guide Rev-4.2012.3 - Page 215
Troubleshooting > Troubleshooting Troubleshooting When a problem occurs, first check the following. If the problem persists, contact your dealer or service representative. Symptom Checkpoint Corrective Action Reference Page Cannot send document. Is the modular cord connected Connect the - Kyocera FS-6530MFP | Fax System (U) Operation Guide Rev-4.2012.3 - Page 216
> Troubleshooting Symptom Checkpoint Cannot output from a Sub Address Box. Is the box password been set? Cannot use polling reception. Is polling transmission being used correctly on the sending machine? Cannot use sub address bulletin board communication. Does the other party's fax machine - Kyocera FS-6530MFP | Fax System (U) Operation Guide Rev-4.2012.3 - Page 217
11 Appendix This chapter explains the following topics: Character Entry Method ...11-2 Specifications ...11-5 Menu Map ...11-7 Received FAX Sizes and Paper Priority (Inch Model 11-12 Received FAX Sizes and Paper Priority (Metric Model 11-15 11-1 - Kyocera FS-6530MFP | Fax System (U) Operation Guide Rev-4.2012.3 - Page 218
are available. If necessary, change the layout. For information on how to change layouts, refer to the machine's Operation Guide. QWERTY layout is used here as an example. You may use another layout following the same steps. Entry Screens Lower-case Letter Entry Screen 3 4 5 67 - Kyocera FS-6530MFP | Fax System (U) Operation Guide Rev-4.2012.3 - Page 219
Appendix > Character Entry Method Upper-case Letter Entry Screen Add - Name AB ABC A/a Input: 2 Limit: 32 Del. QW E R T Y U I O P ASDFGHJ KL _ Z X C V B N M~ GB0057_E02 Cancel < Back Next > Number/Symbol Entry Screen Add - Name 123 Symbol 䯹 Input: 3 Limit: 32 Del. 1234567890 +, - Kyocera FS-6530MFP | Fax System (U) Operation Guide Rev-4.2012.3 - Page 220
GB0057_E12 Appendix > Character Entry Method Entering Characters Follow the steps below to enter 'List A-1' for an example. 1 Enter 'List', (space). Add - Name L 1, 3 ABC A/a Input: 1 Limit: 32 Del. 2 Q W E R T Y U I O P ASDFGHJ KL _ Z X C V B N M~ Cancel < Back Next > Add - Name List - Kyocera FS-6530MFP | Fax System (U) Operation Guide Rev-4.2012.3 - Page 221
dpi Ultra (Ultra Fine) (16 dot/mm × 15.4 line/mm) 600 × 600 dpi 256 shades (Error diffusion) 100 keys Max. 100 destinations 700 sheets or more (when using ITU-T A4 #1) 9.5 MB (standard)(For fax transmission and reception) Sent result report, FAX RX result report, Activity report, Status page 11-5 - Kyocera FS-6530MFP | Fax System (U) Operation Guide Rev-4.2012.3 - Page 222
Password in the Network FAX Driver when User Login, is turn ON in the fax machine. Requires the input of an Account ID in the Network FAX Driver when Job Accounting, is turned ON in the fax machine. A format can be selected using the Network FAX Driver or a template can be created. Up to 1000 pages - Kyocera FS-6530MFP | Fax System (U) Operation Guide Rev-4.2012.3 - Page 223
's Operation Guide) Send Job Status (refer to the machine's Operation Guide) Store Job Status (refer to the machine's Operation Guide) Scheduled Job (page 4-19) Print Job Log (page 8-3) Send Job Log (page 8-3) Store Job Log (page 8-3) Scanner (refer to the machine's Operation Guide) Printer (refer - Kyocera FS-6530MFP | Fax System (U) Operation Guide Rev-4.2012.3 - Page 224
> Menu Map FAX Menu Manual RX (page 5-7) Outgoing FAX Log (page 8-7) Incoming FAX Log (page 8-7) Outgoing FAX Report (page 8-7) Incoming FAX Report (page 8-7) Toner Status (refer to the machine's Operation Guide) Paper Status (refer to the machine's Operation Guide) Removable Memory - Kyocera FS-6530MFP | Fax System (U) Operation Guide Rev-4.2012.3 - Page 225
(page 9-4) Status Page (page 8-9) Font List (refer to the machine's Operation Guide) Network Status (refer to the machine's Operation Guide) Service Status (refer to the machine's Operation Guide) Accounting Report (refer to the machine's Operation Guide) Sub Address Box List (page 6-22) FAX - Kyocera FS-6530MFP | Fax System (U) Operation Guide Rev-4.2012.3 - Page 226
(refer to the machine's Operation Guide) Internet (refer to the machine's Operation Guide) Address Book/One Touch Address Book (page 2-2) One Touch Key (page 2-12) Address Book Defaults Sort Print List (page 2-11) User Login/Job Accounting (refer to the machine's Operation Guide) 11-10 - Kyocera FS-6530MFP | Fax System (U) Operation Guide Rev-4.2012.3 - Page 227
machine's Operation Guide) Auto Error Clear (refer to the machine's Operation Guide) Error Clear Timer (refer to the machine's Operation Guide) Interrupt Clear Timer (refer to the machine's Operation Guide) Unusable Time (page 9-22) Adjustment/ Maintenance Service Settings FAX Call Settings - Kyocera FS-6530MFP | Fax System (U) Operation Guide Rev-4.2012.3 - Page 228
size and orientation, the machine automatically chooses the printing paper according to the following priority. Same Size Override Received FAX Size Priority Paper Size 1* 2 3 4* 5 6 7 ST LT-R LT LG LD ST-R LT-R LG LT LD LT-R * LT LG LD * ST-R LT * LT-R * LG LD LG ** LT-R *,** - Kyocera FS-6530MFP | Fax System (U) Operation Guide Rev-4.2012.3 - Page 229
the following paper sizes. ST: Statement STR: Statement-R LT: Letter LTR: Letter-R LG: Legal LD: Ledger When a paper type is selected in Media Type, a received fax is printed using the matching paper source. (Refer to page 5-10.) If [All Media Types] is selected, a paper type cannot be specified for - Kyocera FS-6530MFP | Fax System (U) Operation Guide Rev-4.2012.3 - Page 230
the following paper sizes. ST: Statement STR: Statement-R LT: Letter LTR: Letter-R LG: Legal LD: Ledger When a paper type is selected in Media Type, a received fax is printed using the matching paper source. (Refer to page 5-10.) If [All Media Types] is selected, a paper type cannot be specified for - Kyocera FS-6530MFP | Fax System (U) Operation Guide Rev-4.2012.3 - Page 231
and orientation, the machine automatically chooses the printing paper according to the following priority. Same Size Override Received FAX Size Priority Paper Size A5 1* A5-R 2 A4-R 3 FL 4* A4 5 B5 6* B5-R 7 A3 8 B4 9 10 B5 B5 * B5-R B4 A4 * A4-R * FL A3 A4-R A4-R * A4 - Kyocera FS-6530MFP | Fax System (U) Operation Guide Rev-4.2012.3 - Page 232
Appendix > Received FAX Sizes and Paper Priority (Metric Model) * Paper orientation is different from the . FL: Folio When a paper type is selected in Media Type, a received fax is printed using the matching paper source. (Refer to page 5-10.) If [All Media Types] is selected, a paper type cannot be - Kyocera FS-6530MFP | Fax System (U) Operation Guide Rev-4.2012.3 - Page 233
size according to the paper size. NOTE The abbreviations denote the following paper sizes. FL: Folio When a paper type is selected in Media Type, a received fax is printed using the matching paper source. (Refer to page 5-10.) If [All Media Types] is selected, a paper type cannot be specified for - Kyocera FS-6530MFP | Fax System (U) Operation Guide Rev-4.2012.3 - Page 234
Results and Registration Status 8-2 Confirmation Screen of Destinations 8-12 D Date 1-10, 9-3 Default fax settings 9-2 Delayed Limit 9-24 Login 9-27 L Local FAX ID 1-7, 9-6 Local FAX Name 1-7, 9-6 Local FAX Number 1-7, 9-6 M Machine (Names) 1-2 Manual Reception 5-7, 7-9 Manual Send 4-16 - Kyocera FS-6530MFP | Fax System (U) Operation Guide Rev-4.2012.3 - Page 235
Default Settings 6-50 Flow of Receiving 6-43 Flow of Sending 6-43 Installing the Network Fax Driver 6-45 Setup 6-44 No Print Output 10-9 O One-touch Keys 2-12 Adding a Destination 2-12 Change/Delete 2-14 Select Destination 3-6 Operation Panel 1-4 Original 2-sided/Book Original 4-10 Continuous Scan - Kyocera FS-6530MFP | Fax System (U) Operation Guide Rev-4.2012.3 - Page 236
Setting 9-20 Reject FAX No. 9-14 Send Restriction Setting 9-19 Unknown Number Reception 9-21 Troubleshooting 10-9 TX Start Speed 2-4, 3-3, 9-7 U Unusable Time 9-22 User Accounting 9-24 Contents 9-24 Login 9-25 V Volume Adjustment FAX Monitor Volume 1-7, 9-5 FAX Speaker Volume 1-7, 9-5 Index - Kyocera FS-6530MFP | Fax System (U) Operation Guide Rev-4.2012.3 - Page 237
- Kyocera FS-6530MFP | Fax System (U) Operation Guide Rev-4.2012.3 - Page 238
Rev.4 2012.3 5JRKMEN004
-
 1
1 -
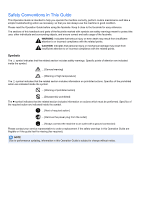 2
2 -
 3
3 -
 4
4 -
 5
5 -
 6
6 -
 7
7 -
8
-
9
-
10
-
11
-
12
-
13
-
14
-
15
-
16
-
17
-
18
-
19
-
20
-
21
-
22
-
23
-
24
-
25
-
26
-
27
-
28
-
29
-
30
-
31
-
32
-
33
-
34
-
35
-
36
-
37
-
38
-
39
-
40
-
41
-
42
-
43
-
44
-
45
-
46
-
47
-
48
-
49
-
50
-
51
-
52
-
53
-
54
-
55
-
56
-
57
-
58
-
59
-
60
-
61
-
62
-
63
-
64
-
65
-
66
-
67
-
68
-
69
-
70
-
71
-
72
-
73
-
74
-
75
-
76
-
77
-
78
-
79
-
80
-
81
-
82
-
83
-
84
-
85
-
86
-
87
-
88
-
89
-
90
-
91
-
92
-
93
-
94
-
95
-
96
-
97
-
98
-
99
-
100
-
101
-
102
-
103
-
104
-
105
-
106
-
107
-
108
-
109
-
110
-
111
-
112
-
113
-
114
-
115
-
116
-
117
-
118
-
119
-
120
-
121
-
122
-
123
-
124
-
125
-
126
-
127
-
128
-
129
-
130
-
131
-
132
-
133
-
134
-
135
-
136
-
137
-
138
-
139
-
140
-
141
-
142
-
143
-
144
-
145
-
146
-
147
-
148
-
149
-
150
-
151
-
152
-
153
-
154
-
155
-
156
-
157
-
158
-
159
-
160
-
161
-
162
-
163
-
164
-
165
-
166
-
167
-
168
-
169
-
170
-
171
-
172
-
173
-
174
-
175
-
176
-
177
-
178
-
179
-
180
-
181
-
182
-
183
-
184
-
185
-
186
-
187
-
188
-
189
-
190
-
191
-
192
-
193
-
194
-
195
-
196
-
197
-
198
-
199
-
200
-
201
-
202
-
203
-
204
-
205
-
206
-
207
-
208
-
209
-
210
-
211
-
212
-
213
-
214
-
215
-
216
-
217
-
218
-
219
-
220
-
221
-
222
-
223
-
224
-
225
-
226
-
227
-
228
-
229
-
230
-
231
-
232
-
233
-
234
-
235
-
236
-
237
-
238
 |
 |
OPERATION GUIDE
FAX System(U)