Kyocera FS3820N FS-3820N/3830N Operation Guide Rev-1.1
Kyocera FS3820N - B/W Laser Printer Manual
 |
View all Kyocera FS3820N manuals
Add to My Manuals
Save this manual to your list of manuals |
Kyocera FS3820N manual content summary:
- Kyocera FS3820N | FS-3820N/3830N Operation Guide Rev-1.1 - Page 1
FS-3820N FS-3830N Page Printers Operation Guide - Kyocera FS3820N | FS-3820N/3830N Operation Guide Rev-1.1 - Page 2
user is following the instructions in this guide. No responsibility is assumed for defects in the printer's firmware (contents of its read-only memory). This guide, any copyrightable subject matter sold or provided with or in connection with the sale of the page printer, are protected by copyright - Kyocera FS3820N | FS-3820N/3830N Operation Guide Rev-1.1 - Page 3
IBM PROGRAM LICENSE AGREEMENT The device you have purchased contains one or more software programs ("Programs") which belong to international business machines corporation ("IBM"). This document defines the terms and conditions under which the software is being licensed to you by IBM. If you do not - Kyocera FS3820N | FS-3820N/3830N Operation Guide Rev-1.1 - Page 4
printers. If you need to have access to the fonts on more than three printers of defective parts, upon their Toner Handling • Do not incinerate toner and toner containers. Dangerous sparks may cause burn. • Never open the toner container or waste toner box. • Make sure not to inhale the toner - Kyocera FS3820N | FS-3820N/3830N Operation Guide Rev-1.1 - Page 5
More Information...xiii Guide to the Operation Guide...xiv Chapter 1 ...1-12 Menu Map ...1-12 Status Page...1-14 Service Status Page ...1-18 Network Interface Status Page ...1- Type in MP Tray 1-31 Creating Custom Paper Type 1-32 Resetting the Custom Paper Type 1-36 MP Tray Mode...1-37 Selecting - Kyocera FS3820N | FS-3820N/3830N Operation Guide Rev-1.1 - Page 6
1-47 Setting the Character Pitch for Courier/Letter Gothic 1-48 Code Set...1-49 Number of Copies...1-50 Printing Orientation ...1-51 KIR (Kyocera Image Refinement) ...1-52 Ecoprint ...1-54 Resolution...1-55 e-MPS ...1-56 Quick Copy ...1-57 Proof and Hold ...1-59 Printing a Private Job ...1-61 - Kyocera FS3820N | FS-3820N/3830N Operation Guide Rev-1.1 - Page 7
93 Wide A4 Pitch...1-94 Print Density...1-95 Total Printed Pages...1-96 Toner Counter Resetting ...1-96 Message Language...1-97 Automatic Form Feed Timeout...1-99 Sleep Timer Setting ...1-100 Printer Resetting ...1-102 Resource Protection ...1-103 Alarm (Buzzer) Setting...1-104 Auto Continue Setting - Kyocera FS3820N | FS-3820N/3830N Operation Guide Rev-1.1 - Page 8
4 Troubleshooting 4-1 General Guide...4-2 Print Quality Problems ...4-3 Indicators and Messages ...4-6 Indicators...4-6 Maintenance Messages...4-7 Error Messages ...4-10 Correcting a Paper Jam...4-12 Jam at the Paper Cassette or Inside the Printer 4-14 Paper Jam at the Option Duplexer ...4-16 - Kyocera FS3820N | FS-3820N/3830N Operation Guide Rev-1.1 - Page 9
Interface (Option) ...B-6 RS-232C Interface...B-6 RS-232C Protocol ...B-7 PRESCRIBE FRPO D0 Command...B-9 RS-232C Cable Connection ...B-10 Obtain a Suitable RS-232C Cable...B-10 Connecting the Printer to the Computer B-10 Appendix C Specifications C-1 Glossary Glossary-1 Index Index-1 viii - Kyocera FS3820N | FS-3820N/3830N Operation Guide Rev-1.1 - Page 10
The Kyocera Mita page printer has many extremely desirable features. It was designed to make a contribution to a cleaner environment as well as to represent the latest generation of page printer technology. This section contains the following subsections. • Features • For More Information... • Guide - Kyocera FS3820N | FS-3820N/3830N Operation Guide Rev-1.1 - Page 11
This section outlines the common major printer features of the FS-3830N page printer. Ultra long life modules The drum, developer, and fuser have been designed for ultra long life. Amorphous silicon drum The drum has been developed using Kyocera's unique ceramic technology using amorphous silicon - Kyocera FS3820N | FS-3820N/3830N Operation Guide Rev-1.1 - Page 12
Serial Bus) Interface This printer supports Hi-Speed USB 2.0 system. Printer control language PRESCRIBE The printer uses PRESCRIBE, Kyocera Mita's page printer control language or less) file directly to the printer without invoking a printer driver. Account management system The account management - Kyocera FS3820N | FS-3820N/3830N Operation Guide Rev-1.1 - Page 13
/SPX, NetBEUI and EtherTalk protocols, network printing is possible with various environments including Windows, Macintosh, UNIX and NetWare, etc. Support for network printer monitor utility (KM-NET VIEWER) Allows network wide management of printers. See the readme file in the CD-ROM (comes with the - Kyocera FS3820N | FS-3820N/3830N Operation Guide Rev-1.1 - Page 14
the procedure to install the printer driver software. Guides you through topics concerning the operations and maintenance of the printer. Describes how to install and set the printer driver. PRESCRIBE is the native language of the Kyocera Mita printers. This Technical Reference contains the - Kyocera FS3820N | FS-3820N/3830N Operation Guide Rev-1.1 - Page 15
of paper that can be used with the printer. Chapter 3 Maintenance This chapter explains how to replace the toner container, waste toner box, and how to care for your printer. Chapter 4 Troubleshooting This chapter explains how to handle printer problems that may occur, such as paper jams. Chapter - Kyocera FS3820N | FS-3820N/3830N Operation Guide Rev-1.1 - Page 16
Indicates tips or advice useful for operation. Note Caution Indicates situations that are potentially hazardous to the human body or devices. Warning Indicates situations that are potentially extremely hazardous to the human body or devices. Option Indicates operations that can be performed - Kyocera FS3820N | FS-3820N/3830N Operation Guide Rev-1.1 - Page 17
Chapter 1 Using the Operator Panel 1 This chapter explains the following topics: • Understanding the Operator Panel • Printing Test Pages • Paper Handling • Pagination • e-MPS • Interface • Operating the Storage Device • Configuration 1-1 - Kyocera FS3820N | FS-3820N/3830N Operation Guide Rev-1.1 - Page 18
for the first time after the toner container is installed, (Adding toner) also appears. The printer is ready to print. The printer is receiving data, generating graphics, reading a CompactFlash card/Microdrive, or printing. The printer is in sleep mode. The printer wakes from sleep mode whenever the - Kyocera FS3820N | FS-3820N/3830N Operation Guide Rev-1.1 - Page 19
)† b5 ISO B5 (17.6 × 25 cm) CU Custom Size (14.8 × 21 cm to 21.6 × 35.6 cm) Table 1-2 † With only the MP tray feeding. While the printer is processing data, the SIZE indicator indicates the paper size selected by the application software. Note 1-3 - Kyocera FS3820N | FS-3820N/3830N Operation Guide Rev-1.1 - Page 20
is being processed, or that data is being written to the memory card. Flashing: Indicates when the printer needs maintenance attention or the printer is warming up (Please wait). Lit: Indicates when a problem or an error occurs that you can clear by yourself. (For example, paper jam occurs.) Table - Kyocera FS3820N | FS-3820N/3830N Operation Guide Rev-1.1 - Page 21
(appears only when an option serial interface board kit is installed) Option (appears only when an stops after the current page is printed. • Resets numeric values, or cancels a setting procedure. • MENU key when Ready is shown on this printer, the AdministrationID menu will be displayed. This menu - Kyocera FS3820N | FS-3820N/3830N Operation Guide Rev-1.1 - Page 22
your specific needs. Settings can be made when Ready is indicated on the printer message display. The printer obeys the most recently received printer settings sent from the application software, or from the printer driver, which take priority Note over operator panel settings. The following is the - Kyocera FS3820N | FS-3820N/3830N Operation Guide Rev-1.1 - Page 23
Understanding the Operator Panel Continued from previous page Interface > Parallel IUnStBerface NIenttweorrfkace SIenrtiearlface Option > > > >Parallel I/F Auto Normal High Speed Nibble (high) >NetWare >ONfeftWare > On >TCP/IP Off On >Ether Talk Off >Network Status Page On >> - Kyocera FS3820N | FS-3820N/3830N Operation Guide Rev-1.1 - Page 24
Understanding the Operator Panel Continued from previous page Emulation PCL 6 Emulation > KPDL Emulation > KPDL (AUTO) Emulation Line Printer Emulation IBM Proprinter Emulation DIABLO 630 Emulation EPSON LQ-850 >Print KPDL errs Off On >Alt. Emulation PCL 6 >Print KPDL errs Off On Font - Kyocera FS3820N | FS-3820N/3830N Operation Guide Rev-1.1 - Page 25
Continued from previous page Print Quality > Hard Disk > RAM Disk Mode ROAfMf Disk Mode On Memory Card > >KIR Mode On Off >Ecoprint Mode Off On >Resolution Fast 1200 mode Fine 1200 mode 300 dpi 600 dpi >Print Density 03 >Read Data >Write Data >Delete Data >List of Partitions >RAM Disk Size > - Kyocera FS3820N | FS-3820N/3830N Operation Guide Rev-1.1 - Page 26
Size > Custom >Cassette Type Plain >Feed Select Cassette >Duplex Mode None >Stack Select T>oSptatcrkaySeFlaeccetDn RearTray FaceUp >Sorter Mode 1 >Reset Type Adjust >Total Print 0123456 >New Toner Installed >>Unit mm inch >>X Dimension >>Y Dimension >>Paper weight Normal 2 >>Duplex Path Enable - Kyocera FS3820N | FS-3820N/3830N Operation Guide Rev-1.1 - Page 27
-DUMP >Printer Reset >Resource Prot. Off Permanent Perm / Temp >Buzzer On Off >Auto Continue > Mode On Mode Off >Finishing > >Service > >>Sleep Mode On Off >>Auto Continue Timer 030sec. >>Duplex Off On >>Print Status Page >>Print Event Log †† >>Developer †† >>DRUM-CTRL 00 †† >>Drum †† This - Kyocera FS3820N | FS-3820N/3830N Operation Guide Rev-1.1 - Page 28
is usefull as a reference to guide yourself through the menu selection system. The status page is a list of parameters and settings for most basic printer configurations. You may be required to produce a status page when requesting service to the printer. Menu Map The printer prints a full list of - Kyocera FS3820N | FS-3820N/3830N Operation Guide Rev-1.1 - Page 29
Sample MENU MAP Printing Test Pages FS-3830N Page Printer MENU MAP 1-13 - Kyocera FS3820N | FS-3820N/3830N Operation Guide Rev-1.1 - Page 30
Test Pages Status Page If you want to check the printer's current status, including memory available and option settings, you appears. Print Status Page ? 4 Press the ENTER key again. The printer prints a status page. For a full description of the status page, see the following pages. 1-14 - Kyocera FS3820N | FS-3820N/3830N Operation Guide Rev-1.1 - Page 31
to the contents explained on the following pages. FS-3830N Page Printer STATUS PAGE Firmware Version: Released: 1 Hardware Information Memory 2 8 Toner Gauge 9 0 100 10 KIR Test pattern ON 11 Items and values on the status page may vary depending on the printer's firmware version. - Kyocera FS3820N | FS-3820N/3830N Operation Guide Rev-1.1 - Page 32
This information shows the firmware version and date of issue of the printer. 2 - Hardware Information This information shows various printer settings, such as card in the printer. 7 - Emulation This shows all available emulations of the printer. The printer is shipped from the factory with PCL 6 - Kyocera FS3820N | FS-3820N/3830N Operation Guide Rev-1.1 - Page 33
10 - Interface Information This information shows the default font and the default emulation for all interfaces installed in the printer. 11 - KIR Test Pattern KIR is the Kyocera Mita's original smoothing function. This test pattern shows the effect of the KIR (Kyocera Image Refinement) system. 1-17 - Kyocera FS3820N | FS-3820N/3830N Operation Guide Rev-1.1 - Page 34
Printing Test Pages Service Status Page The service status page contains printer settings information that is more detailed than the standard status page and is therefore for mostly service purposes. However, since there is a great deal of information available on the service status page that may - Kyocera FS3820N | FS-3820N/3830N Operation Guide Rev-1.1 - Page 35
interface. The network interface status page shows the firmware version, the network addresses, and other information under FS-3830N Page Printer NETWORK STATUS PAGE Printing out a network interface status page may not be possible with the option network interface card. For details, see the manual - Kyocera FS3820N | FS-3820N/3830N Operation Guide Rev-1.1 - Page 36
Printing Test Pages 4 Press the or key repeatedly until Network appears. Interface ? Network 5 Press the ENTER key again. A > appears. Interface > Network 6 Press the > key and then press the or key repeatedly until the message display indicates >Network Status Page. >Network Status Page Off - Kyocera FS3820N | FS-3820N/3830N Operation Guide Rev-1.1 - Page 37
. >List of Internal Fonts 7 Press the ENTER key. A question mark (?) appears. >List of Internal Fonts? 8 Press the ENTER key again. Processing appears, then Ready. The printer prints a list of fonts with a short sample and font ID (number) for each font. 1-21 - Kyocera FS3820N | FS-3820N/3830N Operation Guide Rev-1.1 - Page 38
Printing Test Pages Font Lists Internal Scalable and Bitmapped Fonts List PRESCRIBE Font Name Scalable/Bitmap Password Selection [FSET] Font ID Internal Scalable and Bitmapped Fonts List PRESCRIBE Font Name Scalable/Bitmap Password Selection [FSET] Font ID 1-22 - Kyocera FS3820N | FS-3820N/3830N Operation Guide Rev-1.1 - Page 39
Waiting appears. Processing Waiting 7 Send data to be dumped to the printer. The message Processing will be displayed during receiving the data. Once the possible to cancel the printing of any further dumped data by taking the printer offline by pressing the GO key and then pressing the CANCEL key. - Kyocera FS3820N | FS-3820N/3830N Operation Guide Rev-1.1 - Page 40
is made by the application software (printer driver). Setting the Paper Size in Paper Cassette Guide supplies with the printer. 1 Turn the paper size dial so that the size of the paper you are going to use appears in the paper size window. Paper Size Dial Paper Size Window 2 Adjust the paper guides - Kyocera FS3820N | FS-3820N/3830N Operation Guide Rev-1.1 - Page 41
. Properly set the paper into the paper cassette. For details about the adjustment of the paper guides and paper stopper inside the paper cassette, see the Installation Guide supplied with the printer. Setting Paper Size Dial Use the following procedure to set the paper size dial to OTHER. 1 Pull - Kyocera FS3820N | FS-3820N/3830N Operation Guide Rev-1.1 - Page 42
Paper Handling 4 Press the or key repeatedly until >Cassette Size > appears. If option paper feeders are added, Cassette 1 Size will appear for the standard paper cassette and Cassette 2 Size, Cassette 3 Size, and Cassette 4 Size will appear for the option paper feeders. >Cassette Size > Custom 5 - Kyocera FS3820N | FS-3820N/3830N Operation Guide Rev-1.1 - Page 43
Paper Handling Selecting the Unit of Measurement Then, use the following procedure to set the unit of measurement. 1 Press the > key. 2 Press the or key repeatedly until >>Unit appears. The unit of measurement can be selected between millimeters and inches. The current unit of measurement is - Kyocera FS3820N | FS-3820N/3830N Operation Guide Rev-1.1 - Page 44
details, see KX Printer Drivers Operation Guide. Setting the Paper Size in MP Tray When using the MP tray in the cassette mode, you should set the same paper size to the MP tray as that is used to format the job to print. The factory default setting is A4 or Letter. This menu does - Kyocera FS3820N | FS-3820N/3830N Operation Guide Rev-1.1 - Page 45
Paper Handling 3 Press the > key. 4 Press the or key repeatedly until >MP Tray Size appears. >MP Tray Size A4 5 Press the ENTER key. A blinking question mark (?) appears. >MP Tray Size ? A4 6 Press the or key to display the desired MP tray size. The display changes as shown below. A4 Executive - Kyocera FS3820N | FS-3820N/3830N Operation Guide Rev-1.1 - Page 46
. If the paper type is set correctly, you can perform printing using the media type selection function from the application software (printer driver). The factory default setting is Plain. For more details about the paper types that can be fed from the paper cassette, see Chapter 2. 1 Press the - Kyocera FS3820N | FS-3820N/3830N Operation Guide Rev-1.1 - Page 47
select the paper cassette according to the selection made by the application software (printer driver). The factory default setting is Plain. This menu does not appears when the option envelope feeder is installed on the printer. For more details about the paper types that can be fed from the - Kyocera FS3820N | FS-3820N/3830N Operation Guide Rev-1.1 - Page 48
procedure used to set a user-defined paper type for the printer. Eight custom user settings may be registered. After having been set Setting the Duplex Path on page 1-35) after selecting the paper type to be customized as follows. For how to reset the customized settings, see Resetting the Custom - Kyocera FS3820N | FS-3820N/3830N Operation Guide Rev-1.1 - Page 49
ENTER key. 8 Press the > key and proceed to Setting the Paper Weight on the following page. Proceed to Setting the Paper Weight and Setting the Duplex Path starting from the following page. 1-33 - Kyocera FS3820N | FS-3820N/3830N Operation Guide Rev-1.1 - Page 50
, press the ENTER key. 6 Press the MENU key. The message display returns to Ready. If the paper type is set to Custom and the option duplexer is installed on the printer, duplex printing can be enabled and disabled. See Setting the - Kyocera FS3820N | FS-3820N/3830N Operation Guide Rev-1.1 - Page 51
Option If the paper type is set to Custom and the option duplexer is installed on the printer, you can set whether or not to enable duplex printing as follows. The default setting is Enable. 1 Display the custom paper type (see Creating Custom Paper Type on page 1-32) and press the > key. 2 - Kyocera FS3820N | FS-3820N/3830N Operation Guide Rev-1.1 - Page 52
> key. 4 Press the or key repeatedly until >Reset Type Adjust appears. >Reset Type Adjust 5 Press the ENTER key. A question mark (?) appears. >Reset Type Adjust ? 6 Press the ENTER key. All the customized paper weight and duplex path settings will be reset to the default. The message display returns - Kyocera FS3820N | FS-3820N/3830N Operation Guide Rev-1.1 - Page 53
the first mode. • First Mode The MP tray automatically feeds paper placed on the MP tray overriding another paper source that is selected on the printer driver. After all paper sheets in the MP tray have been used up (approximately 100 sheets [A4 size, 0.11 mm thickness]), paper will be fed from - Kyocera FS3820N | FS-3820N/3830N Operation Guide Rev-1.1 - Page 54
which paper source printing will be performed. If no option units are installed, the only selections are the paper cassette and MP tray of the printer. If option paper feeders are installed, they can also be selected using the manner described below. 1 Press the MENU key. 2 Press the or key - Kyocera FS3820N | FS-3820N/3830N Operation Guide Rev-1.1 - Page 55
6 Press the or key to display the desired destination. The output tray changes as shown below. Top tray FaceDn (Printer's top tray) [Default] RearTray FaceUp (Printer's rear tray) [Option rear tray required] Sorter FaceDn [Option sorter required] 7 When the desired paper source displayed, press the - Kyocera FS3820N | FS-3820N/3830N Operation Guide Rev-1.1 - Page 56
Paper Handling Overriding A4 and Letter Size Difference This selects whether to enable or disable the difference between A4 size and Letter size. Under the default setting of Off, the paper size of the paper source is matched to the paper size formatting the jobs. If these differ, a corresponding - Kyocera FS3820N | FS-3820N/3830N Operation Guide Rev-1.1 - Page 57
emulation modes shown below appears, indicating the current emulation. PCL 6 (default) KPDL KPDL (AUTO) Line Printer IBM Proprinter DIABLO 630 EPSON LQ-850 KPDL is the Kyocera's implementation of the PostScript page description language. 3 Press the ENTER key. A blinking question mark (?) appears - Kyocera FS3820N | FS-3820N/3830N Operation Guide Rev-1.1 - Page 58
the MENU key. The message display returns to Ready. Alternative Emulation for KPDL Emulation The auto KPDL (KPDL (AUTO)) emulation enables the printer to automatically change the emulation mode according to the print job received. The alternative emulation can be selected using the operator panel - Kyocera FS3820N | FS-3820N/3830N Operation Guide Rev-1.1 - Page 59
key. 10 Press the MENU key. The message display returns to Ready. Printing KPDL Errors The printer can print error descriptions when printing error occurs during KPDL emulation. The default is Off - the printer does not print KPDL errors. 1 Press the MENU key. 2 Press the or key repeatedly until - Kyocera FS3820N | FS-3820N/3830N Operation Guide Rev-1.1 - Page 60
display returns to Ready. You can select the default font for the current interface. In addition to the internal fonts, all fonts that are downloaded to the printer memory, or fonts stored on a CompactFlash card, Microdrive, or option ROM, can be selected as the default font. In this menu, you can - Kyocera FS3820N | FS-3820N/3830N Operation Guide Rev-1.1 - Page 61
Pagination 6 Press the > key. The message display changes to that show below. >> I000 The letter before the number indicates the type of font as shown below: Letter I S M H O Table 1-6 Description Internal font Soft (down load) font Fonts in an option CompactFlash card Fonts in a RAM disk or - Kyocera FS3820N | FS-3820N/3830N Operation Guide Rev-1.1 - Page 62
Pagination Default Font Size The following procedure determines the size of the default font. If the default font is a fixed font such as Courier or Letter Gothic, the character pitch can be changed instead of the font size. 1 Press the MENU key. 2 Press the or key repeatedly until Font > appears - Kyocera FS3820N | FS-3820N/3830N Operation Guide Rev-1.1 - Page 63
Pagination Changing Type for Courier/Letter Gothic Courier or Letter Gothic font type can be selected as Regular or Dark. For example, to change the type of Courier, proceed as follows: 1 Press the MENU key. 2 Press the or key repeatedly until Font > appears. Font > 3 Press the > key. 4 Press - Kyocera FS3820N | FS-3820N/3830N Operation Guide Rev-1.1 - Page 64
Pagination Setting the Character Pitch for Courier/Letter Gothic The character pitch for fixed fonts is adjustable when the default font is Courier or Letter Gothic. 1 Press the MENU key. 2 Press the or key repeatedly until Font > appears. Font > 3 Press the > key. 4 Press the or key repeatedly - Kyocera FS3820N | FS-3820N/3830N Operation Guide Rev-1.1 - Page 65
Code Set Pagination You can change the character code set. Available character code sets vary depending on the current font. (The default is IBM PC-8.) 1 Press the MENU key. 2 Press the or key repeatedly until Font > appears. Font > 3 Press the > key. Press the or key until > Code Set appears. - Kyocera FS3820N | FS-3820N/3830N Operation Guide Rev-1.1 - Page 66
Pagination Number of Copies You can set the number of copies to be printed of each page for the current interface. The number of copies can be set between 1 and 999. 1 Press the MENU key. 2 Press the or key repeatedly until Page set > appears. Page Set > 3 Press the > key. 4 Press the or key - Kyocera FS3820N | FS-3820N/3830N Operation Guide Rev-1.1 - Page 67
Pagination Printing Orientation The default orientation of the page can be selected from the portrait (upright) and landscape (sideways) page orientation. Portrait orientation Landscape orientation A A 1 Press the MENU key. 2 Press the or key repeatedly until Page Set > appears. Page Set > - Kyocera FS3820N | FS-3820N/3830N Operation Guide Rev-1.1 - Page 68
Pagination KIR (Kyocera Image Refinement) This printer incorporates the KIR (Kyocera Image Refinement) smoothing function. This function FS-3830N Page Printer STATUS PAGE Firmware Version: Released: Memory Page Information Network Status Interfaces Installed Options Emulation Error Log Toner - Kyocera FS3820N | FS-3820N/3830N Operation Guide Rev-1.1 - Page 69
Pagination 1 Press the MENU key. 2 Press the or key repeatedly until Print Quality > appears. Print Quality > 3 Press the > key. 4 Press the or key repeatedly until >KIR Mode appears. >KIR Mode On 5 Press the ENTER key. A blinking question mark (?) appears. >KIR Mode ? On 6 Select On or Off using - Kyocera FS3820N | FS-3820N/3830N Operation Guide Rev-1.1 - Page 70
Pagination Ecoprint The Ecoprint enables you to reduce the amount of toner consumed on the page so as to save your printing costs. You can set to Ecoprint mode on, as follows. (The factory default setting is Off.) The Ecoprint setting has no effect on the print speed. The Ecoprint mode setting is - Kyocera FS3820N | FS-3820N/3830N Operation Guide Rev-1.1 - Page 71
Resolution Pagination Proceed as follows to set the default print resolution from four ways - 300 dpi, 600 dpi, Fast 1200 mode, and Fine 1200 mode. The clarity of printed characters and graphics becomes sharper in this order. 1 Press the MENU key. 2 Press the or key repeatedly until Print Quality > - Kyocera FS3820N | FS-3820N/3830N Operation Guide Rev-1.1 - Page 72
on RAM disk setup. Job Retention Job Retention has four modes as summarized below. These modes are selected when you choose on the printer driver through the application software: Mode Primary function Quick Copy To later print additional copies Start storing by On terminating print setting from - Kyocera FS3820N | FS-3820N/3830N Operation Guide Rev-1.1 - Page 73
printer driver when printing from a computer. Virtual Mailbox Virtual mailbox is part of Job Storage, which stores print jobs on the Virtual mailbox is part of copies from the printer operator panel. To print a job as a quick copy job, see KX Printer Drivers Operation Guide. The default number of - Kyocera FS3820N | FS-3820N/3830N Operation Guide Rev-1.1 - Page 74
key to display the desired user name, Arlen, in this example. >Quick Copy ?Arlen 7 Press the ENTER key. The job name entered in the printer driver (Report, in this example) appear with a blinking question mark (?) before the letters. >Arlen ?Report 8 Press the or key to scroll to the desired job - Kyocera FS3820N | FS-3820N/3830N Operation Guide Rev-1.1 - Page 75
before continuing to print the remaining copies. Since you can proof the printouts before printing the remaining copies, wastage of paper can be reduced. The printer prints one copy and, at the same time, saves the print job on the Microdrive. You can also change the number of copies when resuming - Kyocera FS3820N | FS-3820N/3830N Operation Guide Rev-1.1 - Page 76
key to display the desired user name, Arlen, in this example. >Quick Copy ?Arlen 7 Press the ENTER key. The job name entered in the printer driver (Report, in this example) appear with a blinking question mark (?) before the letters. >Arlen ?Report 8 Press the or key to scroll to the desired job - Kyocera FS3820N | FS-3820N/3830N Operation Guide Rev-1.1 - Page 77
release the job from the operator panel. At sending the job from the application software, you should specify a 4-digit access code in the printer driver. The job is released for printing by entering the access code on the operator panel. Thus, this function ensures confidentiality of the print job - Kyocera FS3820N | FS-3820N/3830N Operation Guide Rev-1.1 - Page 78
The ID input line appears. Enter the four-digit access code entered in the printer driver and press the ENTER key. To enter the ID, press the < or press the ENTER key. Enter the four-digit access code entered in the printer driver and press the ENTER key. >Agenda Copies 001 3 Press the key - Kyocera FS3820N | FS-3820N/3830N Operation Guide Rev-1.1 - Page 79
e-MPS > appears. e-MPS > 3 Press the > key. 4 Press the or key repeatedly until >Private/Stored appears. The name entered in the printer driver (Harold, in this example) also appears. >Private/Stored Harold 5 Press the ENTER key. A blinking question mark (?) before a user name appears. >Private - Kyocera FS3820N | FS-3820N/3830N Operation Guide Rev-1.1 - Page 80
title of the job to be printed is displayed (Agenda, in this example), press the ENTER key. If you entered an access code for the printer driver, enter the four-digit access code and press the ENTER key. >Agenda Copies 001 3 Press the key repeatedly until Delete appears for the number of - Kyocera FS3820N | FS-3820N/3830N Operation Guide Rev-1.1 - Page 81
Clients software from the CD-ROM supplied with the printer. To do this, from the CD-ROM Main Menu, select Printer Utilities > KM-NET for Clients. 1 Browse through Windows Start > Programs > Kyocera Mita > KMNET for Clients. 2 Click the Add Printer icon (below). Select the Local or Network port. Add - Kyocera FS3820N | FS-3820N/3830N Operation Guide Rev-1.1 - Page 82
. The jobs that are stored in that printer will be displayed. To print the job, right click Job name and then click Print on the drop down list that appears. Job Manager Icon For more detailed information, refer to KM-NET for Clients Operation Guide that is included on the CD-ROM - Kyocera FS3820N | FS-3820N/3830N Operation Guide Rev-1.1 - Page 83
e-MPS Printing a List of Code Jobs If you select Permanent Job Storage on the printer driver, you can have a List of Code Job printed using the operator panel. 1 Press the MENU key question mark (?) appears. >List of Code JOB ? 6 Press the ENTER key again. The printer prints a Code Job list. 1-67 - Kyocera FS3820N | FS-3820N/3830N Operation Guide Rev-1.1 - Page 84
e-MPS Retrieving Jobs from Virtual Mailbox (VMB) To use this mode, an option Microdrive must be installed in the printer. Option To retrieve the jobs posted in the virtual mailbox, proceed as follows. 1 Press the MENU key. 2 Press the or key repeatedly until e-MPS > appears. e- - Kyocera FS3820N | FS-3820N/3830N Operation Guide Rev-1.1 - Page 85
repeatedly until >List of VMB appears. >List of VMB 5 Press the ENTER key. A question mark (?) appears. >List of VMB ? 6 Press the ENTER key again. The printer prints a list of jobs currently posted in the virtual mailboxes. 1-69 - Kyocera FS3820N | FS-3820N/3830N Operation Guide Rev-1.1 - Page 86
e-MPS e-MPS Configuration Option You can change the following parameters for e-MPS operation: • Maximum number of Quick Copy/Proof and Hold jobs • Maximum space assigned to temporary code jobs • Maximum space assigned to permanent code jobs • Maximum space assigned to virtual mailboxes The total - Kyocera FS3820N | FS-3820N/3830N Operation Guide Rev-1.1 - Page 87
space that holds temporary code jobs. You can change the maximum space from 0 to 9999 (megabytes). The actual maximum size depends on the size of free hard disk space, however. The default size is 50 MB. 1 Press the MENU key. 2 Press the or key repeatedly until e-MPS > appears. e-MPS > 3 Press - Kyocera FS3820N | FS-3820N/3830N Operation Guide Rev-1.1 - Page 88
that holds permanent code jobs. You can change the maximum space from 0 to 9999 (megabytes). The actual maximum size depends on the size of free Microdrive space, however. The default size is 50 MB. 1 Press the MENU key. 2 Press the or key repeatedly until e-MPS > appears. e-MPS > 3 Press the - Kyocera FS3820N | FS-3820N/3830N Operation Guide Rev-1.1 - Page 89
space for virtual mailboxes. You can change the maximum space from 0 to 9999 (megabytes). The actual maximum size depends on the size of free Microdrive space, however. The default size is 50 MB. 1 Press the MENU key. 2 Press the or key repeatedly until e-MPS > appears. e-MPS > 3 Press - Kyocera FS3820N | FS-3820N/3830N Operation Guide Rev-1.1 - Page 90
printer supports a bi-directional/highspeed mode. Normally, this interface is used under the default setting AUTO. For details, see Appendix B. After setting the interface, be sure to reset the printer Network Serial (when a serial interface board kit is installed) Option (when a network interface - Kyocera FS3820N | FS-3820N/3830N Operation Guide Rev-1.1 - Page 91
of the interface names shown below appears, indicating the current interface. Parallel (default) USB Network Serial (when a serial interface board kit is installed) Option (when a network interface card is installed) 3 Press the ENTER key. A blinking question mark (?) appears. Interface ? Parallel - Kyocera FS3820N | FS-3820N/3830N Operation Guide Rev-1.1 - Page 92
Interface Parameters Option This section applies to the printers having the option serial interface board kit (IB-11) installed. The baud rate, interface. Parallel (default) USB Network Serial (when a serial interface board kit is installed) Option (when a network interface card is installed) 3 - Kyocera FS3820N | FS-3820N/3830N Operation Guide Rev-1.1 - Page 93
, 57600, and 115200. Some computers may not be compatible with a baud rate of 115200 bps. If you set the baud rate to 115200 and communication problems occur, Note lower the baud rate. 9 Display the desired baud rate and press the ENTER key. 10 Press the MENU key. The message display returns - Kyocera FS3820N | FS-3820N/3830N Operation Guide Rev-1.1 - Page 94
Interface Network Interface Parameters This printer supports TCP/IP, NetWare and EtherTalk protocols. In addition the current interface. Parallel (default) USB Network Serial (when a serial interface board kit is installed) Option (when a network interface card is installed) 3 Press the ENTER - Kyocera FS3820N | FS-3820N/3830N Operation Guide Rev-1.1 - Page 95
must be activated (On) for networking with Macintosh computers. >Network Status Page On When the item is set to On, the printer prints out a network status page when it prints the printer status. See page 1-19. 7 The following example explains how to activate TCP/IP protocol to connect the - Kyocera FS3820N | FS-3820N/3830N Operation Guide Rev-1.1 - Page 96
Interface 8 Press the > key. Each time the or key is pressed, the item changes as shown below. >>DHCP Off >>IP Address 000.000.000.000 >>Subnet Mask 000.000.000.000 >>Gateway 000.000.000.000 9 Display the item to be set and press the ENTER key. For DHCP, a question mark (?) appears. For IP Address, - Kyocera FS3820N | FS-3820N/3830N Operation Guide Rev-1.1 - Page 97
you attempt to set the RAM disk size beyond this restriction, the printer automatically round it down so that the size is always 9 MB less than the total printer memory. Once the RAM disk size is set, the printer must be reset. By default, the RAM disk is not activated (Off). To confirm the - Kyocera FS3820N | FS-3820N/3830N Operation Guide Rev-1.1 - Page 98
key again, and change the RAM disk size using the or key. It is not possible to make a setting that exceeds total printer memory. The default value for the RAM disk is the total printer memory minus 9 MB. This parameter may be set anywhere from 0001 to 1024 depending on the available - Kyocera FS3820N | FS-3820N/3830N Operation Guide Rev-1.1 - Page 99
Operating the Storage Device Reading Data To read data on a CompactFlash card, Microdrive, or the RAM disk use the following procedure: 1 Press the MENU key. 2 Press the or key repeatedly until Memory Card >, Hard Disk > or RAM Disk Mode > appears. Memory Card > 3 Press the > key. 4 Press the or - Kyocera FS3820N | FS-3820N/3830N Operation Guide Rev-1.1 - Page 100
Operating the Storage Device Writing Data Note You can write data to a CompactFlash card, the Microdrive, or the RAM disk using the operator panel. When writing data to the storage device, a name is automatically assigned to the data. The CompactFlash card or the Microdrive or the RAM disk must be - Kyocera FS3820N | FS-3820N/3830N Operation Guide Rev-1.1 - Page 101
the file to the memory card and instructs the printer to automatically print out a CompactFlash card write information page as shown below. FS-3830N Page Printer WRITE INFORMATION Partition Type. Type of data written (currently only type 2 is supported). Partition Name. Name of data written. Write - Kyocera FS3820N | FS-3820N/3830N Operation Guide Rev-1.1 - Page 102
in the CompactFlash card at once, print a list of data names as explained on page 1-89, Printing a List of Data Names. You can use the printer's operator panel to delete data from a CompactFlash card, the Microdrive or the RAM disk. 1 Press the MENU key. 2 Press the or key repeatedly until Memory - Kyocera FS3820N | FS-3820N/3830N Operation Guide Rev-1.1 - Page 103
Fonts from a CompactFlash Card If a font (CompactFlash) card is already inserted into the slot when the printer is turned on, the fonts are automatically read into the printer. To re-read fonts into the printer from a CompactFlash card, proceed as follows. 1 Press the MENU key. 2 Press the or key - Kyocera FS3820N | FS-3820N/3830N Operation Guide Rev-1.1 - Page 104
Formatting a Storage Device A new CompactFlash card or Microdrive must be formatted before it can be used in the printer. You can format the storage device using the printer operator panel. • Formatting will destroy any existing data on a storage device. • You can format the Microdrive using the - Kyocera FS3820N | FS-3820N/3830N Operation Guide Rev-1.1 - Page 105
automatically prints out a format information page as shown below. FS-3830N Page Printer FORMAT INFORMATION Capacity. The total size of the CompactFlash card or the Microdrive memory. Used Space. The size the printer uses for its system. Free Space. The size remaining in the CompactFlash card or the - Kyocera FS3820N | FS-3820N/3830N Operation Guide Rev-1.1 - Page 106
Processing appears and the printing of the list starts. FS-3830N Page Printer PARTITION LIST Device Information Partition Information The list provides in bytes. Free Space. The space remaining in the storage device for storing more data, including the memory space required by the printer for its - Kyocera FS3820N | FS-3820N/3830N Operation Guide Rev-1.1 - Page 107
A4 Pitch • Print Density • Total Printed Pages • Toner Counter Resetting • Message Language • Automatic Form Feed Timeout • Sleep Timer Setting • Printer Resetting • Resource Protection • Alarm (Buzzer) Setting • Auto Continue Setting • Duplex Printing Error Detection Setting Page Protect Mode The - Kyocera FS3820N | FS-3820N/3830N Operation Guide Rev-1.1 - Page 108
. >Page Protect ? Auto 7 Press the ENTER key. 8 Press the MENU key. The message display returns to Ready. Linefeed (LF) Action This procedure instructs the printer what to do when it receives a linefeed code (character code 0AH). 1 Press the MENU key. 2 Press the or key repeatedly until Page set - Kyocera FS3820N | FS-3820N/3830N Operation Guide Rev-1.1 - Page 109
is displayed, press the ENTER key. 8 Press the MENU key. The message display returns to Ready. Carriage-Return (CR) Action This procedure instructs the printer what to do when it receives a carriagereturn code (character code 0DH) 1 Press the MENU key. 2 Press the or key repeatedly until Page - Kyocera FS3820N | FS-3820N/3830N Operation Guide Rev-1.1 - Page 110
Configuration Wide A4 Pitch Turn this to On to increase the maximum number of characters that can be printed in a line for A4 page (78 characters at 10 pitch) and Letter size page (80 characters at 10 pitch). This setting is effective in only PCL 6 emulation. 1 Press the MENU key. 2 Press the or - Kyocera FS3820N | FS-3820N/3830N Operation Guide Rev-1.1 - Page 111
Print Density Configuration The print density can be adjusted in five steps: from 01 (light) to 05 (dark). The factory setting is 03. 1 Press the MENU key. 2 Press the or key repeatedly until Print Quality > appears. Print Quality > 3 Press the > key. 4 Press the or key - Kyocera FS3820N | FS-3820N/3830N Operation Guide Rev-1.1 - Page 112
status page. Note that if this operation is performed when the toner container is not replaced, the toner gauge measurement will not be indicated correctly. Also refer to the Installation Guide supplied with the toner kit when replacing the toner container. 1 Press the MENU key. 2 Press the or key - Kyocera FS3820N | FS-3820N/3830N Operation Guide Rev-1.1 - Page 113
the ENTER key. The toner counter is reset. The message display returns to Ready. Message Language You can select the language of the messages on the message display by following the procedure given below. You can optionally download messages in order language. Contact your Kyocera Mita dealer for - Kyocera FS3820N | FS-3820N/3830N Operation Guide Rev-1.1 - Page 114
Configuration 6 Press the key. The display cycles through the available selections in the following order (The key cycles in the reverse order): >MSG Language ? English >Langue ? Francais >Anzeigesprache ? Deutsch >Lingua ? Italiano >Berichttaal ? Nederlands >Idioma ? Español >Idioma da MSG ? - Kyocera FS3820N | FS-3820N/3830N Operation Guide Rev-1.1 - Page 115
Configuration Automatic Form Feed Timeout When the printer receives no data for a certain time, it time out and releases the current interface: it prints whatever data it has in its buffer and feeds - Kyocera FS3820N | FS-3820N/3830N Operation Guide Rev-1.1 - Page 116
is not printing, processing, or receiving data. You can adjust the timer value, the length of time the printer waits before entering sleeping mode in the absence of data. 1 Press the MENU key. 2 Press the or key repeatedly until Others > appears. Others > 3 Press the > - Kyocera FS3820N | FS-3820N/3830N Operation Guide Rev-1.1 - Page 117
Configuration Turning Off the Sleep Timer You can turn off the sleep timer function by following the procedure given below. 1 Press the MENU key. 2 Press the or key repeatedly until Others > appears. Others > 3 Press the > key. 4 Press the or key repeatedly until >Sleep Timer > appears. >Sleep - Kyocera FS3820N | FS-3820N/3830N Operation Guide Rev-1.1 - Page 118
> 3 Press the > key. 4 Press the or key repeatedly until >Printer Reset appears. >Printer Reset 5 Press the ENTER key. A question mark (?) appears. >Printer Reset ? 6 Press the ENTER key again. Self test appears while the printer is resetting itself, then Please wait followed by Ready. Self test - Kyocera FS3820N | FS-3820N/3830N Operation Guide Rev-1.1 - Page 119
are intact when you change the emulation back to PCL 6. Resource protection requires extra memory to store the downloaded fonts and macros. The total size of the printer memory recommended for Note using the resource protection option is affected by several factors. See Appendix A. 1 Press the - Kyocera FS3820N | FS-3820N/3830N Operation Guide Rev-1.1 - Page 120
jamming occurs, an audio warning is made to sound. This is useful, for example, when the printer is in a location some distance from the user. The audio alarm is set to On when leaving the factory. If the alarm is set to Off, it is made not to sound. 1 Press the MENU - Kyocera FS3820N | FS-3820N/3830N Operation Guide Rev-1.1 - Page 121
Continue Setting When Auto Continue is enabled, the printer will automatically print the next received data following error Press GO MemoryCard err Press GO Duplex disabled Press GO If one of the above errors is caused by someone on a network where the printer is being shared, for example, data - Kyocera FS3820N | FS-3820N/3830N Operation Guide Rev-1.1 - Page 122
Configuration Setting the Auto Continue Recovery Time Follow the procedure given below to change the recovery time for Auto Continue. 1 Press the MENU key. 2 Press the or key repeatedly until Others > appears. Others > 3 Press the > key. 4 Press the or key repeatedly until Auto Continue Mode > - Kyocera FS3820N | FS-3820N/3830N Operation Guide Rev-1.1 - Page 123
has been turned On, and you attempt to print onto a paper size and paper type that cannot be used for duplex printing, the Duplex disabled Press GO error message will be displayed and printing will stop. To print onto one-side of the paper only when this message is - Kyocera FS3820N | FS-3820N/3830N Operation Guide Rev-1.1 - Page 124
Chapter 2 Paper Selection 2 This chapter explains the following topics: • General Guidelines • Special Paper • Paper Type 2-1 - Kyocera FS3820N | FS-3820N/3830N Operation Guide Rev-1.1 - Page 125
productivity of your office by ensuring efficient, trouble-free printing and reducing wear and tear on the printer. Paper Availability Most types of paper the less risk there will be of paper jams and other problems, and the higher the level of quality your printed output will reflect. Differences between - Kyocera FS3820N | FS-3820N/3830N Operation Guide Rev-1.1 - Page 126
General Guidelines Selecting the Right Paper Laser printing is a process involving laser light, electrostatic discharge, toner, and heat. In addition, as the paper passes through the printer it undergoes considerable sliding, bending, and twisting motions. A highquality printing paper matching the - Kyocera FS3820N | FS-3820N/3830N Operation Guide Rev-1.1 - Page 127
that is too light or too heavy can cause misfeeding, jams, and premature wear of the printer. Uneven paper weight can cause multiple feeds, print defects, poor toner fusing, blurring, and other print quality problems. The proper weight is 60 to 105 g/m² for the paper cassette, and 60 to 200 g/m² for - Kyocera FS3820N | FS-3820N/3830N Operation Guide Rev-1.1 - Page 128
paper. The paper used with the printer should be neither extremely thick nor extremely thin. If you are having problems with paper jams, multiple feeds, the paper's appearance, feedability, curl, electrostatic properties, and toner fusing characteristics. The moisture content of the paper varies with - Kyocera FS3820N | FS-3820N/3830N Operation Guide Rev-1.1 - Page 129
paper can cause feeding problems in the printer. All paper used in the printer should be long grain. printer. Printed sheets will then come out flat. Most paper also has a top and bottom surface. Loading instructions paper is electrostatically charged to attract the toner. The paper must be able to - Kyocera FS3820N | FS-3820N/3830N Operation Guide Rev-1.1 - Page 130
are specified for use with photocopiers and/or page printers. Feed paper other than colored paper or pre- placed in the cassette; they must be fed manually and delivered in the face up stack. Since more likely than white bond paper to give trouble during printing. No liability will be assumed if - Kyocera FS3820N | FS-3820N/3830N Operation Guide Rev-1.1 - Page 131
with any part of the printer. Adhesive paper sticking to the drum or rollers will damage the printer. Be label paper is particularly likely to give trouble in printing. Top sheet (white bond paper apt to peel off, causing serious paper jam problems. Some label paper is manufactured with an extra - Kyocera FS3820N | FS-3820N/3830N Operation Guide Rev-1.1 - Page 132
a flat place and rub the edges with, for example, a ruler to smooth them. Envelopes The printer can print on envelopes using paper with a basis weight of 60 to 79 g/m² (16 to 21 lb/ream). Envelopes must be manually fed. An envelope is a more complex object than a single sheet of paper. For this - Kyocera FS3820N | FS-3820N/3830N Operation Guide Rev-1.1 - Page 133
Special Paper To avoid jamming due to curled envelopes, do not leave more than approximately 10 printed envelopes stacked in the paper trays during multiple envelope printing. Envelopes should be fed in the face-up position, right edge first. Thick Paper Fan the stack of paper and align the edges - Kyocera FS3820N | FS-3820N/3830N Operation Guide Rev-1.1 - Page 134
200 °C or 392 °F). Preprinted Paper Preprinted paper should have a bond paper base. The preprinted ink must be able to withstand the heat of fusing during the printing process, and must not be recycled paper, test a sample on the printer and check that the print quality is satisfactory. Note 2-11 - Kyocera FS3820N | FS-3820N/3830N Operation Guide Rev-1.1 - Page 135
the paper type for the paper source from the printer's operator panel will cause the printer to automatically select the paper source and print in be set. Paper source MP tray Paper Type Paper Paper Cassette Weight Duplex path (MP tray available only in Cassette mode) Plain Yes Yes Normal - Kyocera FS3820N | FS-3820N/3830N Operation Guide Rev-1.1 - Page 136
Chapter 3 Maintenance 3 This chapter explains how to replace the toner container and how to clean parts such as the registration roller and charger wire. This chapter explains the following topics: • Toner Container Replacement • Waste Toner Box Replacement • Cleaning 3-1 - Kyocera FS3820N | FS-3820N/3830N Operation Guide Rev-1.1 - Page 137
such as floppy disks during toner container replacement. Note • Be sure to clean the inside of the printer when replacing the toner container. For details, see Cleaning on page 3-9. • Use of original Kyocera Mita toner kits is highly recommended to prevent printer trouble and ensure the long life - Kyocera FS3820N | FS-3820N/3830N Operation Guide Rev-1.1 - Page 138
the printer top cover all the way. Top Cover 2 Pull the lock lever (blue colored) to the right and gently lift the old toner container. Lock Lever Keep the toner container as level as possible while removing. Note 3 Put the old toner container in the plastic bag supplied with the toner kit and - Kyocera FS3820N | FS-3820N/3830N Operation Guide Rev-1.1 - Page 139
shake the toner container (in the direction of the arrows) ten times or more. This ensures that the toner is evenly distributed inside. New Toner Container 10 times or more 6 Carefully remove the protective seal (orange colored). 7 Install the toner container into the printer. Protective Seal - Kyocera FS3820N | FS-3820N/3830N Operation Guide Rev-1.1 - Page 140
clicking sound. 9 Close the top cover. It is necessary to clean the inside of the printer after replacing the toner container. If the toner container is replaced when Replace toner Clean Note printer is displayed, Clean printer Press GO will appear after replacement. After cleaning the inside of the - Kyocera FS3820N | FS-3820N/3830N Operation Guide Rev-1.1 - Page 141
Box Replacement Replacing the Waste Toner Box When replacing the toner container, the used waste toner box in the printer should also be replaced with the new one from the new toner kit. Note 1 Open the left cover on the left side of the printer. Left Cover Old Waste Toner Box 2 While holding the - Kyocera FS3820N | FS-3820N/3830N Operation Guide Rev-1.1 - Page 142
Waste Toner Box Replacement 3 Cap the waste toner box after removing from the printer. Cap Old Waste Toner Box 4 To avoid toner spilling, place the capped waste toner box in the plastic bag supplied before proper disposal. Plastic Bag 5 Open the cap of the new waste toner box. Cap New Waste Toner - Kyocera FS3820N | FS-3820N/3830N Operation Guide Rev-1.1 - Page 143
into place. New Waste Toner Box 7 Ensure that it is correctly inserted and close the left cover. The printer parts must be cleaned when replacing the toner container. See Cleaning on page 3-9. 8 When the toner container is replaced, reset the toner counter (see Toner Counter Resetting on page 1-96 - Kyocera FS3820N | FS-3820N/3830N Operation Guide Rev-1.1 - Page 144
. Cleaning the Charger Wire The charger wire is a part in the drum unit that needs to be periodically cleaned. You can clean the charger wire by pulling the cleaning knob as instructed below. 1 Open the left cover on the left side of the printer. Left Cover Charger Unit 2 Pull the cleaning knob - Kyocera FS3820N | FS-3820N/3830N Operation Guide Rev-1.1 - Page 145
Grid The charger grid is a part located at the bottom of the charger unit, which also needs to be cleaned. You should use a grid cleaner attaching it to the printer and pull out the charger unit as instructed below. 1 Take the grid cleaner from protective bag in the new toner kit, and remove the cap - Kyocera FS3820N | FS-3820N/3830N Operation Guide Rev-1.1 - Page 146
Cleaning 3 Attach the grid cleaner to the printer with the pad at the top, as shown in the slowly pulling out and pushing back in the charger unit, as shown in the figure. This cleans grid part underneath the charger unit. Charger Roller Charger Unit Do not push the charger unit all the way in. - Kyocera FS3820N | FS-3820N/3830N Operation Guide Rev-1.1 - Page 147
Cleaning 5 Remove the grid cleaner from the printer and dispose of it. The grid cleaner is not re-usable. 6 After cleaning the charger wire and grid, push the charger unit all the way in and close the left cover. 3-12 - Kyocera FS3820N | FS-3820N/3830N Operation Guide Rev-1.1 - Page 148
Cleaning Paper Transfer Unit To avoid print quality problems due to paper dust and debris, clean the paper dust on the registration roller and the paper ramp using the wiper cloth included in the toner kit. Transfer Roller [Black] See Note below. Wiper Cloth Paper Ramp Registration Roller [Metal] - Kyocera FS3820N | FS-3820N/3830N Operation Guide Rev-1.1 - Page 149
Chapter 4 Troubleshooting 4 This chapter explains how to handle printer problems that may occur. If a problem cannot be corrected, contact your Kyocera Mita dealer. This chapter explains the following topics: • General Guide • Print Quality Problems • Indicators and Messages • Correcting a Paper Jam - Kyocera FS3820N | FS-3820N/3830N Operation Guide Rev-1.1 - Page 150
another file or using another print command. If the problem occurs only with a specific file or application, check the printer settings for that application. Table 4-1 If you still cannot correct a printer problem even after checking the above, please contact your Kyocera Mita dealer. 4-2 - Kyocera FS3820N | FS-3820N/3830N Operation Guide Rev-1.1 - Page 151
as blank output as. The troubleshooting procedure for each type of problem is explained below. If you still can not solve the problem, contact your Kyocera Mita dealer. Printed Results Completely blank printout Corrective Action Check the developer unit. Open the printer top cover and check that - Kyocera FS3820N | FS-3820N/3830N Operation Guide Rev-1.1 - Page 152
is flashing, install a new toner kit. See Toner Container Replacement on page 3-2. Check the print density. Display the print density menu from the operator panel and select a lighter density setting. See Print Density on page 1-95. Clean the charger wire. Open the printer's left cover. Pull the - Kyocera FS3820N | FS-3820N/3830N Operation Guide Rev-1.1 - Page 153
Dirt on the top edge or back of the paper Characters out of position. Print Quality Problems Corrective Action Check the paper chute and the ramp. Pull out the paper transfer unit and check for toner on the paper ramp. Clean the paper ramp using a soft, dry, lintfree cloth. See Cleaning on - Kyocera FS3820N | FS-3820N/3830N Operation Guide Rev-1.1 - Page 154
Either data is being processed, or data is being written onto the option CompactFlash card or Microdrive. The printer needs maintenance attention or the printer is warming up (Please wait). A problem or an error occurs that you can clear by yourself. (For example, a paper jam occurs.) Operations are - Kyocera FS3820N | FS-3820N/3830N Operation Guide Rev-1.1 - Page 155
Indicators and Messages Maintenance Messages The following table lists maintenance messages that you can deal with by yourself. If Call service person appears, turn off the printer, disconnect the power cord, and contact your Kyocera Mita dealer. Message Corrective Action Add paper (paper - Kyocera FS3820N | FS-3820N/3830N Operation Guide Rev-1.1 - Page 156
alternative? and you can change the source for paper feeding. Missing duplex drawer Paper jam After selecting a paper source and pressing the MENU toner Clean printer Replace the toner container using a new toner kit. The printer does not operate when this message is displayed. See Toner - Kyocera FS3820N | FS-3820N/3830N Operation Guide Rev-1.1 - Page 157
because there is not enough internal memory. Try adding more memory or changing resolution. See Appendix A. The printer's internal memory is running low due to the number of fonts and macros downloaded. Print a status page to see how much user memory is left, and try deleting unnecessary fonts and - Kyocera FS3820N | FS-3820N/3830N Operation Guide Rev-1.1 - Page 158
is no available Microdrive space. Delete unnecessary files, etc., in order to free up space. 05: The specified file does not exist in the Microdrive. job is not correct. Check the ID that is set using the printer driver. Insert the same memory card You have inserted the wrong CompactFlash (memory - Kyocera FS3820N | FS-3820N/3830N Operation Guide Rev-1.1 - Page 159
of the memory card. Memory overflow Press GO MemoryCard err## Press GO Paper path error The total amount of data received by the printer exceeds the printer's internal memory. Try adding more memory (expansion DIMM). Press the GO key to resume printing. You can abandon printing by the CANCEL key - Kyocera FS3820N | FS-3820N/3830N Operation Guide Rev-1.1 - Page 160
location A B C D E Description Paper is jammed at the paper cassette or inside the printer. Paper is jammed at the option paper feeder's cassette. Paper is jammed inside the rear cover of the option duplexer or at the duplexer drawer. Paper is jammed at the option sorter. Reference page 4-14 4-14 - Kyocera FS3820N | FS-3820N/3830N Operation Guide Rev-1.1 - Page 161
paper that may have been torn off and overlooked when the jammed paper was removed. If you cannot solve the problem by changing the paper, there may be a problem with the printer. Call a service person. When pulling the paper, pull it gently so as not to tear it. Torn pieces of paper are difficult - Kyocera FS3820N | FS-3820N/3830N Operation Guide Rev-1.1 - Page 162
Paper jam Cassette 1 Paper is jammed at the paper cassette or inside the printer. Remove the jammed paper using the procedure given below. While the display alternates between the paper jam message and HELP START, press the ? key. An - Kyocera FS3820N | FS-3820N/3830N Operation Guide Rev-1.1 - Page 163
Correcting a Paper Jam 3 If paper is jammed before the registration roller, remove it as shown in A. If paper is jammed under the registration roller, remove it as shown in B. A B Registration Roller Registration Roller Also, remove the paper jam 4 Open the rear cover and remove the jammed - Kyocera FS3820N | FS-3820N/3830N Operation Guide Rev-1.1 - Page 164
display alternates between the paper jam message and HELP START, press the ? key. An online help message appears. ? 1 Examples of online help messages Open duplexer rear cover and Open the rear cover of the duplexer and remove the jammed paper. remove the paper jam. Rear Cover 2 Pull out the - Kyocera FS3820N | FS-3820N/3830N Operation Guide Rev-1.1 - Page 165
3 Remove the jammed paper. and remove the paper jam. Correcting a Paper Jam Close rear cover 4 Close the rear cover of the duplexer and the duplex drawer. and duplex drawer. - HELP END -- Press ? Key ? 4-17 - Kyocera FS3820N | FS-3820N/3830N Operation Guide Rev-1.1 - Page 166
Correcting a Paper Jam Paper Jam at the Option Sorter Paper jam Sorter Paper is jammed at the option sorter. Remove the jammed paper using the procedure given below. While the display alternates between the paper jam message and HELP START, press the ? key. An online help message appears. -- - Kyocera FS3820N | FS-3820N/3830N Operation Guide Rev-1.1 - Page 167
Correcting a Paper Jam Close rear cover. 3 Close the rear cover of the option sorter. - HELP END -- Press ? Key ? 4-19 - Kyocera FS3820N | FS-3820N/3830N Operation Guide Rev-1.1 - Page 168
Check the 2 MP tray and Remove the paper jammed at the MP tray. Open and close the top cover (the paper jam error will be reset). remove the paper jam. Open and close top cover to release paper jam error. - HELP END -- Press ? Key ? 4-20 - Kyocera FS3820N | FS-3820N/3830N Operation Guide Rev-1.1 - Page 169
of fonts you can use with the printer. A font is a set of characters of a particular design. The design is referred to as a typeface. Several characteristics identify a font. These include the code set (For details on the code sets, read the Programming Manual on the supplied CD-ROM), spacing, pitch - Kyocera FS3820N | FS-3820N/3830N Operation Guide Rev-1.1 - Page 170
80 PostScript Level 3 compatible fonts. You can print the font list from the printer by using the printer's operator panel key. To print a list of fonts, see Font Lists on page 1-21. Font may be downloaded to the printer's memory from an option memory card or a hard disk. PCL (Scalable and Bitmap - Kyocera FS3820N | FS-3820N/3830N Operation Guide Rev-1.1 - Page 171
Font number Font samples 28 29 30 31 32 33 34 35 36 37 38 39 40 41 42 43 44 45 46 47 48 49 50 51 52 53 54 55 56 57 58 59 60 61 62 63 64 65 66 67 5-3 List of Fonts - Kyocera FS3820N | FS-3820N/3830N Operation Guide Rev-1.1 - Page 172
List of Fonts Font number Font samples 68 69 70 71 72 73 74 75 76 77 78 79 80 5-4 - Kyocera FS3820N | FS-3820N/3830N Operation Guide Rev-1.1 - Page 173
KPDL Fonts (1) List of Fonts 5-5 - Kyocera FS3820N | FS-3820N/3830N Operation Guide Rev-1.1 - Page 174
List of Fonts KPDL Fonts (2) 5-6 - Kyocera FS3820N | FS-3820N/3830N Operation Guide Rev-1.1 - Page 175
's memory and how to install each option unit. Also refer to the manuals of the respective option units. This appendix explains the following option units: • Expanding the Printer Memory • PF-60 Paper Feeder • DU-61 Duplexer • SO-60 Sorter • EF-60 Envelope Feeder • PT-4/PT-60 Rear Tray • Network - Kyocera FS3820N | FS-3820N/3830N Operation Guide Rev-1.1 - Page 176
into the option interface slot at the rear of the printer. The printer can be used on network environments including Windows, Macintosh, UNIX, NetWare, etc. For details, see User's Manual in the CDROM supplied with IB-20/21E/22. Serial lnterface Board Kit (IB-11) Connect to the computer's serial - Kyocera FS3820N | FS-3820N/3830N Operation Guide Rev-1.1 - Page 177
DIMM into your printer, the memory of the FS-3830N can be increased to a maximum of 576 MB and that of the FS-3820N to a maximum of 320 MB. • The expansion memory should be installed only by a Kyocera Mita authorized dealer or Kyocera Mita certified technician. Kyocera Mita Note shall not - Kyocera FS3820N | FS-3820N/3830N Operation Guide Rev-1.1 - Page 178
Memory Removing the Main Circuit Board The main circuit board of the printer is equipped with two sockets for memory expansion. Expansion memory is available in the form of DIMM. The following instructions are intended for the technician only. Note Notes on Handling the Main Circuit Board and - Kyocera FS3820N | FS-3820N/3830N Operation Guide Rev-1.1 - Page 179
objects, accidentally sticking to the back of the Note main circuit board, can cause serious damage to the printer. • There are two sockets are provided on the FS-3830N and one socket on the FS-3820N for expanding the printer's memory. (The extra 32 MB of DIMM memory that come standard with the - Kyocera FS3820N | FS-3820N/3830N Operation Guide Rev-1.1 - Page 180
, 32 MB, 64 MB, 128 MB, and 256 MB DIMM can be used for memory expansion. See your Kyocera Mita dealer for purchasing information of the DIMM that are best suited for use with this printer. Installing DIMM Insert the DIMM into the socket as shown below. 1 Remove the DIMM from its package - Kyocera FS3820N | FS-3820N/3830N Operation Guide Rev-1.1 - Page 181
the expansion memory, proceed as follows: 1 Make sure printer is turned off. Plug the power cord into the printer and turn the printer on. 2 Press the MENU key on the operator panel the amount of expanded memory. (The factory installed memory size is 64 MB for the FS3820N and 96 MB for FS-3830N.) A-7 - Kyocera FS3820N | FS-3820N/3830N Operation Guide Rev-1.1 - Page 182
you install the additional memory to the printer, follow the instructions below to set the printer driver so that the printer can use the memories efficiently. 1 Click the Windows start button, and click Printers and Faxes. 2 Right click the Kyocera Mita FS-3830N KX icon, and click Properties. The - Kyocera FS3820N | FS-3820N/3830N Operation Guide Rev-1.1 - Page 183
size paper. When installing more than one paper feeder, first stack the paper feeders together. Note 1 Turn off the printer and disconnect the power cord and printer cable. 2 Gently place the printer on top of the paper feeder(s). 3 Pull the paper cassette all the way out of the paper feeder. A-9 - Kyocera FS3820N | FS-3820N/3830N Operation Guide Rev-1.1 - Page 184
Installing Option Units 4 Push down the bottom plate until it locks. 5 Set the paper size dial to the size of paper to be used. 6 Adjust the paper guides and paper stopper to the size of paper to be used. A-10 - Kyocera FS3820N | FS-3820N/3830N Operation Guide Rev-1.1 - Page 185
7 Load paper. Installing Option Units • Do not load more paper than will fit under the load limits on the paper guides. Note • The paper cassette will hold approximately 500 sheets of paper with a 80 g/m² (21 lb) basis weight, or with a thickness of 0.11 mm. Load Limit - Kyocera FS3820N | FS-3820N/3830N Operation Guide Rev-1.1 - Page 186
bind) with the two printing orientations (portrait and landscape), duplex printing is possible in four different methods. Duplex printing can be specified from the application (printer driver). 1 Remove the tape and the pad from the duplexer. Pad 2 While pushing the rear cover release lever inward - Kyocera FS3820N | FS-3820N/3830N Operation Guide Rev-1.1 - Page 187
Installing Option Units 4 Gently place the printer on top of the duplexer. 5 Connect the printer cable (parallel interface cable, USB interface cable, serial interface cable or network interface cable) according to your operation environment. If you are using a paper cassette - Kyocera FS3820N | FS-3820N/3830N Operation Guide Rev-1.1 - Page 188
Installing Option Units 7 Pass the connected cable and power cord through the opening in the duplexer. 8 Install the duplexer rear cover. A-14 - Kyocera FS3820N | FS-3820N/3830N Operation Guide Rev-1.1 - Page 189
collator mode, and the mail box mode (for details about the modes, see KX Printer Drivers Operation Guide. The following installation procedure explains how to install the sorter when the option paper feeder (PF-60) and duplexer (DU-61) have already been installed. 1 Unpack the sorter and place it - Kyocera FS3820N | FS-3820N/3830N Operation Guide Rev-1.1 - Page 190
Installing Option Units 5 If the duplexer is installed, remove the duplexer rear cover, power cord, and printer cable. 6 Remove the sorter connection cover from the printer. Store the removed cover in a safe place. Sorter Connection Cover 7 Install the sorter by inserting the four hooks on its - Kyocera FS3820N | FS-3820N/3830N Operation Guide Rev-1.1 - Page 191
attachment legs by releasing the levers as shown in the figure one by one, and then lift the sorter. 9 Connect the sorter cable to the printer. Sorter Cable A-17 - Kyocera FS3820N | FS-3820N/3830N Operation Guide Rev-1.1 - Page 192
with two power cord sockets. The upper one is to be connected to a power outlet and the lower one is to be connected to the printer. If you are using a paper cassette for Legal size paper, be sure to pull the cassette out towards you first before you connect the - Kyocera FS3820N | FS-3820N/3830N Operation Guide Rev-1.1 - Page 193
the duplexer is installed, secure the power cord to the duplexer. Take care not to loosen the power cord. NO 13 If the duplexer is installed, remove the two cut-out portions from the upper part of the duplexer rear cover removed in step 5. 14 Reinstall the duplexer rear cover. Duplexer Rear Cover - Kyocera FS3820N | FS-3820N/3830N Operation Guide Rev-1.1 - Page 194
Installing Option Units 15 Install the five sorter trays to the sorter. Sorter Tray 16 Connect the power cord supplied with the printer to the sorter. Do not move or lift the printer with the sorter installed. Warning NO A-20 - Kyocera FS3820N | FS-3820N/3830N Operation Guide Rev-1.1 - Page 195
to print on large quantities of envelopes at one time. Installing the envelope feeder on the printer Turn OFF the power to the printer before installing the envelope feeder. Note 1 Pull the printer's paper transfer unit release lever (green colored), then draw the paper transfer unit fully out of - Kyocera FS3820N | FS-3820N/3830N Operation Guide Rev-1.1 - Page 196
paper transfer unit as shown in the figure and lay the envelope feeder down toward you. Envelope Feeder 4 Return the paper transfer unit into the printer with the envelope feeder mounted. Load envelopes into the envelope feeder 1 Push the bottom tray downward, as shown in the figure, until you hear - Kyocera FS3820N | FS-3820N/3830N Operation Guide Rev-1.1 - Page 197
3 Load envelopes into the envelope feeder so that they feed in face up, right edge first. Then adjust the envelope feeder's paper guides to the width of the envelope. Paper Guides • Do not set different types of envelopes into the feeder at the same time. Note • Do not load envelopes into the - Kyocera FS3820N | FS-3820N/3830N Operation Guide Rev-1.1 - Page 198
while they are being fed, or attempt to pull an envelope back once it starts being fed. Damage to the mechanism may result. • To avoid trouble, we recommend that envelopes be delivered face-up using the option rear tray. Refer to next page. A-24 - Kyocera FS3820N | FS-3820N/3830N Operation Guide Rev-1.1 - Page 199
facing up (reverse order), or when you are printing on envelopes, postcards, transparencies, or thick paper. When installing it directly to the printer, use PT-4. If an option duplexer has been installed, use PT-60. 1 Install the paper stopper according to the size of paper to be used. (same for - Kyocera FS3820N | FS-3820N/3830N Operation Guide Rev-1.1 - Page 200
standard for the network interface on the printer, the network interface card supports TCP/IP, IPX/SPX, NetBEUI, and EtherTalk protocols, so that the printer can be used on network environments including Windows, Macintosh, UNIX, NetWare, etc. 1 Turn off the printer and disconnect the power cord and - Kyocera FS3820N | FS-3820N/3830N Operation Guide Rev-1.1 - Page 201
4 Connect the network cable. Installing Option Units Network Cable 5 Set the network address from the printer operator panel (for details about the modes, see Network Interface Parameters on page 1-78). A-27 - Kyocera FS3820N | FS-3820N/3830N Operation Guide Rev-1.1 - Page 202
use the e-MPS functions. For details, see e-MPS on page 1-56. For details of available Microdrives, see your dealer. 1 Turn off the printer and disconnect the power cord and printer cable. 2 Remove the two screws from the rear panel. Rear Panel Screws 3 Pull the main circuit board all the way out of - Kyocera FS3820N | FS-3820N/3830N Operation Guide Rev-1.1 - Page 203
Installing Option Units 4 Install the Microdrive into its slot on the main circuit board. Microdrive Slot Microdrive 5 Return the main circuit board to the printer by reversing the procedure followed when removing it. A-29 - Kyocera FS3820N | FS-3820N/3830N Operation Guide Rev-1.1 - Page 204
. Do not insert or remove a CompactFlash card while power is on. If the CompactFlash card is removed while the printer is on, damage could Note result in the printer's electronics or the CompactFlash card. 2 Insert the CompactFlash card in the slot. Insert it face up, connector end first. Push - Kyocera FS3820N | FS-3820N/3830N Operation Guide Rev-1.1 - Page 205
timings, connector specifications, and voltage levels. The RS-232C protocols are also covered. Finally, it explains how to use the printer in a multi-computer environment. This appendix explains the following topics: • Parallel Interface • USB Interface • Serial Interface (Option) • RS-232C Protocol - Kyocera FS3820N | FS-3820N/3830N Operation Guide Rev-1.1 - Page 206
interface. The parallel interface mode can be activated from the operator panel. See Parallel Interface Mode on page 1-74. Use a parallel printer cable that complies with the IEEE1284 standard. Note You can choose from four communication modes: Communication Mode Auto [default] Nibble (high - Kyocera FS3820N | FS-3820N/3830N Operation Guide Rev-1.1 - Page 207
Parallel Interface Pin In/out Description 1 In Strobe* [nStrobe] 2 In/Out Data 0 [Data 1] 3 In/Out Data 1 [Data 2] 4 In/Out Data 2 [Data 3] 5 In/Out Data 3 [Data 4] 6 In/Out Data 4 [Data 5] 7 In/Out Data 5 [Data 6] 8 In/Out Data 6 [Data 7] 9 In/Out Data 7 [Data 8] 10 Out - Kyocera FS3820N | FS-3820N/3830N Operation Guide Rev-1.1 - Page 208
to 9) These eight signals form the data byte sent from the host computer to the printer. Data 7 [8] is the most significant bit. Acknowledge* [nAck] (Pin 10) This Power Ready (Pin 35) This signal is high when the printer is turned on. The Paper Empty, Online, and Error signals are not used unless - Kyocera FS3820N | FS-3820N/3830N Operation Guide Rev-1.1 - Page 209
USB Interface USB Interface This printer supports the Hi-Speed USB 2.0/Full-Speed USB 2.0 interface specifications and interface signals are as follows. Specifications Basic specification Complies with the Hi-Speed USB 2.0/Full-Speed USB 2.0. Connectors Printer: B-type receptacle (female) with - Kyocera FS3820N | FS-3820N/3830N Operation Guide Rev-1.1 - Page 210
) Serial Interface (Option) Installing the option serial interface board kit (IB-11) in the printer enables connection to a computer with an RS-232C standard serial interface. RS-232C Interface Interface Signals The pins of the printer's RS-232C interface connector carry the signals listed in - Kyocera FS3820N | FS-3820N/3830N Operation Guide Rev-1.1 - Page 211
up memory. They are indicated on the status printout. They can be changed by the FRPO (firmware reprogram) command described in the Programming Manual provided on the CD-ROM supplied with the printer. The parameters and their identification codes are given below. H1: Baud rate Parameter value 12 24 - Kyocera FS3820N | FS-3820N/3830N Operation Guide Rev-1.1 - Page 212
of data in a continuous stream. H8: Received-data buffer size This is the size of the input buffer, specified in units of 10 Kbytes. The factory-set value is 6, meaning 60 Kbytes. Since DTR/DSR protocol is not used with the RS-422A standard, select a parameter value other than 0, 1, or 2 for - Kyocera FS3820N | FS-3820N/3830N Operation Guide Rev-1.1 - Page 213
RS-232C Protocol PRESCRIBE FRPO D0 Command The PRESCRIBE FRPO D0 command provides control over XON/XOFF operation when an error occurs on the serial interface. The following table summarizes the error status corresponding to different D0 values. Timing of XON transfer to host while Ready or - Kyocera FS3820N | FS-3820N/3830N Operation Guide Rev-1.1 - Page 214
interface connector. 4 Switch on the printer's power. 5 The printer's RS-232C parameters are factory-set to the following values: Baud rate printer performs both of them simultaneously, using positive logic for DTR. If you are uncertain as to the printer's current parameter settings, you can reset - Kyocera FS3820N | FS-3820N/3830N Operation Guide Rev-1.1 - Page 215
bar and align the cursor with Settings, then click on Control Panel from among the items displayed. 2 The Control Panel window opens. Double click on System. 3 System Properties window opens. Click on the Hardware tab, then click on the Device Manager button, and double click on Ports (COM & LPT - Kyocera FS3820N | FS-3820N/3830N Operation Guide Rev-1.1 - Page 216
95/98/Me, make settings as follows: 1 Click on Start button in the Windows 95/98/Me Task Bar and align the cursor with Settings, then click on Control Panel from among the items displayed. 2 The control panel folder - Kyocera FS3820N | FS-3820N/3830N Operation Guide Rev-1.1 - Page 217
RS-232C Cable Connection In DOS, enter the following commands: C:\>MODE COM1:96,N,8,1,P C:\>MODE LPT1:=COM1 To test the interface, enter the following: CTRL P C:\>DIR CTRL P The software settings made using the above procedures are temporary. On most computers, permanent settings must be made with - Kyocera FS3820N | FS-3820N/3830N Operation Guide Rev-1.1 - Page 218
Appendix C Specifications C C-1 - Kyocera FS3820N | FS-3820N/3830N Operation Guide Rev-1.1 - Page 219
Drum Toner saving Paper Paper feed trays Capacity of output trays Table C-1 Parallel USB Network Option Cassette MP tray Top tray Rear tray (Option) Description FS-3820N FS-3830N Electrophotography, laser )/Full-Speed USB 2.0 (12 Mbps), 1 Protocol support: TCP/IP, IPX/SPX, NetBEUI, EtherTalk, 1 - Kyocera FS3820N | FS-3820N/3830N Operation Guide Rev-1.1 - Page 220
Specifications Item Description FS-3820N FS-3830N Ambient conditions Temperature: 10 to 32.5 °C (50 to 90.5 °F) Humidity: 20 to 80 % RH Optimum conditions: 23 °C (73.4 °F), 60 % RH Altitude: Max. 2,000 m (6,500 - Kyocera FS3820N | FS-3820N/3830N Operation Guide Rev-1.1 - Page 221
Glossary C Glossary-1 - Kyocera FS3820N | FS-3820N/3830N Operation Guide Rev-1.1 - Page 222
per inch, and is the unit of printer resolution. Ecoprint This is a printing mode that controls toner consumption. Pages printed in the Ecoprint mode management tool that can be used with the Kyocera Mita FS series. You can view information for printers connected to the network using SNMP commands. - Kyocera FS3820N | FS-3820N/3830N Operation Guide Rev-1.1 - Page 223
supports Hi-Speed USB 2.0. The maximum transfer rate is 480 Mbps and the maximum cable length is 5 meters (16 feet). RAM disk This is a virtual disk drive that uses part of the printer's memory. With RAM disk you can set any memory size arbitrarily, and use electronic sorting (to reduce print - Kyocera FS3820N | FS-3820N/3830N Operation Guide Rev-1.1 - Page 224
Index Index-1 - Kyocera FS3820N | FS-3820N/3830N Operation Guide Rev-1.1 - Page 225
drum x Auto continue 1-105 C Cassette size 1-24 Charger unit 3-10 Cleaning 3-9 charger wire 3-9 grid cleaner 3-10 paper transfer unit 3-13 Cleaning knob 3-9 Code job 1-67, 1-72 CompactFlash card xii, 1-81, A-2, A-30 D Developer unit 4-3 DIMM A-4 Duplexer A-28 Maintenance messages 4-7 paper guides 1- - Kyocera FS3820N | FS-3820N/3830N Operation Guide Rev-1.1 - Page 226
gauge 1-16, 1-96 Toner kit 3-2 Top cover 3-3 Troubleshooting error messages 4-10 indicators 4-6 interface 4-2 maintenance messages 4-7 quality problems 4-3 Typeface 5-1 U USB interface xi, 1-3, 1-75, B-5, Glossary-3 V Virtual Mailbox (VMB) 1-68 W Waste toner box 3-2, 3-6 Windows B-12 Wiper cloth - Kyocera FS3820N | FS-3820N/3830N Operation Guide Rev-1.1 - Page 227
©2003, 2004 is a trademark of Kyocera Corporation 2004.1
-
 1
1 -
 2
2 -
 3
3 -
 4
4 -
 5
5 -
 6
6 -
 7
7 -
8
-
9
-
10
-
11
-
12
-
13
-
14
-
15
-
16
-
17
-
18
-
19
-
20
-
21
-
22
-
23
-
24
-
25
-
26
-
27
-
28
-
29
-
30
-
31
-
32
-
33
-
34
-
35
-
36
-
37
-
38
-
39
-
40
-
41
-
42
-
43
-
44
-
45
-
46
-
47
-
48
-
49
-
50
-
51
-
52
-
53
-
54
-
55
-
56
-
57
-
58
-
59
-
60
-
61
-
62
-
63
-
64
-
65
-
66
-
67
-
68
-
69
-
70
-
71
-
72
-
73
-
74
-
75
-
76
-
77
-
78
-
79
-
80
-
81
-
82
-
83
-
84
-
85
-
86
-
87
-
88
-
89
-
90
-
91
-
92
-
93
-
94
-
95
-
96
-
97
-
98
-
99
-
100
-
101
-
102
-
103
-
104
-
105
-
106
-
107
-
108
-
109
-
110
-
111
-
112
-
113
-
114
-
115
-
116
-
117
-
118
-
119
-
120
-
121
-
122
-
123
-
124
-
125
-
126
-
127
-
128
-
129
-
130
-
131
-
132
-
133
-
134
-
135
-
136
-
137
-
138
-
139
-
140
-
141
-
142
-
143
-
144
-
145
-
146
-
147
-
148
-
149
-
150
-
151
-
152
-
153
-
154
-
155
-
156
-
157
-
158
-
159
-
160
-
161
-
162
-
163
-
164
-
165
-
166
-
167
-
168
-
169
-
170
-
171
-
172
-
173
-
174
-
175
-
176
-
177
-
178
-
179
-
180
-
181
-
182
-
183
-
184
-
185
-
186
-
187
-
188
-
189
-
190
-
191
-
192
-
193
-
194
-
195
-
196
-
197
-
198
-
199
-
200
-
201
-
202
-
203
-
204
-
205
-
206
-
207
-
208
-
209
-
210
-
211
-
212
-
213
-
214
-
215
-
216
-
217
-
218
-
219
-
220
-
221
-
222
-
223
-
224
-
225
-
226
-
227
 |
 |
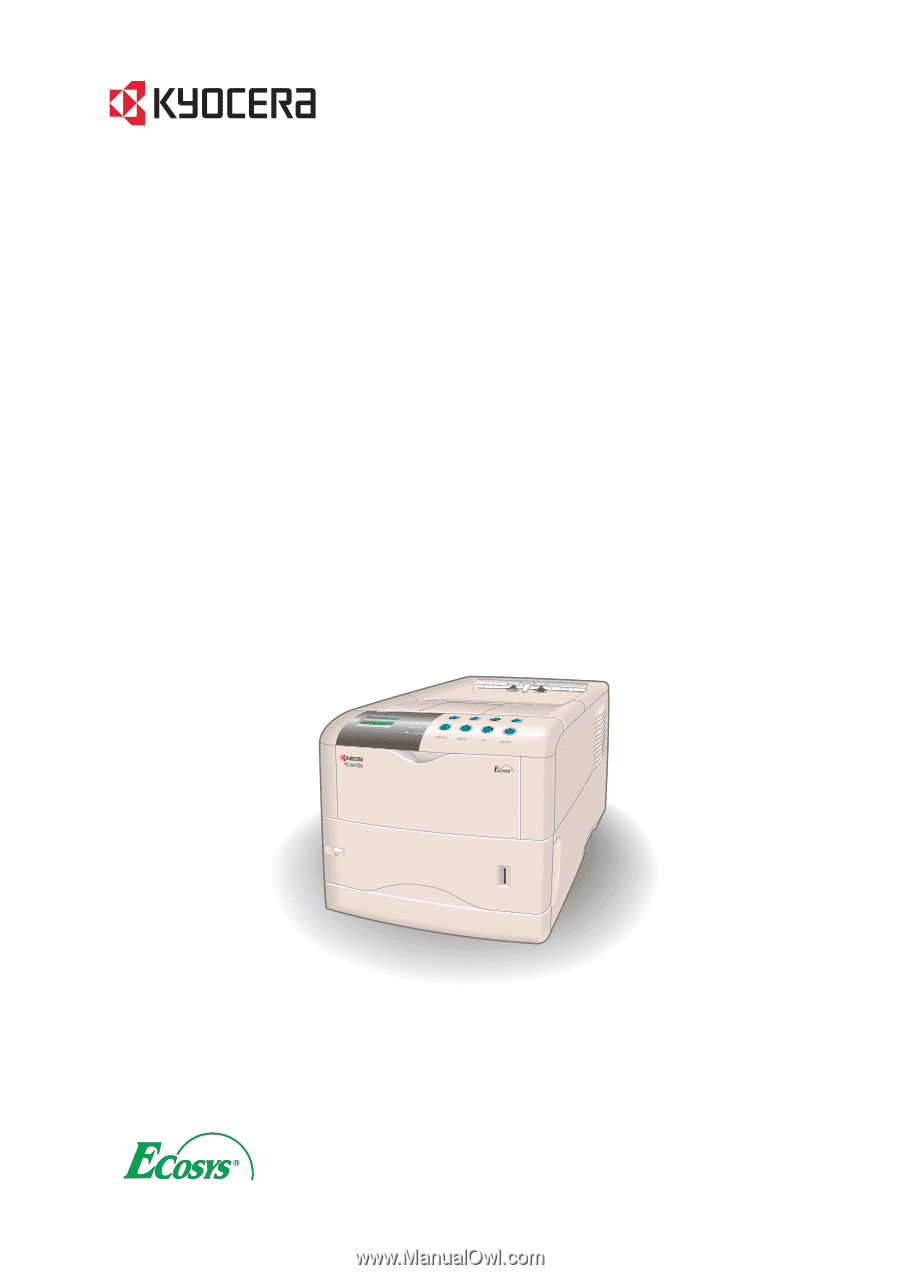
FS-3820N
FS-3830N
Page Printers
Operation Guide