Kyocera KM-1820 1820 Operation Guide (Advanced Edition) - Page 118
Machine Parts, Placing Originals in the Document Processor, Left Cover, Original Insert Guides
 |
View all Kyocera KM-1820 manuals
Add to My Manuals
Save this manual to your list of manuals |
Page 118 highlights
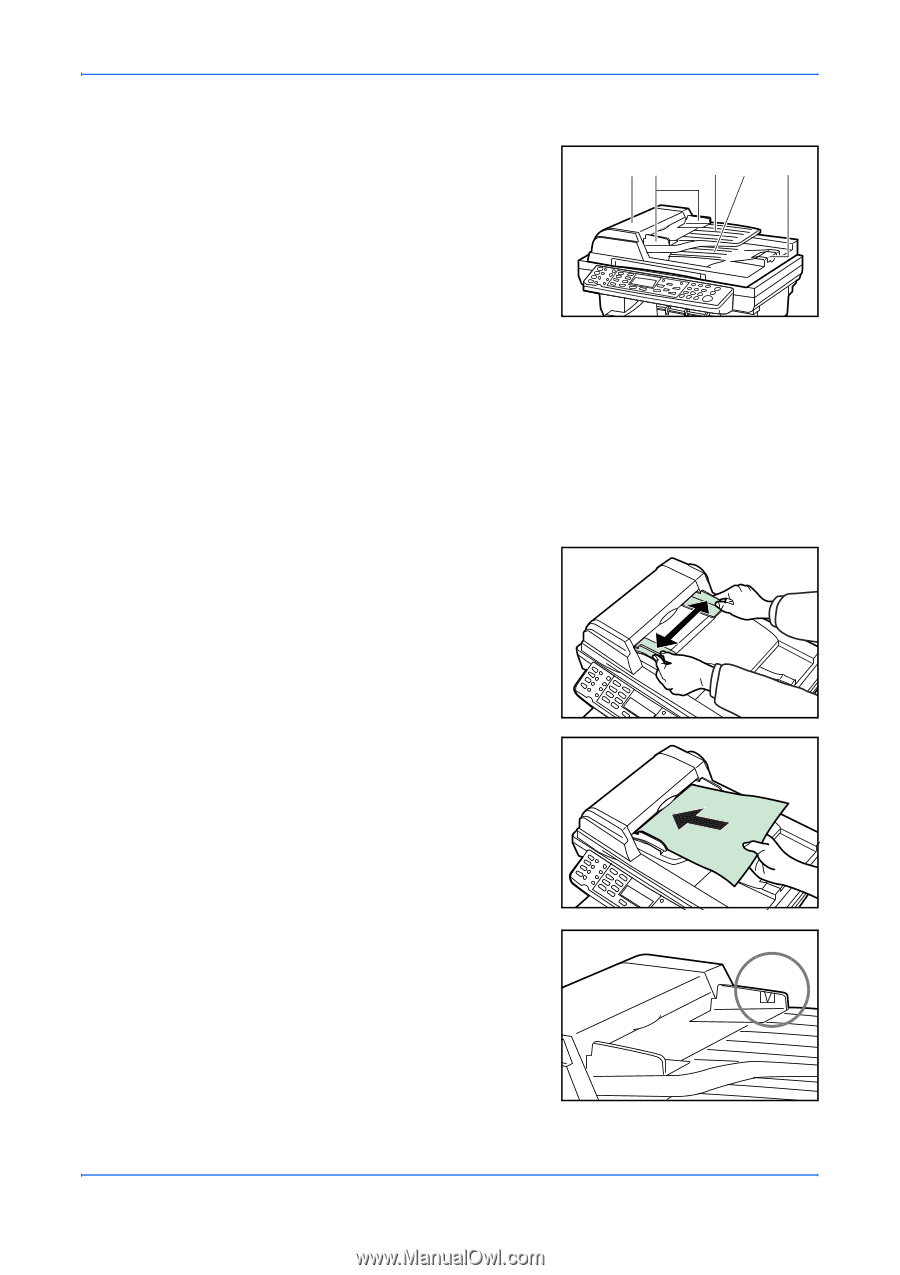
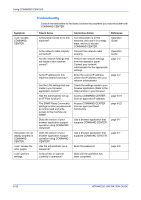
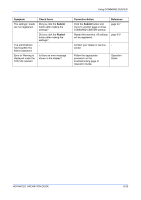
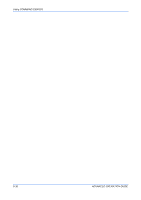
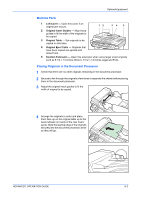
Optional Equipment Machine Parts 1 Left Cover - Open this cover if an original jam occurs. 12 34 5 2 Original Insert Guides - Align these guides to fit the width of the originals to be copied. 3 Original Table - Set originals to be copied on this table. 4 Original Eject Table - Originals that have been copied are ejected and stored here. 5 Ejection Extension - Open this extension when using larger sized originals such as 8 1/2 × 13 inches Oficio II, 8 1/2 × 14 inches Legal and Folio. Placing Originals in the Document Processor 1 Check that there are no other originals remaining in the document processor. 2 Be sure to fan through the originals a few times to separate the sheets before placing them in the document processor. 3 Adjust the original insert guides to fit the width of original to be copied. 4 Arrange the originals in order and place them face up on the original table up to the level indicator on inside of the rear insert guide. Slide the leading edge of the originals securely into the document processor as far as they will go. ADVANCED OPERATION GUIDE 9-3
-
 1
1 -
2
-
3
-
4
-
5
-
6
-
7
-
8
-
9
-
10
-
11
-
12
-
13
-
14
-
15
-
16
-
17
-
18
-
19
-
20
-
21
-
22
-
23
-
24
-
25
-
26
-
27
-
28
-
29
-
30
-
31
-
32
-
33
-
34
-
35
-
36
-
37
-
38
-
39
-
40
-
41
-
42
-
43
-
44
-
45
-
46
-
47
-
48
-
49
-
50
-
51
-
52
-
53
-
54
-
55
-
56
-
57
-
58
-
59
-
60
-
61
-
62
-
63
-
64
-
65
-
66
-
67
-
68
-
69
-
70
-
71
-
72
-
73
-
74
-
75
-
76
-
77
-
78
-
79
-
80
-
81
-
82
-
83
-
84
-
85
-
86
-
87
-
88
-
89
-
90
-
91
-
92
-
93
-
94
-
95
-
96
-
97
-
98
-
99
-
100
-
101
-
102
-
103
-
104
-
105
-
106
-
107
-
108
-
109
-
110
-
111
-
112
-
 113
113 -
 114
114 -
 115
115 -
 116
116 -
 117
117 -
 118
118 -
 119
119 -
 120
120 -
 121
121 -
 122
122 -
 123
123 -
124
-
125
-
126
-
127
-
128
-
129
-
130
-
131
-
132
-
133
-
134
-
135
-
136
-
137
-
138
-
139
-
140
-
141
-
142
-
143
-
144
-
145
-
146
-
147
 |
 |