Kyocera KM-1820 1820 Operation Guide (Advanced Edition) - Page 40
Subnet Mask Setting, Default Gateway Setting
 |
View all Kyocera KM-1820 manuals
Add to My Manuals
Save this manual to your list of manuals |
Page 40 highlights
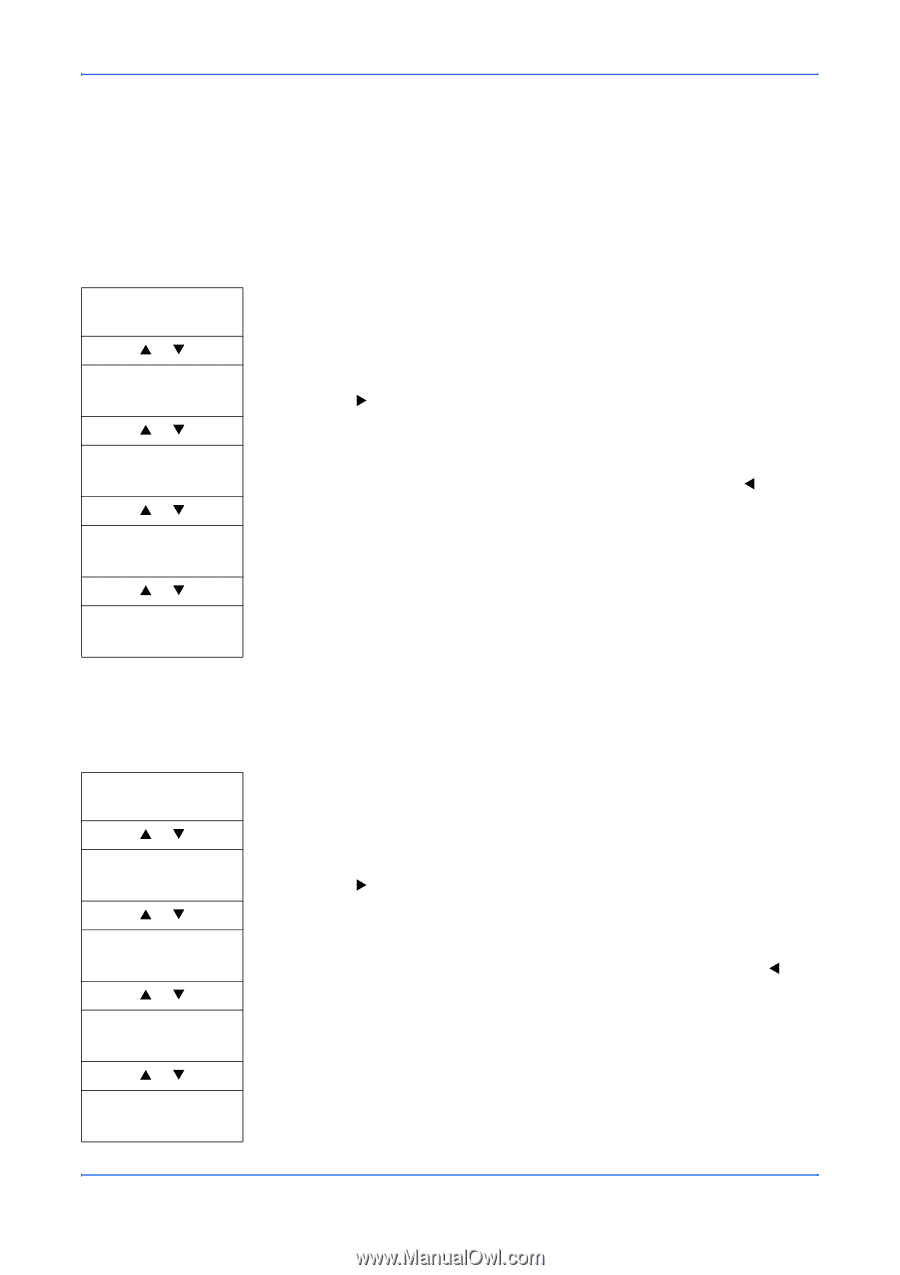
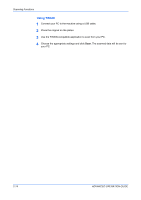
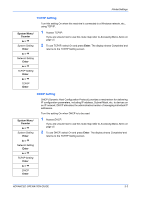
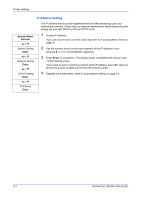
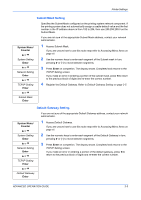
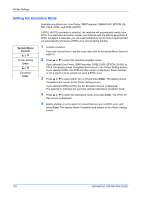
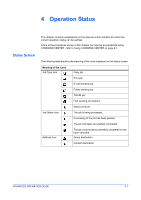
Printer Settings Subnet Mask Setting Specifies the Subnet Mask configured on the printing system network component. If the printing system does not automatically assign a usable default value and the first number in the IP address above is from 192 to 254, then use 255.255.255.0 as the Subnet Mask. If you are not sure of the appropriate Subnet Mask address, contact your network administrator. System Menu/ Counter S or T System Setting Enter S or T Network Setting Enter S or T TCP/IP Setting Enter S or T Subnet Mask Enter 1 Access Subnet Mask. If you are unsure how to use this route map refer to Accessing Menu Items on page vii. 2 Use the numeric keys to enter each segment of the Subnet mask in turn, pressing X or [*.] to move between segments. 3 Press Enter on completion. The display shows Completed and returns to the TCP/IP Setting screen. If you make an error in entering a portion of the subnet mask, press W to return to the previous block of digits and re-enter the correct number. 4 Register the Default Gateway. Refer to Default Gateway Setting on page 3-5. Default Gateway Setting If you are not sure of the appropriate Default Gateway address, contact your network administrator. System Menu/ Counter S or T System Setting Enter S or T Network Setting Enter S or T TCP/IP Setting Enter S or T Default Gateway Enter 1 Access Default Gateway. If you are unsure how to use this route map refer to Accessing Menu Items on page vii. 2 Use the numeric keys to enter each segment of the Default Gateway in turn, pressing X or [*.] to move between segments. 3 Press Enter on completion. The display shows Completed and returns to the TCP/IP Setting screen. If you make an error in entering a portion of the default gateway, press W to return to the previous block of digits and re-enter the correct number. ADVANCED OPERATION GUIDE 3-5
-
 1
1 -
2
-
3
-
4
-
5
-
6
-
7
-
8
-
9
-
10
-
11
-
12
-
13
-
14
-
15
-
16
-
17
-
18
-
19
-
20
-
21
-
22
-
23
-
24
-
25
-
26
-
27
-
28
-
29
-
30
-
31
-
32
-
33
-
34
-
 35
35 -
 36
36 -
 37
37 -
 38
38 -
 39
39 -
 40
40 -
 41
41 -
 42
42 -
 43
43 -
 44
44 -
 45
45 -
46
-
47
-
48
-
49
-
50
-
51
-
52
-
53
-
54
-
55
-
56
-
57
-
58
-
59
-
60
-
61
-
62
-
63
-
64
-
65
-
66
-
67
-
68
-
69
-
70
-
71
-
72
-
73
-
74
-
75
-
76
-
77
-
78
-
79
-
80
-
81
-
82
-
83
-
84
-
85
-
86
-
87
-
88
-
89
-
90
-
91
-
92
-
93
-
94
-
95
-
96
-
97
-
98
-
99
-
100
-
101
-
102
-
103
-
104
-
105
-
106
-
107
-
108
-
109
-
110
-
111
-
112
-
113
-
114
-
115
-
116
-
117
-
118
-
119
-
120
-
121
-
122
-
123
-
124
-
125
-
126
-
127
-
128
-
129
-
130
-
131
-
132
-
133
-
134
-
135
-
136
-
137
-
138
-
139
-
140
-
141
-
142
-
143
-
144
-
145
-
146
-
147
 |
 |