Kyocera KM-1820 1820 Operation Guide (Basic Edition) Rev-1.1 - Page 38
Connecting the Power Cord, Turning the Machine On, Preparations, OPERATION GUIDE
 |
View all Kyocera KM-1820 manuals
Add to My Manuals
Save this manual to your list of manuals |
Page 38 highlights
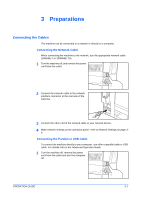
Preparations 2 Connect the printer cable to the appropriate connector located at the rear side of the machine. Parallel Cable USB Cable 3 Connect the other end of the printer cable to the appropriate connector on your computer. Connecting the Power Cord Connect the power cord to the rear of the machine. Connect the other end to a suitable power outlet. Turning the Machine On Turn the power switch on. The machine will begin to warm up after which the basic screen is displayed. 3-2 OPERATION GUIDE
-
 1
1 -
2
-
3
-
4
-
5
-
6
-
7
-
8
-
9
-
10
-
11
-
12
-
13
-
14
-
15
-
16
-
17
-
18
-
19
-
20
-
21
-
22
-
23
-
24
-
25
-
26
-
27
-
28
-
29
-
30
-
31
-
32
-
 33
33 -
 34
34 -
 35
35 -
 36
36 -
 37
37 -
 38
38 -
 39
39 -
 40
40 -
 41
41 -
 42
42 -
 43
43 -
44
-
45
-
46
-
47
-
48
-
49
-
50
-
51
-
52
-
53
-
54
-
55
-
56
-
57
-
58
-
59
-
60
-
61
-
62
-
63
-
64
-
65
-
66
-
67
-
68
-
69
-
70
-
71
-
72
-
73
-
74
-
75
-
76
-
77
-
78
-
79
-
80
-
81
-
82
-
83
-
84
-
85
-
86
-
87
-
88
-
89
-
90
 |
 |
Preparations
3-2
OPERATION GUIDE
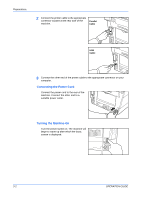
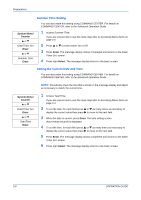
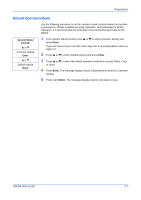
2
Connect the printer cable to the appropriate
connector located at the rear side of the
machine.
3
Connect the other end of the printer cable to the appropriate connector on your
computer.
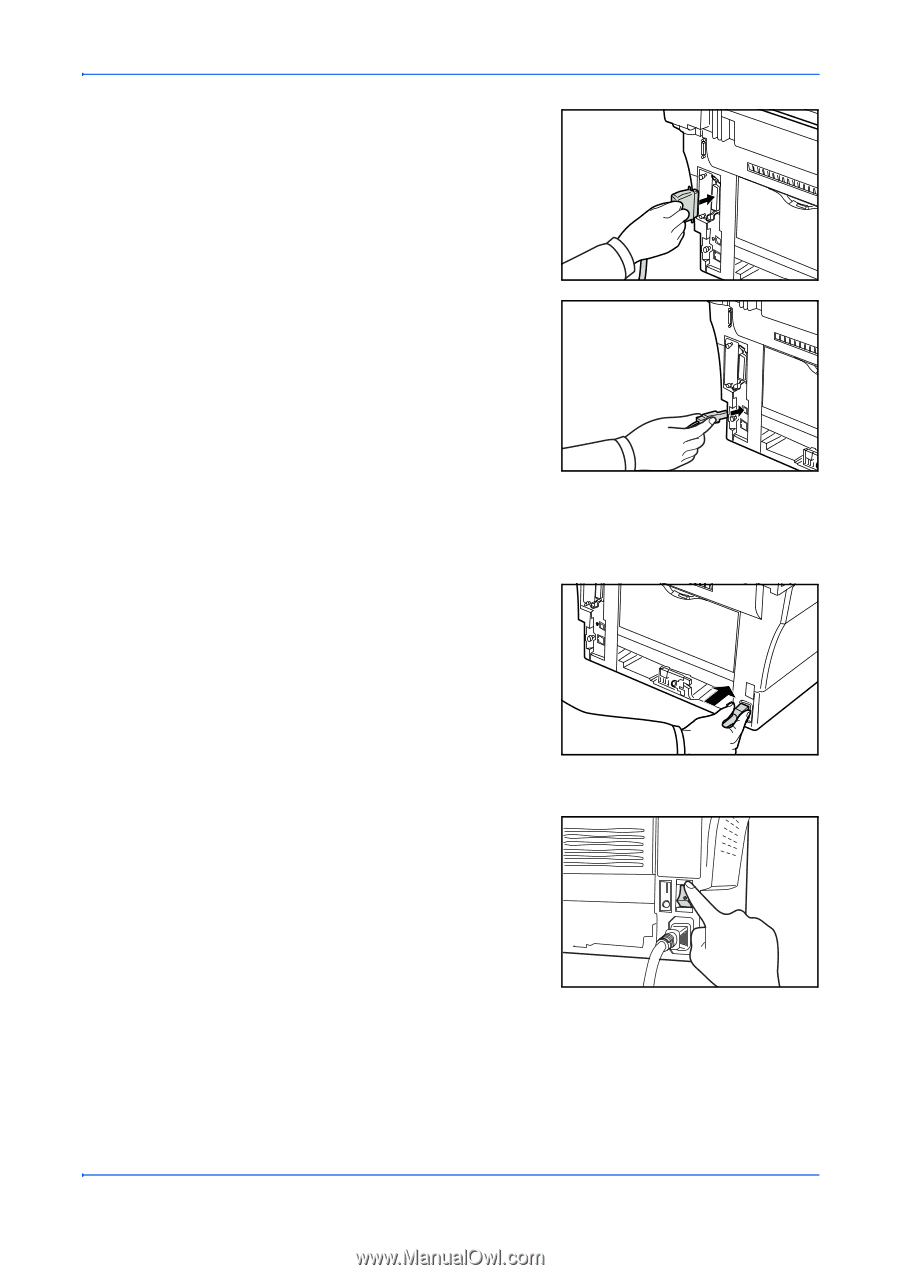
Connecting the Power Cord
Connect the power cord to the rear of the
machine. Connect the other end to a
suitable power outlet.
Turning the Machine On
Turn the power switch on. The machine will
begin to warm up after which the basic
screen is displayed.
Parallel
Cable
USB
Cable