Kyocera KM-1820 1820 Operation Guide (Basic Edition) Rev-1.1 - Page 66
Cleaning the Charger and the Registration Roller, CLEANER HOME POSITION
 |
View all Kyocera KM-1820 manuals
Add to My Manuals
Save this manual to your list of manuals |
Page 66 highlights
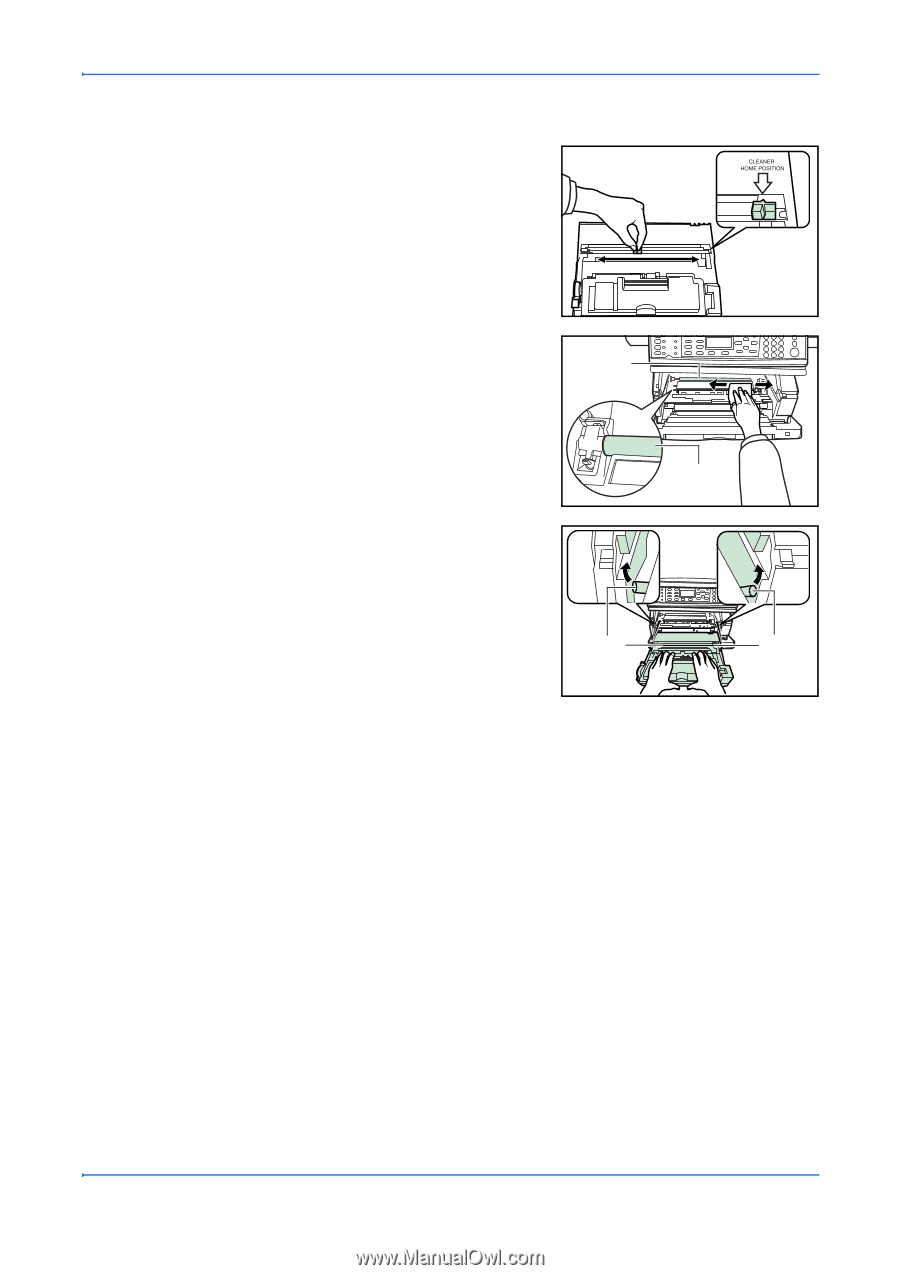
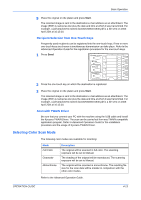
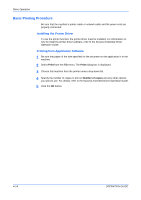
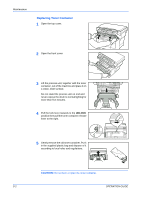
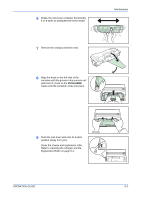
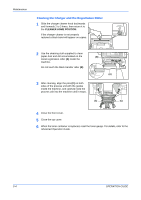
Maintenance Cleaning the Charger and the Registration Roller 1 Slide the charger cleaner knob backwards and forwards 2 to 3 times, then return it to the CLEANER HOME POSITION. If the charger cleaner is not properly restored a black band will appear on copies. 2 Use the cleaning cloth supplied to clean paper dust and dirt accumulated on the (B) metal registration roller (A) inside the machine. Do not touch the black transfer roller (B). 3 After cleaning, align the pins (C) on both sides of the process unit with the guides inside the machine, and carefully slide the process unit into the machine until in stops. (C) (A) (C) 4 Close the front cover. 5 Close the top cover. 6 When the toner container is replaced, reset the toner gauge. For details, refer to the Advanced Operation Guide. 5-4 OPERATION GUIDE
-
 1
1 -
2
-
3
-
4
-
5
-
6
-
7
-
8
-
9
-
10
-
11
-
12
-
13
-
14
-
15
-
16
-
17
-
18
-
19
-
20
-
21
-
22
-
23
-
24
-
25
-
26
-
27
-
28
-
29
-
30
-
31
-
32
-
33
-
34
-
35
-
36
-
37
-
38
-
39
-
40
-
41
-
42
-
43
-
44
-
45
-
46
-
47
-
48
-
49
-
50
-
51
-
52
-
53
-
54
-
55
-
56
-
57
-
58
-
59
-
60
-
 61
61 -
 62
62 -
 63
63 -
 64
64 -
 65
65 -
 66
66 -
 67
67 -
 68
68 -
 69
69 -
 70
70 -
 71
71 -
72
-
73
-
74
-
75
-
76
-
77
-
78
-
79
-
80
-
81
-
82
-
83
-
84
-
85
-
86
-
87
-
88
-
89
-
90
 |
 |