Kyocera KM-3530 2530/3530/4030 Operation Guide Rev 2C - Page 25
Basic Operation
 |
View all Kyocera KM-3530 manuals
Add to My Manuals
Save this manual to your list of manuals |
Page 25 highlights
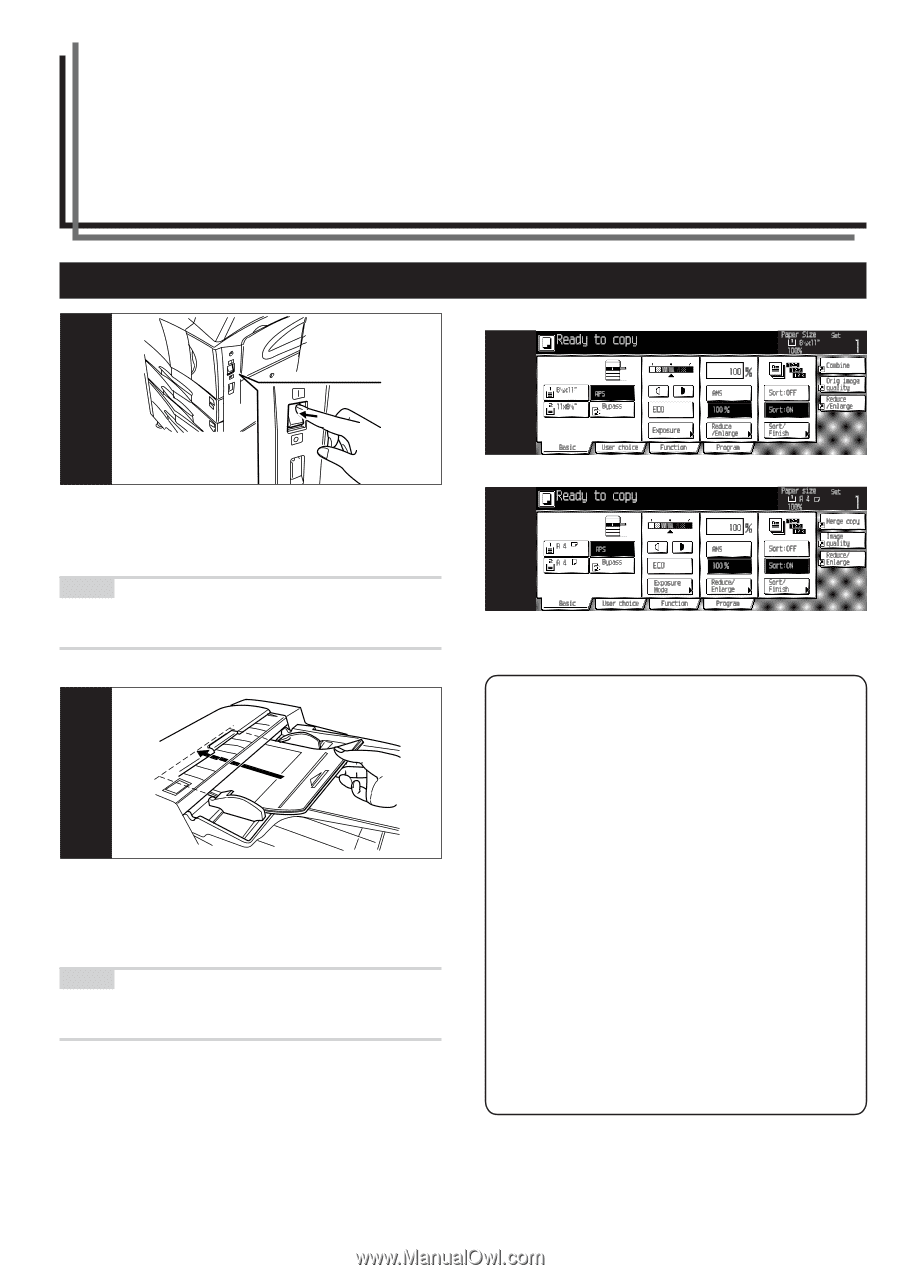
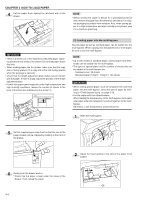
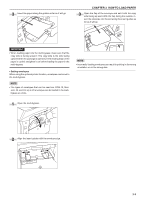
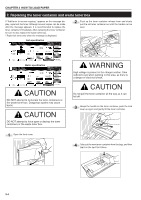
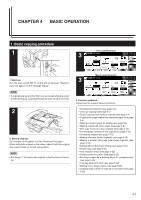
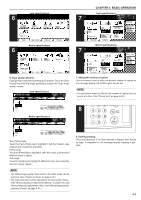
CHAPTER 4 BASIC OPERATION 1. Basic copying procedure 1 Inch specifications 3 1. Warm-up Turn the main switch ON ( | ). At the end of warm-up, "Ready to copy." will appear on the message display. NOTE • If originals are set and the Start key is pressed while the copier is still warming up, copying will begin as soon as warm-up ends. 2 2. Setting originals Set originals on the platen or in the Document Processor. When setting the original on the platen, adjust it with the original size scales based on the left rear position. NOTE • See page 7-1 for how to set originals in the Document Proces- sor. Metric specifications 3 3. Function selection Select from the copier's various functions. • Enlargement/reduction (see page 4-4) • Interrupt copying (see page 4-7) • Duplex copying from various originals (see page 5-1) • Copying two-page originals as separate pages (see page 5-4) • Making a margin space for binding (see page 5-6) • Making copies with clean edges (see page 5-8) • One copy from two or four originals (see page 5-10) • Printing page numbers on the copies (see page 5-12) • Overlaying images (see page 5-15) • Making a booklet (sheet originals) (see page 5-16) • Making a booklet (two-page [open-face] originals) (see page 5-18) • Sorting without document finisher (see page 5-20) • Rotate copy (see page 5-21) • Auto selection mode (see page 5-22) • Adding covers for copies (see page 5-23) • Feeding a paper as a backing sheet for transparencies (see page 5-26) • Inverting black and white (see page 5-28) • Making mirror-image copies (see page 5-29) • Copying large number of originals in one batch (see page 5-30) 4-1
-
 1
1 -
2
-
3
-
4
-
5
-
6
-
7
-
8
-
9
-
10
-
11
-
12
-
13
-
14
-
15
-
16
-
17
-
18
-
19
-
 20
20 -
 21
21 -
 22
22 -
 23
23 -
 24
24 -
 25
25 -
 26
26 -
 27
27 -
 28
28 -
 29
29 -
 30
30 -
31
-
32
-
33
-
34
-
35
-
36
-
37
-
38
-
39
-
40
-
41
-
42
-
43
-
44
-
45
-
46
-
47
-
48
-
49
-
50
-
51
-
52
-
53
-
54
-
55
-
56
-
57
-
58
-
59
-
60
-
61
-
62
-
63
-
64
-
65
-
66
-
67
-
68
-
69
-
70
-
71
-
72
-
73
-
74
-
75
-
76
-
77
-
78
-
79
-
80
-
81
-
82
-
83
-
84
-
85
-
86
-
87
-
88
-
89
-
90
-
91
-
92
-
93
-
94
-
95
-
96
-
97
-
98
-
99
-
100
-
101
-
102
-
103
-
104
-
105
-
106
-
107
-
108
-
109
-
110
-
111
-
112
-
113
-
114
-
115
-
116
-
117
-
118
-
119
-
120
-
121
-
122
-
123
-
124
-
125
-
126
-
127
-
128
-
129
-
130
-
131
-
132
-
133
-
134
-
135
-
136
-
137
-
138
-
139
-
140
-
141
-
142
-
143
-
144
-
145
-
146
 |
 |