Kyocera KM-3530 2530/3530/4030 Operation Guide Rev 2C - Page 83
Turning copy management ON/OFF, Turning printer management ON/OFF optional, Inch specifications,
 |
View all Kyocera KM-3530 manuals
Add to My Manuals
Save this manual to your list of manuals |
Page 83 highlights
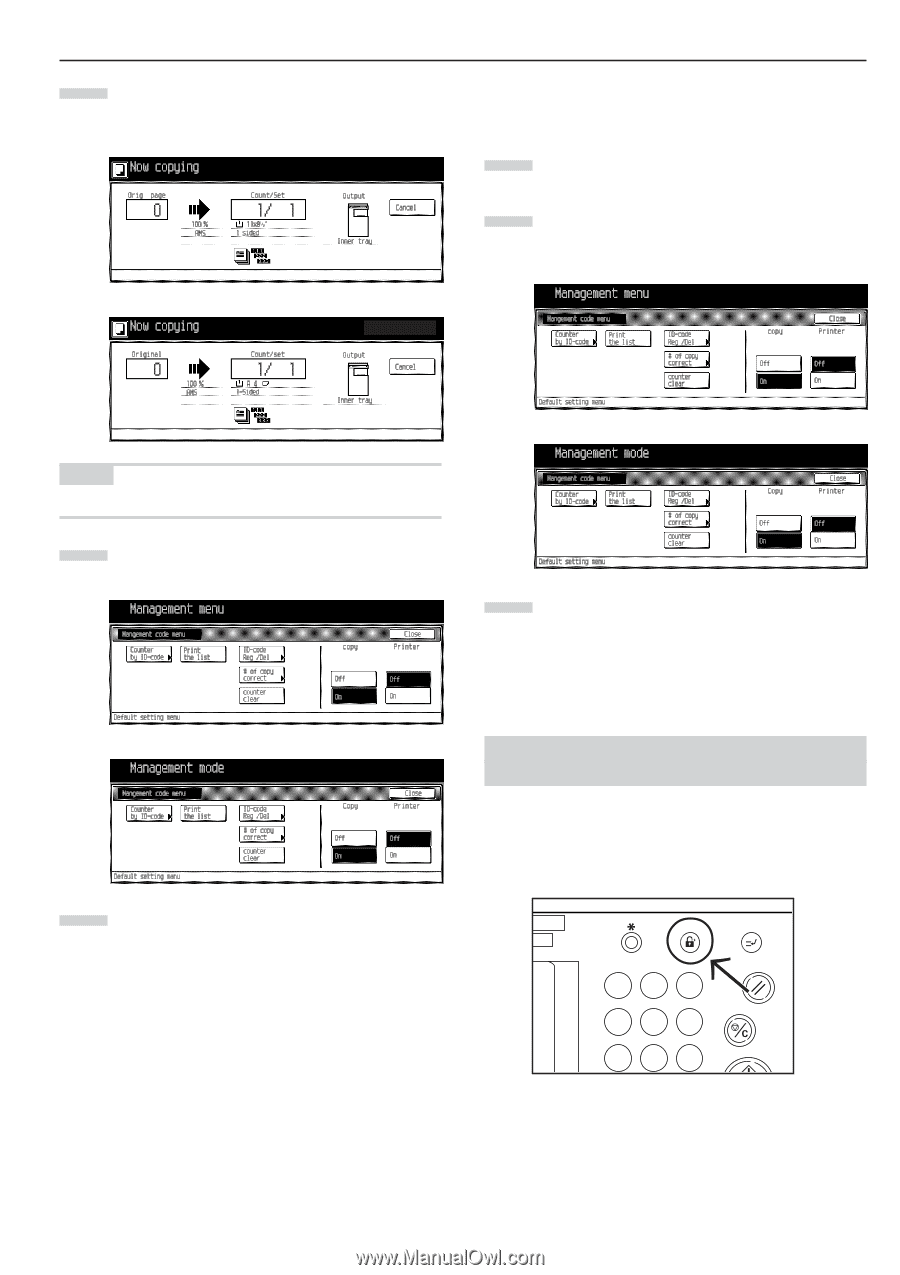
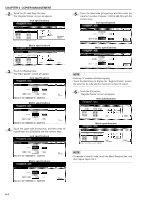
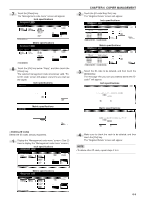
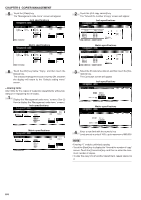
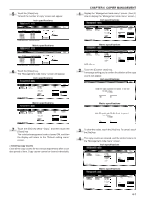
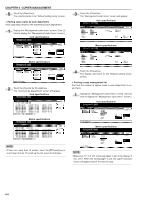
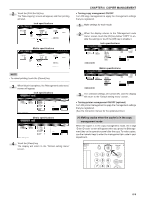
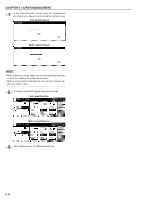
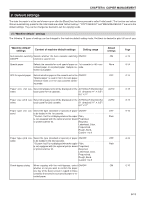
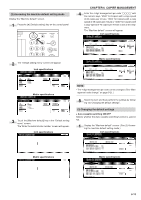
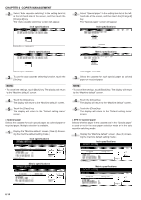
2 Touch the [Print the list] key. The "Now copying" screen will appear, and then printing will start. Inch specifications Metric specifications CHAPTER 6 COPIER MANAGEMENT • Turning copy management ON/OFF Turn ON copy management to apply the management settings that you registered. 1 Make settings for each mode. 2 When the display returns to the "Management code menu" screen, touch the [On] key below "COPY" to enable the settings or touch the [Off] key to disable it. Inch specifications NOTE • To cancel printing, touch the [Cancel] key. 3 When list print completes, the "Management code menu" screen will appear. Inch specifications Metric specifications 4 Touch the [Close] key. The display will return to the "Default setting menu" screen. Metric specifications 3 The selected settings are turned ON, and the display will return to the "Default setting menu" screen. • Turning printer management ON/OFF (optional) Turn ON printer management to apply the management settings that you registered. (See the Instruction manual for the optional printer.) (4) Making copies when the copier is in the copy management mode When the copier is in the copy management mode, the 4-digit "Enter ID-code" screen will appear when you press the [Management] key on the operation panel after the copy. To make copies, use the numeric keys to enter the management pin code in your department. Selection Management Interrupt En 1 2 3 Reset 456 Stop/ Clear 789 6-9
-
 1
1 -
2
-
3
-
4
-
5
-
6
-
7
-
8
-
9
-
10
-
11
-
12
-
13
-
14
-
15
-
16
-
17
-
18
-
19
-
20
-
21
-
22
-
23
-
24
-
25
-
26
-
27
-
28
-
29
-
30
-
31
-
32
-
33
-
34
-
35
-
36
-
37
-
38
-
39
-
40
-
41
-
42
-
43
-
44
-
45
-
46
-
47
-
48
-
49
-
50
-
51
-
52
-
53
-
54
-
55
-
56
-
57
-
58
-
59
-
60
-
61
-
62
-
63
-
64
-
65
-
66
-
67
-
68
-
69
-
70
-
71
-
72
-
73
-
74
-
75
-
76
-
77
-
 78
78 -
 79
79 -
 80
80 -
 81
81 -
 82
82 -
 83
83 -
 84
84 -
 85
85 -
 86
86 -
 87
87 -
 88
88 -
89
-
90
-
91
-
92
-
93
-
94
-
95
-
96
-
97
-
98
-
99
-
100
-
101
-
102
-
103
-
104
-
105
-
106
-
107
-
108
-
109
-
110
-
111
-
112
-
113
-
114
-
115
-
116
-
117
-
118
-
119
-
120
-
121
-
122
-
123
-
124
-
125
-
126
-
127
-
128
-
129
-
130
-
131
-
132
-
133
-
134
-
135
-
136
-
137
-
138
-
139
-
140
-
141
-
142
-
143
-
144
-
145
-
146
 |
 |