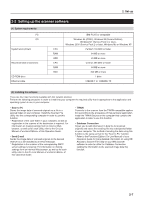
Kyocera KM-5035 Print/Scan System (U) Operation Guide (Setup Edition) - Page 19
Performing the Required Operation at the Scanner, 3-1 Scanning under the Scan to PC and Send E-
 |
View all Kyocera KM-5035 manuals
Add to My Manuals
Save this manual to your list of manuals |
Page 19 highlights
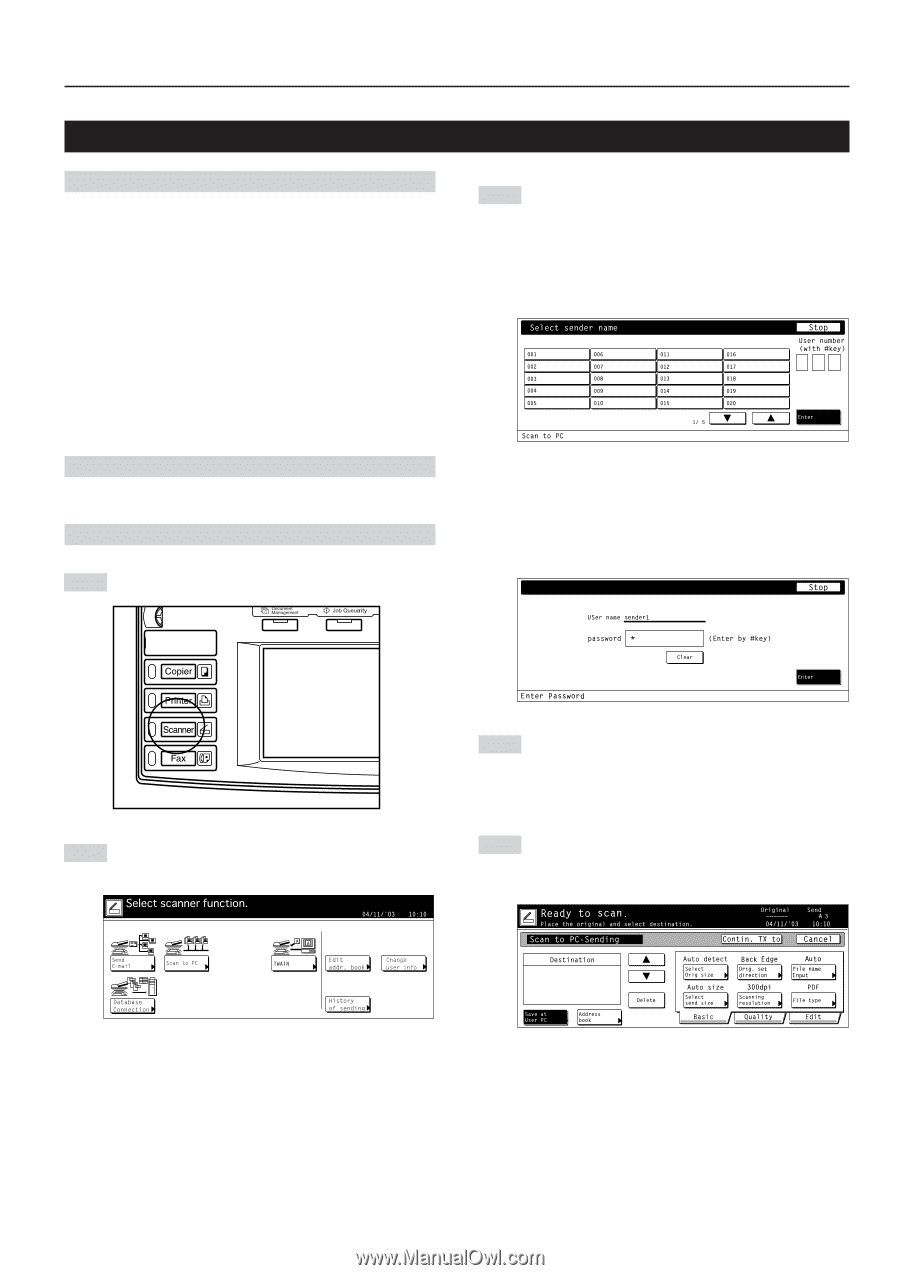
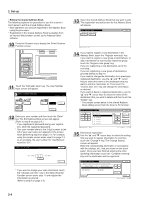
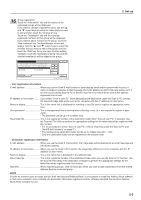
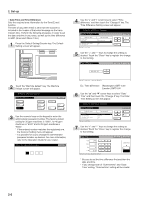
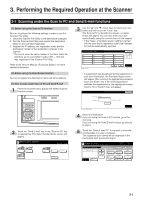
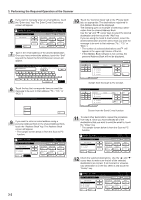
3. Performing the Required Operation at the Scanner 3-1 Scanning under the Scan to PC and Send E-mail functions (1) Before using the Scan to PC function Be sure to perform the following settings in order to use the Scanner File Utility. 1. Install the Scanner File Utility in the destination computer. 2. Run the Scanner File Utility and register the destination folder for the scanned image data. 3. Register the IP address, the registration name and the destination number of the destination computer in the scanner. * Be sure to enter the same number in the Save folder No. field here as the save folder number (001 - 100) that was registered in the Scanner File Utility. Refer to the On-Line Manual for more detailed information. 3 Use the "L" and "M" cursor keys to select your user name and then touch the "Enter" key. The Scan to PC or Send E-mail screen, as appropriate, will appear. You can also enter your user name directly using the numeric keys on the keypad. * If the "Selec. of senders (users)" setting is turned ON, the user that is registered under User Number 001 will be automatically selected. (2) Before using the Send E-mail function Be sure to register the destination name and email address. (3) How to scan under Scan to PC and Send E-mail 1 Press the Scanner key to display the Select Scanner Function screen. * If a password was designated during registration of your user information, the Password Input screen will appear. After entering the appropriate password, touch the "Enter" key. If the entered password matches the registered one, the appropriate screen, Scan to PC or Send E-mail, will appear. 2 Touch the "Send E-mail" key or the "Scan to PC" key, as appropriate. The Select Sender Name screen will appear. 4 Select the destination. If you are using the Scan to PC function, go to the next step. If you are using the Send E-mail function, go directly to step 6. 5 Touch the "Save at user PC" if you want to save the scanned data in a user's computer. The registered user names will be displayed in the Destination field. proceed to step 9. 3-1
-
 1
1 -
2
-
3
-
4
-
5
-
6
-
7
-
8
-
9
-
10
-
11
-
12
-
13
-
 14
14 -
 15
15 -
 16
16 -
 17
17 -
 18
18 -
 19
19 -
 20
20 -
 21
21 -
 22
22 -
 23
23 -
 24
24 -
25
-
26
-
27
-
28
-
29
-
30
-
31
-
32
 |
 |