Kyocera KM-5035 Print/Scan System (U) Operation Guide (Setup Edition) - Page 24
Setting up the Database Connection function, (1) Preparations
 |
View all Kyocera KM-5035 manuals
Add to My Manuals
Save this manual to your list of manuals |
Page 24 highlights
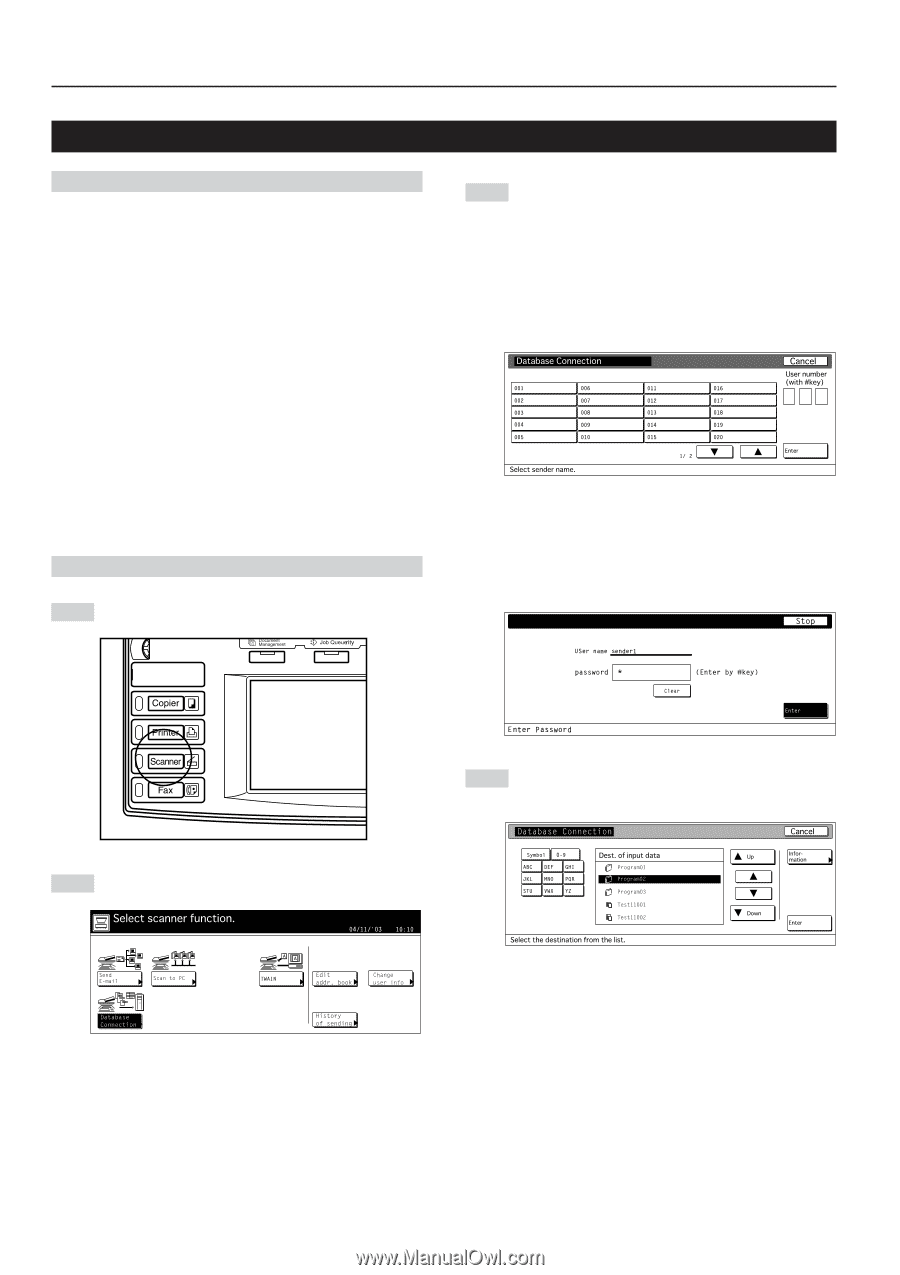
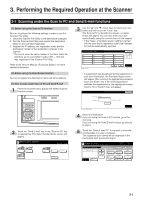
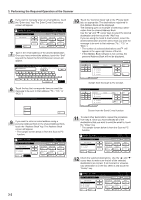
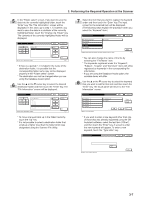
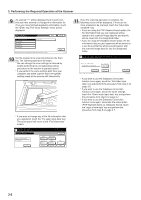
3. Performing the Required Operation at the Scanner 3-3 Setting up the Database Connection function (1) Preparations First, perform the following set-up procedure in order to use the Database Connection function. 1. Install the DB Assistant into the network manager's computer. 2. Run the DB Assistant and perform the related settings for the Database Communication function. 3. Run the Scanner File Utility in the computer in which you want to save the scanned image data and perform the related settings for the Database Communication function. * The information for the computer(s) in which you installed the DB Assistant and the Scanner File Utility must be registered in advance at the scanner itself or using a Web browser. * Refer to the Functions Edition (On-Line Manual) of your Operation Guide for more detailed information. The following section contains an explanation composed mainly of setting up the PDF Keyword Assist option (which allows you to add keywords as file information to scanned image data files). (2) How to set up the Database Connection function 1 Press the Scanner key. The "Scanner Mode Select" menu will be displayed. 3 Use the L or the M cursor key to select your sender name and then touch the "Enter" key. The "Destination of input data" screen will be displayed. * You can also select the destination by entering the corresponding user number directly using the keypad. * If the "Selec. of senders (users)" setting is turned ON, the user that is registered under User Number 001 will be automatically selected. * If a password was designated during registration of that destination, the Password Input screen will appear first. After entering the appropriate password, touch the "Enter" key. If the entered password matches the registered one, the "Destination of input data" screen will appear. 2 Touch the "Database Connection" key. The "Select sender name" screen will be displayed. 4 Use the L or the M cursor key to select the desired destination for the data and then touch the "Enter" key. The following steps explain the procedure when you are using the PDF Keyword Assist option (which allows you to add keywords as file information to scanned image data files). * To verify more detailed information related to a destination, use the s or the t cursor key to select the desired destination and then touch the "Information" key. The IP address and save folder number(s) of the destination computer can be verified. * If you are using the Database Assist option (which creates a csv file of the file information for scanned image data files), and a password has been designated in the DB Assistant software, it will be necessary to enter the corresponding password. 3-6
-
 1
1 -
2
-
3
-
4
-
5
-
6
-
7
-
8
-
9
-
10
-
11
-
12
-
13
-
14
-
15
-
16
-
17
-
18
-
 19
19 -
 20
20 -
 21
21 -
 22
22 -
 23
23 -
 24
24 -
 25
25 -
 26
26 -
 27
27 -
 28
28 -
 29
29 -
30
-
31
-
32
 |
 |