Kyocera KM-5050 Scan To SMB (PC) Setup Guide Rev-3 - Page 7
STEP 1: Creating a Shared Folder
 |
View all Kyocera KM-5050 manuals
Add to My Manuals
Save this manual to your list of manuals |
Page 7 highlights
STEP 1: Creating a Shared Folder Create a shared folder to receive data in the destination computer. Share the folder by enabling folder sharing on a normal folder. The following example explains how to create a folder named "scannerdata" on drive C. NOTE: The following description is one example of screenshots of Windows XP. The details differ depending on the type of operating system. IMPORTANT: Log on to Windows with administrator privileges. 1 Create a folder named "scannerdata" on drive C. 2 Right-click the "scannerdata" folder and select Sharing and Security···. The scannerdata Properties dialog box appears. 3 Select Share this folder. NOTE: You can change the Share name. 5
-
 1
1 -
 2
2 -
 3
3 -
 4
4 -
 5
5 -
 6
6 -
 7
7 -
 8
8 -
 9
9 -
 10
10 -
 11
11 -
 12
12 -
13
-
14
-
15
-
16
-
17
-
18
-
19
-
20
-
21
-
22
-
23
 |
 |
5
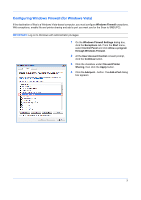
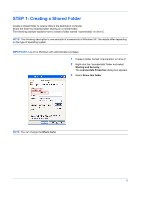
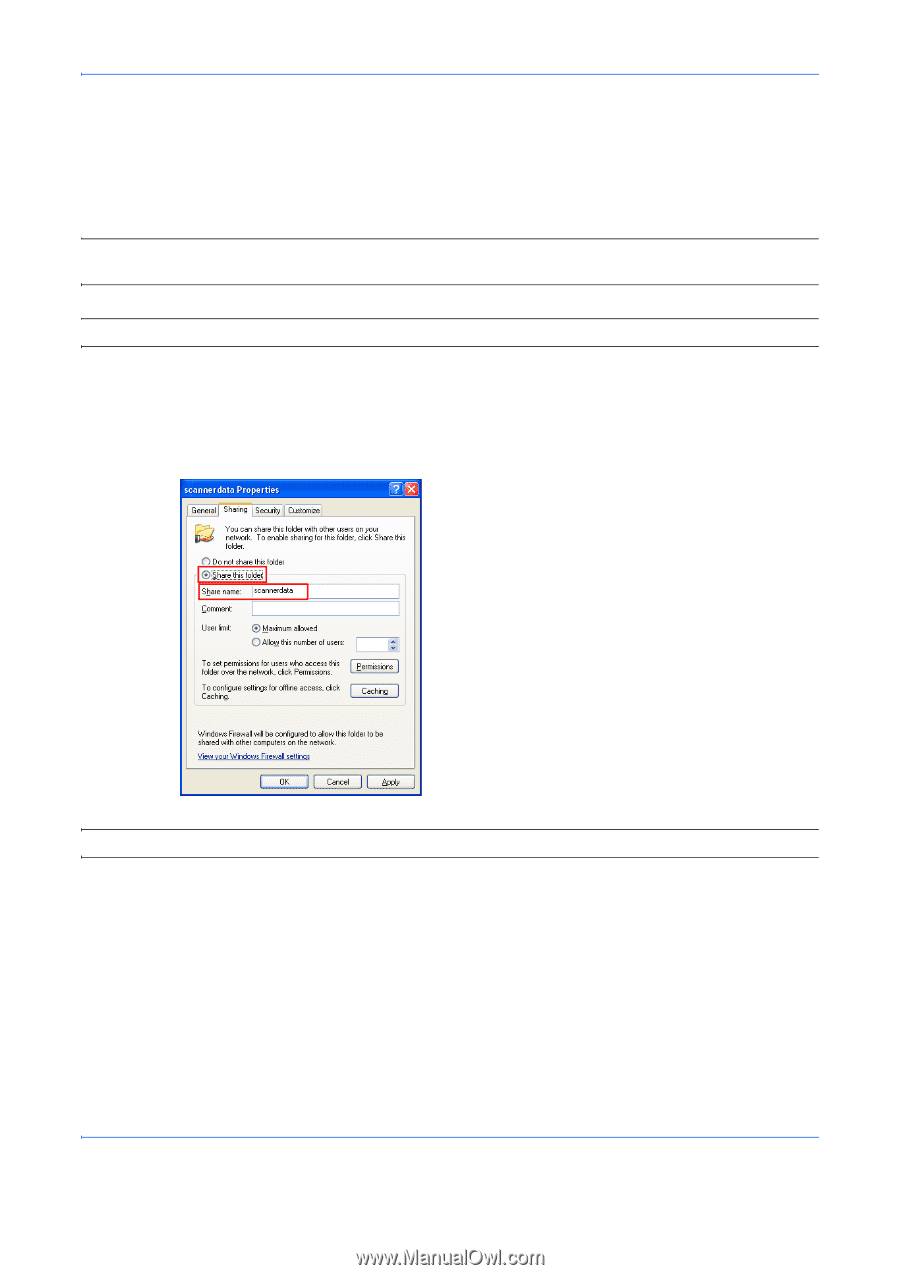
STEP 1: Creating a Shared Folder
Create a shared folder to receive data in the destination computer.
Share the folder by enabling folder sharing on a normal folder.
The following example explains how to create a folder named “scannerdata” on drive C.
NOTE:
The following description is one example of screenshots of Windows XP. The details differ depending
on the type of operating system.
IMPORTANT:
Log on to Windows with administrator privileges.
1
Create a folder named “scannerdata” on drive C.
2
Right-click the “scannerdata” folder and select
Sharing and Security
···
.
The
scannerdata Properties
dialog box appears.
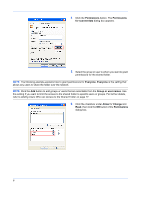
3
Select
Share this folder
.
NOTE:
You can change the
Share name
.