Kyocera KM-6030 Scan To SMB (Scan to Folder) Setup Rev-1.0
Kyocera KM-6030 Manual
 |
View all Kyocera KM-6030 manuals
Add to My Manuals
Save this manual to your list of manuals |
Kyocera KM-6030 manual content summary:
- Kyocera KM-6030 | Scan To SMB (Scan to Folder) Setup Rev-1.0 - Page 1
path (the path of the shared folder or the folder used to save files in the shared folder) • User name • Password Registering a destination folder Destination folders are registered in the Scan to SMB Common address book / Destination List (SMB). Up to 10 folders can be registered. The procedure - Kyocera KM-6030 | Scan To SMB (Scan to Folder) Setup Rev-1.0 - Page 2
name and enter the domain name. Example: [email protected] Enter the password used to access the shared folder. 9 Set up for scanning. Note For scanning set up, refer to the Functions Edition of the Operation Guide (On-Line Manual). 10 Place the original and press the [Start] key to start
-
 1
1 -
 2
2
 |
 |
SMB Transmission Function
The SMB transmission function converts document data scanned on the machine to PDF or TIFF
format, and transmits the data to a shared folder on a computer.
Up to 10 destination folders can be registered. It is possible to transmit a file to as many as 20
folders at once, including folders whose addresses are directly entered.
SMB transmission uses the file sharing service of SMB protocol, which is available in DOS and
Windows.
In an environment where SMB protocol is ready to be used, there is no need to install new software.
Important!
•
In some network environments and configurations, it may not be possible to connect to a
shared folder outside the LAN.
•
To use the SMB transmission function, the network scanner option is required.
Before using the SMB transmission function
Changes to files by network users must be permitted in the security settings of the destination
folder.
To specify a destination shared folder, the following information is required.
•
The host name or IP address of the destination computer.
•
The path (the path of the shared folder or the folder used to save files in the shared folder)
•
User name
•
Password
Registering a destination folder
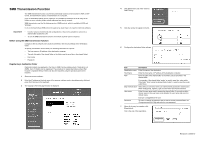
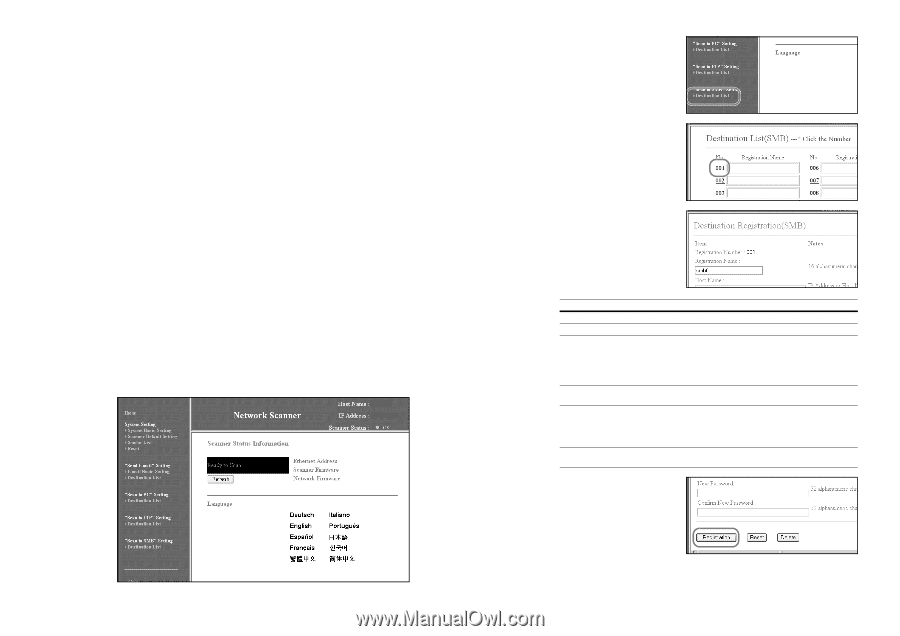
Destination folders are registered in the Scan to SMB Common address book / Destination List
(SMB). Up to 10 folders can be registered. The procedure for registering folders using a Web
browser is explained below. Folders can also be registered using the operation panel of the
machine.
1
Start web browser software.
2
Enter the IP address or the host name of the scanner interface card in the address entry field and
press the Enter key on the keyboard.
3
The top page of the web page function is displayed.
4
Click [Destination List] under
“Scan to
SMB” Setting
.
5
Click the number to register in the list.
6
Configure the destination folder settings.
7
When all the entry is complete, click
[Registration].
This is the end of the registration.
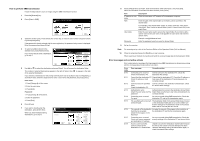
Item
Description
Registration name
Enter the name of the destination.
Host Name
Enter the host name or IP address of the destination computer.
Path
Enter the path of the shared folder or the folder used to save files in the
shared folder.
For example, if the shared folder “public” is used to save files, enter
public
.
If the folder “Scan” inside the shared folder “public” is used to save files, enter
public\Scan
.
Skip Authentication
Select [Yes], to omit entry of the user name and the password in transmission.
When setting [Yes], register
Login Account Name
and
Password
below.
User name
Enter the user name used to access the shared folder. If you wish to add a
domain name to the user name, enter
@
after the user name and enter the
domain name.
Example: [email protected]
Password
To enter or change the password that is used to access a shared folder, set
Change password
to [Yes] and enter the new password.
Revision1.0 2006.12