Kyocera KM-6330 Scan System D Operation Guide (Functions)
Kyocera KM-6330 Manual
 |
View all Kyocera KM-6330 manuals
Add to My Manuals
Save this manual to your list of manuals |
Kyocera KM-6330 manual content summary:
- Kyocera KM-6330 | Scan System D Operation Guide (Functions) - Page 1
Operation Guide Click on the button to jump to the desired section. Using the Scanner Function Sending Scanned Image Data to Your Computer Sending Scanned Image Data by Email Using TWAIN Capabilities Adding File Information to Scanned Image Data - Kyocera KM-6330 | Scan System D Operation Guide (Functions) - Page 2
scanned image data sent directly to that location. i * Network settings as well as the sender and destination address registration procedures can be accomplished at the scanner itself. For information on these procedures, refer to the of this Operation Guide. - Kyocera KM-6330 | Scan System D Operation Guide (Functions) - Page 3
an Internet Web browser See page 2-1 Sending scanned image data Use the scanner to designate a destination and have scanned image data sent directly to that can be accomplished at the scanner itself. For information on these procedures, refer to the of this Operation Guide. ii - Kyocera KM-6330 | Scan System D Operation Guide (Functions) - Page 4
page will take you directly to that page. Making basic settings In order to use the TWAIN source it is necessary to make certain scanner-related settings. Settings related to the TWAIN source See page 3-99 Starting the scanning operation Use the TWAIN source to initiate the scanning operation - Kyocera KM-6330 | Scan System D Operation Guide (Functions) - Page 5
to make network settings, designate the location to save the data, and register your (the sender's) name. Adding File Information to Scanned Image Data The scanner's operation panel is used to designate the destination where the scanned data will be saved and send that data. iv * When you add file - Kyocera KM-6330 | Scan System D Operation Guide (Functions) - Page 6
Microsoft Corporation of America and other countries. • Windows Me and Windows XP is a trademark of Microsoft Corporation. • Ethernet other countries. All other company and product names contained in this Instruction Handbook are trademarks or registered trademarks of their respective companies. The - Kyocera KM-6330 | Scan System D Operation Guide (Functions) - Page 7
v Contents ...vi Section 1 What is the Network Scanning System 1-1 1-1 Outline ...1-2 1-2 Using the Scanner Utilities CD-ROM 1-3 1-2-1 Contents of the CD-ROM 1-4 (1) Scanner Utilities 1-5 (2) TWAIN Source 1-6 (3) Configuration Tool 1-6 (4) Documents 1-6 (5) Select Language 1-6 vi - Kyocera KM-6330 | Scan System D Operation Guide (Functions) - Page 8
1-3 Using the Scanner Function 1-8 1-3-1 Basic Settings 1-12 (1) Original size selection ("Select original size 1-12 (2) Image transmission size selection ("Select sending size 1-13 (3) Scanning resolution selection ("Scanning resolution 1-13 (4) - Kyocera KM-6330 | Scan System D Operation Guide (Functions) - Page 9
Section 2 Making Settings from a Web Browser 2-1 2-1 WebPage Functions 2-2 2-2 Index of Objectives 2-3 2-3 Cautions ...2-4 2-3-1 If you are having trouble connecting to the scanner from a Web browser 2-4 2-3-2 If a message appears which informs you that you can not connect, such as "Could not - Kyocera KM-6330 | Scan System D Operation Guide (Functions) - Page 10
2-6-5 Reset ...2-21 2-7 Scan to PC Setting 2-22 2-7-1 Destination List 2-22 2-8 Send E-mail Setting 2-29 2-8-1 E-mail Basic Setting 2-29 2-8-2 Destination List 2-32 viii - Kyocera KM-6330 | Scan System D Operation Guide (Functions) - Page 11
Utility 3-9 (1) Accessing the Initial Dialogue Box for the Scanner File Utility ....... 3-9 (2) Contents of the Initial Dialogue Box for the Scanner File Utility ..... 3-10 3-2-5 Destination Folders for Scanned Data 3-12 (1) The Setup Dialogue Box 3-12 (2) Designating a New Destination Folder for - Kyocera KM-6330 | Scan System D Operation Guide (Functions) - Page 12
3-2-6 Saving Scanned Data as a File 3-23 (1) Outline of the Procedure 3-23 (2) The File Name 3-24 (3) The Image Data 3-25 (4) If an Error Occurs when Writing Data to the Hard Disk 3-25 x - Kyocera KM-6330 | Scan System D Operation Guide (Functions) - Page 13
32 3-3-6 Scanner Search 3-34 3-3-7 Password Entry (when connected to the scanner 3-36 3-3-8 System Setting 3-37 (1) System Basic Setting 3-37 (2) Administrator Tab 3-40 (3) Change Password 3-41 (4) Default Setting 3-42 (5) Sender (User) List 3-44 (6) Registering and editing user information - Kyocera KM-6330 | Scan System D Operation Guide (Functions) - Page 14
computer group information ... 3-58 3-3-11 Tool Bar 3-60 3-3-12 Importing Data from Address Editor 3-61 (1) Importing Address Data into the Sender (User) List and Destination List (for the Send E-mail and Scan to PC functions 3-61 (2) Making the corresponding field settings 3-63 (3) Checking - Kyocera KM-6330 | Scan System D Operation Guide (Functions) - Page 15
3-4 Address Book ...3-67 3-4-1 About the Address Book 3-67 3-4-2 Computer Environment 3-68 3-4-3 Installation and Uninstallation 3-69 (1) Installing the Address Book 3-69 (2) Uninstalling the Address Book 3-70 3-4-4 Initial Dialogue Box for the Address Book 3-71 (1) Accessing the Initial - Kyocera KM-6330 | Scan System D Operation Guide (Functions) - Page 16
3-4-6 (9) Registering or changing password of a destination group for the Scan to PC function 3-89 (10) Adding destinations to or deleting destinations from a destination group for the Scan to PC function 3-90 Importing an Address Data File 3-92 (1) Importing from Address Book 3-92 (2) - Kyocera KM-6330 | Scan System D Operation Guide (Functions) - Page 17
3-112 3-5-11 If You Can't Connect to the Scanner 3-113 3-5-12 Maximam image size 3-114 3-6 Configuration Tool 3-115 3-6-1 The Configuration Tool 3-115 3-6-2 Computer Environment 3-115 3-6-3 Using the Quick Setup Wizard 3-116 3-6-4 Using AdminManager 3-118 (1) Installing AdminManager 3-118 - Kyocera KM-6330 | Scan System D Operation Guide (Functions) - Page 18
DB Assistant 3-128 3-7-4 Dialogue Boxes in the DB Assistant 3-129 (1) Accessing the Setup Dialogue Box 3-129 (2) Contents of the Initial Dialogue Box 3-130 (3) The Setup Dialogue Box 3-131 3-7-5 Setting Up the PDF Keyword Assist Option 3-132 Supplemental: Making Settings related to the 'Access - Kyocera KM-6330 | Scan System D Operation Guide (Functions) - Page 19
1 Section What is the Network Scanning System? Page 1-1 - Kyocera KM-6330 | Scan System D Operation Guide (Functions) - Page 20
be installed in the scanner itself and the Scanner Library CD-ROM is for use in the computer(s). Refer to the User's Guide included on the TWAIN-compatible application CD-ROM for information regarding to how to use the TWAIN-compatible application. This On-Line Manual contains explanations regarding - Kyocera KM-6330 | Scan System D Operation Guide (Functions) - Page 21
-Line Manual. In order to use this Network Scanning System, it will be necessary for you to install the TWAIN source and other scanner utilities screen for the Scanner Utilities CD-ROM will appear automatically. * If the "Auto Run" function is turned off, double-click on the Setup.exe file that - Kyocera KM-6330 | Scan System D Operation Guide (Functions) - Page 22
1-2 Using the Scanner Utilities CD-ROM 1-2-1 Contents of the CD-ROM The contents of the Scanner Utilities CD-ROM that you can access are displayed as selectable items in the Main Menu screen. Page 1-4 - Kyocera KM-6330 | Scan System D Operation Guide (Functions) - Page 23
in the computer. Using this utility enables you to create and use your own personal destination list. By selecting the [Private book] tab on the scanner's operation panel, the personal Address Book that you are allowed to use will be displayed and you will be able to select the desired destinations - Kyocera KM-6330 | Scan System D Operation Guide (Functions) - Page 24
Source" in the computer. Once this driver is installed, you will be able to operate the scanner and use the scanned image data right Documents This item allows you to view the On-Line Manual for the software that is included on the Scanner Utilities CD-ROM (Refer to page 1-7.) (5) Select Language - Kyocera KM-6330 | Scan System D Operation Guide (Functions) - Page 25
Utilities CD-ROM 1-2-2 On-Line Manual The On-Line Manual that is on this Scanner Utilities CD-ROM is prepared in a PDF (Portable Description File) format and can only be viewed using the Adobe Acrobat Reader application. Thus, prior to reading the On-Line Manual, you will first need to install - Kyocera KM-6330 | Scan System D Operation Guide (Functions) - Page 26
of the scanning functions of your copier. Make the appropriate settings according to your scanning needs. For more detailed information regarding the setting procedures for the functions in each different scanner, refer to the of your Operation Guide. Basic settings Select original - Kyocera KM-6330 | Scan System D Operation Guide (Functions) - Page 27
1-3 Using the Scanner Function Image quality settings Scanning density Original image quality JPEG level set Adjusts the density of the scanned image to a desired value. Sets the appropriate - Kyocera KM-6330 | Scan System D Operation Guide (Functions) - Page 28
1-3 Using the Scanner Function Other settings Output by page Continuous scanning Auto selection File name input Full scanning Centering With this mode, the original is scanned and a file - Kyocera KM-6330 | Scan System D Operation Guide (Functions) - Page 29
1-3 Using the Scanner Function Note Available function symbols Some functions can or can not be used depending on the transmission mode that is selected or the type of copier in use. The following symbols indicate the transmission modes and types of copiers under which that particular function can - Kyocera KM-6330 | Scan System D Operation Guide (Functions) - Page 30
1-3 Using the Scanner Function 1-3-1 Basic Settings (1) Original size selection ("Select original size") The - 17", 50 mm - 432 mm (Monochrome Copiers) Width: 2" - 17", 50 mm - 420 mm (Color Copiers) * The original size cannot be entered manually when using an optional Document Processor. Page 1-12 - Kyocera KM-6330 | Scan System D Operation Guide (Functions) - Page 31
Scanner default setting: Auto * 11" x 8-1/2" is also available in monochrome copiers. * This setting is not available when the original size is custom selected is generally used for viewing on computer screens is 96 dpi for a Windows environment and between 150 dpi and 600 dpi for printing. * A high - Kyocera KM-6330 | Scan System D Operation Guide (Functions) - Page 32
1-3 Using the Scanner Function (4) Original orientation selection ("Orig. set direction") Specifies the Sets the desired format of the image file. Monochrome copiers "Black & White" ..... TIFF, PDF "Full Color JPEG, PDF-JPEG, TIFF-JPEG "Gray JPEG, PDF-JPEG, TIFF-JPEG * The original is scanned and - Kyocera KM-6330 | Scan System D Operation Guide (Functions) - Page 33
1-3 Using the Scanner Function 1-3-2 Image Quality Settings (1) Scanning density adjustment ("Scanning density") Adjusts the density of the scanned image to a desired value. (This setting will also affect the density of the machine's copier functions.) • "Original Image Type" (manual switching) - Kyocera KM-6330 | Scan System D Operation Guide (Functions) - Page 34
1-3 Using the Scanner Function (4) Color mode selection ("Color mode") Sets the desired color mode. • "A.C.S" (Auto Color System) ... Automatically determines whether the original is a black and white or a color - Kyocera KM-6330 | Scan System D Operation Guide (Functions) - Page 35
scanned separately. You can select the binding method when using a monochrome copier. "1 side" ..... Select this setting when you want to scan "Left" * Set book-type originals with their top edge towards the rear of the scanner. * When using book-type originals, only 11" x 8-1/2", 11" x 17"R, B5R - Kyocera KM-6330 | Scan System D Operation Guide (Functions) - Page 36
1-3 Using the Scanner Function (2) Border erase mode ("Erase") With this mode, you can erase the dark shadows and lines that appear when scanning originals such as books, magazines, - Kyocera KM-6330 | Scan System D Operation Guide (Functions) - Page 37
1-3 Using the Scanner Function (4) Continuous scanning function ("Continuous scanning") After scanning one original, , the default file name will be set automatically. Change the file name manually as necessary. * This function is only available with scanners that possess a touch panel. Page 1-19 - Kyocera KM-6330 | Scan System D Operation Guide (Functions) - Page 38
1-3 Using the Scanner Function (7) Full scanning ("Border erase modes") With this mode, you can scan the entire area of the selected original size as image when this function - Kyocera KM-6330 | Scan System D Operation Guide (Functions) - Page 39
1-3 Using the Scanner Function (8) Centering ("Centering/Image shift mode") When the ratio for the length and width of the scan image does not fit, it may cause the - Kyocera KM-6330 | Scan System D Operation Guide (Functions) - Page 40
data. 1. Press the default (*) key on the scanner's operation panel and then access the System Basic screen on the touch panel. the touch panel" on page 2-2 of the Set-Up Edition of your Operation Guide for the procedure on accessing the System Basic screen. 2. Use the "L" and - Kyocera KM-6330 | Scan System D Operation Guide (Functions) - Page 41
1-3 Using the Scanner Function 3. To stop compression in cases when the volume of the compressed data will end up being greater that the original data, touch the "On" - Kyocera KM-6330 | Scan System D Operation Guide (Functions) - Page 42
2 Section Making Settings from a Web Browser Page 2-1 - Kyocera KM-6330 | Scan System D Operation Guide (Functions) - Page 43
using standard Internet Web browser software. Performing such tasks as changing network settings and basic scanner settings, in addition to performing settings related to email and data transmission to a computer and the like, can be easily accomplished over the network. IMPORTANT! - Kyocera KM-6330 | Scan System D Operation Guide (Functions) - Page 44
as a reference index when making the corresponding settings. Make networkrelated settings Contains explanations on the network-related settings for the Scanner Interface Card. See page 2-13 Set the administration password Contains explanations on the administration password that must be entered - Kyocera KM-6330 | Scan System D Operation Guide (Functions) - Page 45
trouble connecting to the scanner from a Web browser... If you are trying to make settings related to the Scanner interface Card or to utilities in the scanner Is another operation in progress on the copier-scanner? → Confirm that the operation is completed and that the message display has - Kyocera KM-6330 | Scan System D Operation Guide (Functions) - Page 46
Start up your Internet Web browser software. 2. Type the IP address or host name of the Scanner Interface Card into the address field. 3. Press the Enter key on your computer keyboard. 4. The home page for WebPage Functions will appear. *The acual windows will differ depending upon the mdel of your - Kyocera KM-6330 | Scan System D Operation Guide (Functions) - Page 47
2-4 Using the WebPage Functions Interface 5. If the administration password has been registered, the following dialogue box will appear when you click on one of the setting links in the menu frame, such as System Basic Setting. In this case, type in the correct password and click on the OK button. - Kyocera KM-6330 | Scan System D Operation Guide (Functions) - Page 48
2-5 The Home Page The home page is constructed of 3 different frames. • The top frame Displays the IP address of the Scanner Interface Card and the status of the scanner. (Refer to page 2-8.) The top frame The menu frame The main frame • The menu frame Allows selection of various settings - Kyocera KM-6330 | Scan System D Operation Guide (Functions) - Page 49
Interface Card and the status of the scanner. • Displays the IP address that is registered for the Scanner Interface Card. • If the scanner is in a "Ready" state, "O OK" will be displayed under Scanner Status. • If the scanner is not "Ready", "O OTHER" will be displayed - Kyocera KM-6330 | Scan System D Operation Guide (Functions) - Page 50
Default Setting For making the default settings for the main functions of the scanner. • Sender (User) List For registering the list of those users who will be allowed to use the network scanning functions (Send E-mail and Send to PC). • Send E-mail Setting This item consists of 2 basic settings - Kyocera KM-6330 | Scan System D Operation Guide (Functions) - Page 51
want to use is also accomplished here. * The registered default values will be displayed during start up of WebPage Functions. • Scanner Status Information When "O OTHER" is displayed under Scanner Status on the home page, click on the Refresh button at the bottom of the screen and the status of the - Kyocera KM-6330 | Scan System D Operation Guide (Functions) - Page 52
It is necessary for you to enter the administrator's password in order to access the settings related to either the Scanner Interface Card or to the scanner itself. • The administration password can be changed through the Administrator item under System Basic Setting. There is no password registered - Kyocera KM-6330 | Scan System D Operation Guide (Functions) - Page 53
button after you have completed the desired settings. Network • Host Name Register the host name of the scanner (up to 32 single-byte characters) in this field. • IP Address Register the IP address of the Scanner Interface Card in this field in the following form: XXX.XXX.XXX.XXX Page 2-12 - Kyocera KM-6330 | Scan System D Operation Guide (Functions) - Page 54
Card in this field in the following form: XXX.XXX.XXX.XXX • Default Gateway Register the default gateway of the Scanner Interface Card in this field in the following form: XXX.XXX.XXX.XXX • DHCP/BOOTP The DHCP and BOOTP can be set to either "ENABLE" - Kyocera KM-6330 | Scan System D Operation Guide (Functions) - Page 55
Setting • WINS Server (Pri.) When WINS (Windows Internet Name Service) is used to resolve the IP address using Click on this button to have all of the selected settings registered in the Scanner Interface Card. • Reset button Click on this button to return all of the settings back to their factory - Kyocera KM-6330 | Scan System D Operation Guide (Functions) - Page 56
password into both the New Password and Confirm new password fields and then click on this button, the new password will be registered in the Scanner Interface Card. * If you leave the Confirm new password field blank, or the password that you typed into that field does not match the password - Kyocera KM-6330 | Scan System D Operation Guide (Functions) - Page 57
2-6 System Setting 2-6-3 Scanner Setting Default settings related to scanning in images at the scanner are performed under this item. You can also make settings related to certain scanning conditions and the default file name (for saving scanned data). Page 2-16 - Kyocera KM-6330 | Scan System D Operation Guide (Functions) - Page 58
and 200 dpi • File Type Sets the file format in which scanned data will be saved: TIFF, PDF and JPEG (Only available in Color Copiers) • JPEG Quality (Only available in Color Copiers) Sets the JPEG Quality. 1 (Low) / 2 / 3 (Middle) / 4 / 5 (Hight) • Output Color Type Sets the output Color Type. RGB - Kyocera KM-6330 | Scan System D Operation Guide (Functions) - Page 59
displayed in the corresponding text box. If you click on the number for which you want to register or edit the related information, the Sender (User) Setting screen will appear and you will be able to perform the desired settings. IMPORTANT! BE SURE to click on the Registration button after you - Kyocera KM-6330 | Scan System D Operation Guide (Functions) - Page 60
• Registration Number The number that was selected in the Sender (User) List will be displayed here. This is merely information in name registered here will be displayed in the sender table and in the scanner's operation panel. * The registration name can be up to 16 single-byte characters in length. Page - Kyocera KM-6330 | Scan System D Operation Guide (Functions) - Page 61
Click on this button to have all the selected settings registered in the scanner. If you move to the next page without clicking on the Registration button, any settings that have not been properly registered will be deleted. • Reset button Click on this button to return all of the settings back to - Kyocera KM-6330 | Scan System D Operation Guide (Functions) - Page 62
If you click on any Reset button, a coresonding confirmation windows, will restart the scanner board or returned its settings to their factory default values. • Restart Networking Only Restarts the scanning operation. • Set All Network Settings to Factory default Initializes - Kyocera KM-6330 | Scan System D Operation Guide (Functions) - Page 63
2-7 Scan to PC Setting You can send scanned image files to a folder on a computer that was designated in advance, when you use the Scanner Interface Card. This items explains how to register the destination computer. * Refer to pages 2-29 through 2-38 for an explanation on the functions of the - Kyocera KM-6330 | Scan System D Operation Guide (Functions) - Page 64
2-7 Scan to PC Setting • Class The registration type (single or group) is displayed here. : Displayed for group registration : Displayed for single registration • Registration Name The registered name is displayed here. IMPORTANT! BE SURE to click on the Registration button after you have completed - Kyocera KM-6330 | Scan System D Operation Guide (Functions) - Page 65
2-7 Scan to PC Setting • Destination Registration (PC) You can select the registration type (single registration or group registration). If you click on the Single Regist. or the Group Regist. button, the corresponding Registration and Editing screen will appear. Page 2-24 - Kyocera KM-6330 | Scan System D Operation Guide (Functions) - Page 66
registration name (name of the destination party) into this field. The name registered here will be displayed in the destination computer table and in the scanner's operation panel. * The registration name can be up to 16 single-byte characters in length. Page 2-25 - Kyocera KM-6330 | Scan System D Operation Guide (Functions) - Page 67
on this button to have all of the selected settings registered in the scanner. If you move to the next page without clicking on the Registration button , any settings that have not been properly registered will be deleted. • Reset button Click on this button to return all of the settings back to - Kyocera KM-6330 | Scan System D Operation Guide (Functions) - Page 68
2-7 Scan to PC Setting • Destination Group Registration (PC) You will be able to register and edit information for groups of destination computers. Choose the destinations that you want to register as a group and click on the checkbox next to the desired number. Type the registration name and - Kyocera KM-6330 | Scan System D Operation Guide (Functions) - Page 69
on this button to have all the selected settings registered in the scanner. If you move to the next page without clicking on the Registration button, any settings that have not been properly registered will be deleted. • Reset button Click on this button to return all of the settings back to their - Kyocera KM-6330 | Scan System D Operation Guide (Functions) - Page 70
2-8 Send E-mail Setting The following explains the various settings for sending scanned images by email to a computer. 2-8-1 E-mail Basic Setting Make basic settings related to sending email (scanned data) here. IMPORTANT! BE SURE to click on the Registration button after you have completed the - Kyocera KM-6330 | Scan System D Operation Guide (Functions) - Page 71
2-8 Send E-mail Setting • Item 1. Transmission Domain Setting .... Select from among Non-restricted sending, Permitted destination domain names, and Restricted destination domain names. * If you select Non-restricted sending, there will be no restriction under the Send E-mail function in regard to - Kyocera KM-6330 | Scan System D Operation Guide (Functions) - Page 72
), Shift-JIS (Japanese) and ISO-8859-1 (West Europe) • Registration button Click on this button to have all the selected settings registered in the scanner. If you move to the next page without clicking on the Registration button, any settings that have not been properly registered will be deleted - Kyocera KM-6330 | Scan System D Operation Guide (Functions) - Page 73
2-8 Send E-mail Setting 2-8-2 Destination List • Destination List (E-mail) Click on this item when you want to access the destination address registration screen where you can register, confirm and edit information for up to 100 (No. 001 to No. 100) destination addresses. * If a registration name - Kyocera KM-6330 | Scan System D Operation Guide (Functions) - Page 74
2-8 Send E-mail Setting • No. The registration number is displayed here. Click on the number for which you want to register or edit information in order to access the corresponding Destination Registration (E-mail) screen. • Class The registration type (single or group) is displayed here. : - Kyocera KM-6330 | Scan System D Operation Guide (Functions) - Page 75
2-8 Send E-mail Setting • Destination Registration (E-mail) You can select the registration type (single registration or group registration). If you click on the Single Regist. or the Group Regist. button, the corresponding Registration and Editing screen will appear. Page 2-34 - Kyocera KM-6330 | Scan System D Operation Guide (Functions) - Page 76
2-8 Send E-mail Setting • Destination Registration (Single) You will be able to register and edit registration names and destination email addresses for each number. Page 2-35 - Kyocera KM-6330 | Scan System D Operation Guide (Functions) - Page 77
button Click on this button to have all of the selected information registered in the scanner. If you do not click on the Registration button, any information that has not been properly registered will be deleted. • Reset button Click on this button to return all of the settings back to their - Kyocera KM-6330 | Scan System D Operation Guide (Functions) - Page 78
2-8 Send E-mail Setting • Destination Group Registration (E-mail) You will be able to register and edit information for destination groups (E-mail). Choose the destinations that you want to register as a group and click on the check box next to the number. Type the registration name and click on the - Kyocera KM-6330 | Scan System D Operation Guide (Functions) - Page 79
on this button to have all the selected settings registered in the scanner. If you move to the next page without clicking on the Registration button, any settings that have not been properly registered will be deleted. • Reset button Click on this button to return all of the settings back to their - Kyocera KM-6330 | Scan System D Operation Guide (Functions) - Page 80
3 Section Additional Utilities Page 3-1 - Kyocera KM-6330 | Scan System D Operation Guide (Functions) - Page 81
in your computer. Using this utility enables you to create and use your own personal destination list. By selecting the [Private book] Tab on the scanner's operation panel, the personal Address Book that you are allowed to use will be displayed and you will be able to select the desired destinations - Kyocera KM-6330 | Scan System D Operation Guide (Functions) - Page 82
to use the same procedures to manage the network settings for our printer and scanner models. * Refer to pages 3-115 through 3-122. DB Assistant By which you can save the file information as a separate csv file. The PDF Keyword Assist option also allows you to view on the operation panel an index - Kyocera KM-6330 | Scan System D Operation Guide (Functions) - Page 83
and the computer booted up again, the utility will also be started up automatically. In this case, an icon that indicates the status of the Scanner File Utility will be displayed in the Windows Task Bar and the utility will remain in a waiting state for data to be sent from the - Kyocera KM-6330 | Scan System D Operation Guide (Functions) - Page 84
. Network Manager 2 Use the Address Editor, Address Book or a Web browser to register the destination computer. Scanner Destination Computer 3 Scan the original. 1 Use the Scanner File Utility to designate the destination folder. 5 The transmitted data will be received. 4 The scanned data will - Kyocera KM-6330 | Scan System D Operation Guide (Functions) - Page 85
3-2 Scanner File Utility 3-2-2 Computer Environment • Hardware IBM PC/AT or compatible • Interface 10BASE-T or 100BASE-TX • OS Windows NT 4.0 (Service Pack 5), Windows 2000, Windows 98 (Second Edition), Windows 95 (OSR2), Windows Me and Windows XP Page 3-6 - Kyocera KM-6330 | Scan System D Operation Guide (Functions) - Page 86
File Utility 3-2-3 Installation and Uninstallation (1) Installing the Scanner File Utility 1. Click on Scanner Utilities in the Main Menu of the Scanner CD-ROM. The following window will appear. * In order to access the Main Menu, refer to "1-2 Using the Scanner CD-ROM" on page 1-3. 2. Click on - Kyocera KM-6330 | Scan System D Operation Guide (Functions) - Page 87
3-2 Scanner File Utility 3. Follow the instructions indicated in the wizard to continue the installation procedure. * During the installation, the following window will appear to add the following components. Select the following components when you want to add the following system connection - Kyocera KM-6330 | Scan System D Operation Guide (Functions) - Page 88
icon in the Task Bar. The initial dialogue box for the Scanner File Utility will appear. • When the Scanner File Utility is NOT running... Click on Start in the Windows Task Bar and then select Program -> Scanner User Software -> Scanner File Utility in that order from the successive menus. An icon - Kyocera KM-6330 | Scan System D Operation Guide (Functions) - Page 89
(2) Contents of the Initial Dialogue Box for the Scanner File Utility 5 2 1 3 4 7 8 6 9 1. Status field Displays the current status of the scanner. 2. OK button Click on this button when you want to close the initial dialogue box. 3. Setup button Click on this button when you want to - Kyocera KM-6330 | Scan System D Operation Guide (Functions) - Page 90
File Utility 4. Close button Click on this button when you want to quit the Scanner File Utility. 5. Details button Displays the list of connected scanners. (A maximum of three) 6. Received file list field .... Displays the list of received files. 7. Open File button Open the selected file - Kyocera KM-6330 | Scan System D Operation Guide (Functions) - Page 91
Scanner File Utility 3-2-5 Destination Folders for Scanned Data (1) The Setup Dialogue Box When you want to select a new destination folder for receiving scanned data, or when you want to change settings or set a security password for any of the currently registered folders, click on the Setup - Kyocera KM-6330 | Scan System D Operation Guide (Functions) - Page 92
3-2 Scanner File Utility 1. New button Click on this button when you want to designate a hard disk reaches the designated percentage, the icon that is displayed in the Windows Task Bar whenever the Scanner File Utility is running will turn yellow as well in order to indicate that status. Page 3-13 - Kyocera KM-6330 | Scan System D Operation Guide (Functions) - Page 93
3-2 Scanner File Utility 8. Reception notice checkbox Displays the notice on the screen when new image data is saved as a file. *Put a check mark in this checkbox - Kyocera KM-6330 | Scan System D Operation Guide (Functions) - Page 94
3-2 Scanner File Utility (2) Designating a New Destination Folder for Receiving Scanned Data When you want to designate a new destination folder for receiving scanned data, click on the New button in the Setup Dialogue Box. The Folder Setting Dialogue Box for making the corresponding settings will - Kyocera KM-6330 | Scan System D Operation Guide (Functions) - Page 95
3-2 Scanner File Utility 2. Click on the Browse button to the right of the Folder field in order to select the new folder that you want to - Kyocera KM-6330 | Scan System D Operation Guide (Functions) - Page 96
click on the OK button. "Folder Setting" Dialogue Box will appear once again. * If you did enter a scanner password, it will also be necessary to enter that password in the scanner during the scanning procedure there. 5. If you want to enter a comment about that folder, type the desired information - Kyocera KM-6330 | Scan System D Operation Guide (Functions) - Page 97
3-2 Scanner File Utility 6. You can also designate a program for the folder that you want system connection. (Refer to page 123). None The scanned data is saved into the designated folder. PDF Keyword Embedder .... Document Information, "Keyword" is added on the scanned image. DataBase Link Handler - Kyocera KM-6330 | Scan System D Operation Guide (Functions) - Page 98
3-2 Scanner File Utility (3) Changing Settings for a Registered Destination Folder When you want to change the settings of a destination folder currently registered to receive scanned data, select the folder you want from among the displayed list and then click on the Edit button in the Setup - Kyocera KM-6330 | Scan System D Operation Guide (Functions) - Page 99
3-2 Scanner File Utility 2. If you want to change the security password for that folder, click on the "Password Setting" button. "Password Setting" will appear. Type the - Kyocera KM-6330 | Scan System D Operation Guide (Functions) - Page 100
3-2 Scanner File Utility 5. If you want to change a comment about that folder, type the desired information directly into the "Comment" field (Up to 32 characters). 6. If - Kyocera KM-6330 | Scan System D Operation Guide (Functions) - Page 101
3-2 Scanner File Utility (4) Removing a Destination Folder Designation Perform the following procedure when you want to remove the designation of any folder as a destination folder for receiving scanned data. 1. In the Folder field of the Setup Dialogue Box, click on the folder that you want to - Kyocera KM-6330 | Scan System D Operation Guide (Functions) - Page 102
one, an error will occur and you will be unable to continue the procedure. 5. Press the Start key on the scanner's operation panel. The original that was set in the scanner will be scanned and the resulting data will be sent to the designated computer. The received image data will be compressed - Kyocera KM-6330 | Scan System D Operation Guide (Functions) - Page 103
own page number. This will be displayed as a 3-digit number between "000" and "999". • suffix Refers to the suffix that is added automatically by the Scanner File Utility based on the file format of the saved file. IMPORTANT! If the file name that is automatically assigned to a file is exactly the - Kyocera KM-6330 | Scan System D Operation Guide (Functions) - Page 104
3-2 Scanner File Utility (3) The Image Data • File format Supports TIFF and PDF* formats. * Using PDF Convert Library by HyperGEAR, Inc. • Image data size Standard disk reaches a designated percent, the Scanner File Utility icon that is displayed in the Windows Task Bar will turn yellow to indicate - Kyocera KM-6330 | Scan System D Operation Guide (Functions) - Page 105
, the same destination list can be easily registered into all these scanners. 3-3-2 Computer Environment • Hardware IBM PC/AT or compatible • Interface 10BASE-T or 10BASE-TX • OS Windows NT 4.0 (Service Pack 5), Windows 2000, Windows 98 (Second Edition), Windows 95 (OSR2) and Windows Me Page 3-26 - Kyocera KM-6330 | Scan System D Operation Guide (Functions) - Page 106
(1) Installing the Address Editor 1. Click on Scanner Utilities in the Main Menu of the Scanner CD-ROM. * In order to access the Main Menu, refer to "1-2 Using the Scanner CD-ROM" on page 1-3. 2. Click on Address Editor. 3. Follow the instructions indicated in the wizard to continue the installation - Kyocera KM-6330 | Scan System D Operation Guide (Functions) - Page 107
3-3 Address Editor (2) Uninstalling the Address Editor Use the "Add/Remove Programs" function in Windows to uninstall the Address Book. Page 3-28 - Kyocera KM-6330 | Scan System D Operation Guide (Functions) - Page 108
3-3 Address Editor 3-3-4 Running Address Editor 1. Start up Address Editor. * Click on Start in the Windows Task Bar and then select Program -> Scanner User Software -> Address Editor in that order and the Address Book will start up. 2. The screen for the Main Menu of the Address Book will appear. 1 - Kyocera KM-6330 | Scan System D Operation Guide (Functions) - Page 109
for easy execution of tasks such as writing new or edited data to the scanner, etc. 3. Menu Area Enables actual selection of items such as scanning and Send E-mail related settings. 4. Work Area Displays the settings window for the selected item and allows you to make the desired settings. Page - Kyocera KM-6330 | Scan System D Operation Guide (Functions) - Page 110
the Address Editor data that you want to edit. You can then connect to the scanner and edit or register the setting data directly in the scanner, or create and edit setting data without being connected to the scanner. In the latter case, once editing is complete, your computer will connect to the - Kyocera KM-6330 | Scan System D Operation Guide (Functions) - Page 111
Address .......... Type in the address (host name or IP address) of the scanner that you want to connect to into this field. The addresses corresponding to the last 10 times a scanner was connected to can be accessed in the drop-down list. * Type in a maximum of 32 single-byte characters for the - Kyocera KM-6330 | Scan System D Operation Guide (Functions) - Page 112
address or when that address is allotted by the DHCP server. * Refer to "3-3-6 Scanner Search" on page 3-34 for an explanation on the actual procedure of searching for a scanner. The Search button is not usable under Windows 95. 3. new data Select this radio button when you want to create new data - Kyocera KM-6330 | Scan System D Operation Guide (Functions) - Page 113
Box enables you to search for a specific scanner over the network. * A scanner search will only display a list of those scanners that respond within a predetermined period of time. The Scanner Search function is not supported under Windows 95. 1 2 3 4 5 7 6 1. IP address Displays the IP address - Kyocera KM-6330 | Scan System D Operation Guide (Functions) - Page 114
address can be selected from among the drop-down list of the addresses corresponding to the last 10 times a scanner was connected to. • The scanner address can be typed in directly. 7. Start Editing button ....... Click on this button to start the editing operation for the selected Address Editor - Kyocera KM-6330 | Scan System D Operation Guide (Functions) - Page 115
and other information. * Refer to "(3) Change Password" on page 3-41 for information on setting the administrator's password. 1. Scanner Address .......... Displays the IP address of the scanner that your computer is currently connected to. 2. Password Type the administrator's password for the - Kyocera KM-6330 | Scan System D Operation Guide (Functions) - Page 116
3-3 Address Editor 3-3-8 System Setting Make basic scanner settings. (1) System Basic Setting Lets you make settings related to your network connection, such as the scanner's IP address. 1 2 3 4 5 6 7 8 9 10 11 12 13 14 15 16 Page 3-37 - Kyocera KM-6330 | Scan System D Operation Guide (Functions) - Page 117
.XXX.XXX.XXX 5. Default Gateway Type the default gateway of the Scanner Interface Card in this field in the following form: XXX.XXX.XXX -byte characters) in this field. 12. WINS Server (Pri When WINS (Windows Internet Name Service) is used to resolve the IP address using the name of the computer, - Kyocera KM-6330 | Scan System D Operation Guide (Functions) - Page 118
3-3 Address Editor 13. WINS Server (Sec.) ....... Type the IP address of the secondary WINS server in this field in the following form: XXX.XXX.XXX.XXX 14. Scope ID Register the scope ID in this field. 15. SMTP Server name ....... Type the IP address of the SMTP server in this field in the - Kyocera KM-6330 | Scan System D Operation Guide (Functions) - Page 119
3-3 Address Editor (2) Administrator Tab Lets you make administrator settings. 1 2 1. E-mail Address Type the administrator's email address of the in this field. * The email address can be up to 64 single-byte characters in length. 2. Change Password button Click on this button to set the - Kyocera KM-6330 | Scan System D Operation Guide (Functions) - Page 120
3-3 Address Editor (3) Change Password Sets the administrator password. 1 2 1. New Password Type a new password into this field. * The administrator password can be up to 8 single-byte characters in length. 2. Confirm new password Type the same password as you did in the New Password field in here - Kyocera KM-6330 | Scan System D Operation Guide (Functions) - Page 121
Editor (4) Default Setting Lets you change default settings for using the scanner functions of your copier. * Perform the Black and White mode settings if you have a monochrome copier, and the Color/Mono- chrome (Gray) mode settings if you have a color copier. 1 4 2 5 3 6 7 8 9 Page 3-42 - Kyocera KM-6330 | Scan System D Operation Guide (Functions) - Page 122
Type Sets the file format at which scanned data will be saved: TIFF or PDF 3. Orig. image quality ....... You can select from among the following 4 original the file format at which scanned data will be saved: JPEG, TIFF or PDF 6. JPEG image quality ...... You can select the quality level of the - Kyocera KM-6330 | Scan System D Operation Guide (Functions) - Page 123
3-3 Address Editor (5) Sender (User) List Registers the information for users who will be allowed to use the network-scanner functions of the copier (Send E-mail and Scan to PC). 1 23 4 5 6 7 8 9 Page 3-44 - Kyocera KM-6330 | Scan System D Operation Guide (Functions) - Page 124
. 4. Registration Number .... This is a registration number for the user information. * This number will be displayed in the scanner's operation panel. * Up to 40 numbers (users) can be registered. 5. E-mail Address Displays the user's e-mail address. 6. New address button ....... Click on this - Kyocera KM-6330 | Scan System D Operation Guide (Functions) - Page 125
Sender editing Dialogue Box allows you to register new users or edit information for previously registered users. 1 2 7 3 4 5 6 8 9 1. Name The name registered here will be displayed as the sender name in the scanner's operation panel. * The available registration Number is between 001 - Kyocera KM-6330 | Scan System D Operation Guide (Functions) - Page 126
3-3 Address Editor 4. Address of PC with "Address Book" installed Type the host name or IP address of the computer that contains this user's personal Address Book into this field. 5. Signature Type the data (personal information) that will be transmitted with the email message into this field. 6. - Kyocera KM-6330 | Scan System D Operation Guide (Functions) - Page 127
3-3 Address Editor 3-3-9 Send E-mail Setting Make basic settings and register or edit the destination information for sending scanned images by email under the Send E-mail function. (1) E-mail Basic Setting Select this item when you want to make basic settings related to sending email (scanned data) - Kyocera KM-6330 | Scan System D Operation Guide (Functions) - Page 128
3-3 Address Editor 1. E-mail Transmission Restriction Select from among Non-restricted sending, Permitted destination domain names, and Restricted destination domain names. * If you select Non-restricted sending, there will be no restriction under the Send E-mail function in regard to the - Kyocera KM-6330 | Scan System D Operation Guide (Functions) - Page 129
3-3 Address Editor (2) Destination List (E-mail) Select this item when you want to confirm or edit the list of destinations under the Send E-mail function. 1 23 4 56 7 89 Page 3-50 - Kyocera KM-6330 | Scan System D Operation Guide (Functions) - Page 130
The name indicated here will be displayed as the destination name in the scanner's operation panel. 2. S mark will be appeared in this column when the address related to the [Sender (User) List] is registered. [Sender (User) List] (E-mail) will also be changed at the editing. 3. Registration Number - Kyocera KM-6330 | Scan System D Operation Guide (Functions) - Page 131
for previously registered destinations. 1 2 3 1. Name The name registered here will be displayed as the destination name in the scanner's operation panel. 2. Registration Number .... This is a registration number for destination information. 3. E-mail Address Type the destination email address - Kyocera KM-6330 | Scan System D Operation Guide (Functions) - Page 132
3-3 Address Editor (4) Registering and Editing Destination Group Information The Destination Group Registration Dialogue Box allows you to register new destination groups under the Send E-mail function, or edit information for previously registered destination groups. 4 5 1 2 6 3 10 7 8 9 - Kyocera KM-6330 | Scan System D Operation Guide (Functions) - Page 133
3-3 Address Editor 1. Name The name registered here will be displayed as the destination group name in the scanner's operation panel. 2. Registration Number .... Type the registration number for that destination group into this field. 3. Name Displays the name of each destination - Kyocera KM-6330 | Scan System D Operation Guide (Functions) - Page 134
3-3 Address Editor 3-3-10 Scan to PC Setting Register or edit destination information for sending scanned images directly to computers under the Scan to PC function. (1) Destination List (PC) Select this item when you want to confirm or edit the list of destinations under the Scan to PC function. 1 - Kyocera KM-6330 | Scan System D Operation Guide (Functions) - Page 135
indicated here will be displayed as the destination computer name in the scanner's operation panel. 2. S mark will be appeared in this column when the address related to the [Sender (User) List] is registered. [Sender (User) List] (PC) will also be changed at the editing. 3. Registration Number - Kyocera KM-6330 | Scan System D Operation Guide (Functions) - Page 136
registered destinations. 1 2 3 4 1. Name The name registered here will be displayed as the destination computer name in the scanner's operation panel. 2. Registration Number .... This is a registration number for destination computer information. 3. PC address Type the destination computer - Kyocera KM-6330 | Scan System D Operation Guide (Functions) - Page 137
3-3 Address Editor (3) Registering and editing destination computer group information The Destination Group Registration Dialogue Box allows you to register new destination computer groups under the Scan to PC function, or edit information for previously registered destination computer groups. 1 3 - Kyocera KM-6330 | Scan System D Operation Guide (Functions) - Page 138
3-3 Address Editor 1. Name The name registered here will be displayed as the destination computer group name in the scanner's operation panel. 2. Registration Number .... Type the registration number for that destination computer group into this field. 3. Change Password button Click on this - Kyocera KM-6330 | Scan System D Operation Guide (Functions) - Page 139
3-3 Address Editor 3-3-11 Tool Bar The Tool Bar contains buttons for easy execution of tasks such as writing edited data to the scanner, etc. 123 45 1. Open button Opens the selected Address Editor file. 2. Save button Saves edited data. 3. Send data button Registers the currently edited data - Kyocera KM-6330 | Scan System D Operation Guide (Functions) - Page 140
data that has been created in and exported from Address Editor, Address Book, or Microsoft Outlook as a csv file. (1) Importing Address Data into the Sender (User) List and Destination List (for Send E-mail and Scan to PC functions) The Open Dialogue Box allows you to import address data for use in - Kyocera KM-6330 | Scan System D Operation Guide (Functions) - Page 141
selected file. 6. Move Folder / Create New / Change Display, etc. ....... Operation of each button in the Tool Bar is the same as with normal operation under Windows. Page 3-62 - Kyocera KM-6330 | Scan System D Operation Guide (Functions) - Page 142
List. 1 2 3 4 1. Name The name indicated here will be displayed as the email destination name in the scanner's operation panel. 2. Name field Select the name of the item in the Sender (User) List where you want the name that is registered in the csv file to go. 3. E-mail Address Displays the - Kyocera KM-6330 | Scan System D Operation Guide (Functions) - Page 143
3-3 Address Editor (3) Checking Information to be Imported The Select Import data Dialogue Box allows you to confirm imported address data and add it to the Sender (User) List or the Destination List. 2 3 1 4 Page 3-64 - Kyocera KM-6330 | Scan System D Operation Guide (Functions) - Page 144
will be deleted once you edit the email address to an acceptable number of characters. * If ? is shown in the warning column, the problem data will be automatically converted into an acceptable form for importing into the Destination List (E-mail). * If ! is shown in the warning column, importing - Kyocera KM-6330 | Scan System D Operation Guide (Functions) - Page 145
3-3 Address Editor 3-3-13 Address Editor Version Information The About Scanner Address Editor screen will appear with version information any time Version Information is selected under Help in the Menu Bar. Page 3-66 - Kyocera KM-6330 | Scan System D Operation Guide (Functions) - Page 146
and sending scanned image data from the scanner to a designated email address. Once installation of Address Book is complete, it will start up automatically each time the computer is booted up, and an icon that indicates that the Address Book is running will appear in the Windows Task Bar. Page 3-67 - Kyocera KM-6330 | Scan System D Operation Guide (Functions) - Page 147
3-4 Address Book 3-4-2 Computer Environment • Hardware IBM PC/AT or compatible • Interface 10BASE-T or 100BASE-TX • OS Windows NT 4.0 (Service Pack 5), Windows 2000, Windows 98 (Second Edition), Windows 95 (OSR2) and Windows Me Page 3-68 - Kyocera KM-6330 | Scan System D Operation Guide (Functions) - Page 148
Book 3-4-3 Installation and Uninstallation (1) Installing the Address Book 1. Click on Scanner Utilities in the Main Menu of the Scanner CD-ROM. The following window will appear. * In order to access the Main Menu, refer to "1-2 Using the Scanner CD-ROM" on page 1-3. 2. Click on Address Book. Page - Kyocera KM-6330 | Scan System D Operation Guide (Functions) - Page 149
Address Book 3. Follow the instructions indicated in the wizard to continue the installation procedure. * The Address Book will start up automatically with the computer and will run in the background. In addition, an icon that indicates that the utility is running will appear in the Windows Task Bar - Kyocera KM-6330 | Scan System D Operation Guide (Functions) - Page 150
dialogue box for the Address Book will appear. • When the Address Book is NOT running... Click on Start in the Windows Task Bar and then select Program -> Scanner User Software -> Address Book in that order from the successive menus. An icon that indicates that the utility is now running will - Kyocera KM-6330 | Scan System D Operation Guide (Functions) - Page 151
. The Starting time column shows at what time connection was initially made to that scanner. 2. OK button Click on this button when you want to close the initial dialogue box for the Address Book. 3. Setup button Click on this button when you want to register or edit destination information. The - Kyocera KM-6330 | Scan System D Operation Guide (Functions) - Page 152
want to register or edit destination information for sending scanned image data under the Send E-mail or Scan to PC functions, click on the Setup button in the initial dialogue box for the Address Book. The Address Book Dialogue Box will appear and you can confirm destination information that has - Kyocera KM-6330 | Scan System D Operation Guide (Functions) - Page 153
3-4 Address Book 1. Apply button Click on this button to save any changes made to the information in the Destination List. 2. New Address button ........ Click on this button to register information for a new destination in either the Send E-mail or Scan to PC Destination List. (Refer to pages 3-77 - Kyocera KM-6330 | Scan System D Operation Guide (Functions) - Page 154
in the Destination List for use under the Send E-mail function. 2. Name The destination or destination group name indicated here will be displayed in the scanner's operation panel. Page 3-75 - Kyocera KM-6330 | Scan System D Operation Guide (Functions) - Page 155
3-4 Address Book 3. ID Indicates the registration number for the registered destination or destination group. The registration number is designated to each destination or destination group in the order that it is registered under the Destination List. 4. E-mail address Displays the email address - Kyocera KM-6330 | Scan System D Operation Guide (Functions) - Page 156
3-4 Address Book (3) Registering and editing destination information for the Send E-mail function The Destination Registration (E-mail) Dialogue Box allows you to register new destinations or edit information for previously registered destinations in the Destination List that is used under the Send - Kyocera KM-6330 | Scan System D Operation Guide (Functions) - Page 157
3-4 Address Book 4. Type in the email address of that destination (up to 64 single-byte characters). 5. Type in any comments that you want. 6. Click on the OK button. The entered destination information will be registered and the Address Book Dialogue Box will be displayed once again. 7. Click on - Kyocera KM-6330 | Scan System D Operation Guide (Functions) - Page 158
3-4 Address Book (4) Registering and editing destination group information for the Send E-mail function The Destination Group Registration (E-mail) Dialogue Box allows you to register new destination groups or edit information for previously registered destination groups in the Destination List - Kyocera KM-6330 | Scan System D Operation Guide (Functions) - Page 159
3-4 Address Book 2. Type in a name for the destination group that you want to register (up to 16 single-byte characters). 3. The registration number for this destination group will be automatically designated (001 - 100) in the order that the destination group has been registered under the - Kyocera KM-6330 | Scan System D Operation Guide (Functions) - Page 160
3-4 Address Book (5) Adding destinations to or deleting destinations from a destination group for the Send E-mail function The Editing member (E-mail) Dialogue Box allows you to add destinations to or delete destinations from a previously registered destination group for the Send E-mail function. - Kyocera KM-6330 | Scan System D Operation Guide (Functions) - Page 161
3-4 Address Book 2. Select the destinations that you want to add to the group in the Auxiliary group members list and then click on the Add button. 3. If you want to delete destinations from the group, select the destinations that you want to delete from the group in the Group members list and then - Kyocera KM-6330 | Scan System D Operation Guide (Functions) - Page 162
the Destination List for use under the Scan to PC function. 2. Name The destination or destination group name indicated here will be displayed in the scanner's operation panel. Page 3-83 - Kyocera KM-6330 | Scan System D Operation Guide (Functions) - Page 163
3-4 Address Book 3. ID Indicates the registration number for the registered destination or destination group. The registration number is designated to each destination or destination group in the order that it is registered under the Destination List. 4. PC address Displays the host name or IP - Kyocera KM-6330 | Scan System D Operation Guide (Functions) - Page 164
3-4 Address Book (7) Registering and editing destination information for the Scan to PC function The Destination Registration (PC) Dialogue Box allows you to register new destinations or edit information for previously registered destinations in the Destination List that is used under the Scan to PC - Kyocera KM-6330 | Scan System D Operation Guide (Functions) - Page 165
3-4 Address Book 2. Type in a name for the destination that you want to register (up to 16 single-byte characters). 3. The registration number for this destination will be automatically designated (001 - 100) in the order that the destination has been registered under the Destination List. It is - Kyocera KM-6330 | Scan System D Operation Guide (Functions) - Page 166
3-4 Address Book (8) Registering and editing destination group information for the Scan to PC function The Destination Group Registration (PC) Dialogue Box allows you to register new destination groups or edit information for previously registered destination groups in the Destination List that is - Kyocera KM-6330 | Scan System D Operation Guide (Functions) - Page 167
3-4 Address Book 2. Type in a name for the destination group that you want to register (up to 16 single-byte characters). 3. The registration number for this destination group will be automatically designated (001 - 100) in the order that the destination group has been registered under the - Kyocera KM-6330 | Scan System D Operation Guide (Functions) - Page 168
3-4 Address Book (9) Registering or changing password of a destination group for the Scan to PC function The Change Password Dialogue Box allows you to set or change the password for destination groups used under the Send E-mail function. IMPORTANT! Be sure to set the same password for the save - Kyocera KM-6330 | Scan System D Operation Guide (Functions) - Page 169
3-4 Address Book (10) Adding destinations to or deleting destinations from a destination group for the Scan to PC function The Editing member (PC) Dialogue Box allows you to add destinations to or delete destinations from a previously registered destination group for the Scan to PC function. EDITING - Kyocera KM-6330 | Scan System D Operation Guide (Functions) - Page 170
3-4 Address Book 2. Select the destinations that you want to add to the group in the Auxiliary group members list and then click on the Add button. 3. If you want to delete destinations from the group, select the destinations that you want to delete from the group in the Group members list and then - Kyocera KM-6330 | Scan System D Operation Guide (Functions) - Page 171
3-4 Address Book 3-4-6 Importing an Address Data File (1) Importing from Address Book Data files that have been created and saved in Address Book can be selected and opened for use. IMPORTING PROCEDURE 1. With the Address Book Dialogue Box open, select Import -> Address Book under the File menu in - Kyocera KM-6330 | Scan System D Operation Guide (Functions) - Page 172
3-4 Address Book 2. Select the folder in which the address data file that you want to import is saved. (The Address Book folder will be selected by default.) 3. Select the file type of the file that you want to import. (Only .dat can be selected.) 4. Type the name of the file in the File name field. - Kyocera KM-6330 | Scan System D Operation Guide (Functions) - Page 173
3-4 Address Book (2) Importing a csv file Data files that have been created and saved in csv format by other email software can be selected and opened for use in Address Book. IMPORTING PROCEDURE 1. With the Address Book Dialogue Box open, click on the Send E-mail button and then select Import -> - Kyocera KM-6330 | Scan System D Operation Guide (Functions) - Page 174
3-4 Address Book 2. Select the folder in which the csv formatted address data file that you want to import is saved. 3. Select the file type of the file that you want to import. (Only .csv can be selected.) 4. Type the name of the file in the File name field. (You can also select the desired file - Kyocera KM-6330 | Scan System D Operation Guide (Functions) - Page 175
3-4 Address Book • Making the corresponding field settings Once you have selected a csv file to import, you can determine which item will correspond to which field in the Destination List (for the Send E-Mail function). 6 7 8 9 6. Select the item that you want to be displayed in the Name field of - Kyocera KM-6330 | Scan System D Operation Guide (Functions) - Page 176
3-4 Address Book • Checking the information to be imported and registering it in the Address Book Check the contents of the csv file that you have selected to import before you register that data in the Destination List of the Address Book for the Send E-mail function. 11 10 12 Warning column - Kyocera KM-6330 | Scan System D Operation Guide (Functions) - Page 177
a Warning Symbol appears, click on the Edit button. The Destination Registration (E-mail) Dialogue Box will appear. (Refer to page 3-77.) Edit the problem information as required to make it acceptable for import and the Warning Symbol will be deleted. Warning Symbols ?: Displayed when information of - Kyocera KM-6330 | Scan System D Operation Guide (Functions) - Page 178
image displayed in that application. This section of this Operation Guide contains explanations on using a TWAIN-compatible application for scanning , the TWAIN source should be installed in each of those computers. 1 Scanner Perform the desired settings for the TWAIN mode. 2 Set the original. - Kyocera KM-6330 | Scan System D Operation Guide (Functions) - Page 179
3-5 TWAIN Source 3-5-2 Computer Environment • Hardware IBM PC/AT or compatible • Interface 100BASE-T or 10BASE-TX • OS Windows NT 4.0 (Service Pack 5), Windows 2000, Windows 98 (Second Edition), Windows 95 (OSR2) and Windows Me Page 3-100 - Kyocera KM-6330 | Scan System D Operation Guide (Functions) - Page 180
on Install TWAIN Source in the Main Menu of the Scanner CD-ROM. * In order to access the Main Menu, refer to "1-2 Using the Scanner CD-ROM" on page 1-3. 2. Select the model of the scanner being used. 3. Follow the instructions indicated in the wizard to continue the installation procedure. Page - Kyocera KM-6330 | Scan System D Operation Guide (Functions) - Page 181
3-5 TWAIN Source 3-5-4 Uninstalling the TWAIN source Use the "Add/Remove Programs" function in Windows to uninstall the TWAIN source. Page 3-102 - Kyocera KM-6330 | Scan System D Operation Guide (Functions) - Page 182
3-5 TWAIN Source 3-5-5 Image Data The following indicates the image data specifications supported by this product. Max. image size Width: 432 mm (17"), Length: 297 mm (A4 length-wise) Resolution (dpi 200 x 200, 300 x 300, 400 x 400, 600 x - Kyocera KM-6330 | Scan System D Operation Guide (Functions) - Page 183
is appropriate to the operation that you will use. * For more information on these procedures, refer to the Scanner Set-up Edition of the Operation Guide for your scanner. (1) Starting the scanning operation at your computer... 1. Use the TWAIN-compatible application to start TWAIN source in your - Kyocera KM-6330 | Scan System D Operation Guide (Functions) - Page 184
3-5 TWAIN Source 3-5-7 Main Dialogue Box The following explains each item within the TWAIN source Main Dialogue Box. *The actual windows differ difer depending upon the model of your Scanner. 74 5 6 1 2 3 9 11 12 8 10 11 12 13 13 14 Page 3-105 - Kyocera KM-6330 | Scan System D Operation Guide (Functions) - Page 185
3-5 TWAIN Source 1 Original Image Size ....... Lets you select, from among the following size settings, the size of the original that you want to scan. • Inch Specifications Auto, Ledger (11" x 17"), Computer Form (11" x 15"), Legal (8-1/2" x 14"), Letter (8-1/2" x 11"), Statement (5-1/2" x 8-1/2") - Kyocera KM-6330 | Scan System D Operation Guide (Functions) - Page 186
3-5 TWAIN Source 4 Color (Only available in color scanners Lets you select, from among the following, the color designation of you set the original to be scanned on the platen, that original will be scanned and the scanner will wait for the next command. If you set the original(s) in the DF, the - Kyocera KM-6330 | Scan System D Operation Guide (Functions) - Page 187
......... Click to display the Scanner Setup Dialogue Box in which you can change the scanner' IP address (Refer to page 3-109). switch units of measurement (between inch and metric), or select data compression during scanning Yes or No (Only available in color copiers). 16 Cancel button Click to - Kyocera KM-6330 | Scan System D Operation Guide (Functions) - Page 188
the settings and register the new IP address. 1. Click on the Scan Setup button in the TWAIN source Main Dialogue Box. The Scanner Setup Dialogue Box will appear. 2. The currently registered IP address will be displayed in the Scanner Address field. If you want to change that address, click on the - Kyocera KM-6330 | Scan System D Operation Guide (Functions) - Page 189
3-5 TWAIN Source 3. Type in the correct IP address. 4. Click on the OK button to return to the Scanner Setup Dialogue Box. 5. Click on the OK button. The new scanner IP address will be registered. Page 3-110 - Kyocera KM-6330 | Scan System D Operation Guide (Functions) - Page 190
department code 1. Click on the Scan Setup button in the TWAIN source Main Dialogue Box. The Scanner Setup Dialogue Box will appear. 2. Click on of this machine. For a more detailed explanation, refer to the Operation Guide for your copier. 5. Type into the Confirm Code field the same password as you - Kyocera KM-6330 | Scan System D Operation Guide (Functions) - Page 191
scanners for purposes of color adjustment. *The procedure to embed a color profile in the scanning data will differ depending upon the TWAIN-compat- ible software being used. Refer to the Instruction manual The files name for the color profile for this scanner will be shown on the right side of the - Kyocera KM-6330 | Scan System D Operation Guide (Functions) - Page 192
3-5 TWAIN Source 3-5-11 If You Can't Connect to the Scanner... If you cannot successfully connect to the scanner, one of the following causes is possible. Check the situation at the scanner's operation panel and the try to reconnect. • The machine is currently in the middle of a copy operation or it - Kyocera KM-6330 | Scan System D Operation Guide (Functions) - Page 193
3-5 TWAIN Source 3-5-12 Maximum image size There are some cases where the image can not be scanned depending upon the available memory size. • Select Color or Gray 200dpi 300dpi 400dpi 600dpi A3 22MB 50MB 89MB 199MB* A4 11MB 25MB 44MB 100MB 11" x 17" 21MB 48MB 86MB 193MB* 8-1/2" - Kyocera KM-6330 | Scan System D Operation Guide (Functions) - Page 194
Setup Wizard Enables quick set-up of those settings required in the Scanner Interface Card. • Advanced Set-up Installs AdminManager and enables more advanced settings. 3-6-2 Computer Environment • Hardware IBM PC/AT or compatible • Interface 10BASE-T or 100BASE-TX • OS Windows NT 4.0 (Service - Kyocera KM-6330 | Scan System D Operation Guide (Functions) - Page 195
use, this section provides an explanation on connecting to the scanner. Insert the CD-ROM and select Quick Setup Wizard under the IB-2x Configuration menu. A screen that will allow you to select the printer/scanner will be displayed. Any Scanner Interface Cards installed on the same network as your - Kyocera KM-6330 | Scan System D Operation Guide (Functions) - Page 196
IPX or IP as long as the protocol is installed on the Windows machine that is running Quick Setup (e.g., if only IPX is installed, then Quick Setup will find and display only IPX printers. In this case, since this scanner does not support the IPX protocol, it will not be displayed.) • If a desired - Kyocera KM-6330 | Scan System D Operation Guide (Functions) - Page 197
procedure from the beginning even if you want to run AdminManager directly from the CD-ROM without copying it onto your hard disk. 1. Insert the Scanner Library CD-ROM into the CD-ROM drive of your computer. The CD-ROM should boot up and the Main Menu screen for the CD - Kyocera KM-6330 | Scan System D Operation Guide (Functions) - Page 198
2x Configuration menu will appear. 3. Click on Advanced Setup. 4. Click on Install AdminManager in the next menu. * If you select "Run AdminManager directly from the CD", use can run AdminManager directly from the CD-ROM. 5. Follow the instructions in the installation wizard in order to continue the - Kyocera KM-6330 | Scan System D Operation Guide (Functions) - Page 199
procedure explains how to use AdminManager to set the IP address in the Scanner Interface Card. Perform this procedure when you want to set a static IP address. 1. Run AdminManager. 2. Under Setup in the Menu Bar, select Set Initial IP Address. The IP Address Setup window will open. Page 3-120 - Kyocera KM-6330 | Scan System D Operation Guide (Functions) - Page 200
to select it. 2. Under Setup in the Menu Bar, select Protocols. 3. Click on the TCP/IP Tab. 4. Enter the Subnet Mask and the Default Gateway address in the appropriate fields. 5. Click on the OK button. Follow the instructions on-screen in order to reboot the Scanner Interface Card. Page 3-121 - Kyocera KM-6330 | Scan System D Operation Guide (Functions) - Page 201
it. 2. Under Setup in the Menu Bar, select Protocols. The Protocol Setup window will open. 3. Click on the General Tab. 4. Type the password that you want to use in the appropriate field. 5. Click on the OK button. Follow the instructions on-screen in order to reboot the Scanner Interface Card. Page - Kyocera KM-6330 | Scan System D Operation Guide (Functions) - Page 202
this case, an icon that indicates the status of the DB Assistant will be displayed in the Windows Task Bar and the utility will remain in a waiting state for data to be sent from the scanner. PDF Keyword Assist This option adds filed information as keywords to scanned image data files. Since the - Kyocera KM-6330 | Scan System D Operation Guide (Functions) - Page 203
host name of the computer in which you installed the DB Assistant. 4. Run the Scanner File Utility in the computer in which you want to save the scanned image data and select either "KM-DB Link Handler" (for the PDF Keyword Assist option) or "Database Link Handler" (for the Database Assist option - Kyocera KM-6330 | Scan System D Operation Guide (Functions) - Page 204
computer. Destination Computer Select "Database Connection", select the desired file information and scan the original. Use the Scanner File Utility to select the option to be used: PDF Keyword Assist or Database Assist. Save the image data and file information in the destination folder. Image - Kyocera KM-6330 | Scan System D Operation Guide (Functions) - Page 205
3-7 DB Assistant 3-7-2 Computer Environment • Hardware IBM PC/AT or compatible • Interface 10BASE-T or 100BASE-TX • OS Windows NT 4.0 (Service Pack 5), Windows 2000, Windows 98 (Second Edition), Windows 95 (OSR2), Windows Me and Windows XP Page 3-126 - Kyocera KM-6330 | Scan System D Operation Guide (Functions) - Page 206
Installation and Uninstallation (1) Installing the DB Assistant 1. Click on Scanner Utilities in the Main Menu of the Scanner CD-ROM. The window shown below will appear. * In order to access the Main Menu, refer to "1-2 Using the Scanner Utilities" on page 1-3. 2. Click on DB Assistant. Page 3-127 - Kyocera KM-6330 | Scan System D Operation Guide (Functions) - Page 207
the instructions indicated in the wizard to continue the installation procedure. * During installation, the window shown below will appear to enable you to select the desired components that you want to install. Select the option(s) that you want to use under the DB Assistant. PDF Keyword Assist - Kyocera KM-6330 | Scan System D Operation Guide (Functions) - Page 208
DB Assistant will appear. Click on Configuration... and the setup dialogue box for the DB Assistant will appear. • When the DB Assistant is NOT running... Click on Start in the Windows Task Bar and then select Program -> Scanner User Software -> DB Assistant in that order from the successive menus - Kyocera KM-6330 | Scan System D Operation Guide (Functions) - Page 209
connected scanner(s) under the Scanner name column, and the time each connection was established under Starting time. 3. OK button Click on this button when you want to close the initial dialogue box. 4. Configuration... button .. Click on this button when you want to access the setup dialogue - Kyocera KM-6330 | Scan System D Operation Guide (Functions) - Page 210
for the PDF Keyword Assist and/or Database Assist options, click on the Configuration...button in the initial dialogue box. The setup dialogue box will appear. Save button Save button Click on this button when you want to save any new settings you have made. If you close the window without first - Kyocera KM-6330 | Scan System D Operation Guide (Functions) - Page 211
's PDF Keyword Assist option (which adds file information as keywords to scanned image files). First, access the DB Assistant's setup dialogue this section as reference. 1. Click on Edit in the menu bar of the setup dialogue box and select New. Then select Destination PC in the resulting submenu. The - Kyocera KM-6330 | Scan System D Operation Guide (Functions) - Page 212
will be displayed on the operation panel of the scanner and will be sorted by that name. 3. of the folder that was designated in the Scanner File Utility. * For more detailed information on the Destination Folder for Receiving Scanned Data" under "3-3 Scanner File Utility" on page 3-15. * - Kyocera KM-6330 | Scan System D Operation Guide (Functions) - Page 213
file (which determines how scanning will be accomplished), doubleclick on that file (or right-click and select Set in the resulting menu). The Default Setting window will appear. Setup items under the PDF Keyword Assist option Displays the content of the - Kyocera KM-6330 | Scan System D Operation Guide (Functions) - Page 214
Assistant 6. Select the desired settings in the Default Setting window and click on OK in order to save those settings and return to the setup dialogue box. * For more detailed information on the various basic settings, refer to "1-3 Using the Scanner Function" on page 1-8. * It is possible to use - Kyocera KM-6330 | Scan System D Operation Guide (Functions) - Page 215
and select Set in the resulting menu). The Access Setting window will appear. You can use this window to limit those who can access the settings for the to these settings according to the user. Only users selected from the Sender List registered in the scanner will be able to access the settings - Kyocera KM-6330 | Scan System D Operation Guide (Functions) - Page 216
. 9. In order to edit the Keyword item, double-click on that item (or right-click and select Edit in the resulting menu). The Keyword Edit window will be displayed. Page 3-137 - Kyocera KM-6330 | Scan System D Operation Guide (Functions) - Page 217
List field where it can now be edited. Once you have edited that keyword as desired, click on the OK button to return to the setup dialogue box. * A maximum of 100 keywords can be registered. * To change the order of the displayed keywords, select (click to highlight) a keyword from the list - Kyocera KM-6330 | Scan System D Operation Guide (Functions) - Page 218
(or right-click and select Edit in the resulting menu). The Creator Edit window will be displayed. Enter the creator information (up to 32 characters) in the registered creators The settings for using the PDF Keyword Assist option (which adds file information to scanned image files) under DB Assistant - Kyocera KM-6330 | Scan System D Operation Guide (Functions) - Page 219
the PDF Keyword Assist Option" on page 3-136. 1. Enter into the Sender List field the name of the user (up register the entered user name into the list below that field. If you want to edit a user name, select ( click on the Edit button. The selected user name will be displayed in Sender List field - Kyocera KM-6330 | Scan System D Operation Guide (Functions) - Page 220
currently registered in that scanner, click on the Download list button. Select the users from that list that you want to add to the access list, click on the >> button and they will be copied to the List of senders to be added on the right side of the window. To register any - Kyocera KM-6330 | Scan System D Operation Guide (Functions) - Page 221
, click on the OK button (or press the Enter key on your keyboard). The Current Sender List window will be displayed again, and the address for the selected scanner will appear in the corresponding Scanner Address field. 6. Click on the Download list button. A list of the senders who are currently - Kyocera KM-6330 | Scan System D Operation Guide (Functions) - Page 222
A Appendix Error Codes Page A-1 - Kyocera KM-6330 | Scan System D Operation Guide (Functions) - Page 223
accessed on the scanner's message display. For more detailed information, refer to the Set-up Edition of your Operation Guide. Error Code the personal Address Book due to a connection problem. An attempt to use the Send E-mail function was made, but the scanner was unable to find the SMTP server. - - Kyocera KM-6330 | Scan System D Operation Guide (Functions) - Page 224
File Utility is running properly in that computer, or whether it is already connected to another scanner. • Check to make sure that there are no problems with any connections, such as checking that the network cables are connected properly. Check the password that is set in the destination computer - Kyocera KM-6330 | Scan System D Operation Guide (Functions) - Page 225
trouble has occurred in the destination computer. Try to perform the operation again after the connection to the other scanner is completed. Check the Scanner scanned at one time. • Check to make sure that the Scanner File Utility in the destination computer is running properly. • Check to - Kyocera KM-6330 | Scan System D Operation Guide (Functions) - Page 226
is no software that utilizes the network, besides Scanner File Utility, also running on the computer that is running the personal Address Book. • If the trouble is with the computer that is running the personal Address Book, fix that problem. Check the computer of each group member as necessary
-
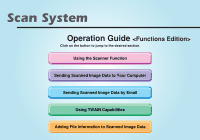 1
1 -
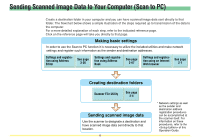 2
2 -
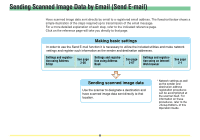 3
3 -
 4
4 -
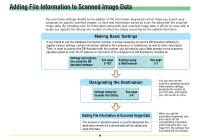 5
5 -
 6
6 -
 7
7 -
8
-
9
-
10
-
11
-
12
-
13
-
14
-
15
-
16
-
17
-
18
-
19
-
20
-
21
-
22
-
23
-
24
-
25
-
26
-
27
-
28
-
29
-
30
-
31
-
32
-
33
-
34
-
35
-
36
-
37
-
38
-
39
-
40
-
41
-
42
-
43
-
44
-
45
-
46
-
47
-
48
-
49
-
50
-
51
-
52
-
53
-
54
-
55
-
56
-
57
-
58
-
59
-
60
-
61
-
62
-
63
-
64
-
65
-
66
-
67
-
68
-
69
-
70
-
71
-
72
-
73
-
74
-
75
-
76
-
77
-
78
-
79
-
80
-
81
-
82
-
83
-
84
-
85
-
86
-
87
-
88
-
89
-
90
-
91
-
92
-
93
-
94
-
95
-
96
-
97
-
98
-
99
-
100
-
101
-
102
-
103
-
104
-
105
-
106
-
107
-
108
-
109
-
110
-
111
-
112
-
113
-
114
-
115
-
116
-
117
-
118
-
119
-
120
-
121
-
122
-
123
-
124
-
125
-
126
-
127
-
128
-
129
-
130
-
131
-
132
-
133
-
134
-
135
-
136
-
137
-
138
-
139
-
140
-
141
-
142
-
143
-
144
-
145
-
146
-
147
-
148
-
149
-
150
-
151
-
152
-
153
-
154
-
155
-
156
-
157
-
158
-
159
-
160
-
161
-
162
-
163
-
164
-
165
-
166
-
167
-
168
-
169
-
170
-
171
-
172
-
173
-
174
-
175
-
176
-
177
-
178
-
179
-
180
-
181
-
182
-
183
-
184
-
185
-
186
-
187
-
188
-
189
-
190
-
191
-
192
-
193
-
194
-
195
-
196
-
197
-
198
-
199
-
200
-
201
-
202
-
203
-
204
-
205
-
206
-
207
-
208
-
209
-
210
-
211
-
212
-
213
-
214
-
215
-
216
-
217
-
218
-
219
-
220
-
221
-
222
-
223
-
224
-
225
-
226
 |
 |
Operation Guide
<Functions Edition>
Click on the button to jump to the desired section.
Sending Scanned Image Data to Your Computer
Using TWAIN Capabilities
Sending Scanned Image Data by Email
Using the Scanner Function
Adding File Information to Scanned Image Data