Kyocera KM-8030 PRESCRIBE Commands Technical Reference Manual - Rev. 4.7 - Page 32
Drawing Filled Blocks, A Filled Block
 |
View all Kyocera KM-8030 manuals
Add to My Manuals
Save this manual to your list of manuals |
Page 32 highlights
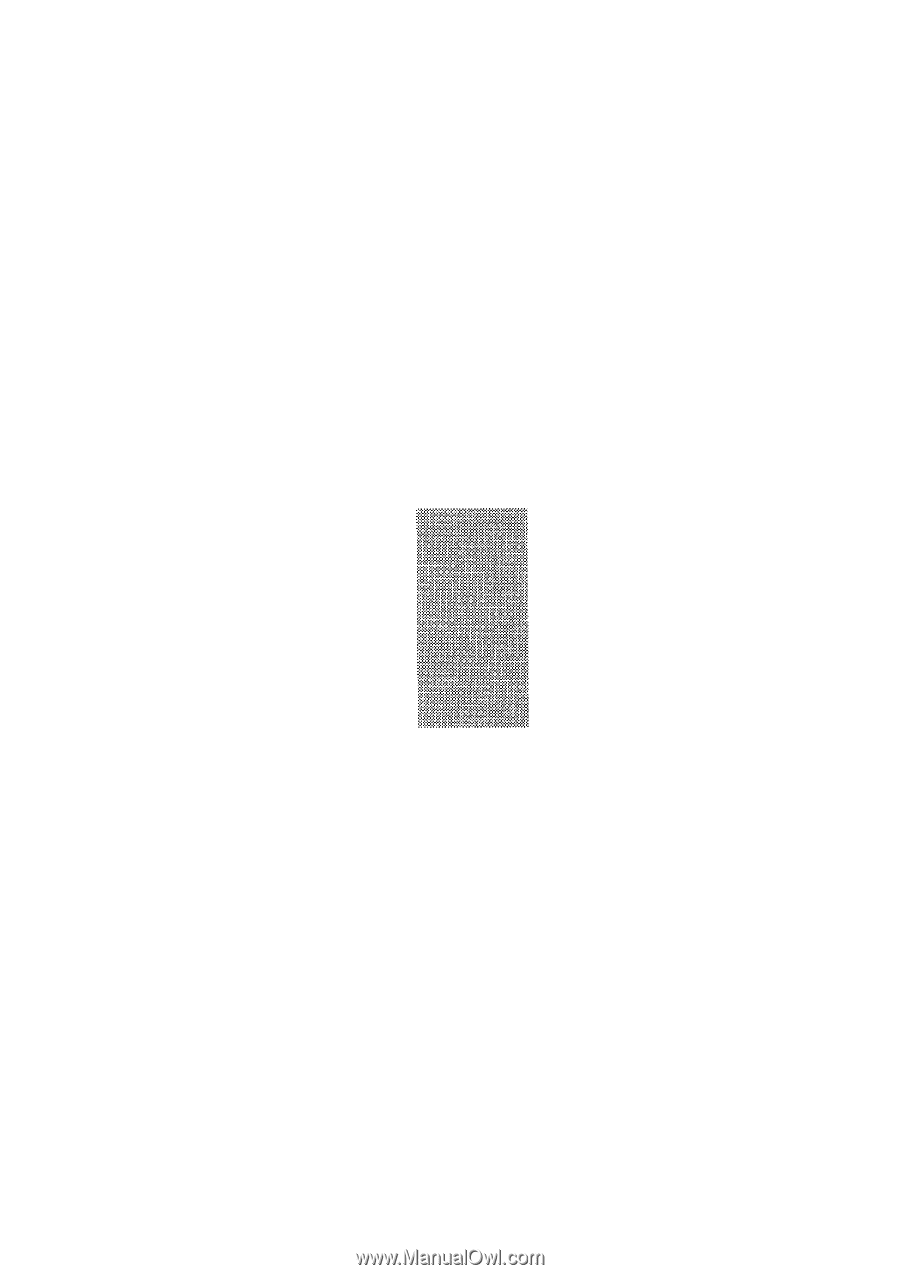
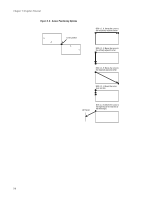
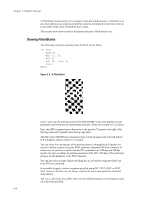
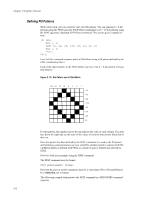
Chapter 2 Graphics Tutorial A filled block consists simply of a rectangle of any desired dimensions. A filled arc is an area enclosed by an arc segment and the line segments extending from the ends of the arc to the center of the circle of which the arc is a part. This section shows how to select a fill pattern and print a filled block or arc. Drawing Filled Blocks The following command sequence prints the block shown below. !R! RES; UNIT P; MZP 72, 72; PAT 6; BLK 72, -144, H; PAGE; EXIT; Figure 2. 8. A Filled Block Lines 1 and 2 put the printing system in the PRESCRIBE mode, reset printing system parameters and set the unit of measurement to points. (One point is equal to 1/72 inches.) Next, the MZP command moves the cursor to the position 72 points to the right of the left edge limit and 72 points below the top edge limit. The PAT (select fill PATtern) command on line 4 of the program selects the fill pattern. In this program, pattern number 6 is selected. You can select from among any of the printing system's 60 predefined fill patterns or choose to define a pattern using the XPAT (generate eXpanded PATtern) command. In either case, the selection is made with the PAT command. For 1200-dpi and 600-dpi models, the user can define the printing resolution (300, 600, 1200 dpi) of the pattern by giving a second parameter to the PAT command. You can also select a shade of gray for filling the arc or block by using the GPAT (set Gray PATtern) command. It is possible to apply a color to a pattern specified using PAT, FPAT, GPAT or XPAT. Note, however, that this may not always result in the exact same pattern as printed in monochrome. The way a color looks may differ when used for different patterns even though the same color has been specified. 2-10
-
 1
1 -
2
-
3
-
4
-
5
-
6
-
7
-
8
-
9
-
10
-
11
-
12
-
13
-
14
-
15
-
16
-
17
-
18
-
19
-
20
-
21
-
22
-
23
-
24
-
25
-
26
-
 27
27 -
 28
28 -
 29
29 -
 30
30 -
 31
31 -
 32
32 -
 33
33 -
 34
34 -
 35
35 -
 36
36 -
 37
37 -
38
-
39
-
40
-
41
-
42
-
43
-
44
-
45
-
46
-
47
-
48
-
49
-
50
-
51
-
52
-
53
-
54
-
55
-
56
-
57
-
58
-
59
-
60
-
61
-
62
-
63
-
64
-
65
-
66
-
67
-
68
-
69
-
70
-
71
-
72
-
73
-
74
-
75
-
76
-
77
-
78
-
79
-
80
-
81
-
82
-
83
-
84
-
85
-
86
-
87
-
88
-
89
-
90
-
91
-
92
-
93
-
94
-
95
-
96
-
97
-
98
-
99
-
100
-
101
-
102
-
103
-
104
-
105
-
106
-
107
-
108
-
109
-
110
-
111
-
112
-
113
-
114
-
115
-
116
-
117
-
118
-
119
-
120
-
121
-
122
-
123
-
124
-
125
-
126
-
127
-
128
-
129
-
130
-
131
-
132
-
133
-
134
-
135
-
136
-
137
-
138
-
139
-
140
-
141
-
142
-
143
-
144
-
145
-
146
-
147
-
148
-
149
-
150
-
151
-
152
-
153
-
154
-
155
-
156
-
157
-
158
-
159
-
160
-
161
-
162
-
163
-
164
-
165
-
166
-
167
-
168
-
169
-
170
-
171
-
172
-
173
-
174
-
175
-
176
-
177
-
178
-
179
-
180
-
181
-
182
-
183
-
184
-
185
-
186
-
187
-
188
-
189
-
190
-
191
-
192
-
193
-
194
-
195
-
196
-
197
-
198
-
199
-
200
-
201
-
202
-
203
-
204
-
205
-
206
-
207
-
208
-
209
-
210
-
211
-
212
-
213
-
214
-
215
-
216
-
217
-
218
-
219
-
220
-
221
-
222
-
223
-
224
-
225
-
226
-
227
-
228
-
229
-
230
-
231
-
232
-
233
-
234
-
235
-
236
-
237
-
238
-
239
-
240
-
241
-
242
-
243
-
244
-
245
-
246
-
247
-
248
-
249
-
250
-
251
-
252
-
253
-
254
-
255
-
256
-
257
-
258
-
259
-
260
 |
 |