Kyocera KM-C830D KX Driver User Guide Version 5.90 - Page 11
Product Library CD, Installing using the Add Printer Wizard, Completing the Add Printer Wizard
 |
View all Kyocera KM-C830D manuals
Add to My Manuals
Save this manual to your list of manuals |
Page 11 highlights
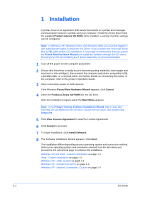
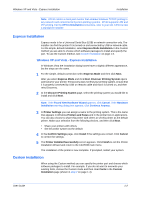
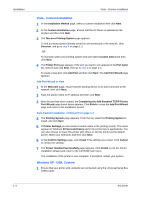
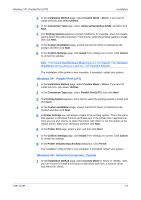
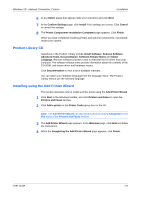
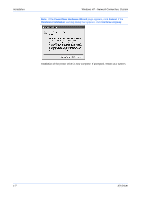
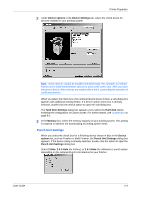
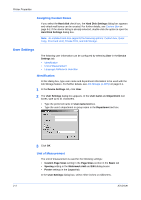
Windows XP - Network Connection, Custom Installation 6 In any Select pages that appear make your selections and click Next. 7 In the Confirm Settings page, click Install if the settings are correct. Click Cancel to correct the settings. 6 8 The Printer Components Installation Completed page appears. Click Finish. 7 When you have completed installing printers and optional components, if prompted, restart your system. Product Library CD Selections in the Product Library include Install Software, Remove Software, Advanced Tools, Documentation, Software Release Notes and Select Language. Remove software provides a tool to eliminate the KX driver from your computer. The software release notes provide information about the contents of the CD-ROM, and known driver and hardware issues. Click Documentation to view a list of available manuals. You can select your interface language from the language menu. The Product Library menus use the selected language. Installing using the Add Printer Wizard This section describes how to install a printer driver using the Add Printer Wizard. 1 Click Start in the Windows taskbar, and click Printers and Faxes to open the Printers and Faxes window. 1 2 Click Add a printer in the Printer Tasks group box on the left. 2 Note: The Add Printer Wizard can also be launched by clicking Add printer in the File menu of the Printers and Faxes window. 3 The Add Printer Wizard page appears. In the Welcome page, click Next and follow the instructions. 3 4 When the Completing the Add Printer Wizard page appears, click Finish. 4 User Guide 1-6
-
 1
1 -
2
-
3
-
4
-
5
-
 6
6 -
 7
7 -
 8
8 -
 9
9 -
 10
10 -
 11
11 -
 12
12 -
 13
13 -
 14
14 -
 15
15 -
 16
16 -
17
-
18
-
19
-
20
-
21
-
22
-
23
-
24
-
25
-
26
-
27
-
28
-
29
-
30
-
31
-
32
-
33
-
34
-
35
-
36
-
37
-
38
-
39
-
40
-
41
-
42
-
43
-
44
-
45
-
46
-
47
-
48
-
49
-
50
-
51
-
52
-
53
-
54
-
55
-
56
-
57
-
58
-
59
-
60
-
61
-
62
-
63
-
64
-
65
-
66
-
67
-
68
-
69
-
70
-
71
-
72
-
73
-
74
-
75
-
76
-
77
-
78
-
79
-
80
-
81
-
82
-
83
-
84
-
85
-
86
-
87
-
88
-
89
-
90
-
91
-
92
-
93
-
94
-
95
-
96
-
97
-
98
-
99
-
100
-
101
-
102
-
103
-
104
-
105
 |
 |