Kyocera TASKalfa 250ci Kyocera Command Center Operation Guide Rev 6.3 - Page 56
Editing a Group, Advanced > Management > IC-Card Settings
 |
View all Kyocera TASKalfa 250ci manuals
Add to My Manuals
Save this manual to your list of manuals |
Page 56 highlights
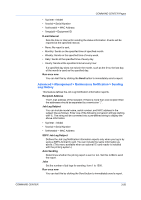
COMMAND CENTER Pages 2 Click Add and specify group information and Permit or Prohibit. 3 Click Submit. Editing a Group 1 Click Group Authorization Set., open the Group Authorization Set page. 2 Click the desired Group ID or Group Name to edit the group and modify their information. 3 Click Submit. Deleting a Group 1 Click Group Authorization Set., open the Group Authorization Set. page. 2 Check the desired group. When the check box on the left side of Group ID is selected, all groups displayed on the page will be checked. 3 Click Delete. The Group Authorization Set.-Delete page appears. You can confirm the groups to delete. 4 Click Delete when the desired groups are selected. Advanced > Management > IC-Card Settings This feature is available when an optional IC card reader is installed with the printing system. This enables reading an IC card (FeliCa®) to login the printing system. IC Card Read Type Selects either IDM or FeliCa® type for the IC card to use. System Code, Service Code, Number of User Blocks to Use These items are used when FeliCa is selected in IC Card Read Type. Each item must be given a specific parameter for the FeliCa IC card to use. Advanced > Management > Notification/Maintenance > Maintenance Notification This feature defines the recipient of maintenance information reports. Equipment ID This is the name by which the machine will be identified. Recipient Address The E-mail address of the recipient. If there is more than one recipient then the addresses should be separated by a semicolon ";". Subject You can include model name, serial number, MAC address and equipment ID in the subject line as follows: Enter one of the following conversion strings starting with %. The string will be converted into a pre-defined string to display the above information. 3-49 User Guide
-
 1
1 -
2
-
3
-
4
-
5
-
6
-
7
-
8
-
9
-
10
-
11
-
12
-
13
-
14
-
15
-
16
-
17
-
18
-
19
-
20
-
21
-
22
-
23
-
24
-
25
-
26
-
27
-
28
-
29
-
30
-
31
-
32
-
33
-
34
-
35
-
36
-
37
-
38
-
39
-
40
-
41
-
42
-
43
-
44
-
45
-
46
-
47
-
48
-
49
-
50
-
 51
51 -
 52
52 -
 53
53 -
 54
54 -
 55
55 -
 56
56 -
 57
57 -
 58
58 -
 59
59 -
 60
60 -
 61
61 -
62
-
63
-
64
-
65
-
66
 |
 |