Kyocera TASKalfa 2550ci 2550ci Printer Driver User Guide - Page 42
Profiles, Selecting a Profile
 |
View all Kyocera TASKalfa 2550ci manuals
Add to My Manuals
Save this manual to your list of manuals |
Page 42 highlights
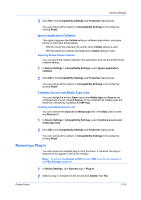
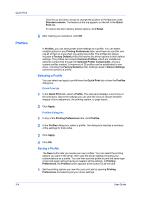
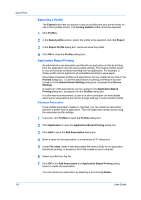
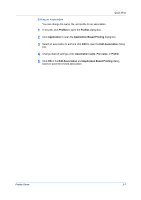
Quick Print Profiles Click the up and down arrows to change the position of the features under Selected controls. The feature at the top appears on the left in the Quick Print tab. To restore the list to factory default options, click Reset. 5 After making your selections, click OK. In Profiles, you can save printer driver settings as a profile. You can select multiple options in any Printing Preferences tabs, save them as a profile, and use all of them at once when you apply the profile. The profiles list always includes a Factory Default profile that returns the driver options to their default settings. The profiles can include Common Profiles, which are installed as optional components through the Optional Printer Components, and any custom profiles created. A maximum of 26 profiles can be established in one driver, including the Factory Default profile. Settings made in Device Settings cannot be saved to a profile. Selecting a Profile You can select and apply a profile from the Quick Print tab or from the Profiles dialog box. Quick Print tab 1 In the Quick Print tab, select a Profile. The side panel displays a summary of the selections. Above the settings you can click the icons to choose between images of tone adjustment, the printing system, or page layout. 2 Click Apply. Profiles dialog box 1 In any of the Printing Preferences tabs, click Profiles. 2 In the Profiles dialog box, select a profile. The dialog box displays a summary of the settings for that profile. 3 Click Apply. 4 Click OK. Saving a Profile The Save button lets you create your own profiles. You can select the printing options you want in the driver, then save the driver settings including your customizations as a profile. You can then use that profile to print the same type of print job again without having to reselect all the settings. In Printing Preferences, the Profiles button appears at the bottom of all the tabs. 1 Set the printing options you want for your print job by opening Printing Preferences and selecting all your driver settings. 3-4 User Guide
-
 1
1 -
2
-
3
-
4
-
5
-
6
-
7
-
8
-
9
-
10
-
11
-
12
-
13
-
14
-
15
-
16
-
17
-
18
-
19
-
20
-
21
-
22
-
23
-
24
-
25
-
26
-
27
-
28
-
29
-
30
-
31
-
32
-
33
-
34
-
35
-
36
-
 37
37 -
 38
38 -
 39
39 -
 40
40 -
 41
41 -
 42
42 -
 43
43 -
 44
44 -
 45
45 -
 46
46 -
 47
47 -
48
-
49
-
50
-
51
-
52
-
53
-
54
-
55
-
56
-
57
-
58
-
59
-
60
-
61
-
62
-
63
-
64
-
65
-
66
-
67
-
68
-
69
-
70
-
71
-
72
-
73
-
74
-
75
-
76
-
77
-
78
-
79
-
80
-
81
-
82
-
83
-
84
-
85
-
86
-
87
-
88
-
89
-
90
-
91
-
92
-
93
-
94
-
95
-
96
-
97
-
98
-
99
-
100
-
101
-
102
-
103
-
104
-
105
-
106
 |
 |