Kyocera TASKalfa 2550ci 2550ci Printer Driver User Guide - Page 53
Scaling, Setting Scaling on the Booklet, Printing a Booklet
 |
View all Kyocera TASKalfa 2550ci manuals
Add to My Manuals
Save this manual to your list of manuals |
Page 53 highlights
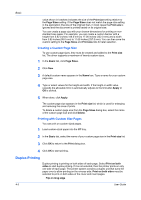
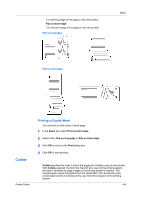
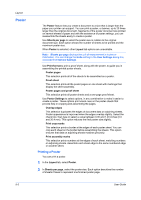
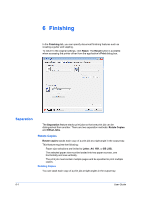
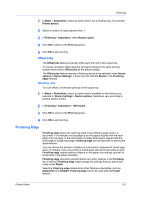
Scaling Booklet 4 In the Layout list, select the direction the pages should flow. 5 Click OK to return to the Print dialog box. 6 Click OK to start printing. Layout Scaling increases or decreases text and graphics on a page. You can also select a gutter setting in the Finishing tab that enlarges the margins to accommodate stapling or manual hole punching. Scaling is unavailable when other Layout tab options are selected. Setting Scaling on the Page You can increase or decrease text and graphics on a page. 1 In the Layout tab, type or select a scaling percentage between 20 to 500. Scaling adjusts proportionately the height and width of the page. A lower percentage reduces the page and a higher percentage enlarges the page. 2 Click OK to return to the Print dialog box. 3 Click OK to start printing. Booklet prints a two-page layout on both sides of each sheet of paper. You can fold and bind the booklet in the center. Folded booklets are half the size of the selected paper. For example, if you select Letter in Basic > Paper > Print size, the printed output can be folded into a 5.5 x 8.5 inch-size booklet. When Booklet is selected, other Layout tab options are unavailable. A different paper source can be selected for the booklet cover. To include a cover on the booklet, select the Publishing tab, then select Cover mode. Printing a Booklet You can print a booklet. 1 In the Layout tab, select Booklet, and one of the two binding options. Left edge binding This selection prints text that reads from left to right. Right edge binding This selection prints text that reads from right to left. 2 Click OK to return to the Print dialog box. 3 Click OK to start printing. Printer Driver 5-2
-
 1
1 -
2
-
3
-
4
-
5
-
6
-
7
-
8
-
9
-
10
-
11
-
12
-
13
-
14
-
15
-
16
-
17
-
18
-
19
-
20
-
21
-
22
-
23
-
24
-
25
-
26
-
27
-
28
-
29
-
30
-
31
-
32
-
33
-
34
-
35
-
36
-
37
-
38
-
39
-
40
-
41
-
42
-
43
-
44
-
45
-
46
-
47
-
 48
48 -
 49
49 -
 50
50 -
 51
51 -
 52
52 -
 53
53 -
 54
54 -
 55
55 -
 56
56 -
 57
57 -
 58
58 -
59
-
60
-
61
-
62
-
63
-
64
-
65
-
66
-
67
-
68
-
69
-
70
-
71
-
72
-
73
-
74
-
75
-
76
-
77
-
78
-
79
-
80
-
81
-
82
-
83
-
84
-
85
-
86
-
87
-
88
-
89
-
90
-
91
-
92
-
93
-
94
-
95
-
96
-
97
-
98
-
99
-
100
-
101
-
102
-
103
-
104
-
105
-
106
 |
 |
