Kyocera TASKalfa 2550ci 2550ci Printer Driver User Guide - Page 8
Selecting an Installation Method, Installing Utilities, Upgrading Driver Components - user manual
 |
View all Kyocera TASKalfa 2550ci manuals
Add to My Manuals
Save this manual to your list of manuals |
Page 8 highlights
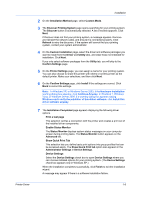
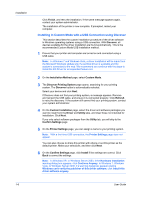
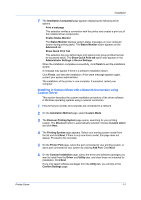
Installation Selecting an Installation Method You can select Express Mode for a network or USB connection and the installation wizard will discover your printers. You can also select Custom Mode for a network or USB connection and either manually select installation packages and specify utilities or let the installation wizard discover your printer. Express Mode Installation Installing in Express Mode on page 1-3 Custom Mode Installation Installing in Custom Mode with a Network Connection using Discover on page 1-4 Installing in Custom Mode with a USB Connection using Discover on page 16 Installing in Custom Mode with a Network Connection using Custom Select on page 1-7 Installing in Custom Mode with a USB Connection using Custom Select on page 1-8 Installing Utilities On the Installation Method page, click Utilities to install printer utilities. You can also select utilities to install during the Custom Installation procedure. Upgrading Driver Components If the installation wizard detects older driver or utility components, the Software Component Upgrade page appears. 1 Choose the component to upgrade. Click Next. 2 Confirm your upgrade settings. To start the upgrade, click Upgrade. 3 When the upgrade completes, click Next. The Installation Method page appears. European Default Duplex Printing on both sides of a sheet of paper (duplex mode) reduces paper consumption and helps conserve environmental resources. Duplex mode also lowers costs by reducing the amount of paper that must be purchased. We recommend that printing systems capable of duplex printing use duplex mode by default. This can be set in the printer driver installation process for European locations only. After you click Express mode or Custom mode in the Installer, if the operating system locale is EU and time zone is GMT 0, GMT +1 or GMT +2, a message about resource and energy conservation appears. Read the message, and then click OK. After installation is successful, an Enable Duplex check box is displayed on the Finished page. Select the check box to have the driver automatically default to duplex mode. Exceptions to the default can afterward be made by selecting options in the driver Quick Print or Basic tabs. 1-2 User Guide
-
 1
1 -
2
-
 3
3 -
 4
4 -
 5
5 -
 6
6 -
 7
7 -
 8
8 -
 9
9 -
 10
10 -
 11
11 -
 12
12 -
 13
13 -
14
-
15
-
16
-
17
-
18
-
19
-
20
-
21
-
22
-
23
-
24
-
25
-
26
-
27
-
28
-
29
-
30
-
31
-
32
-
33
-
34
-
35
-
36
-
37
-
38
-
39
-
40
-
41
-
42
-
43
-
44
-
45
-
46
-
47
-
48
-
49
-
50
-
51
-
52
-
53
-
54
-
55
-
56
-
57
-
58
-
59
-
60
-
61
-
62
-
63
-
64
-
65
-
66
-
67
-
68
-
69
-
70
-
71
-
72
-
73
-
74
-
75
-
76
-
77
-
78
-
79
-
80
-
81
-
82
-
83
-
84
-
85
-
86
-
87
-
88
-
89
-
90
-
91
-
92
-
93
-
94
-
95
-
96
-
97
-
98
-
99
-
100
-
101
-
102
-
103
-
104
-
105
-
106
 |
 |