Kyocera TASKalfa 500ci KM-NET ADMIN Operation Guide for Ver 2.0 - Page 21
Changing the Default Console, Disabling a Console, Set As Default Console
 |
View all Kyocera TASKalfa 500ci manuals
Add to My Manuals
Save this manual to your list of manuals |
Page 21 highlights
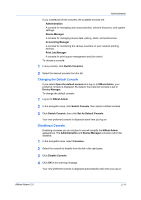
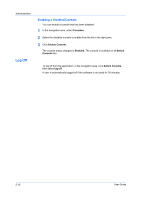
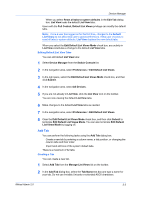
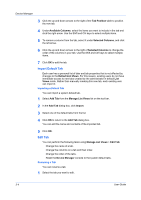
Administration If you installed all of the consoles, the available choices are: Administration A console for managing user accounts/roles, network discovery, and system settings. Device Manager A console for managing device data, polling, alerts, and preferences. Accounting Manager A console for monitoring the various counters on your network printing devices. Print Job Manager A console for print queue management and job control. To choose a console: 1 In any console, click Switch Consoles. 2 Select the desired console from the list. Changing the Default Console If you select Open the default console and log on to KMnet Admin, your preferred console is displayed. By default, the preferred console is set to Device Manager. To change the default console: 1 Log on to KMnet Admin. 2 In the navigation area, click Switch Console, then select a default console. 3 Click Switch Console, then click Set As Default Console. Your new preferred console is displayed each time you log on. Disabling a Console Disabling consoles you do not plan to use will simplify the KMnet Admin appearance. The Administration and Device Manager consoles cannot be disabled. 1 In the navigation area, select Consoles. 2 Select the console to disable from the list in the right pane. 3 Click Disable Console. 4 Click OK in the warning message. Your new preferred console is displayed automatically each time you log on. KMnet Admin 2.0 2-11
-
 1
1 -
2
-
3
-
4
-
5
-
6
-
7
-
8
-
9
-
10
-
11
-
12
-
13
-
14
-
15
-
 16
16 -
 17
17 -
 18
18 -
 19
19 -
 20
20 -
 21
21 -
 22
22 -
 23
23 -
 24
24 -
 25
25 -
 26
26 -
27
-
28
-
29
-
30
-
31
-
32
-
33
-
34
-
35
-
36
-
37
-
38
-
39
-
40
-
41
-
42
-
43
-
44
-
45
-
46
-
47
-
48
-
49
-
50
-
51
-
52
-
53
-
54
-
55
-
56
-
57
-
58
-
59
-
60
-
61
-
62
-
63
-
64
-
65
-
66
-
67
-
68
-
69
-
70
-
71
-
72
-
73
-
74
-
75
-
76
-
77
-
78
-
79
-
80
-
81
-
82
-
83
-
84
-
85
-
86
-
87
-
88
-
89
-
90
-
91
-
92
-
93
-
94
-
95
-
96
-
97
-
98
-
99
-
100
-
101
-
102
-
103
-
104
-
105
-
106
-
107
 |
 |