Kyocera TASKalfa 500ci KM-NET ADMIN Operation Guide for Ver 2.0 - Page 63
Adding or Editing an Account, Device List View Pane - specifications
 |
View all Kyocera TASKalfa 500ci manuals
Add to My Manuals
Save this manual to your list of manuals |
Page 63 highlights
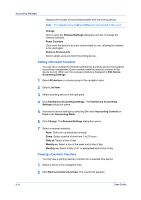
Accounting Manager 2 Click Copy Group. 3 Type the name of the new group in the Group Name box. Do not use invisible Unicode or extended ASCII characters. 4 Click each menu button and change any options. 5 Click OK. The new group appears in the navigation area. Adding or Editing an Account You can create new accounts that can be used with specific printing devices. All accounts created in the Accounting Manager console are registered in the printing devices. An account can be created if at least one printing device is specified. 1 Select one of the following in the navigation area: A printing device that supports accounting management All accounts An account group A single account 2 If necessary, click List View. 3 Click Create New Account or select an existing account and click Edit Account. The Create New Account or Edit Account dialog box opens. 4 Type a name for the account in Account Name. If desired, type an optional account name. Do not use invisible Unicode or extended ASCII characters. Note: Not all printing device models support account names. In this case, the associated name is saved only in KMnet Admin. 5 Type a numeric code in Account Code, or for greater security, use the supplied random code. You can click Generate Code to let KMnet Admin change the random code. 6 Click Add Device to select one or more printing devices to associate with the account. The Device List View Pane dialog box opens. 7 From the list select a device. Use Shift or Ctrl to select multiple devices. You can click the arrow buttons to display more devices. All displayed devices support accounting. 8 Click Add. The added device appears in the lower pane of the Create New Account dialog box. 9 To set printing device balances, click the Balance tab and type the allowed total balance for print, copy, scan, and fax. KMnet Admin 2.0 4-6
-
 1
1 -
2
-
3
-
4
-
5
-
6
-
7
-
8
-
9
-
10
-
11
-
12
-
13
-
14
-
15
-
16
-
17
-
18
-
19
-
20
-
21
-
22
-
23
-
24
-
25
-
26
-
27
-
28
-
29
-
30
-
31
-
32
-
33
-
34
-
35
-
36
-
37
-
38
-
39
-
40
-
41
-
42
-
43
-
44
-
45
-
46
-
47
-
48
-
49
-
50
-
51
-
52
-
53
-
54
-
55
-
56
-
57
-
 58
58 -
 59
59 -
 60
60 -
 61
61 -
 62
62 -
 63
63 -
 64
64 -
 65
65 -
 66
66 -
 67
67 -
 68
68 -
69
-
70
-
71
-
72
-
73
-
74
-
75
-
76
-
77
-
78
-
79
-
80
-
81
-
82
-
83
-
84
-
85
-
86
-
87
-
88
-
89
-
90
-
91
-
92
-
93
-
94
-
95
-
96
-
97
-
98
-
99
-
100
-
101
-
102
-
103
-
104
-
105
-
106
-
107
 |
 |