Kyocera TASKalfa 500ci Kyocera Command Center Operation Guide Rev 6.3 - Page 32
Setting Destinations, Addition, RX/Forward Requirements - Advanced
 |
View all Kyocera TASKalfa 500ci manuals
Add to My Manuals
Save this manual to your list of manuals |
Page 32 highlights
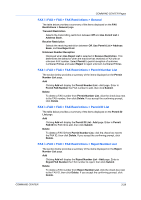
COMMAND CENTER Pages 2 The RX/Forward Requirements - Advanced page appears. Specify the forwarding process. The procedure is almost the same as the procedure for adding a condition. See steps 2 to 6 as a reference. Note: The process of saving faxes in a FAX box cannot be selected as the forwarding process to be applied without using a Requirement List. 3 After you have finished setting the items, click Submit. 4 Returns to the RX/Forward Requirements page. Select ALL and click Submit. This completes the settings for applying the same forwarding process without using a Requirement list. Setting Destinations When setting Forwarding in Action Settings described above, you have to register Destination in advance. You can add a new destination or an address registered in the address book to Destination. Addition Open the Action Settings > Forward page. 1 Click Add. 2 Select the desired type of forwarding process from Address Type. The available types are as follows: E-mail Forwards faxes by E-mail. Specify E-mail address. SMB Saves faxes in a shared folder accessible from Microsoft Windows Network. Specify Host Name, Port Number, Path to the shared folder, Login User Name, and Login Password. FTP Saves faxes on an accessible FTP server. Specify Host Name, Port Number, Path to the folder, Login User Name, and Login Password. FAX Forwards faxes to other FAX machines. Specify FAX Number, Transmit Start Speed, and other necessary information on the forwarding destinations. i-FAX Forwards faxes to other i-FAX systems. Specify i-FAX Address, Connection Mode, and other necessary information on the forwarding destinations. 3 After you have finished specifying the destination, click Submit. 4 The Action Settings > Forward page appears. Check that the Destination is added to the Destination List. 3-25 User Guide
-
 1
1 -
2
-
3
-
4
-
5
-
6
-
7
-
8
-
9
-
10
-
11
-
12
-
13
-
14
-
15
-
16
-
17
-
18
-
19
-
20
-
21
-
22
-
23
-
24
-
25
-
26
-
 27
27 -
 28
28 -
 29
29 -
 30
30 -
 31
31 -
 32
32 -
 33
33 -
 34
34 -
 35
35 -
 36
36 -
 37
37 -
38
-
39
-
40
-
41
-
42
-
43
-
44
-
45
-
46
-
47
-
48
-
49
-
50
-
51
-
52
-
53
-
54
-
55
-
56
-
57
-
58
-
59
-
60
-
61
-
62
-
63
-
64
-
65
-
66
 |
 |