Kyocera TASKalfa 5551ci Kyocera NET ADMIN Operation Guide for Ver 3.1
Kyocera TASKalfa 5551ci Manual
 |
View all Kyocera TASKalfa 5551ci manuals
Add to My Manuals
Save this manual to your list of manuals |
Kyocera TASKalfa 5551ci manual content summary:
- Kyocera TASKalfa 5551ci | Kyocera NET ADMIN Operation Guide for Ver 3.1 - Page 1
- Kyocera TASKalfa 5551ci | Kyocera NET ADMIN Operation Guide for Ver 3.1 - Page 2
in this guide is subject to change without notice. We cannot be held liable for any problems arising from the use of this product, regardless of the information herein. Regarding Trademarks KYOCERA Net Admin is a trademark of KYOCERA Document Solutions Inc. Microsoft®, Windows®, and Internet - Kyocera TASKalfa 5551ci | Kyocera NET ADMIN Operation Guide for Ver 3.1 - Page 3
Files Manually ...1-4 Server Installation ...1-4 Installing KYOCERA Net Admin 1-4 PostgreSQL Files ...1-5 Uninstalling KYOCERA Net Admin 1-5 Removing -Set Template Editor Installation 1-10 Installing the Multi-Set Template Editor 1-10 KYOCERA Net Admin Login ...1-10 Starting and Logging In ...1- - Kyocera TASKalfa 5551ci | Kyocera NET ADMIN Operation Guide for Ver 3.1 - Page 4
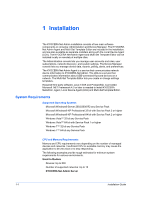
accounts and roles, user subscriptions, network discovery, and system settings. The Device Manager console lets you manage device data, reports, polling, alerts, and preferences. The KYOCERA Net Admin Agent is a service that communicates network device information to KYOCERA Net Admin. The LDA is - Kyocera TASKalfa 5551ci | Kyocera NET ADMIN Operation Guide for Ver 3.1 - Page 5
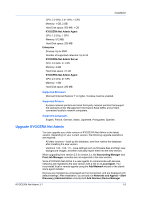
firmware files and Map view background images, and then manually import them into the new version. When upgrading from version 2.0 to version 3.x, the Accounting Manager and Print Job Manager consoles are not supported in the new version. Since KYOCERA Net Admin displayed with default settings. After - Kyocera TASKalfa 5551ci | Kyocera NET ADMIN Operation Guide for Ver 3.1 - Page 6
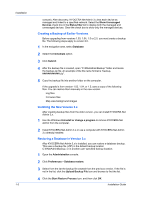
following files. You can restore them manually in the new version. Log files Firmware files Map view background images Installing the New Version 3.x After creating backup files from the older version, you can install KYOCERA Net Admin 3.x. 1 Use the Windows Uninstall or change a program to remove - Kyocera TASKalfa 5551ci | Kyocera NET ADMIN Operation Guide for Ver 3.1 - Page 7
Files Manually After KYOCERA Net Admin 3.x is installed, you can manually restore files that were saved from version 1.03, 1.04, or 1.5. Log files Copy the saved files to the default folder in C:\Program Files\Kyocera\NetAdmin\Admin\log, or to the log folder where version 3.x is installed. Firmware - Kyocera TASKalfa 5551ci | Kyocera NET ADMIN Operation Guide for Ver 3.1 - Page 8
Start now check box and then click Close to login to KYOCERA Net Admin with the default login credentials. For Administrator, the username and password is admin and admin, or for a read-only user, the username and password is guest and guest. 10 Bookmark the link to your Favorites for easier future - Kyocera TASKalfa 5551ci | Kyocera NET ADMIN Operation Guide for Ver 3.1 - Page 9
any remaining user data by deleting the entire PostgreSQL folder at C:\Program Files\PostgreSQL (C drive is the default). Remote Agent Installation This section is required for administrators who install KYOCERA Net Admin Agent on a remote network. The KYOCERA Net Admin Agent is a service that - Kyocera TASKalfa 5551ci | Kyocera NET ADMIN Operation Guide for Ver 3.1 - Page 10
service for defaults. Under Administrator login information for the remote host (available if you selected New Agent in the previous page), type the Agent Login, Agent Password KYOCERA Net Admin. The administrator can send an agent installation package to a remote user, and the user can manually - Kyocera TASKalfa 5551ci | Kyocera NET ADMIN Operation Guide for Ver 3.1 - Page 11
agent service files are copied to the KYOCERA Net Admin location in the folder: C:\Program Files\Kyocera\NetAdmin\Agent (C drive is the default). as network-connected devices. The LDA can support several USB connected devices at the same time, but KYOCERA Net Admin shows only one of them. Install - Kyocera TASKalfa 5551ci | Kyocera NET ADMIN Operation Guide for Ver 3.1 - Page 12
that are connected to network computers through USB ports. The USB device must be connected to the target computer before installing the LDA. 1 Copy the folder C:\Program Files\Kyocera\NetAdmin\Admin\install\local-deviceagent (C drive is the default) to the target computer. 1-9 Installation Guide - Kyocera TASKalfa 5551ci | Kyocera NET ADMIN Operation Guide for Ver 3.1 - Page 13
the same word for the User name and Password: An administrator uses admin A read-only user uses guest For greater security, we recommend changing the default passwords immediately after the first login. You will be automatically logged off after 30 minutes of inactivity. KYOCERA Net Admin 3.1 1-10 - Kyocera TASKalfa 5551ci | Kyocera NET ADMIN Operation Guide for Ver 3.1 - Page 14
KYOCERA Net Admin from Internet Explorer 7 or higher. 1 In the browser, click the application's address in the format: http://:/netadmin/ or find the URL in the Favorites or browser history. 2 On the login page, type the User name and Password. 3 Choose - Kyocera TASKalfa 5551ci | Kyocera NET ADMIN Operation Guide for Ver 3.1 - Page 15
Rev. 3.1 2013.02
-
 1
1 -
 2
2 -
 3
3 -
 4
4 -
 5
5 -
 6
6 -
 7
7 -
8
-
9
-
10
-
11
-
12
-
13
-
14
-
15
 |
 |