LG 42PM4M Owners Manual
LG 42PM4M Manual
 |
View all LG 42PM4M manuals
Add to My Manuals
Save this manual to your list of manuals |
LG 42PM4M manual content summary:
- LG 42PM4M | Owners Manual - Page 1
PLASMA MONITOR MODELS: 42PM4M 50PM4M 60PM4M OWNER'S MANUAL Please read this manual carefully before operating your set. Retain it for future reference. Record model number and serial number of the set. See the label attached on the back cover and quote this information to your dealer when you - LG 42PM4M | Owners Manual - Page 2
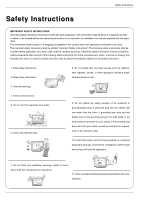
written authorization from LG Electronics. Unauthorized modification could void the user's warranty. COMPLIANCE: The responsible party for this product's compliance is: LG Electronics U.S.A., Inc 1000 Sylvan Avenue, Englewood Cliffs, NJ 07632 1-800-243-0000 http://www.lgusa.com 2 Plasma Monitor - LG 42PM4M | Owners Manual - Page 3
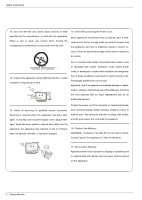
specific safety instruction may be placed immediately adjacent to that safety instruction : 1. Read these instructions. 2. Keep these instructions. 8. Do not install near any heat sources such as radiators, heat registers, stoves, or other apparatus (including ampli- Owner's Manual the power cord - LG 42PM4M | Owners Manual - Page 4
they be placed upon a dedicated circuit; that is, a single outlet circuit which powers only that appliance and has no additional outlets or branch cir- cuits. Check the specification page of this owner's manual to be certain. Do not overload wall outlets. Overloaded wall outlets, loose PORTABLE - LG 42PM4M | Owners Manual - Page 5
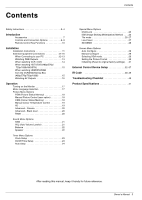
XGA mode 30 Setting the Picture Format 30 Initializing (Reset to original factory settings) . . .31 External Control Device Setup 32~37 IR Code 38~39 Troubleshooting Checklist 40 Product Specifications 41 After reading this manual, keep it handy for future reference. Owner's Manual 5 - LG 42PM4M | Owners Manual - Page 6
Why minute colored dots may be present on the Plasma Monitor screen The Plasma Display Panel which is the display device of this product is composed of 0.9 to 2.2 million cells. A few cell defects will normally occur in the Plasma Monitor manufacturing process. Several minute colored dots visible on - LG 42PM4M | Owners Manual - Page 7
Introduction Ensure that the following accessories are included with your plasma display. If an accessory is missing, please contact the dealer where you purchased the product. Owner's Manual 1.5V 1.5V Batteries POWER AV INPUT SLEEP PSM ARC AUTO 1 2 3 4 5 6 7 8 9 0 MENU EXIT SET - LG 42PM4M | Owners Manual - Page 8
Panel Controls 3 4 5 6 12 7 1. Power Indicator Illuminates red in standby mode, Illuminates green when the Set is turned Plasma Monitor INPUT SELECT VOLUME Remote Control Sensor Power Standby Indicator Illuminates red in standby mode, Illuminates green when the Monitor is turned on Sub power - LG 42PM4M | Owners Manual - Page 9
, refer to 'Speaker & Speaker Stand' manual. 9. POWER CORD SOCKET This set operates on an AC power. The voltage is indicated on the Specifications page. Never attempt to operate the set on DC power. 6. COMPONENT INPUT 1-2 Connect a component video/audio device to these jacks. Owner's Manual 9 - LG 42PM4M | Owners Manual - Page 10
. switches the set on from standby. AUTO Automatic adjustment function. (Operational for the analog signal only) ARC Changes the picture format. There is not a function which is supported. EXIT Clears all on-screen displays and returns to monitor viewing from any menu. SET accepts your selection - LG 42PM4M | Owners Manual - Page 11
For proper ventilation, allow a clearance of 4" on each side and the top and 4" from the wall. Detailed installation instructions are included in the optional Desktop Stand Installation and Setup Guide available from your dealer. 4 inches 4 inches 4 inches 4 inches Owner's Manual 11 - LG 42PM4M | Owners Manual - Page 12
cables shown are included with the plasma display. When Connecting to your PC 1. First of all, see if the computer, product and the peripherals are turned off. Then, connect the signal input cable. AUDIO (RGB/DVI) Rear side of the product. PC 3. Connect the power cord. AC IN 12 Plasma Monitor - LG 42PM4M | Owners Manual - Page 13
Installation 4. Turn on power by pressing the power button on the product. Turn on the PC. 5. Select an input signal. Press the INPUT button on the remote control to select format, cables to be less damaged are recommended. We recommend that you should use cable distributor. Owner's Manual 13 - LG 42PM4M | Owners Manual - Page 14
watching VCR / DVD 1. Connect the video cable as shown in the below figure and then connect the power cord. a. When connecting with a BNC cable. • Connect the input terminal with a proper colour match. cable is connected simultaneously with S-Video cable, S-Video cable is first. 14 Plasma Monitor - LG 42PM4M | Owners Manual - Page 15
/576p/720p/1080i) 1. Connect the video/audio cable as shown in the below figure and then connect the power cord. a. Product HDMI/DVI IN RGB IN OUT AUDIO (RGB/DVI) Product HDMI/DVI IN RGB IN OUT Component1 Component2 RGB HDMI/DVI Input AV Component1 Component2 RGB HDMI/DVI Owner's Manual 15 - LG 42PM4M | Owners Manual - Page 16
the resolution of PC is over UXGA, there will be no picture on the set.) RGB : Mode 1 ~ Mode 19 HDMI/DVI : Mode 1 ~ Mode 17 16 Plasma Monitor HDMI X X O O O O - LG 42PM4M | Owners Manual - Page 17
manual. Turning on the Monitor Turning on the Monitor just after installation 1. Connect power cord correctly. At this moment, the Monitor is switched to standby mode. 2. Press the INPUT or button on the Monitor or press the POWER the MENU button to return to the previous menu. Owner's Manual 17 - LG 42PM4M | Owners Manual - Page 18
When adjusting picture options (contrast, brightness, colour, sharpness and tint (NTSC input only)) manually, PSM is automatically changed to User. 1. Press the PSM button • Each press of the PSM button E button changes the screen display as shown below. Cool Normal Warm User 18 Plasma Monitor - LG 42PM4M | Owners Manual - Page 19
is LG electronic's automatically to reproduce as closely as possible to the natural colours. • XD NR : Removing the noise up to the point where it does not damage the original picture. • MPEG NR : To reduce the picture noise which may appear on the screen during watching the Monitor. Owner's Manual - LG 42PM4M | Owners Manual - Page 20
Operation Picture Menu Options Advanced - Cinema - Set up the monitor for the best picture appearance for viewing movies. - This feature operates only in AV, S-Video to select the PICTURE menu. 2. Press the G button and then D / E button to select Reset. 3. Press the G button. 20 Plasma Monitor - LG 42PM4M | Owners Manual - Page 21
automatically selects the appropriate sound option based on the program content. PICTURE0 SSM SOUND G AVL TIME0 Balance 0 SPECIAL0 Speaker SCREEN0 PICTURE0 SSM SOUND0 TIME0 SPECIAL0 AVL Balance Speaker to select On or Off. 4. Press the EXIT button to save the new settings. Owner's Manual 21 - LG 42PM4M | Owners Manual - Page 22
. Menu Prev. 1. Press the MENU button and then use D / E button to select the SOUND menu. 2. Press the G button and then use D / E button to select Speaker. 3. Press the G button and then use D / E button to select On or Off. 4. Press the EXIT button to save the new settings. 22 Plasma Monitor - LG 42PM4M | Owners Manual - Page 23
time. - If you do not press any button within 2 hours after the monitor turns on with the On Time function, the monitor will auto- matically revert to standby mode. PICTURE0 Clock SOUND0 TIME G SPECIAL0 Off to set volume level. 6. Press the EXIT button to save the new settings. Owner's Manual 23 - LG 42PM4M | Owners Manual - Page 24
Operation Timer Menu Options Auto sleep - If there is no input signal, the Monitor turns off automatically after 10 minutes. PICTURE0 Clock SOUND0 TIME G SPECIAL0 Off time On time Auto sleep D / E button to select On or Off. 4. Press the EXIT button to save the new settings. 24 Plasma Monitor - LG 42PM4M | Owners Manual - Page 25
panel is pressed. 4. Press the EXIT button to save the new settings. -In setting Child lock 'On', if the monitor is turned off with the remote control, press the SELECT on the monitor or POWER, INPUT on the remote control to turn the monitor will automatically invert the plasma display panel colour - LG 42PM4M | Owners Manual - Page 26
Method Set ID Tile mode Low power Demo PICTURE0 SOUND0 TIME0 SPECIAL0 SCREEN0 Language Child lock ISM Method Set ID Tile mode Low power Demo Tile mode Natural Tile ID mode (product 1 ~ 9) : r(3) x c(3) row column column - Tile mode (product 1 ~16) : r(4) x c(4) row column 26 Plasma Monitor - LG 42PM4M | Owners Manual - Page 27
power Demo PICTURE0 SOUND0 TIME0 SPECIAL0 SCREEN0 Language Child lock ISM Method Set ID Tile mode Low power Power - Low power reduces the plasma display's power consumption Press the G button and then use D / E button to select Low power. 3. Press the G button and then use D / E button to select - LG 42PM4M | Owners Manual - Page 28
power Demo G To start Menu Prev. Menu Prev. 1. Press the MENU button and then D / E button to select the SPECIAL menu. 2. Press the G button and then use D / E button to select XD Demo. 3. Press the G button to begin XD Demo. 4. To stop XD Demo, press the MENU or EXIT button. 28 Plasma Monitor - LG 42PM4M | Owners Manual - Page 29
Automatically adjusts picture position and minimizes image shaking. - This function works in the following mode : RGB[PC]. PICTURE0 SOUND0 TIME0 SPECIAL0 SCREEN G Auto config. Manual Manual config.. 5. Press the EXIT button to save the new settings. Manual manually to select Manual config.. 3. - LG 42PM4M | Owners Manual - Page 30
SCREEN G Auto config. Manual config. XGA Mode ARC Reset PICTURE0 Auto config. SOUND0 Manual config. TIME0 XGA Mode only) • Original When your AV receives the wide screen signal, it will be automatically changed to picture format to be sent. • 4:3 This pIcture format is 4:3 Plasma Monitor - LG 42PM4M | Owners Manual - Page 31
value PICTURE0 SOUND0 TIME0 SPECIAL0 SCREEN G Auto config. Manual config. XGA Mode ARC Reset PICTURE0 Auto config. SOUND0 Manual config. TIME0 SPECIAL0 SCREEN0 XGA Mode ARC Reset G Press the G button. • You can initialize Phase, Clock, H-Position, V-Position (Except ARC). Owner's Manual 31 - LG 42PM4M | Owners Manual - Page 32
Monitor back panel. - RS-232C connection cables are not supplied with the Monitor. REMOTE CONTROL IN RS-232C (CONTROL&SERVICE) OUT IN HDMI/DVI IN RGB OUT IN AUDIO (RGB/DVI) COMPONENT IN VIDEO L-AUDIO-R 1 2 VIDEO AV IN L-AUDIO-R AV OUT S-VIDEO EXTERNAL SPEAKER R L 32 Plasma Monitor - LG 42PM4M | Owners Manual - Page 33
straight cable. Command Reference List COMMAND 1 COMMAND 2 DATA (Hexadecimal) 01. Power k 02. Input Select k 03. Aspect Ratio k 04. Screen Mute is 1 ~ 99. When selecting Set ID '0', every connected Plasma Monitor set is controlled. Set ID is indicated as decimal (1~99) Owner's Manual 33 - LG 42PM4M | Owners Manual - Page 34
Power On * In a like manner, if other functions transmit 'FF' data based on this format, Acknowledgement data feedback presents status about each function. 02. Input Select (Command 2:b) (Main Picture Input) G To select input source for the Monitor ][OK][Data][x] 34 Plasma Monitor 04. Screen Mute - LG 42PM4M | Owners Manual - Page 35
-232C, locks the remote control and the local keys. Transmission [k][m][ ][Set ID][ ][Data][Cr] Data 0: off Acknowledgement 1: on [m][ ][Set ID][ ][OK][Data][x] Data 0: off 1: on Owner's Manual 35 - LG 42PM4M | Owners Manual - Page 36
to Read the power off status when Stand-by mode. Transmission [k][z][ ][Set ID][ ][Data][Cr] Data FF : Read 0 : Normal (Power on and signal exist) 1: No signal (Power on) 2 : Turn the monitor off by remote control 3 : Turn the monitor off by sleep time function 4 : Turn the monitor off by RS-232C - LG 42PM4M | Owners Manual - Page 37
distance between the screens to be naturally shown. Transmission [d][j][ ][Set ID][ ][Data][x] Data 0 : Natural Off 1 : Natural On ff : Read Status Acknowledgement [j][ ][Set ID][ ][OK][Data][x] Owner's Manual 37 - LG 42PM4M | Owners Manual - Page 38
How to Connect G Connect your wired remote control to the Remote Control port on the Monitor. Remote Control IR Code G Output waveform Single pulse, modulated with 37.917KHz signal at 455KHz transmitted as long as a key is depressed. Tf Tf 0.56 ms 2.24 ms 38 Plasma Monitor Tf=108ms @455KHz - LG 42PM4M | Owners Manual - Page 39
Number Key 3 Number Key 4 Number Key 5 Number Key 6 Number Key 7 Number Key 8 Number Key 9 SLEEP MUTE POWER VOL+ VOLSET ( ) AII INPUT SELECT MENU ARC F G D E EXIT Auto config. Input video Input Component 1 (Input RGB Selection) Discrete IR Code (Input HDMI/DVI Selection) IR Code Owner's Manual 39 - LG 42PM4M | Owners Manual - Page 40
interference such as an electrical appliance or power tool. No output from one of the speakers • Adjust Balance in the Sound menu. Unusual sound from inside the monitor • A change in ambient humidity or temperature may result in an unusual noise when the plasma display is turned on or off and - LG 42PM4M | Owners Manual - Page 41
Product Specifications Product Specifications MODELS Width (inches / mm) Height (inches / mm) Depth (inches / mm) Weight (pounds / kg) Power requirement Resolution Environmental condition Operating Temperature Operating Humidity Storage Temperature Storage Humidity 42PM4M (42PM4M-WA) 42 / 1066 - LG 42PM4M | Owners Manual - Page 42
- LG 42PM4M | Owners Manual - Page 43
- LG 42PM4M | Owners Manual - Page 44
-
 1
1 -
 2
2 -
 3
3 -
 4
4 -
 5
5 -
 6
6 -
 7
7 -
8
-
9
-
10
-
11
-
12
-
13
-
14
-
15
-
16
-
17
-
18
-
19
-
20
-
21
-
22
-
23
-
24
-
25
-
26
-
27
-
28
-
29
-
30
-
31
-
32
-
33
-
34
-
35
-
36
-
37
-
38
-
39
-
40
-
41
-
42
-
43
-
44
 |
 |
Please read this manual carefully before operating your set.
Retain it for future reference.
Record model number and serial number of the set.
See the label attached on the back cover and quote
this
information to your dealer
when you require service.
OWNER’S MANUAL
PLASMA
MONITOR
MODELS: 42PM4M
50PM4M
60PM4M
P/NO: 38289U0558J (0711-REV00)
Printed in Korea