LG DLE5977W Owners Manual
LG DLE5977W Manual
 |
View all LG DLE5977W manuals
Add to My Manuals
Save this manual to your list of manuals |
LG DLE5977W manual content summary:
- LG DLE5977W | Owners Manual - Page 1
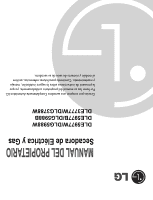
PROPIETARIO Secadora de Eléctrica y Gas DLE5977W/DLG5988W DLE5977B/DLG5988B DLE3777W/DLG3788W Gracias por comprar una secadora Completamente Automática LG. Por favor lea su manual del propietario cuidadosamente, ya que le proveerá de instrucciones sobre la segura instalación, manejo y mantenimiento - LG DLE5977W | Owners Manual - Page 2
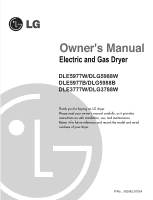
Electric and Gas Dryer DLE5977W/DLG5988W DLE5977B/DLG5988B DLE3777W/DLG3788W P/No.: 3828EL3003A - LG DLE5977W | Owners Manual - Page 3
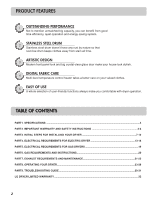
DRYER 7-12 PART4. ELECTRICAL REQUIREMENTS FOR ELECTRIC DRYER 13-18 PART5. ELECTRICAL REQUIREMENTS FOR GAS DRYERS 19 PART6. GAS REQUIREMENTS AND INSTRUCTIONS 20 PART7. EXHAUST REQUIREMENTS AND MAINTENANCE 21-22 PART8. OPERATING YOUR DRYER...23-28 PART9. TROUBLESHOOTING GUIDE ...29-31 LG DRYER - LG DLE5977W | Owners Manual - Page 4
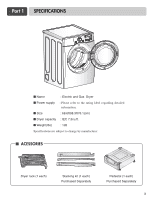
: Electric and Gas Dryer I Power supply : Please refer to the rating label regarding detailed information. I Size : 68.6X98.3X76.1(cm) I Dryer capacity : IEC 7.3cu.ft. I Weight(Ibs) : 126 Specifications are subject to change by manufacturer. I ACESSORIES Dryer rack (1 each) Stacking kit - LG DLE5977W | Owners Manual - Page 5
is available by contacting your nearest LG Service Center and, for warranty period from the date of purchase, if this dryer is installed and operated according to the instructions in this manual, LG will repair or replace any of its mechanical or electrical parts if they are defective in material - LG DLE5977W | Owners Manual - Page 6
drum is moving. 6) Do not install or store this appliance where it will be exposed to the weather. 7) Do not tamper with controls. 8) Do not repair or replace any part of the appliance or attempt any servicing unless specifically recommended in the user-maintenance instructions. 9) Do not use heat - LG DLE5977W | Owners Manual - Page 7
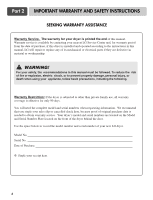
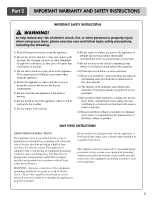
Part 2 IMPORTANT WARRANTY AND SAFETY INSTRUCTIONS ! WHAT TO DO IF YOU SMELL GAS: • Do not try to light a match or cigarette, or turn on any gas or electrical appliance. • Do not touch any electrical switches. Do not use any phone in your building. • Clear the room, building or area of all occupants - LG DLE5977W | Owners Manual - Page 8
that you review this entire manual before proceeding with any installation or use. More detailed instructions concerning electrical connections, gas connections, and exhaust requirements are provided at other parts of this manual. STEP 1: Positioning the Dryer. Choose a location with a solid - LG DLE5977W | Owners Manual - Page 9
also provide important information concerning the placement of and clearances for your dryer. Please review this entire manual before proceeding with any installation. STEP 2: Procedure for Reversing the Door The door on your dryer can be installed to open either to the left or the right. Follow - LG DLE5977W | Owners Manual - Page 10
dryer must be vented to the outdoors. Please follow the instructions (and all others in this manual) very carefully. I ALTERNATE EXHAUST DIRECTIONS 1. Remove screw & exhaust duct. 2. Detach and remove the bottom, left, or right side knockout as desired. (Right side vent not avilable on gas dryer - LG DLE5977W | Owners Manual - Page 11
diagram is provided inside the dryer control hood. Label all wires prior to disconnection when servicing the dryer, because wiring errors can cause serious injury to you and your dryer. 4. For additional instruction on connecting the dryer to an electrical power source, please refer to this manual - LG DLE5977W | Owners Manual - Page 12
after reviewing the following parts on your dryer's Electrical Requirements. STEP 7: Confirming Heat Source Operation. Confirming Heat Source in Gas Dryers Close the door to the dryer drum/drying compartment and, after completing all steps in this manual for proper installation of this dryer, start - LG DLE5977W | Owners Manual - Page 13
a service and installation professional for assistance. The following instructions apply to any installation of the dryer in a manufactured or mobile home: 1) The gas dryer must be permanently attached to the floor. 2) The electrical connection for an electric dryer must be a 4-wire connection - LG DLE5977W | Owners Manual - Page 14
The dryer has its own terminal block that must be connected to a separate branch, 60 Hertz, single phase circuit, AC (alternating current) circuit, fused at 30 Amperes (the circuit must be fused on both sides of the line). ELECTRICAL SERVICE FOR THE DRYER SHOULD BE OF MAXIMUM RATE VOLTAGE LISTED ON - LG DLE5977W | Owners Manual - Page 15
Part 4 ELECTRICAL REQUIREMENTS FOR ELECTRIC DRYERS Review the following options to determine the appropriate electrical connection for your home: 3-wire receptacle (NEMA type10-30R) Use the instructions at this section if your home has a 3-wire receptacle (NEMA type 10-30R) and you will be using a - LG DLE5977W | Owners Manual - Page 16
Place tab of terminal block cover into slot of dryer rear panel. Make sure cover with screw. c b d a e a. External ground connector b. Neutral grounding wire (white) c. Center silver-colored terminal block screw d. Neutral wire (white or center wire) e. 3/4 in. (1.9 cm) UL-listed strain relief - LG DLE5977W | Owners Manual - Page 17
silver-colored terminal block screw d. Neutral wire (white or center wire) e. 3/4 in. (1.9 cm) UL-listed strain relief 3. Connect the other wires to outer terminal block screws. Tighten screws. 4. Tighten strain relief screws. 5. Insert tab of terminal block cover into slot of dryer rear panel - LG DLE5977W | Owners Manual - Page 18
) UL-listed strain relief d. Center silver-colored terminal block screw e. Neutral grounding wire (white) f. Neutral wire (white) 5. Connect the other wires to outer terminal block screws. Tighten screws. 6. Tighten strain relief screws. 7. Insert tab of terminal block cover into slot of dryer rear - LG DLE5977W | Owners Manual - Page 19
Part 4 ELECTRICAL REQUIREMENTS FOR ELECTRIC DRYERS Option 3: Optional 3-wire connection. • If your local codes or ordinances do not allow the connection of a frame-grounding conductor to the neutral wire, use the instructions under this section. 1. Remove center terminal block screw. 2. Remove - LG DLE5977W | Owners Manual - Page 20
check your home's wiring and fuses to ensure that your home has adequate electrical power to operate the dryer. Electrical Requirements for Your Dryer: a) Please note that the wiring diagram is provided inside the dryer control hood. Label all wires prior to disconnection when servicing the dryer - LG DLE5977W | Owners Manual - Page 21
Part 6 GAS REQUIREMENTS AND INSTRUCTIONS Following are important instructions and information concerning the requirements for the gas supply and service for gas dryers. ! Important Warning: The gas supply and service for a gas dryer must comply with all local codes and ordinances. In the absence of - LG DLE5977W | Owners Manual - Page 22
for Short Run Installations 2-1/2" Instructions: 1. Venting materials are not provided with the dryer and you should obtain the necessary venting materials locally. For example, the outer end of exhaust pipe must have a weather hood with hinged dampers to prevent back-draft when the dryer lint and - LG DLE5977W | Owners Manual - Page 23
. Always make sure the lint filter is clean before starting a new load, because a clogged lint filter may increase drying times. 11. Annually remove the lint filter and attach it to the vacuum duct. See item #2 above. 12. Please note that the wiring diagram is provided inside the dryer control hood - LG DLE5977W | Owners Manual - Page 24
To reduce the risk of fire, electric shock, or injury to person, read this entire manual, including the Important Safety Instructions, before operating this dryer. DLE5977W/DLG5988W/DLE5977B/DLG5988B DLE3777W/DLG3788W STARTING YOUR DRYER 1. Using Your Dryer 1. Clean lint screen before or after each - LG DLE5977W | Owners Manual - Page 25
YOUR DRYER 2. To use a Sensor Dry Cycle • Select an Sensor Dry Cycle. • Select DRY LEVEL to adjust how dry you want the load. As the cycle runs, the control senses the dryness of the load and adjusts the time automatically for the selected dryness level. • Select the desired Options. • Press START - LG DLE5977W | Owners Manual - Page 26
CL is displayed. To unlock, press and hold RACK DRY for 3 seconds. The indicator light turns off. 6. Cycle Descriptions Select the drying cycle that matches the type of load you are drying. (See Sensor Dry or Manual Preset Cycle Settings charts.) Sensor Dry Cycles allow you to match the cycle to the - LG DLE5977W | Owners Manual - Page 27
Part 8 OPERATING YOUR DRYER • Time Dry Use this cycle to complete drying if items are still damp after an Sensor Dry Cycle. Time dry is also useful for drying heavyweight and bulky items, such as bedspreads and work clothes. Manual Preset Cycle Settings Manual Dry Temp. Cycles Load Type - LG DLE5977W | Owners Manual - Page 28
into the drum 3. Make sure that dryer is evenly placed right onto the drum inside and door rim. NOTE: Check the lint screen and remove any lint accumulated from items dried on the rack. Suggested Items Temperature Suggested for Rack Drying Setting Time* (Minutes) Washable wool items (block to - LG DLE5977W | Owners Manual - Page 29
To recall your stored CUSTOM PROGRAM Press CUSTOM PROGRAM button, then press START/PAUSE. Maintenance Clean lint filter Clean the lint filter after each use and check it before use. Not cleaning or emptying the filter will increase drying time and energy consumption, therefore dryer life expectancy - LG DLE5977W | Owners Manual - Page 30
/circuit breaker box and replace the fuse or reset the circuit breaker. (IMPORTANT: electric dryers generally use two fuses or breakers.) 2.Problem:My Dryer Doesn 't Heat Question • Is the fuse blown, or is the circuit breaker tripped? • Is the gas supply or service blocked or off? What to Do If - LG DLE5977W | Owners Manual - Page 31
Part 9 TROUBLESHOOTING GUIDE 4.Problem:There is Lint on my Clothes Question What to Do • Is your lint filter full? Please refer to the manual section on cleaning the lint filter, and please confirm that the lint filter is clean. It is important that the lint filter is clean before each new load - LG DLE5977W | Owners Manual - Page 32
Part 9 TROUBLESHOOTING GUIDE 7.Problem:It takes too long for my clothes to dry Question • Did you properly sort your loads of laundry? • Are you drying large loads of heavy fabrics? • Are the dryer controls properly set? • Is the lint filter clean before each new load of laundry? • Are the exhaust - LG DLE5977W | Owners Manual - Page 33
LG DRYER LIMITED WARRANTY - USA 6 6 32
-
 1
1 -
 2
2 -
 3
3 -
 4
4 -
 5
5 -
 6
6 -
 7
7 -
8
-
9
-
10
-
11
-
12
-
13
-
14
-
15
-
16
-
17
-
18
-
19
-
20
-
21
-
22
-
23
-
24
-
25
-
26
-
27
-
28
-
29
-
30
-
31
-
32
-
33
 |
 |

MANUAL
MANUAL
DEL
DEL
PROPIET
PROPIET
ARIO
ARIO
Secadora de Eléctrica y Gas
Gracias por comprar una secadora Completamente Automática LG.
Por favor lea su manual del propietario cuidadosamente, ya que
le proveerá de instrucciones sobre la segura instalación, manejo
y mantenimiento. Consérvelo para futuras referencias, archive
el modelo y números de serie de su secadora.
DLE5977W/DLG5988W
DLE5977B/DLG5988B
DLE3777W/DLG3788W