LG DLG7101W Owners Manual
LG DLG7101W Manual
 |
View all LG DLG7101W manuals
Add to My Manuals
Save this manual to your list of manuals |
LG DLG7101W manual content summary:
- LG DLG7101W | Owners Manual - Page 1
with LG standard of LG(63)-A-5501-34. TRIG. UNIT mm SCALE 1 1 T MODELING DESIGNED REVIEWED CHECKED APPROVED I T 라 종 찬 L 17.09.26 17.09.26 17.09.26 E LG LG Electronics Inc. RELATED DWG. DWG. No. PDF ILLUSTRATOR DR COMPLETED 도면 DR 완료 완료일 : MANUAL,OWNER'S TD Win Dryer 1/1 MFL67652515 - LG DLG7101W | Owners Manual - Page 2
ENGLISH Español OWNER'S MANUAL DRYER Read this owner's manual thoroughly before operating the appliance and keep it handy for reference at all times. DLE7100* (Elec) DLG7101* (Gas) MFL67652515 www.lg.com Copyright © 2018 LG Electronics Inc. All Rights Reserved. - LG DLG7101W | Owners Manual - Page 3
Loads 28 Loading the Dryer 29 Control Panel 31 Cycle Guide 33 Cycle Settings and Options 35 SMART FUNCTIONS 35 Smart Diagnosis™ Function 36 mAINTENANCE 36 Regular Cleaning 37 Troubleshooting 37 FAQs: Frequently Asked Questions 37 User Support Videos 38 Before Calling for Service 45 WARRANTY (USA) - LG DLG7101W | Owners Manual - Page 4
and alerts you to restrictions in the installed household ductwork that reduce exhaust airflow through the dryer. If you see the alert: Clean or repair the ducts to remove the restrictions. Keep IE D DESIGN C C ERTIFIED Proto Sanit Resid Protocol P154 Sanitization Perform Residential Clothes - LG DLG7101W | Owners Manual - Page 5
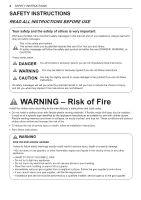
chance of injury, and tell you what may happen if the instructions are not followed. WARNING - Risk of Fire Install the clothes dryer according to the manufacturer's instructions and local codes. •• Do not install a clothes dryer with flexible plastic venting materials. If flexible metal (foil type - LG DLG7101W | Owners Manual - Page 6
and store the dryer where it will not be exposed to temperatures below freezing or exposed to the weather. •• All repairs and servicing must be performed by authorized service personnel unless specifically recommended in this Owner's Manual. Use only authorized factory parts. Failure to follow - LG DLG7101W | Owners Manual - Page 7
parts while the appliance is energized: CONTROL BOARD Warning Fire Hazard Failure to follow safety warnings exactly could result in serious injury, death or property damage. Do not install a booster fan in the exhaust duct. Install all clothes dryers in accordance with the installation instructions - LG DLG7101W | Owners Manual - Page 8
be plugged into a properly grounded outlet. •• For personal safety, this dryer must be properly grounded. Failure to do so may result in electric shock or injury. •• Refer to the installation instructions in this manual for specific electrical requirements for your model. Failure to follow these - LG DLG7101W | Owners Manual - Page 9
8 SAFETY INSTRUCTIONS CALIFORNIA SAFE DRINKING WATER AND TOXIC ENFORCEMENT ACT •• This act requires , and soot, caused primarily by the incomplete combustion of natural gas or LP fuels. •• Properly adjusted dryers will minimize incomplete combustion. Exposure to these substances can be minimized - LG DLG7101W | Owners Manual - Page 10
Lint filter Gas connection location (gas models) Water inlet valve (on some models) Exhaust duct outlet Drying rack (sold separately) No. 3750EL0001C Side vent kit (sold separately) Kit No. 383EEL9001B NOTE •• Visit www.lg.com to purchase accessories. •• Contact LG Customer Service at 1-800 - LG DLG7101W | Owners Manual - Page 11
listed in this manual may vary due to constant product improvements. Dryer Models Electrical requirements Gas requirements Dimensions Net weight Drying capacity - Normal cycle DLE7100*, DLG7101* Please refer to the rating label regarding detailed information. NG: 4-10.5-inch WC LP: 8-13-inch WC - LG DLG7101W | Owners Manual - Page 12
review this entire manual before installing and using the dryer. Detailed instructions concerning electrical connections, gas connections, and exhaust requirements are provided on the following pages. The installation requires: •• A location that allows for proper exhaust installation. A gas dryer - LG DLG7101W | Owners Manual - Page 13
bottom to form openings. Louvered doors with equivalent ventilation openings are also acceptable. NOTE There should be at least a little space around the dryer (or any other appliance) to eliminate the transfer of vibration from one appliance to another. If there is enough vibration, it could cause - LG DLG7101W | Owners Manual - Page 14
on the optional pedestal, you must use the leveling feet on the pedestal to level the dryer. The dryer leveling feet should be fully retracted. 1 Position the dryer in the final location. Check levelness of dryer from side to side. Repeat from front to back. Place level here Place level here Not - LG DLG7101W | Owners Manual - Page 15
14 INSTALLATION Reversing the Door Warning THE DRYER DOOR IS VERY LARGE AND HEAVY. Failure to follow the instructions below can result in damage to the dryer, property damage or injury to persons. •• To avoid damage to the dryer or the door, support the door with a stool or box that fits under the - LG DLG7101W | Owners Manual - Page 16
to the bottom or side (right-side venting is not available on gas models). An adapter kit, part number 383EEL9001B, may be purchased from an LG retailer. This kit contains the necessary duct components to change the dryer vent location. 1 Remove the rear exhaust duct retaining screw. Pull out the - LG DLG7101W | Owners Manual - Page 17
to follow these instructions may result in fire or death. •• Gas dryers MUST exhaust to the outdoors. Failure to follow these instructions may result in appliance by the manufacturer and that comply with the Outline for Clothes Dryer Transition Duct, Subject 2158A, should be used. Ductwork Wall - LG DLG7101W | Owners Manual - Page 18
possible. •• The male end of each section of exhaust duct must point away from the dryer. •• Use duct tape on all duct joints. •• Insulate ductwork that runs through unheated are not covered by the dryer warranty. Dryer failures or service required because of such exhaust systems will not be covered - LG DLG7101W | Owners Manual - Page 19
of water column for LP. •• A qualified service or gas company technician must connect the dryer to the gas service. Failure to follow these instructions may result in fire, explosion, or death. •• Isolate the dryer from the gas supply system by closing its individual manual shutoff valve during any - LG DLG7101W | Owners Manual - Page 20
. Make sure that the dryer is equipped with the correct burner nozzle for the type of gas being used (natural gas or propane gas). Failure to do so may result in fire, explosion, or death. •• If necessary, the correct nozzle (for the LP nozzle kit, order part number 383EEL3002D) should be installed - LG DLG7101W | Owners Manual - Page 21
SERVICE FOR THE DRYER SHOULD BE OF THE MAXIMUM RATE VOLTAGE LISTED ON THE NAMEPLATE. DO NOT CONNECT THE DRYER TO 110-, 115-, OR 120VOLT CIRCUIT. Failure to follow these instructions CFR, Part 3280 gas dryer must be permanently attached to the floor. •• The electrical connection for an electric dryer - LG DLG7101W | Owners Manual - Page 22
terminal block wire colors are indicated in the manual. Failure to follow these instructions may result in a short or overload. Grounding upturned ends. 1 Remove the terminal block access cover on the upper back of the dryer. 2 Install a UL-listed strain relief into the power cord through-hole. 3 - LG DLG7101W | Owners Manual - Page 23
Use UL-listed 4-wire #10 AWG-minimum copper conductor cable. Allow at least 5 ft. (1.5 m) of wire to allow for removal and reinstallation of the dryer. 1 Remove 5 inches (12.7 cm) of the outer covering from the wire. Remove 5 inches (12.7 cm) of insulation from the ground wire. Cut off approximately - LG DLG7101W | Owners Manual - Page 24
terminal block wire colors are indicated in the manual. Failure to follow these instructions may result in a short or overload. Grounding upturned ends. 1 Remove the terminal block access cover on the upper back of the dryer. 2 Install a UL-listed strain relief into the power cord through-hole. 3 - LG DLG7101W | Owners Manual - Page 25
tests and the Installation Test (Duct Check) on the following page. Testing Dryer Heating GAS MODELS Close the dryer door, press the POWER button to turn the dryer on, and start the dryer on a heat setting. When the dryer starts, the igniter should ignite the main burner. ELECTRIC MODELS Close the - LG DLG7101W | Owners Manual - Page 26
call for service. •• Check the power supply or the connection of the power cord to the terminal block. Refer to the Connecting Electric Dryers section of this manual for complete instructions. •• Reset circuit breaker or replace fuse. Do not increase the fuse capacity. If the problem is a circuit - LG DLG7101W | Owners Manual - Page 27
needed. NOTE When the dryer is first installed, this test should be performed to alert you to any existing problems with the exhaust duct in in the exhaust system. Refer to the Venting the Dryer section of this manual for complete exhaust system and venting requirements. Restricted or Blocked - LG DLG7101W | Owners Manual - Page 28
persons, read this entire manual, including the IMPORTANT SAFETY INSTRUCTIONS, before operating this dryer. Using the Dryer Lint Filter 1 Clean the will sound. Immediately remove your clothing from the dryer to reduce wrinkling. If Wrinkle Care is selected, the dryer will tumble briefly every few - LG DLG7101W | Owners Manual - Page 29
dryer and articles in the dryer. Lint Filter Sorting Loads Fabric Care Labels Most articles of clothing feature fabric care labels that include instructions keys can damage both your dryer and your clothes. Flammable objects such as clothes will expand as they dry. Do not overload the dryer; clothes - LG DLG7101W | Owners Manual - Page 30
. NOTE If you do not press the START/PAUSE button to resume a cycle within 60 minutes, the dryer turns off automatically. 5 More Time/Less Time Buttons Use these buttons with the Time Dry and other Manual Dry cycles to adjust the drying time. Press the More Time button to increase the selected - LG DLG7101W | Owners Manual - Page 31
remaining for Time Dry or MANUAL DRY cycles. NOTE The cycle time on SENSOR DRY cycles may fluctuate as the dryer recalculates drying time for optimal reduce exhaust flow from the dryer. Maintaining a clean exhaust system improves operating efficiency and helps minimize service calls, saving you money - LG DLG7101W | Owners Manual - Page 32
Guide Cycle Fabric Type Dry Level Temp. Bedding Heavy Duty Normal Perm. Press Delicates Comforters, pillows, shirts Normal Dry Adjustable Jeans, heavyweight items Normal Dry Adjustable Normal Dry Work clothes light wrinkles from clothing Off Medium High Medium Medium Low High Adjustable - LG DLG7101W | Owners Manual - Page 33
32 OPERATION Sensor Dry Cycles Sensor dry cycles utilize LG's unique dual sensor system to detect and compare the moisture level in clothes and in the air and adjust the drying time as needed to ensure superior results. The dryer automatically sets the dryness level and temperature at the - LG DLG7101W | Owners Manual - Page 34
Time/Less Time Use the More Time/Less Time buttons to add or reduce the drying time of a MANUAL DRY cycle in 1-minute increments. OPERATION 33 Cycle Option Buttons The dryer features several additional cycle options to customize cycles to meet individual needs. Certain option buttons also feature - LG DLG7101W | Owners Manual - Page 35
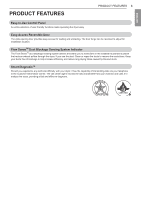
POWER button. NOTE Once set, Control Lock remains active until it is manually deactivated. Control Lock must be turned off to run another cycle. To Control Lock button for 3 seconds. * Damp Dry Signal With this option, the dryer will signal when the load is approximately 80% dry. This allows you to - LG DLG7101W | Owners Manual - Page 36
LG Customer Information Center. Follow the instructions in the SmartThinQ application to perform a Smart Diagnosis using your smartphone. NOTE ••Smart Diagnosis™ cannot be activated unless the appliance can be turned on using the POWER button. If the appliance cannot be turned on, troubleshooting - LG DLG7101W | Owners Manual - Page 37
basic precautions, including the following: •• Unplug the dryer before cleaning to avoid the risk of electric shock . Contact a qualified technician or service provider. Cleaning the Lint Filter Immediately wipe off any spills with a soft, damp cloth. NOTE •• Do not use methylated spirits, solvents, - LG DLG7101W | Owners Manual - Page 38
Why does my dryer take so long to dry clothes? A: Proper airflow is critical to the efficient operation of clothes dryers. A lint filter LG.com website. 1 On the lg.com/us home page, click on the Support menu tab to bring up the menu selections. Select Video Tutorials. 2 Select Appliances and Dryers - LG DLG7101W | Owners Manual - Page 39
38 Troubleshooting Before Calling for Service This dryer is equipped with an automatic error-monitoring system to detect and diagnose problems at an early stage. If the dryer does not function properly or does not function at all, check the following before you call for service. Operation Problem - LG DLG7101W | Owners Manual - Page 40
Troubleshooting 39 ENGLISH Problem Clothes take too long to dry Possible Cause Exhaust ducts are times for large and heavy fabrics, separate these items into smaller loads of a consistent size. Dryer controls are not set properly. Use the appropriate control settings for the type of load you - LG DLG7101W | Owners Manual - Page 41
Troubleshooting Problem Clothes take too long to dry Possible Cause Energy Saver option selected (on some models) Drying time is not consistent Heat settings, load size, or dampness of clothing , natural gas, or LP gas), the size of the load, the type of fabrics, the wetness of the clothes, and - LG DLG7101W | Owners Manual - Page 42
Performance Problem Greasy or dirty spots on clothes Clothes are wrinkled Clothes are shrinking Lint on clothes Troubleshooting 41 Possible Cause Fabric softener used incorrectly. Solutions Confirm and follow the instructions provided with your fabric softener. Clean and dirty clothes are being - LG DLG7101W | Owners Manual - Page 43
Troubleshooting Problem Lint on clothes Possible Cause Excess static in clothes. Solutions Use a fabric softener to reduce static electricity. Be sure to follow the manufacturer's instructions too tightly packed or too sparse the sensor may have trouble reading the dryness level of the load. Use a - LG DLG7101W | Owners Manual - Page 44
drying cycle Solutions Turn off the dryer and call for service. Check the connection of the power cord to the terminal block. Install a shorter or straighter duct run. See the Installation Instructions for details. Ductwork should be checked/cleaned immediately. Dryer can be used in this condition - LG DLG7101W | Owners Manual - Page 45
44 Troubleshooting Problem The display shows d90, d95 Possible Cause The duct work is about 90%-95% blocked.("d90" or "d95" error code is displayed for 2 hours only) House exhaust system blocked. Solutions Do not use the dryer until the exhaust system has been cleaned and/or repaired. Using the - LG DLG7101W | Owners Manual - Page 46
of original retail purchase Scope of Warranty Parts and Labor Dryer drum HOW SERVICE IS HANDLED LG will provide parts and labor to repair or replace defective parts. 10 years warranty on Dryer Drum, including parts & labor. • Replacement products and parts are warranted for the remaining portion - LG DLG7101W | Owners Manual - Page 47
Instructions for door reversal can be found in the owner's manual. The cost of repair or replacement under these excluded circumstances shall be borne by the consumer. TO OBTAIN WARRANTY SERVICE AND ADDITIONAL INFORMATION For additional product information, visit the LG website at http://www.lg - LG DLG7101W | Owners Manual - Page 48
basis, unless you opt out as provided below. Any dispute between you and LG shall not be combined or consolidated with a dispute involving any other person's or entity's product or circumstances proceed as part of a class or representative action. Instead of arbitration, either party may bring an - LG DLG7101W | Owners Manual - Page 49
model number; and (d) the serial number (the serial number can be found (i) on the product; or (ii) online by accessing https://www.lg.com/us/support/repair-service/schedule-repair-continued and clicking on "Find My Model & Serial Number"). You may only opt out of the dispute resolution procedure in - LG DLG7101W | Owners Manual - Page 50
Memo - LG DLG7101W | Owners Manual - Page 51
Memo - LG DLG7101W | Owners Manual - Page 52
Español MANUAL DEL PROPIETARIO SECADORA Lea atentamente este manual del propietario antes de poner el aparato en funcionamiento y téngalo a mano en todo momento para su referencia. DLE7100* (Elec) DLG7101* (Gas) www.lg.com Copyright © 2018 LG Electronics Inc. Todos los Derechos Reservados. - LG DLG7101W | Owners Manual - Page 53
AND TOXIC ENFORCEMENT ACT) 9 DESCRIPCIÓN GENERAL DEL PRODUCTO 9 Partes 9 Accesorios 35 FUNCIONES INTELIGENTES 35 Función Smart Diagnosis™ ( de la puerta 15 Instalación del kit de ventilación lateral 16 Ventilación de la secadora 18 Conexión de secadoras de gas 20 Conexión de secadoras eléctricas - LG DLG7101W | Owners Manual - Page 54
posibilita un diagnóstico rápido y registra eficaz. los datos que transmite su máquina y losEuRtilTizIaFpI aErDa DESIGN C C ERTIFIED Proto Sanit Resid Protocol P154 Sanitization Perform Residential Clothes - LG DLG7101W | Owners Manual - Page 55
importantes. Hemos proporcionado muchos mensajes de seguridad importantes en este manual y en su aparato. Siempre lea y obedezca todos los inflamables cerca de este artefacto ni de ningún otro. -QUÉ HACER SI HUELE GAS • No intente encender ningún aparato. • No toque ningún interruptor eléctrico - LG DLG7101W | Owners Manual - Page 56
instalada como se describe en este manual. Si la secadora no se el equipo, humo o un incendio. •• Las secadoras de gas DEBEN tener escape al exterior. El incumplimiento de estas instrucciones rea de lavado. Una acumulación de pelusa en cualquier parte de la casa puede crear riesgos para la salud - LG DLG7101W | Owners Manual - Page 57
quedar enganchados en la puerta y causar danos si esta cae hacia delante de forma inadvertida. •• No coloque objetos pesados ni se apoye sobre la parte superior de la puerta abierta. •• No intente abrir la puerta de tipo cesto más de 40 grados. •• La secadora podría volcarse hacia delante y causarle - LG DLG7101W | Owners Manual - Page 58
conectada a tierra adecuadamente. Si esto no se cumple, se podrán producir descargas eléctricas o lesiones. •• Consulte las instrucciones de instalación de este manual para obtener los requisitos eléctricos específicos de su modelo. Si no se cumplen estas instrucciones, se podrá causar riesgo de - LG DLG7101W | Owners Manual - Page 59
énitos u otras lesiones reproductivas y obliga a las empresas a alertar a los clientes sobre la posible exposición a tales sustancias. •• Los aparatos de gas pueden causar una exposición leve a cuatro de estas sustancias, principalmente benceno, monóxido de carbono, formaldehído y hollín, generado - LG DLG7101W | Owners Manual - Page 60
ón de la toma de gas (Modelos a gas) Salida del conducto de escape Valvula de entrada de agua (en algunos modelos) Rejilla de secado (se vende por separado) kit: 3750EL0001C Kit de ventilación lateral (se vende por separado) N.º de kit: 383EEL9001B NOTA •• Visita www.lg.com por comprar si falta - LG DLG7101W | Owners Manual - Page 61
Conecte las secadoras eléctricas Secadora de gas Secadora eléctrica Enchufe el cable de alimentación Prueba de instalación Haga una prueba de funcionamiento Especificaciones del producto La apariencia y las especificaciones detalladas en este manual podrían variar, debido a mejoras constantes en - LG DLG7101W | Owners Manual - Page 62
! Es importante que revise este manual por completo antes de instalar y la instalación correcta del sistema de escape. La secadora de gas debe tener un escape al exterior. Consulte la sección Ventilación cm) entre el piso del garaje y la parte inferior de la secadora. Espacios libres Separación para - LG DLG7101W | Owners Manual - Page 63
apertura mínima de 24 pulgadas cuadradas (155 cm2) a no más de un pie del suelo. Instale rejillas de ventilación o corte la puerta en las partes superior e inferior para realizar aberturas. También se permite el uso de puertas de celosía con aberturas de ventilación equivalentes. NOTA Se debe dejar - LG DLG7101W | Owners Manual - Page 64
secadora. 1 Coloque la secadora en su ubicación definitiva. Verifique que la secadora esté nivelada de lado a lado. Repita desde la parte frontal a la parte trasera. Coloque el nivel aquí INSTALACIÓN 13 2 Utilice una llave de tuercas ajustable para girar las patas niveladoras. Desenrosque las patas - LG DLG7101W | Owners Manual - Page 65
14 INSTALACIÓN Inversion de la puerta advertencia LA PUERTA DE LA SECADORA ES MUY GRANDE Y PESADA. El no seguimiento de las instrucciones siguientes puede dañar la secadora, ocasionar daños materiales o físicos. •• Para evitar daños en la secadora o en la puerta, sujete dicha puerta con un taburete - LG DLG7101W | Owners Manual - Page 66
se cumplen todas las advertencias de seguridad de este manual, se podrían producir daños en la parte inferior o lateralmente (la ventilación lateral derecha no está disponible en los modelos de gas). Puede adquirir un kit adaptador, número de pieza 383EEL9001B, de su distribuidor LG. Este kit - LG DLG7101W | Owners Manual - Page 67
como desvanes, muros, cielos rasos, cámaras, chimeneas, conductos de gas o espacios ocultos de un edificio. El incumplimiento de estas instrucciones podr el Esquema para conductos de transición de secadoras (Outline for Clothes Dryer Transition Duct), Sección 2158A. Conductos Tipo de tapa de pared - LG DLG7101W | Owners Manual - Page 68
Español Recorrido y conexión de los conductos NOTA Siga las pautas a continuación para maximizar el rendimiento de secado, para reducir la acumulación de pelusa y la condensación en los conductos. Los conductos y las conexiones NO están incluidos y deben adquirirse por separado. •• Use conductos - LG DLG7101W | Owners Manual - Page 69
sistema de suministro de gas cerrando su válvula de corte manual individual durante las pruebas de presión del suministro de gas. Si esto no se Utilice cinta de teflón o un compuesto para conexión de tuberías insoluble al gas propano (LP) en todas las roscas de las tuberías. Si esto no se cumple, - LG DLG7101W | Owners Manual - Page 70
se usará (gas natural o propano). Si esto no se cumple, se podrá producir una explosión, un incendio o la muerte. •• Si fuera necesario, un técnico calificado deberá instalar la boquilla correcta (para el kit de boquilla para LP, número de la pieza para pedidos 383EEL3002D) y se deberá tomar nota - LG DLG7101W | Owners Manual - Page 71
los Estándares de seguridad y construcción de casas prefabricadas, Título 24 CFR, Parte 3280 o el Estándar CAN/CSA Z240 MH y con los códigos y se podrá producir una explosión, un incendio o la muerte. •• Una secadora de gas estar fija al piso de forma permanente. •• La conexión eléctrica de una - LG DLG7101W | Owners Manual - Page 72
al tornillo del mismo color. El alambre del color indicado en el manual se conecta al tornillo del bloque del mismo color. Si no se siguen . 1 Quite la cubierta de acceso al bloque de bornes localizada en la parte superior trasera de la secadora. 2 Instale un aliviador de tensión homologado por - LG DLG7101W | Owners Manual - Page 73
más cortos en forma de gancho. 1" (2,5 cm) 5" (12,7 cm) Alambre de conexión a tierra 2 Quite la cubierta de acceso al bloque de bornes localizada en la parte superior trasera de la secadora. 3 Instale un aliviador de tensión homologado por UL en el orificio por el que pasa el cable de alimentaci - LG DLG7101W | Owners Manual - Page 74
al tornillo del mismo color. El alambre del color indicado en el manual se conecta al tornillo del bloque del mismo color. Si no se siguen . 1 Quite la cubierta de acceso al bloque de bornes localizada en la parte superior trasera de la secadora. 2 Instale un aliviador de tensión homologado por - LG DLG7101W | Owners Manual - Page 75
cm) 2 Quite la cubierta de acceso al bloque de bornes localizada en la parte superior trasera de la secadora. 3 Instale un aliviador de tensión homologado por UL la siguiente página. Prueba de calentamiento de la secadora MODELOS DE GAS Cierre la puerta de la secadora, presione el botón POWER para - LG DLG7101W | Owners Manual - Page 76
Diríjase a la sección "Conectando Secadoras Eléctricas" de este manual para instrucciones completas. •• Reinstale el circuito o reemplace los fusibles. No de gas se gas de la casa y la llave gAS ha desconectado. de gas de la secadora (Solo para los están completamente modelos de gas). abiertas - LG DLG7101W | Owners Manual - Page 77
durante el ciclo de prueba, aún puede haber restricciones en el sistema de escape. Consulte la sección Ventilación de la secadora de este manual para obtener detalles sobre el sistema de escape y los requisitos de ventilación. Flujo de aire restringido o bloqueado Evite tendidos largos o con muchos - LG DLG7101W | Owners Manual - Page 78
FUNCIONAMIENTO 27 FUNCIONAMIENTO ADVERTENCIA Para reducir el riesgo de incendio, descargas eléctricas o lesiones personales, lea este manual por completo, incluso las INSTRUCCIONES IMPORTANTES DE SEGURIDAD, antes de operar esta secadora. ESPAÑOL Cómo usar la secadora Lint Filter 1 Limpie el - LG DLG7101W | Owners Manual - Page 79
28 FUNCIONAMIENTO Revise el filtro de pelusa antes de cada carga Asegúrese siempre de que el filtro de pelusa esté limpio antes de iniciar una carga nueva; un filtro de pelusa bloqueado incrementará los tiempos de secado. Para limpiarlo, tire del filtro de pelusa hacia arriba y, con los dedos, haga - LG DLG7101W | Owners Manual - Page 80
deseado. Una vez que se haya seleccionado el ciclo deseado, los preajustes estándar se mostrarán en la pantalla. En los ciclos de Manual Dry (Secado Manual) se pueden programar estos ajustes usando los botones de ajuste de ciclos en cualquier momento antes de iniciar el ciclo. 3 Botón START/PAUSE - LG DLG7101W | Owners Manual - Page 81
9 Indicador de fin de ciclo con recordatorio de verificación de filtro Esta parte de la pantalla muestra la etapa del ciclo de secado que se está ciclos SENSOR DRY o el tiempo restante efectivo de los ciclos Time Dry o MANUAL DRY. NOTA El tiempo del ciclo en los ciclos SENSOR DRY puede variar, - LG DLG7101W | Owners Manual - Page 82
ESPAÑOL FUNCIONAMIENTO 31 Guía de ciclos Ciclo Tipo de tela Nivel de secado Bedding (Ropa de cama) Heavy Duty (Secado Intenso) Normal (Normal) Perm. Press (Planchado Perm.) Acolchados, almohadas, camisas. Vaqueros, prendas pesadas. Ropa de trabajo, pana, etc. Prendas sintéticas, planchado - LG DLG7101W | Owners Manual - Page 83
ciclos de secado con sensor utilizan el sistema exclusivo de sensor doble de LG para detectar y comparar el nivel de humedad en las prendas y en guía de ciclos para los detalles. Manual Dry (Ciclos de secado manual) Use los ciclos de secado manual para seleccionar una cantidad especifica de tiempo - LG DLG7101W | Owners Manual - Page 84
Time/Less Time (Más tiempo/Menos tiempo) Use los botones More Time/Less Time para aumentar o disminuir el tiempo de secado de un ciclo MANUAL DRY en incrementos de 1 minuto. FUNCIONAMIENTO 33 Botones de opciones de ciclo Su secadora cuenta con varias opciones de ciclo adicionales para personalizar - LG DLG7101W | Owners Manual - Page 85
los controles, excepto el botón POWER. NOTA Una vez que se fija, la función Control Lock permanece activa hasta que se desactive de forma manual. Se debe desactivar la función Control Lock para ejecutar otro ciclo. Para desactivar Control Lock, mantenga presionado el botón *Control Lock durante - LG DLG7101W | Owners Manual - Page 86
analizar el problema, así le brinda un diagnostico efectivo y rápido. 1 Comuníquese con el Centro de información al cliente de LG Electronics llamando al: (LG EE. UU.) 1-800-243-0000 (LG Canadá) 1-888-542-2623 2 Cuando del centro de información le soliciten que lo haga, coloque el micrófono del tel - LG DLG7101W | Owners Manual - Page 87
abrasivos ni solventes. Dañarán su acabado. Limpieza del exterior El mantenimiento adecuado de su secadora puede prolongar su vida útil. La parte exterior de la máquina puede limpiarse con agua tibia y un detergente para el hogar suave, no abrasivo. Limpie inmediatamente cualquier derrame con - LG DLG7101W | Owners Manual - Page 88
Solución de problemas Preguntas frecuentes Solución de problemas 37 Español P: Cuando presiono un botón, ¿por qué la secadora emite un pitido y luego no sucede nada? R: La función Control Lock está activada. Para desactivar Control Lock, encienda la secadora y, luego, mantenga presionado el botón - LG DLG7101W | Owners Manual - Page 89
funcione sin calor. La pantalla muestra el código de error nP La pantalla muestra el código de error gAS El suministro o el servicio de gas están apagados (solo para modelos de gas). La opción de ahorro de energia (Energy Saver) está seleccionada (sur certains modèles) El cable de alimentaci - LG DLG7101W | Owners Manual - Page 90
Solución de problemas 39 Español Problema La ropa tarda demasiado tiempo en secarse. La ropa tarda demasiado tiempo en secarse. Causa posible Los conductos de escape están bloqueados, sucios o el tendido de los conductos es demasiado extenso. La carga no está clasificada correctamente. Carga - LG DLG7101W | Owners Manual - Page 91
la ropa no son constantes. El tiempo de secado de una carga variará según el ajuste de calor, el tipo de calor utilizado (eléctrico, gas natural o gas LP), el tamaño de la carga, el tipo de tejido, el nivel de humedad de las prendas y la condición de los conductos de escape y el - LG DLG7101W | Owners Manual - Page 92
Rendimiento Problema Manchas de grasa o suciedad en la ropa. La ropa está arrugada. La ropa se encoge. Pelusa en las prendas. Pelusa en las prendas. Solución de problemas 41 Causa posible No se usó correctamente el suavizante de ropa. Soluciones Confirme y siga las instrucciones provistas por el - LG DLG7101W | Owners Manual - Page 93
42 Solución de problemas Problema Exceso de estática en la ropa después del secado. La ropa tiene manchas de humedad después de un ciclo SENSOR DRY. Causa posible No se usó suavizante de ropa o no se lo usó adecuadamente. La ropa se secó durante demasiado tiempo (secado excesivo). Secado de telas - LG DLG7101W | Owners Manual - Page 94
Solución de problemas 43 Español Códigos de error Problema Código de error: tE1 a tE7. La pantalla muestra el código de error: PS (solo para secadoras eléctricas). * El indicador de Flow SenseTM muestra cuatro barras durante el ciclo de secado o la pantalla indica "d80" después del secado. * Esta - LG DLG7101W | Owners Manual - Page 95
44 Solución de problemas Problema La pantalla indica d90, d95. Causa posible Soluciones Los conductos están bloqueados en un 90 %-95 %. (El código de error "d90" o "d95" se muestra solo durante 2 horas). El sistema de escape de la casa está bloqueado. No utilice la secadora hasta que el sistema - LG DLG7101W | Owners Manual - Page 96
UNA CLÁUSULA DE ARBITRAJE QUE LE DEMANDA A USTED Y A LG RESOLVER CONFLICTOS A TRAVÉS DE UN ARBITRAJE VINCULANTE EN LUGAR DE HACERLO 10 años de garantía en secador de tambor, incluyendo partes y mano de obra. • Los productos y las piezas de gas natural a gas LP. MFL67652515_sp_171019.indd 45 2017-10-19 오전 11: - LG DLG7101W | Owners Manual - Page 97
de instalación publicadas, lo que incluye los manuales de instalación y del propietario de LG. • Daños resultantes de un uso inadecuado corriente eléctrica. Sin corriente No calienta La válvula de gas no está abierta. (Secadora de gas) No calienta Limpie la campana y el conducto. Mantenga los - LG DLG7101W | Owners Manual - Page 98
con una controversia relacionada con cualquier otro producto o reclamo de otra persona o entidad. Más LG como parte de una acción colectiva o representativa. En lugar del arbitraje, cualquiera de las partes podrá iniciar una acción individual en la corte de reclamos menores, pero tales acciones en - LG DLG7101W | Owners Manual - Page 99
; y (d) el número del serial (el número del serial puede ser hallado (i) en el producto, o (ii) en la dirección de https://www.lg.com/us/support/repair-service/schedule-repair-continued al hacer clic en "Find My Model & Serial Number"). os en la forma descrita anteriormente (es decir, por cación ser - LG DLG7101W | Owners Manual - Page 100
Memo - LG DLG7101W | Owners Manual - Page 101
)" setting. Changing the factory default settings or enabling other features may increase power consumption that could exceed the limits necessary to qualify for ENERGY STAR . LG Customer Information Center 1-800-243-0000 USA 1-888-542-2623 CANADA Register your product Online! www
-
 1
1 -
 2
2 -
 3
3 -
 4
4 -
 5
5 -
 6
6 -
 7
7 -
8
-
9
-
10
-
11
-
12
-
13
-
14
-
15
-
16
-
17
-
18
-
19
-
20
-
21
-
22
-
23
-
24
-
25
-
26
-
27
-
28
-
29
-
30
-
31
-
32
-
33
-
34
-
35
-
36
-
37
-
38
-
39
-
40
-
41
-
42
-
43
-
44
-
45
-
46
-
47
-
48
-
49
-
50
-
51
-
52
-
53
-
54
-
55
-
56
-
57
-
58
-
59
-
60
-
61
-
62
-
63
-
64
-
65
-
66
-
67
-
68
-
69
-
70
-
71
-
72
-
73
-
74
-
75
-
76
-
77
-
78
-
79
-
80
-
81
-
82
-
83
-
84
-
85
-
86
-
87
-
88
-
89
-
90
-
91
-
92
-
93
-
94
-
95
-
96
-
97
-
98
-
99
-
100
-
101
 |
 |

DWG.
No.
TRIG.
DR COMPLETED
도면 DR 완료
완료일 :
LG 전자
(주)
LG Electronics Inc.
UNIT
SCALE
1
1
mm
REVIEWED
DESIGNED
RELATED DWG.
CHECKED
APPROVED
라 종 찬
권 대 한
정 영 석
17.09.26
17.09.26
17.09.26
MODELING
I
T
L
E
T
APPROVED
승인자
PREPARED
시방자
DATE
년/월/일
REF. NO.
시방 번호
REV. NO.
기호
REVISION DESCRIPTION
변경 사항
4
3
2
1
RELEASING THIS DRAWING
WITHOUT PERMISSION LG
Electronics SHOULD BE
ACCUSED ACCORDING TO THE
LAWS AND COMPANY RULES.
이 도면은 LG전자의 자산으로 불법
유출시 관계법과 회사규정에 의해 처벌됨.
PDF
ILLUSTRATOR
MFL67652515
MANUAL,OWNER’S
TD Win Dryer
1/1
MFL67652515
<< 주기 >>
1. 재질, 인쇄방법, 인쇄도수, 외곽치수등은 작업표에 준한다.
2. 인쇄내용, 문자크기 및 형상, 선의 굵기 등은 설계에서 제시된 FILM에 준함.
3. 외곽치수는 절단후 치수임.
4. 양산전에 설계 한도를 득할 것.
5. 본 부품에 금지물질이 포함되지 않도록 하고,
상세 내용은 LG(63)-A-5501-34를 만족할 것.
<< NOTES >>
1. Material, printing and exterier size are refer to work tables.
2. Printing, text size and line are based on LG design film.
3. Exterier size on the drawing is cutting line.
4. Before product controlled by criteria sample.
5. The part should not contain prohibited substances(Pb,Cd,Hg,Cr+6,PBB,PBDE)
and details should comply with LG standard of LG(63)-A-5501-34.
P/NO. 다
<FRONT>
<BACK>
나
WORK
BRAND
LG
-
DLE7100*
DLG7101*
15
나
MODEL
MFL67652515
다
P/NO.
표지:모조지 150g OFFSET 인쇄
내지:모조지 80g OFFSET 인쇄
MATERIAL AND PRINTING DESCRIPTION
1
1
PRINTING DEGREE
EXTERIER
INTERIER
LG MODEL 명
LANGUAGE
PAGE
EUS
무선
REMARK
SEC.
100
English
Spanish
182
182
257
가
96
1
정영석
라종찬
17/10/19
EAGHA00362
TD Win(D) 인쇄내용 수정 시방
정영석
라종찬
17/11/21
EAGHB00672
TD Win(D) 인쇄Page 수정 (96->100Page, 양산업체 요청에의한 Page 수정)
2
100
정영석
라종찬
17/11/30
EAGHB00969
TD Win(D) 인쇄 내용 수정 (Cycle Guide 내 온도수정 및 불필요내용 삭제)
정영석
라종찬
18/02/19
EAGI200465
TD Win(D) Window 인쇄내용 수정 (*Signal 추가)
5
정영석
라종찬
18/02/21
EAGI200524
TD Win(D) Manual 수정(*Signal 설명부분)