LG DX540 Owners Manual
LG DX540 - LG XGA DLP Projector Manual
 |
View all LG DX540 manuals
Add to My Manuals
Save this manual to your list of manuals |
LG DX540 manual content summary:
- LG DX540 | Owners Manual - Page 1
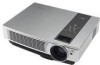
manual carefully before operating your set. Retain it for future reference. Record model number and serial number of the set. See the label attached on the bottom of the set and quote this information to your dealer when you require service. Model number : Serial number : LG DLP PROJECTOR DX540 - LG DX540 | Owners Manual - Page 2
DLP PROJECTOR Warning This is a class A product. In a domestic environment this product may cause radio interference, in which case the user may be required to take adequate measures. - LG DX540 | Owners Manual - Page 3
Instructions 12 Basic Operation of the Projector 13 Using Kensington Security System 14 Turning on the Projector 15 Turning off the Projector Information Supported Monitor Display 35 Maintenance 35 Replacing the Lamp 36 How to fix the lens cap to the projector ..........38 Specifications 39 - LG DX540 | Owners Manual - Page 4
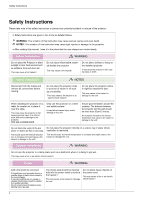
even death. NOTES : The violation of this instruction may cause light injuries or damage to the projector. ➟ After reading this manual, keep it in the place that the user always can contact easily. Indoor Installation WARNING Do not place the Projector in direct sunlight or near heat sources such - LG DX540 | Owners Manual - Page 5
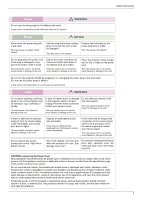
lamp cover will remain very hot! CAUTION concerning the Power Cord Most appliances recommend they be placed upon a dedicated circuit; that is,a single outlet circuit which powers only that appliance and has no additional outlets or branch circuits.Check the specification page of this owner's manual - LG DX540 | Owners Manual - Page 6
as invalidating the warranty ! Others NOTES Be sure to unplug if the projector is not to be used for a long period. Accumulated dust may cause a fire hazard or damage to the unit! Refer lamp servicing to qualified service personnel. Do not mix new batteries with old batteries. This may cause - LG DX540 | Owners Manual - Page 7
is manufactured using high-precision technology. You may, however, see on the Projector screen tiny black points and/or bright points (red, blue, or green). This can be a normal result of the manufacturing process and does not always - LG DX540 | Owners Manual - Page 8
. AUTO Button It automatically corrects the position and the shaking of the image at the RGB mode. POWER Button Turn ON/OFF the projector. MENU SOURCE KEYSTONE KEYSTONE AUTO OK POWER SOURCE Button Switches to RGB(Component), DVI, Video, S-Video mode. / Button Adjusts functions of menus. A OK - LG DX540 | Owners Manual - Page 9
p.27) Installing Batteries CAUTION RISK OF EXPLOSION IF BATTERY IS REPLACED WITH AN INCORRECT TYPE. DISPOSE OF USED BATTERIES ACCORDING TO THE INSTRUCTIONS. • Open the battery compartment cover on the back of the remote control. • Insert the specified type of batteries with correct polarity, match - LG DX540 | Owners Manual - Page 10
On again later. If lamp indicator is red (flashing) again, contact the service center. The lamp cover is open. A high temperature state has been detected. Turn the Projector off. The Projector has turned off due to excessive heat. Power has turned off due to problem with the internal cooling fan - LG DX540 | Owners Manual - Page 11
CD Owner's manual Power Cord Computer Cable Lens cap and Strap Optional Extras * Contact your dealer to purchase these items. * When applying a ceiling installer, use only the ceiling installer for projector. * Contact your service personnel for replacing of lamp. Projection Screen Lamp SCART - LG DX540 | Owners Manual - Page 12
Installing and Composition Installing and Composition Installation Instructions * Don't place the projector in the following conditions. It may cause malfunction or product damage. Provide proper ventilation for this projector. G The projector is equipped with ventilation holes(intake) on the - LG DX540 | Owners Manual - Page 13
will be crooked. If this is so then the keystone adjustment may correct this (Refer to page 26.). 4.Connect the cables of the projector to a wall power socket and other connected sources. projection distance based on the picture format Screen Projection off-set ratio:100% X/2 Screen height - LG DX540 | Owners Manual - Page 14
Kensington Security System G The projector has a 'Kensington' Security System Connector on the side panel. Connect the 'Kensington' Security System cable as below. G For the detailed installation and use of the Kensington Security System, refer to the user's guide attached to the Kensington Security - LG DX540 | Owners Manual - Page 15
longer to activate the lamp after turning on the power and the lifespan of the lamp may be shortened. Turning off the Projector 1. Press the POWER the remote control will not operate. G This projector features the Quick Power On/Off function that allows a user to turn it on and off quickly. Power - LG DX540 | Owners Manual - Page 16
position. 3. Turn the foot at the back left or right to make a fine tune of the length of the projector. After raising the front foot, do not press down on the projector. Selecting source mode 1. Press the SOURCE button. Select OK F RGB G 2. Each press of the F, G button changes the display - LG DX540 | Owners Manual - Page 17
projector to a computer of VGA, SVGA, XGA and SXGA output. * Refer to page 35 for the supported monitor displays of the projector. < How to connect > Connect computer cable to RGB IN of the projector only to the external projector. For details, refer to the operating instructions supplied with your - LG DX540 | Owners Manual - Page 18
TV programmes, it is necessary to purchase a D-TV receiver (Set-Top Box) and connect it to the projector. * Please refer to the owner's manual of the D-TV Set-Top Box for the connection between projector and D-TV Set-Top Box. Computer Cable < How to connect an RGB source > a. Connect Computer cable - LG DX540 | Owners Manual - Page 19
manual, the OSD(On Screen Display) may be different from your Projector's because it is just an example to help with the Projector operation. * This operating guide F, G button changes the screen as shown below. Clear Soft User menu. APC Contrast Brightness Color Sharpness Tint MENU Prev. F - LG DX540 | Owners Manual - Page 20
Function Color Temperature Control - To initialize values (reset to default settings), select the Medium option. 1. Press the MENU button and then use F, G button to select the menu. 2. Press the D , E button to select Color temp. item. 3. Press the F, G button to make desired adjustments. G - LG DX540 | Owners Manual - Page 21
Function Brilliant color TM Function 1. Press the MENU button and then use F, G button to select the 2. Press the D , E button to select Brilliant color TM item. 3. Press the F, G button to select On or Off. G To exit the menu display, repeatedly press the MENU button. menu. * What is the - LG DX540 | Owners Manual - Page 22
Function Expert color Function - This function allows a user to adjust the Gain, Saturation and Hue for Red, Green, Blue, Cyan, Magenta and Yellow individually. 1. Press the MENU button and then use F, G button to - LG DX540 | Owners Manual - Page 23
Special Menu Options Function Selecting Language 1. Press the MENU button and then use F, G button to select the 2. Press the D , E button to select Language item. 3. Press the F, G button to select the language you want to use. G On-Screen-Display (OSD) is displayed in the selected language. G To - LG DX540 | Owners Manual - Page 24
Off G Auto sleep F Off G Set ID F 1 G Presentation timer F Off G MENU Prev. D E Move OK Sleep time Function * The sleep timer turns the projector off at the preset time. 1. Press the MENU button and then use F, G button to select the 2. Press the D , E button to select Sleep time - LG DX540 | Owners Manual - Page 25
Auto sleep Function * This function turns the projector off automatically after the preset time is passed desired preset time. 5. The timer starts to operate if you select specific time. G Time alarm function : If you select a specific time, it is displayed in minute units. After 1 minute, the - LG DX540 | Owners Manual - Page 26
blank image color') 2. Press any button to cancel the blank function. G To temporarily turn off the lamp, press BLANK on the remote control. Do not block the projection lens with any objects when the projector is under operation as this could cause the objects to become heated and deformed or even - LG DX540 | Owners Manual - Page 27
and then use F, G button to select the menu. 2. The used lamp time is displayed. Keystone 0 Blank Image F Logo G GWhen projector lamp is reaching the end of its life, the lamp indicator will turn Lamp mode red. Lamp time GThe lamp warning LED illuminates red continuously in the case of - LG DX540 | Owners Manual - Page 28
RGB PC input only. 1. Press the AUTO button of the remote controller. G Image positioning and synchronization are automatically adjusted. 2. If any more manual adjustment is needed according to the various PC mode inputs even after the auto-correction, execute Phase, Clock, Horizontal and Vertical - LG DX540 | Owners Manual - Page 29
Function Using Horizontal Function 1. Press the MENU button and then use F, G button to select the menu. 2. Press the D , E button to select Horizontal item. 3. Press the F, G button to make desired adjustments. G Horizontal adjustment range is -25 ~ 25. G The variable range can be different - LG DX540 | Owners Manual - Page 30
to select your desired number. Press the AOK button to save the selected number. G The adjustment range of Set ID is 1~99. G Only the projector with the specified ID number will operate from the remote control. G To exit the menu display, repeatedly press the MENU button. Language ARC F English - LG DX540 | Owners Manual - Page 31
Command Reference List Command1 01. Power k 02. Input Select k 03. Aspect Ratio k 04. Screen Mute k 05. Contrast k 06. Brightness k 07. Color k 08. Tint k 09. Sharpness k 10. OSD Select k 11. Remote Control Lock / Key Lock k 12. Color Temperature k 13. Red ADC gain - LG DX540 | Owners Manual - Page 32
.) [2] : not support function(This function doesn't work.) [3] : wait more time(Try again a few minute later.) 01. Power (Command:ka) ➜ To control Power On/Off of the Projector. Transmission [k] [a] [ ] [Set ID] [ ] [Data] [Cr] Data 0 : Power Off 1 : Power On Ack [a] [ ] [Set ID] [ ] [OK] [Data - LG DX540 | Owners Manual - Page 33
Mode Off 1 : OSD Select Mode On 11. Remote Control Lock/Key Lock (Command:km) ➜ To lock the front panel controls on the projector and remote control. Transmission [k] [m] [ ] [Set ID] [ ] [Data] [Cr] Data 0 : Lock Off 1 : Lock On Ack [m] [ ] [Set ID] [ ] [OK] [Data] [x] Data 0 : Lock Off 1 : Lock - LG DX540 | Owners Manual - Page 34
Ack [z] [ ] [Set ID] [ ] [OK] [Data] [x] Data Min : 0 ~ Max : 64 16. Low Power (Command:jq) ➜ To reduce the power consumption of the projector. Transmission [ j ] [q] [ ] [Set ID] [ ] [Data] [Cr] Data 0 : Low Power Off 1 : Low Power On Ack [q] [ ] [Set ID] [ ] [OK] [Data] [x] Data 0 : Low Power Off - LG DX540 | Owners Manual - Page 35
. Sources Format Vertical Freq.(Hz) Horizontal Freq.(kHz) Information * If the projector does not support the input signal, "Out of Range" message appears on the screen. * The projector supports DDC1/2B type as Plug & Play function. (Auto recognition of PC monitor) * The Synchronization - LG DX540 | Owners Manual - Page 36
it. - Replace only with the same type lamp from an LG Electronics Service Center. Using another manufacturers lamp may cause damage to the Projector and lamp. - Pull out the lamp only when replacing the lamp. - Keep the lamp unit out of reach of children. Keep the Lamp away from heat sources such as - LG DX540 | Owners Manual - Page 37
the unit will not power on.) Using another manufacturers lamp may cause damage to the projector or lamp. Make sure the lamp cover is securely fastened. If the lamp cover is not installed correctly the unit will not power on. If this fault persists contact an LG Authorized Service Center. 37 - LG DX540 | Owners Manual - Page 38
in immediately (Ventilation). - Check the product condition at the nearer service center and replace it with new lamp, if necessary. - Don't try to disassemble the product without the authorized technician. How to fix the lens cap to the projector How to fix the lens cap 1 Prepare the lens cap - LG DX540 | Owners Manual - Page 39
Specifications MODEL Resolution Horizontal / Vertical Ratio DLP panel size Screen size (Projection distance) Projection off-set ratio Remote control distance Zoom ratio Video compatibility Power Height(mm/inches) Breadth(mm/inches) Length(mm/inches) Information DX540 (DX540-JD) 1024(Horizontal) x - LG DX540 | Owners Manual - Page 40
-
 1
1 -
 2
2 -
 3
3 -
 4
4 -
 5
5 -
 6
6 -
 7
7 -
8
-
9
-
10
-
11
-
12
-
13
-
14
-
15
-
16
-
17
-
18
-
19
-
20
-
21
-
22
-
23
-
24
-
25
-
26
-
27
-
28
-
29
-
30
-
31
-
32
-
33
-
34
-
35
-
36
-
37
-
38
-
39
-
40
 |
 |

DX540
OWNER’S MANUAL
LG
DLP
PROJECTOR
LG
DLP
PROJECTOR
Please read this manual carefully before operating
your set.
Retain it for future reference.
Record model number and serial number of the set.
See the label attached on the bottom of the set and
quote this information to your dealer when you
require service.
Model number
:
Serial number
: